Welcome to 2CarPros.
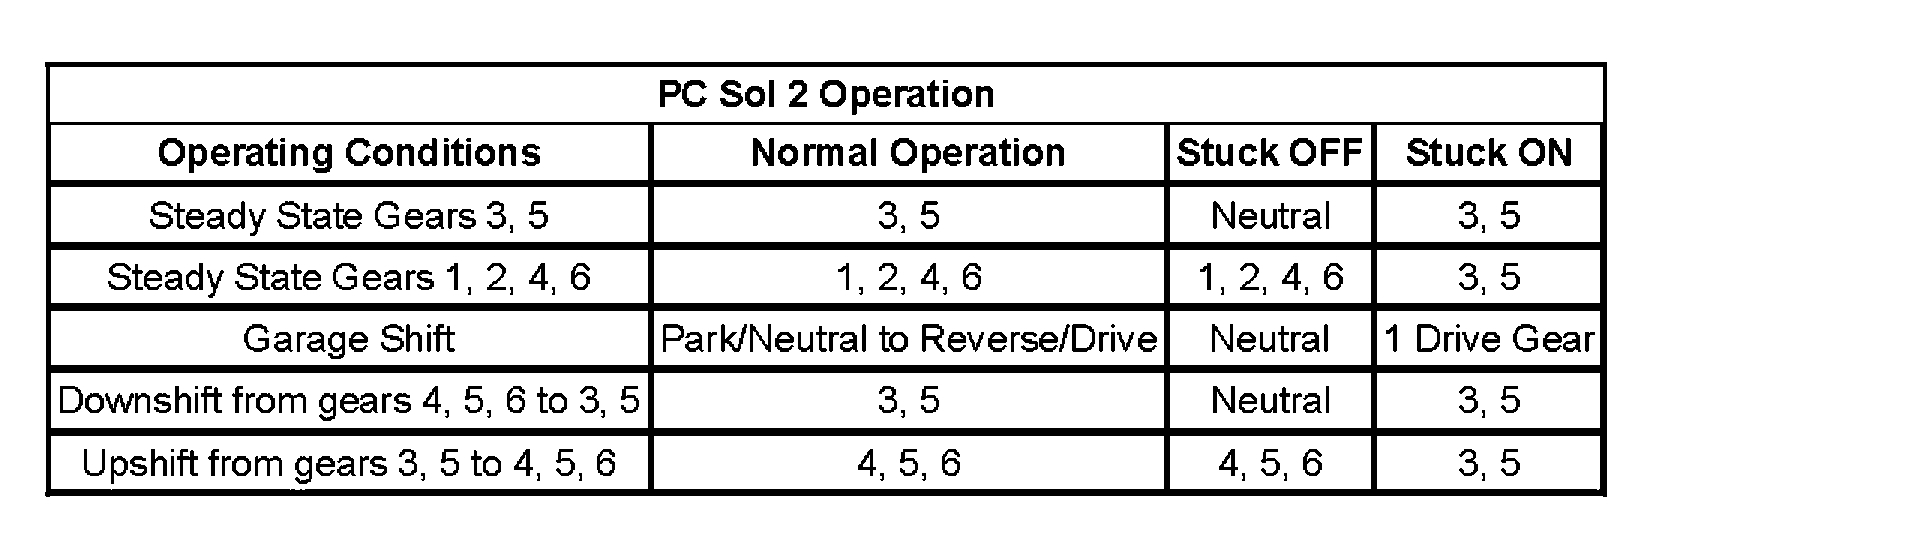
The p0700 is an informational code. It is sent by the transmission control module (TCM) when a fault is indicated. Now, the shift issue is more than likely related to the p0776. That code indicates that Clutch Pressure Control (PC) Solenoid 2 is stuck off.
Now, this could be as simple as low or dirty transmission fluid or an issue with the 3-5-R clutch, or a pressure solenoid issue. I am going to provide the diagnostics for it. Don't be overwhelmed.
P0777
The TCM detects an incorrect off-going clutch gear ratio, or tie-up, when the 3-5-R clutch is commanded OFF for 1.2 seconds and the transmission input shaft speed is 40 RPM or less from the anticipated input shaft speed.
Action Taken When the DTC Sets
* DTCs P0776 and P0777 are Type A DTCs.
* The TCM commands maximum line pressure.
* The TCM inhibits TCC.
* The TCM freezes transmission adaptive functions.
Conditions for Clearing the DIC/DTC
DTCs P0776 and P0777 are Type A DTCs.
Diagnostic Aids
When attempting to set transmission performance DTCs, observe the Freeze Frame and Failure Records to assist in duplicating the failure conditions.
Special Tools Required
* DT-47825 Control Solenoid Test Plate
* DT-47825-10 Jumper Harness
Circuit/System Verification
1. Perform the Transmission Fluid Check. See: Automatic Transmission/Transaxle > Component Tests and General Diagnostics > Transmission Fluid Check
2. Operate the vehicle in drive with the calculated throttle position greater than 15 percent to obtain 72 km/h (45 mph).
* If the DTC resets, go to Circuit/System Testing.
Circuit/System Testing
1. Perform the Line Pressure Check. See: Automatic Transmission/Transaxle > Component Tests and General Diagnostics > Line Pressure Check
* If the pressure is out of specification, correct this concern first.
2. Perform the Control Solenoid Valve and Transmission Control Module Assembly Cleaning and retest the DTC as outlined in the Circuit/System Verification steps. See: Automatic Transmission/Transaxle > Component Tests and General Diagnostics > Control Solenoid Valve and Transmission Control Module Assembly Cleaning
* If the DTC resets, continue on with testing.
3. Perform the Control Solenoid Valve and Transmission Control Module Assembly Inspection. See: Automatic Transmission/Transaxle > Component Tests and General Diagnostics > Control Solenoid Valve and Transmission Control Module Assembly Inspection
* If a concern is found, repair or replace the control solenoid (w/body and TCM) valve assembly.
4. Perform the Control Solenoid Valve and Transmission Control Module Assembly Solenoid Performance Test. See: Automatic Transmission/Transaxle > Component Tests and General Diagnostics > Control Solenoid Valve and Transmission Control Module Assembly Solenoid Performance Test
* If the solenoid is found to be leaking or stuck closed, replace the control solenoid (w/body and TCM) valve assembly.
5. Inspect the control valve lower body assembly for sticking valves, damage, scored bores, or debris.
* If a concern if found in the valve body, repair or replace the valve body as necessary.
6. Inspect the 3-5-R clutch assembly for damage.
* If a concern is found in the 3-5-R clutch assembly, repair or replace as necessary.
Component Testing
pic 1
Repair Instructions
Perform the Diagnostic Repair Verification after completing the diagnostic procedure. See: A L L Diagnostic Trouble Codes ( DTC ) > Verification Tests
* Control valve body replacement - refer to Control Valve Lower Body and Upper Body Replacement.
* 3-5-R clutch assembly repair or replacement - refer to Low and Reverse Clutch and 1-2-3-4 Clutch Plate Removal.
* Control solenoid (w/body and TCM) valve assembly replacement - Refer to Programming and Relearning for replacement, setup, and programming.
* Perform the Service Fast Learn Adapts. See: Vehicle > Programming and Relearning
_____________________
As you can see, it can get involved. What I do suggest is to check the transmission fluid and level to see if that can be causing a pressure issue.
The directions for checking, adding and so on are basically located in the pics starting with number 2. Here are the few words they added.
Transmission Fluid Check
Transmission Fluid Check
pic 2
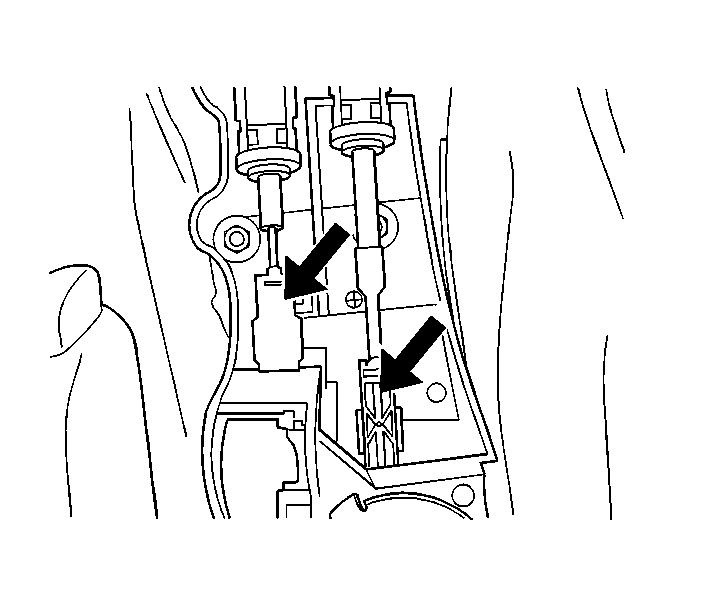
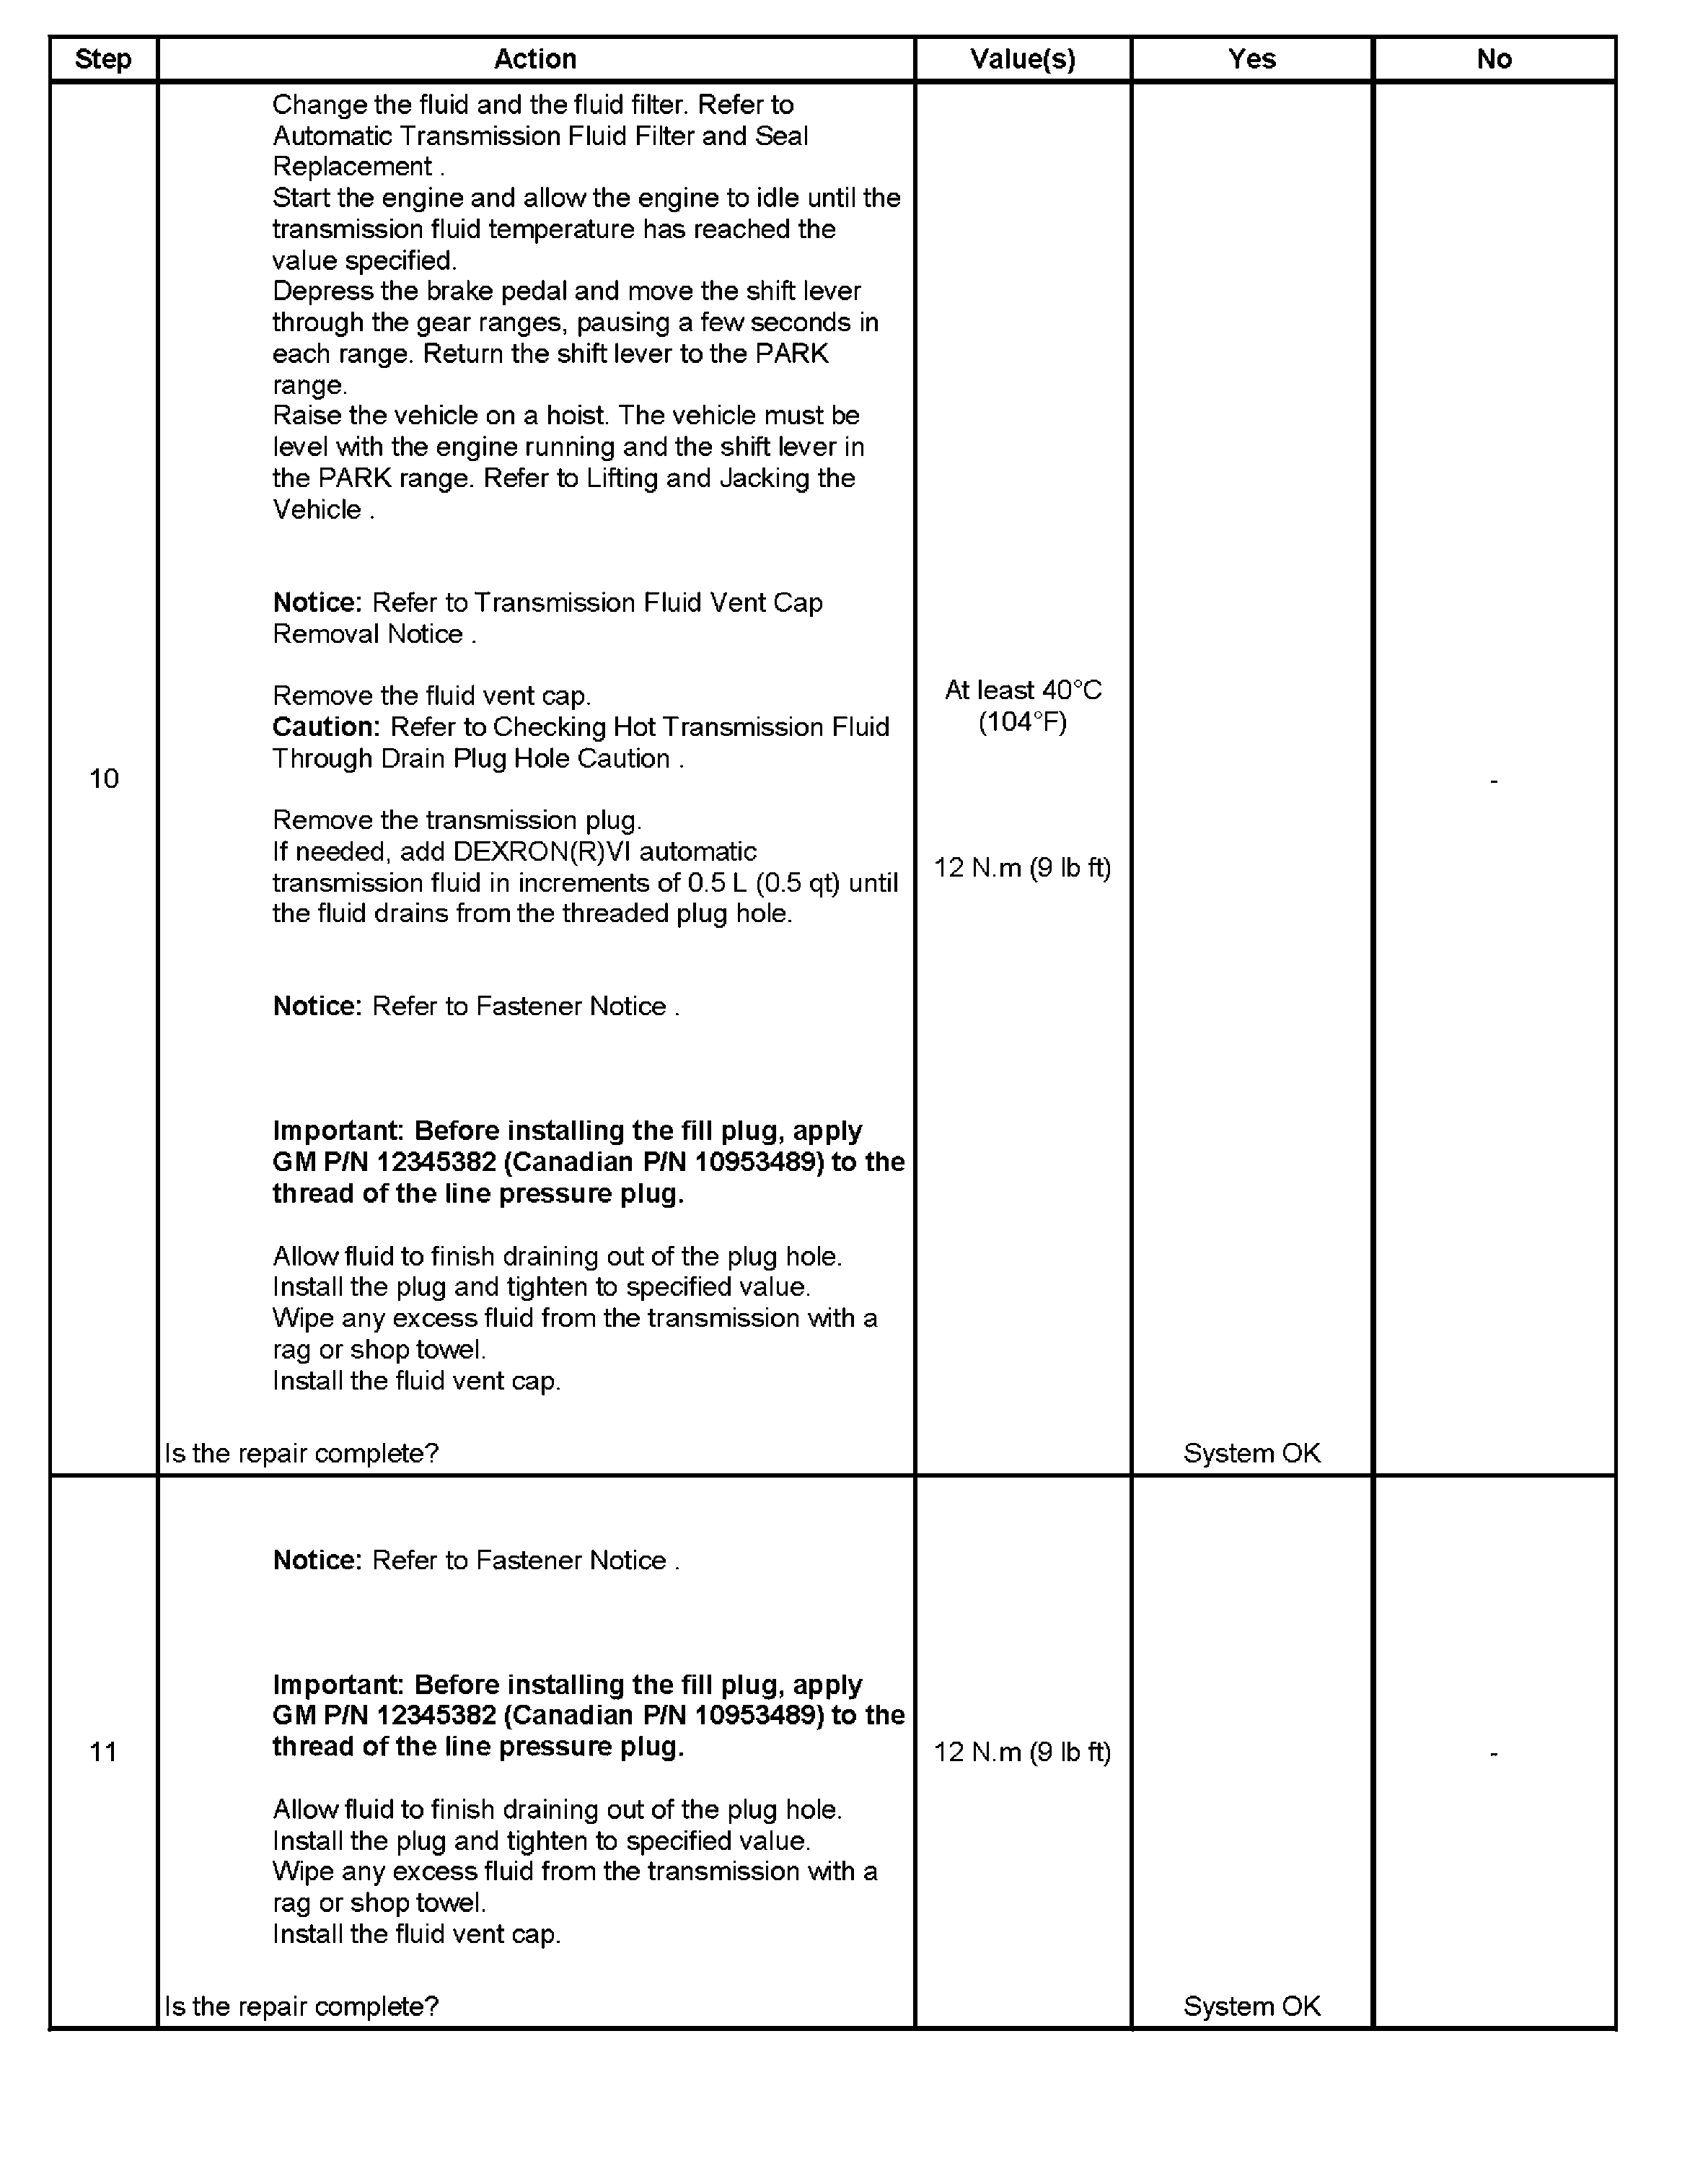
The oil level control plug (65) is located on the torque converter side of the transmission.
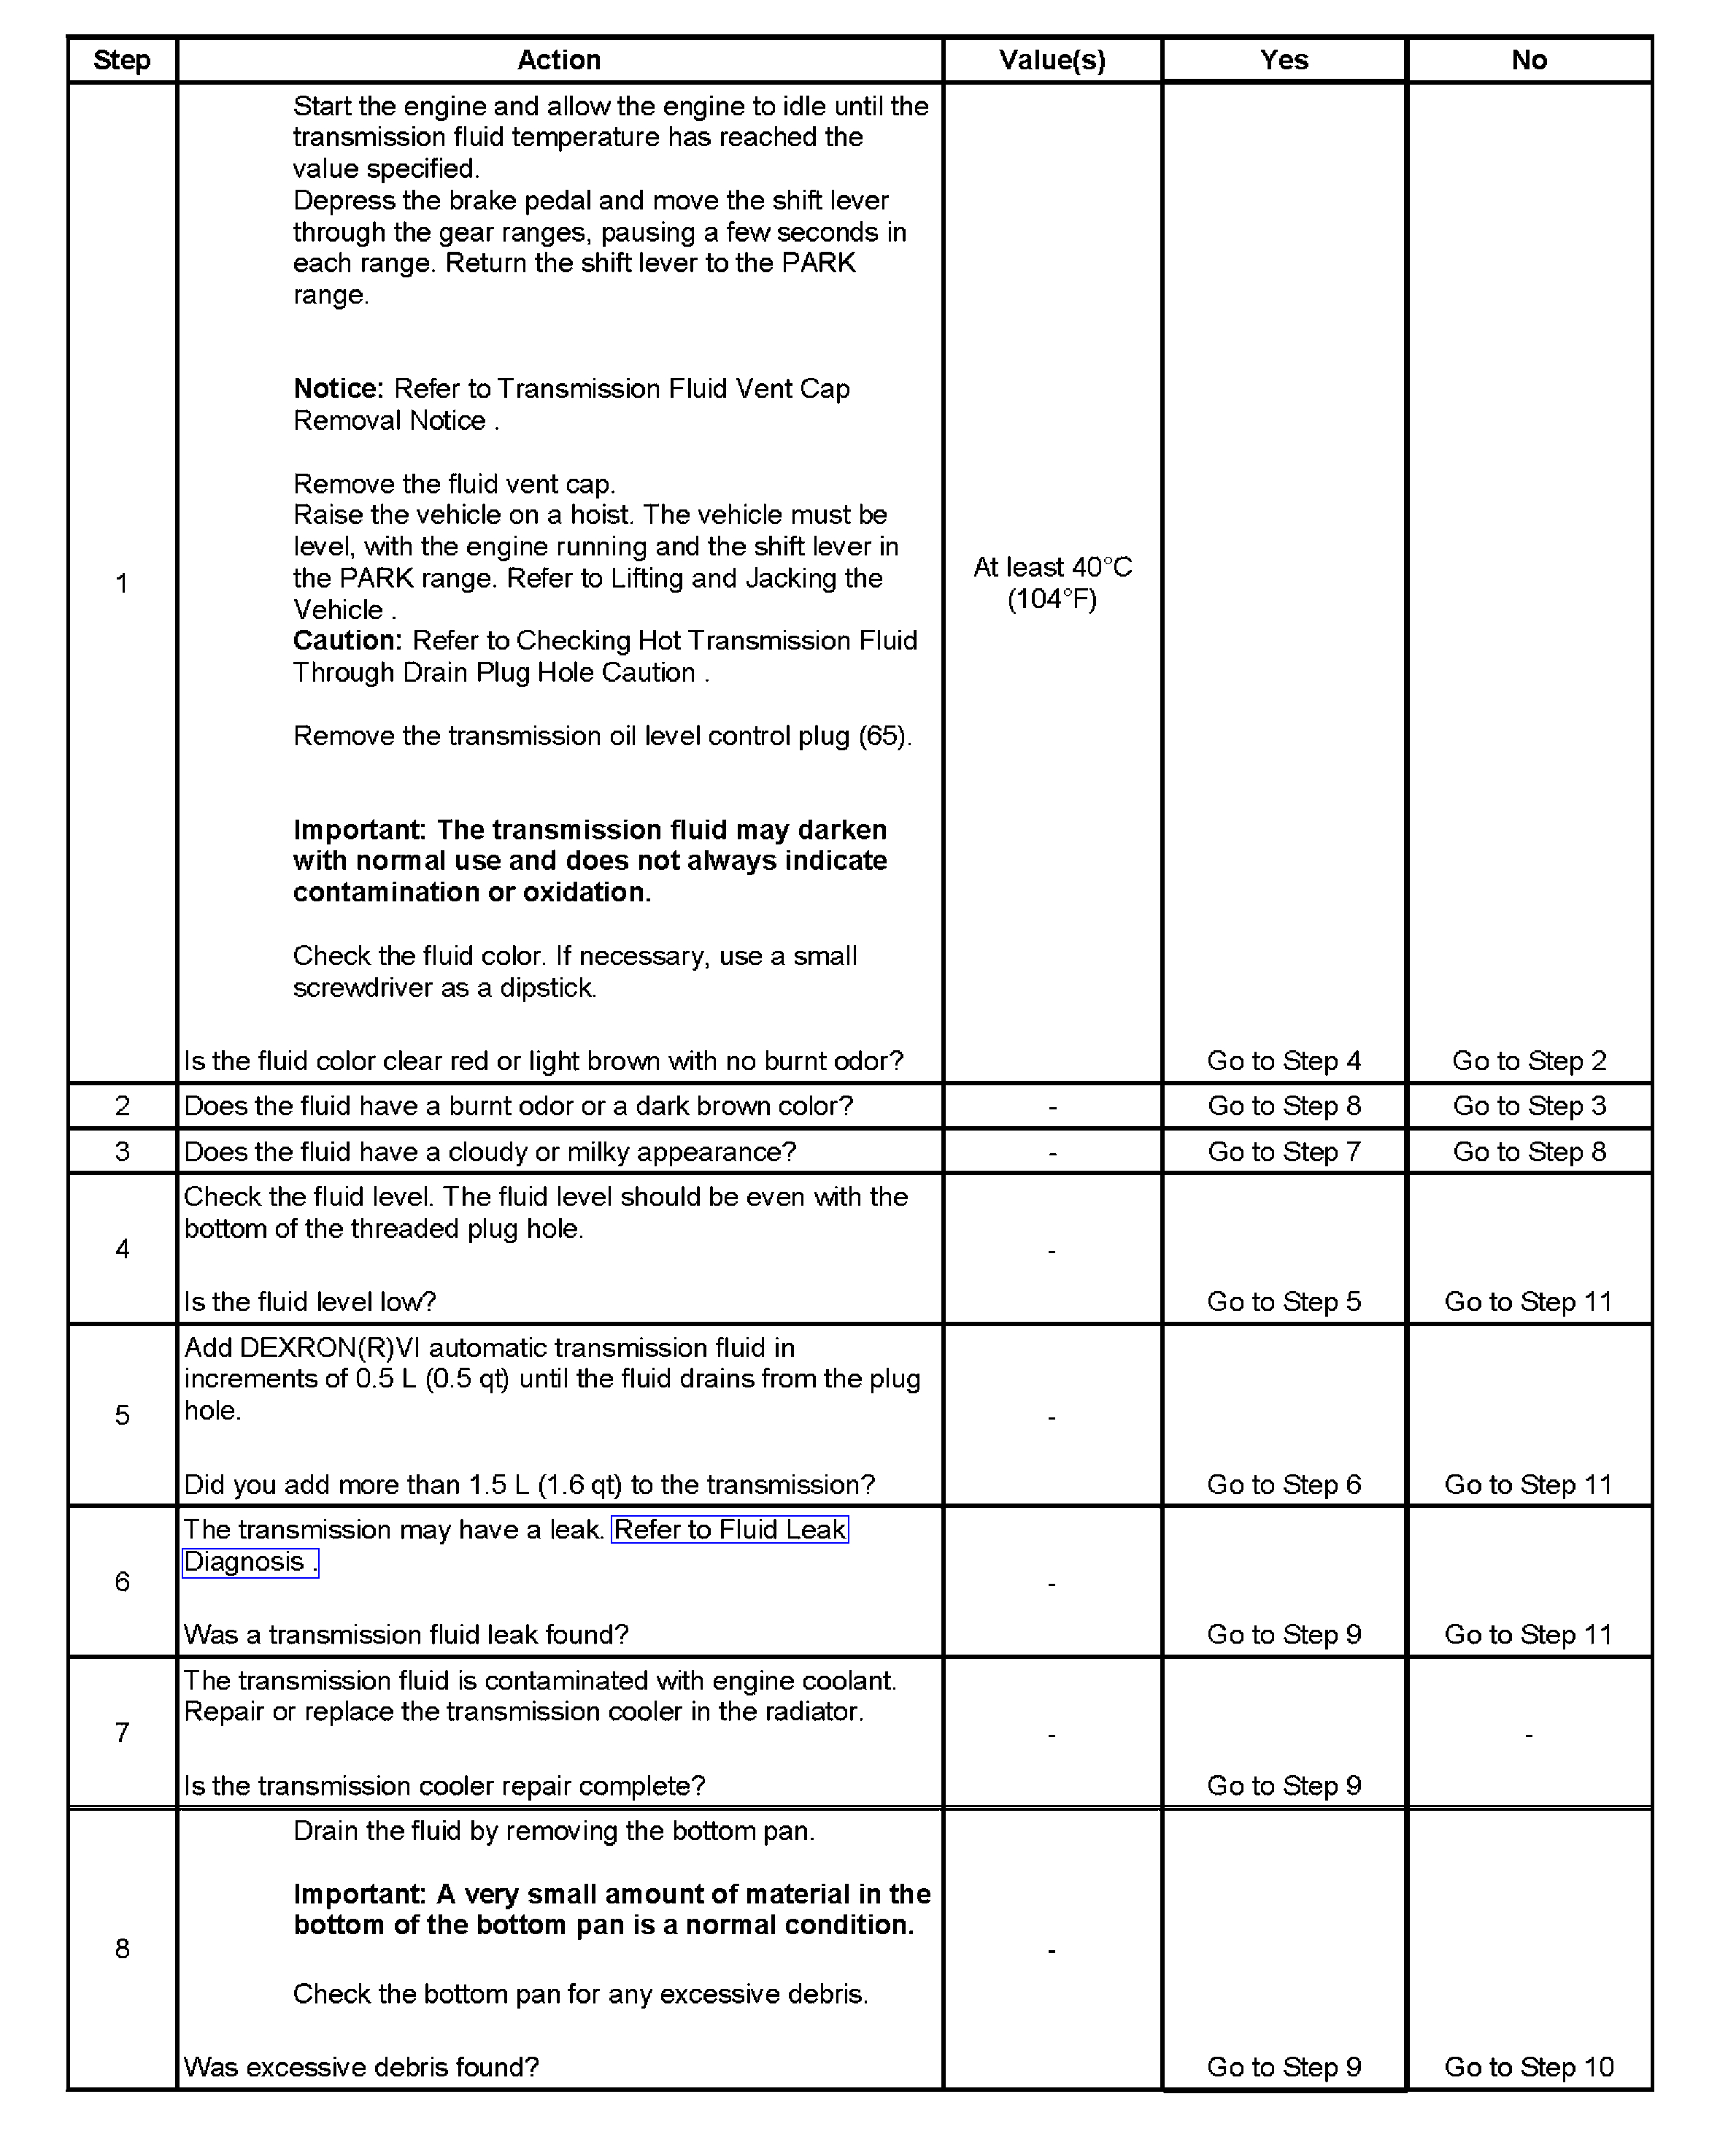
Step 1 - Step 8
pic 3
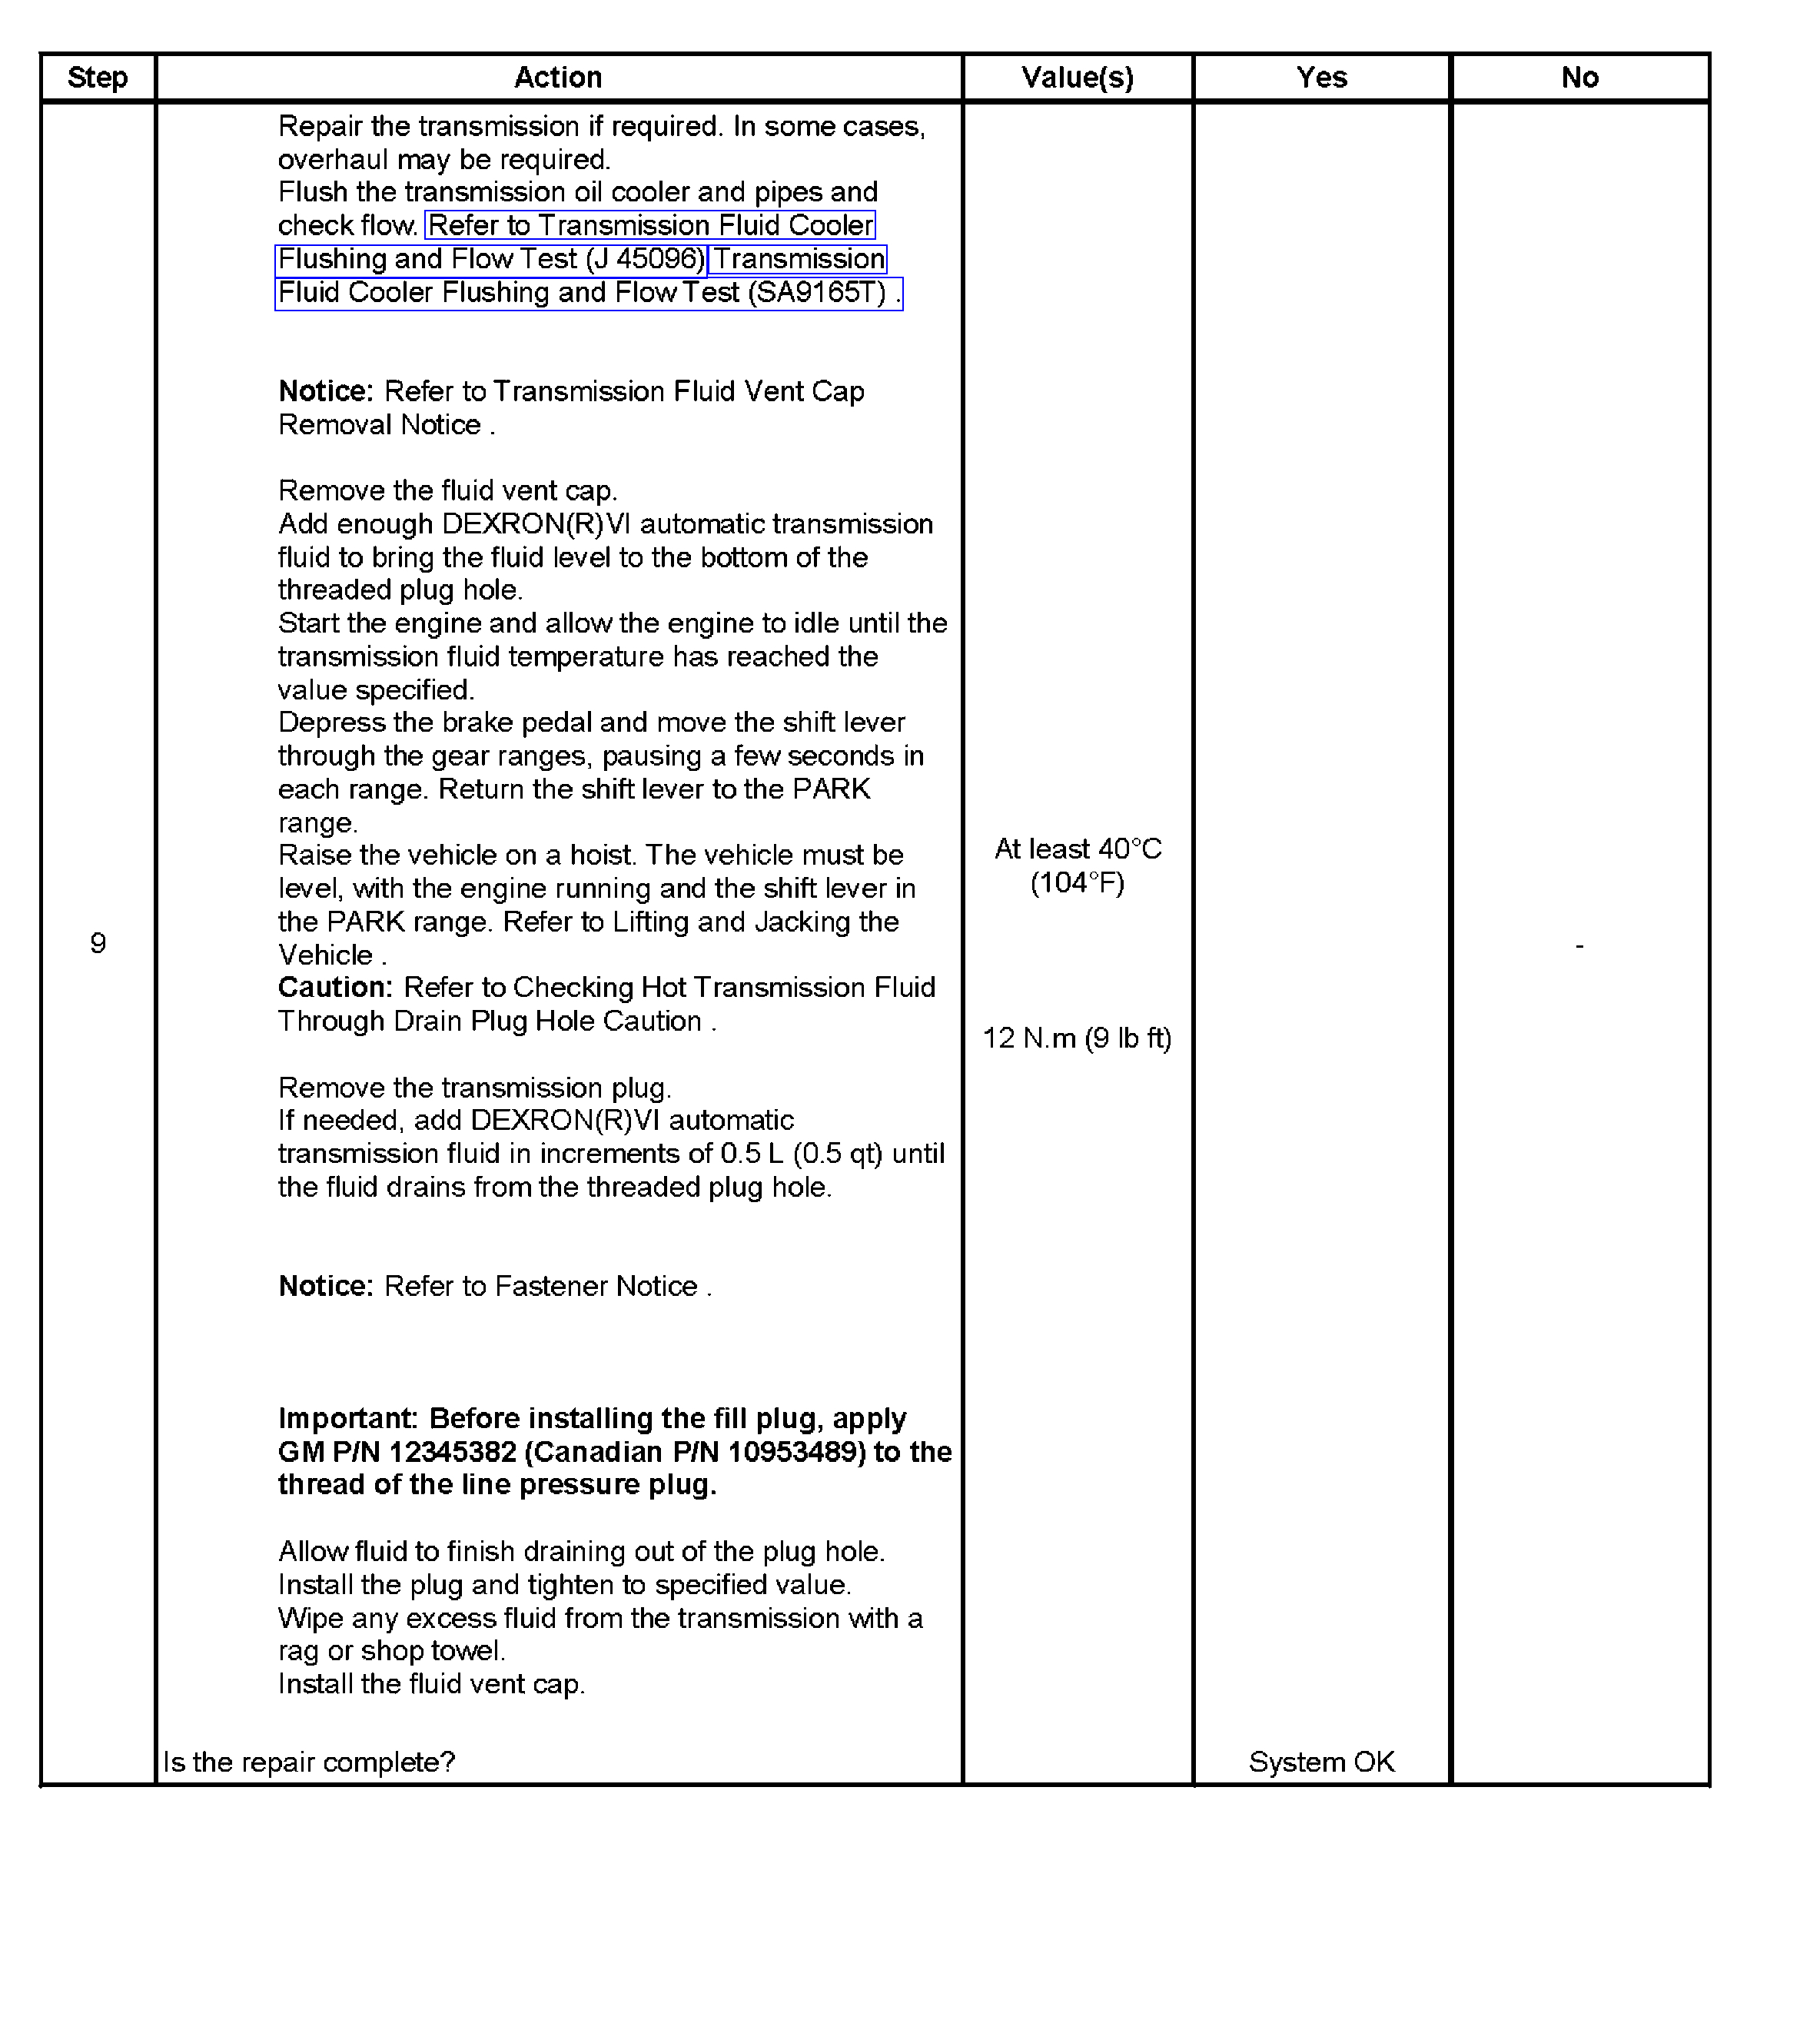
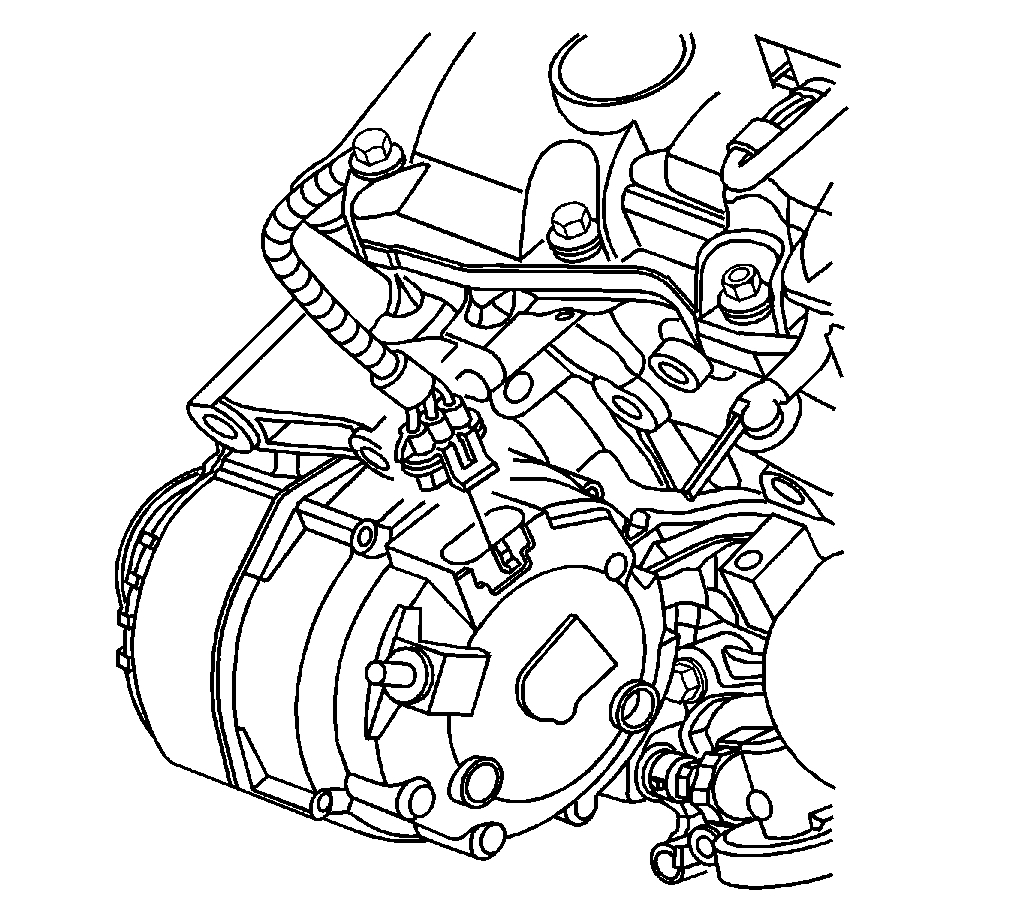
Step 9
pic 4
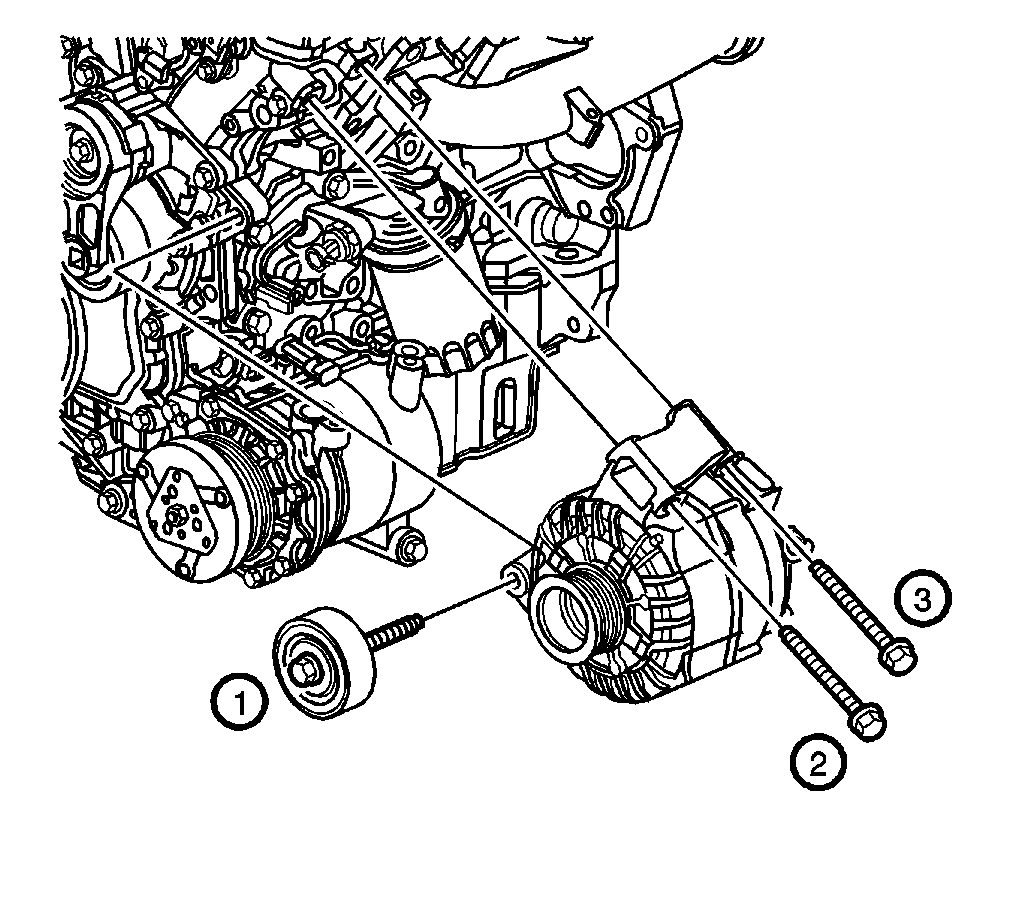
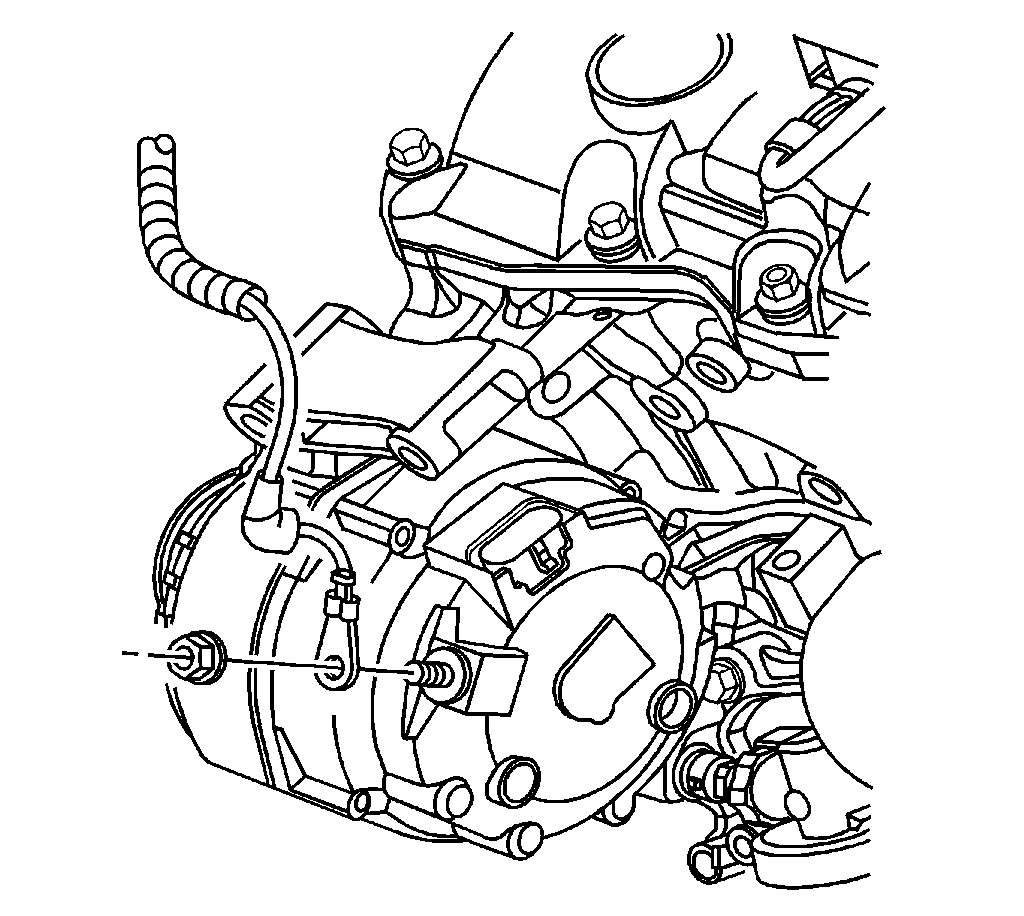
Step 10 - Step 11
pic 5
_________________
Check that first and let me know what you find.
Take care,
Joe
Images (Click to enlarge)
Jun 15, 2019 at 6:01 PM