Hi, I just finished replacing both rear door latches and it is quite challenging. Before attempting this, view this video to get a general idea of how it all works for 2000 Ford Explorer - rear passenger doors.
https://www.youtube.com/watch?v=zy0-fk7fJZY&t=265s
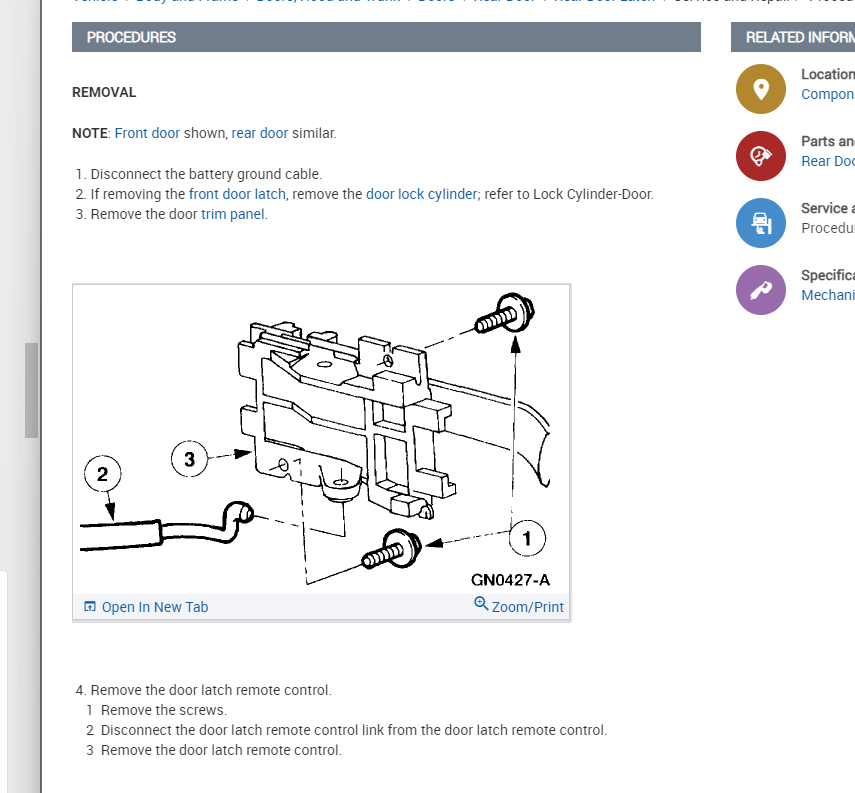
To determine if the latch is bad, look into the latch and poke around with a small screwdriver. You are looking for any loose, rusted, broken springs. If found, then this is the procedure to remove the latch assembly.
First roll the window up and remove the door panel.
To remove the latch, this is the order I took:
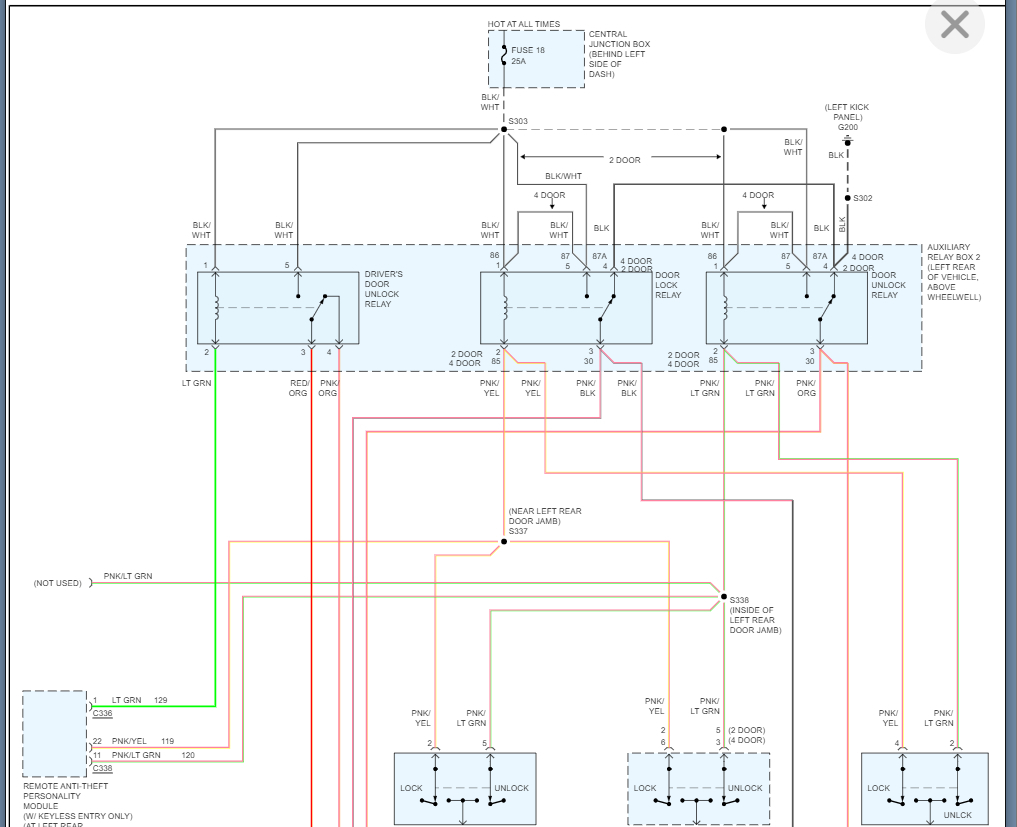
1) Remove the electric plunger mechanism that locks and unlocks the door. It is held on by a very strong U-shaped spring clamp with two nubs that lock it in place and is very hard to get out. The spring clamp itself is held on with a 1/4" rivet going through the lower edge of the door.
To make this easier, I took a Dremel tool and ground down the rivet head on the edge of the door and pulled the clamp & electric plunger out. Remove the electrical connector at the end of the plunger. There are also 2 or 3 wire strain reliefs that you need to push through. You have to remove the electric plunger from the clamp and then punch out the rivet in the clamp. When reassembling, use 1/2" long 1/4" bolts to hold the clamp in. I used 5 min epoxy to secure the bolt to the clamp prior to reassembling.
2) Near the middle of the door is the inside door handle secured by two very small bolts. Remove the two bolts, the push the handle towards the front about 1/4" and pull out. Then remove the handle from the S-shaped rod.
3) Look on the edge of the door and remove the 3 short big Phillips screws holding the latch in. These can be very tight. To avoid stripping I used an impact driver with a big Phillips bit.
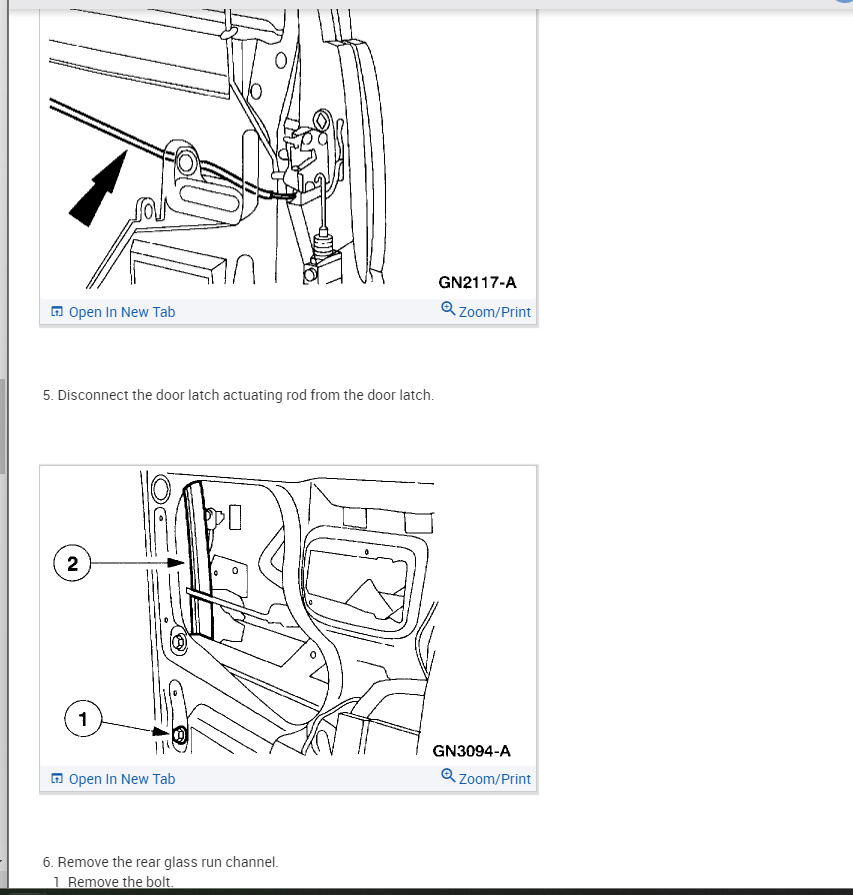
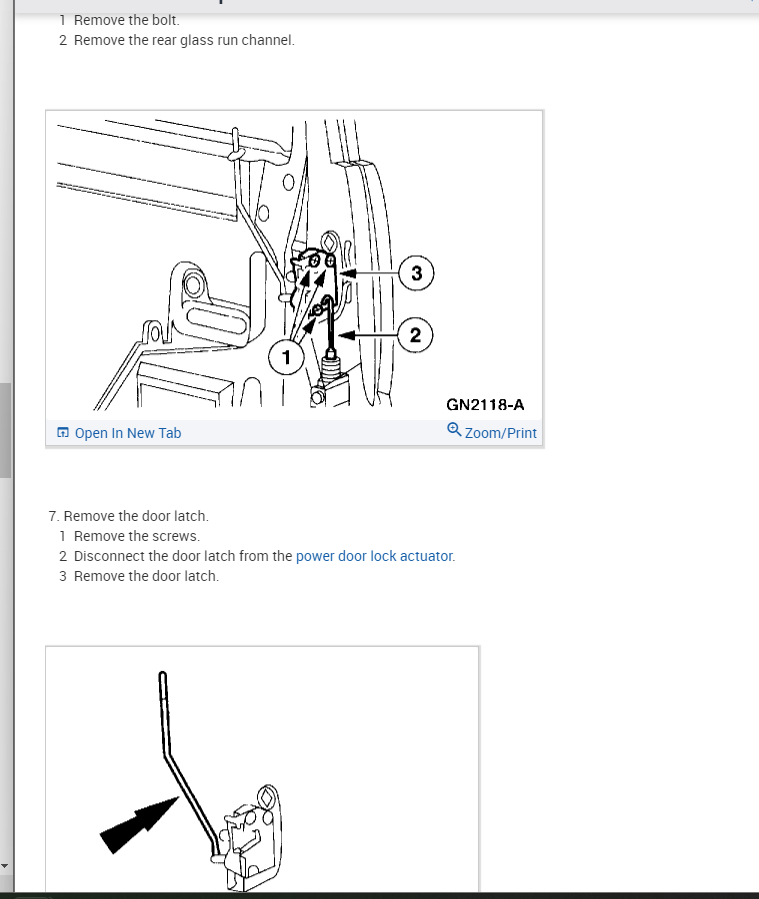
3) Looking at the door you will see 2 horizonal rods. The bottom one is the indoor handle rod that you removed in step 2. The top rod which is the manual lock plunger must be removed from the latch assembly. You can look through one of the holes near the latch. You can pry it off with screwdriver going from the edge of the door where the latch assembly was screwed in OR by putting your hand through the big opening, following the rod to the latch and flip the plastic lock up. After removing the rod, use some masking tape and tape it up and along the side of the door to keep it out of the way. There is a large bolt 14MM? on the left part of the door that holds the window track which you can remove, but it doesn't move very much but may help a little.
4) Near the top part of the latch is a rod with a yellow clip which goes up vertically to the outer door handle. It has a U-loop on the end which goes to a slot on a lever of the outer door handle. Now comes the tricky part of removing the U-loop end from the handle. You have to lift the electric plunger mechanism and the inner door handle rod together as high up as they can go to unhook the rod to the outer door handle. It will help if you reach to the outside handle and jiggle the handle up and down as you do this. This takes a lot of patience. It helps to have a small flashlight duct taped high up inside the door to see what you are doing.
5) Once the U-loop rod is unhooked, you can pull the whole assembly partially out. You can remove the S-shaped hook of the electric plunger from the latch assembly. Two wires are connected to the latch assembly. The one with connector goes to a switch, which is your door ajar switch. The second with a spade-lug is the ground for the switch. On the outside edge of the door, you will see several strain relief wire mounts which you may need to remove.
That's it, hope this helps! I found taping a small flashlight high up in the door and peering in through the small holes helped. Reassembling is just the reverse order. Remember you now have to put a nut on the bolt that is holding clamp for the electric plunger. Finally wear some gloves to protect yourself from sharp edges.
Saturday, April 23rd, 2022 AT 8:32 PM