Hi and thanks for using 2CarPros.
At a minimum, the front brake rotors need replaced. When they warp, your description is the result. I would recommend replacing the brakes and cleaning and lubricating the caliper slides at the same time.
Here is a link that shows in general how it is done:
https://www.2carpros.com/articles/how-to-replace-front-brake-pads-and-rotors-fwd
Here are the directions specific to replacing the rotors on your vehicle. Brake pads replacement is covered in the aforementioned link. All attached pictures correlate with these directions.
_____________________________________________
FRONT BRAKE ROTOR REPLACEMENT (J56)
Front Brake Rotor Replacement (J56)
Special Tools
* J-41013 - Rotor Resurfacing Kit
* J-42450-A - Wheel Hub Resurfacing Kit
Removal Procedure
Warning: Refer to Brake Dust Warning (See: Brakes and Traction Control > Technician Safety Information > Brake Dust Warning).
1. Inspect the fluid level in the brake master cylinder reservoir.
2. If the brake fluid level is midway between the maximum full point and the minimum allowable level, no brake fluid needs to be removed from the reservoir before proceeding.
3. If the brake fluid level is higher than midway between the maximum full point and the minimum allowable level, remove brake fluid to the midway point before proceeding.
4. Raise and support the vehicle. Refer to Lifting and Jacking the Vehicle (See: Vehicle Lifting > Procedures > Lifting and Jacking the Vehicle).
5. Remove the tire and wheel assembly. Refer to Tire and Wheel Removal and Installation (See: Wheels and Tires > Removal and Replacement > Tire and Wheel Removal and Installation).
6. If reinstalling the brake rotor, match mark the brake rotor relationship to the wheel hub.
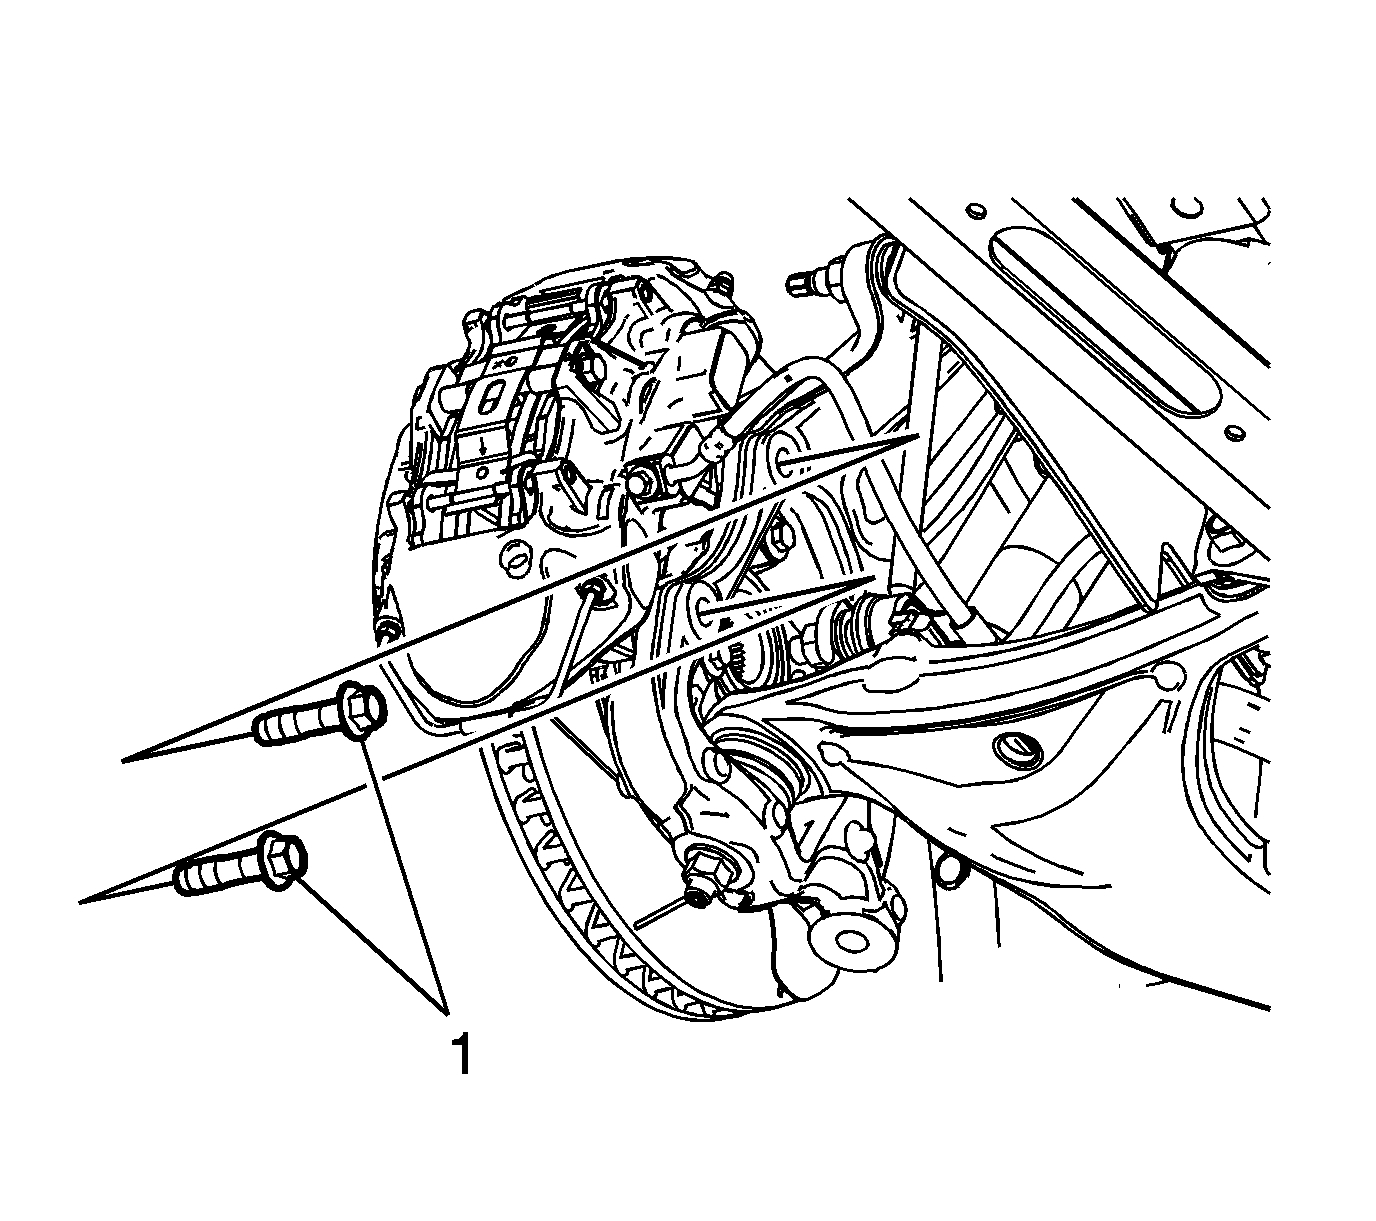
Picture 1
7. Remove the brake caliper bolts (1).
Picture 2
Caution: Support the brake caliper with heavy mechanic wire, or equivalent, whenever it is separated from its mount and the hydraulic flexible brake hose is still connected. Failure to support the caliper in this manner will cause the flexible brake hose to bear the weight of the caliper, which may cause damage to the brake hose and in turn may cause a brake fluid leak.
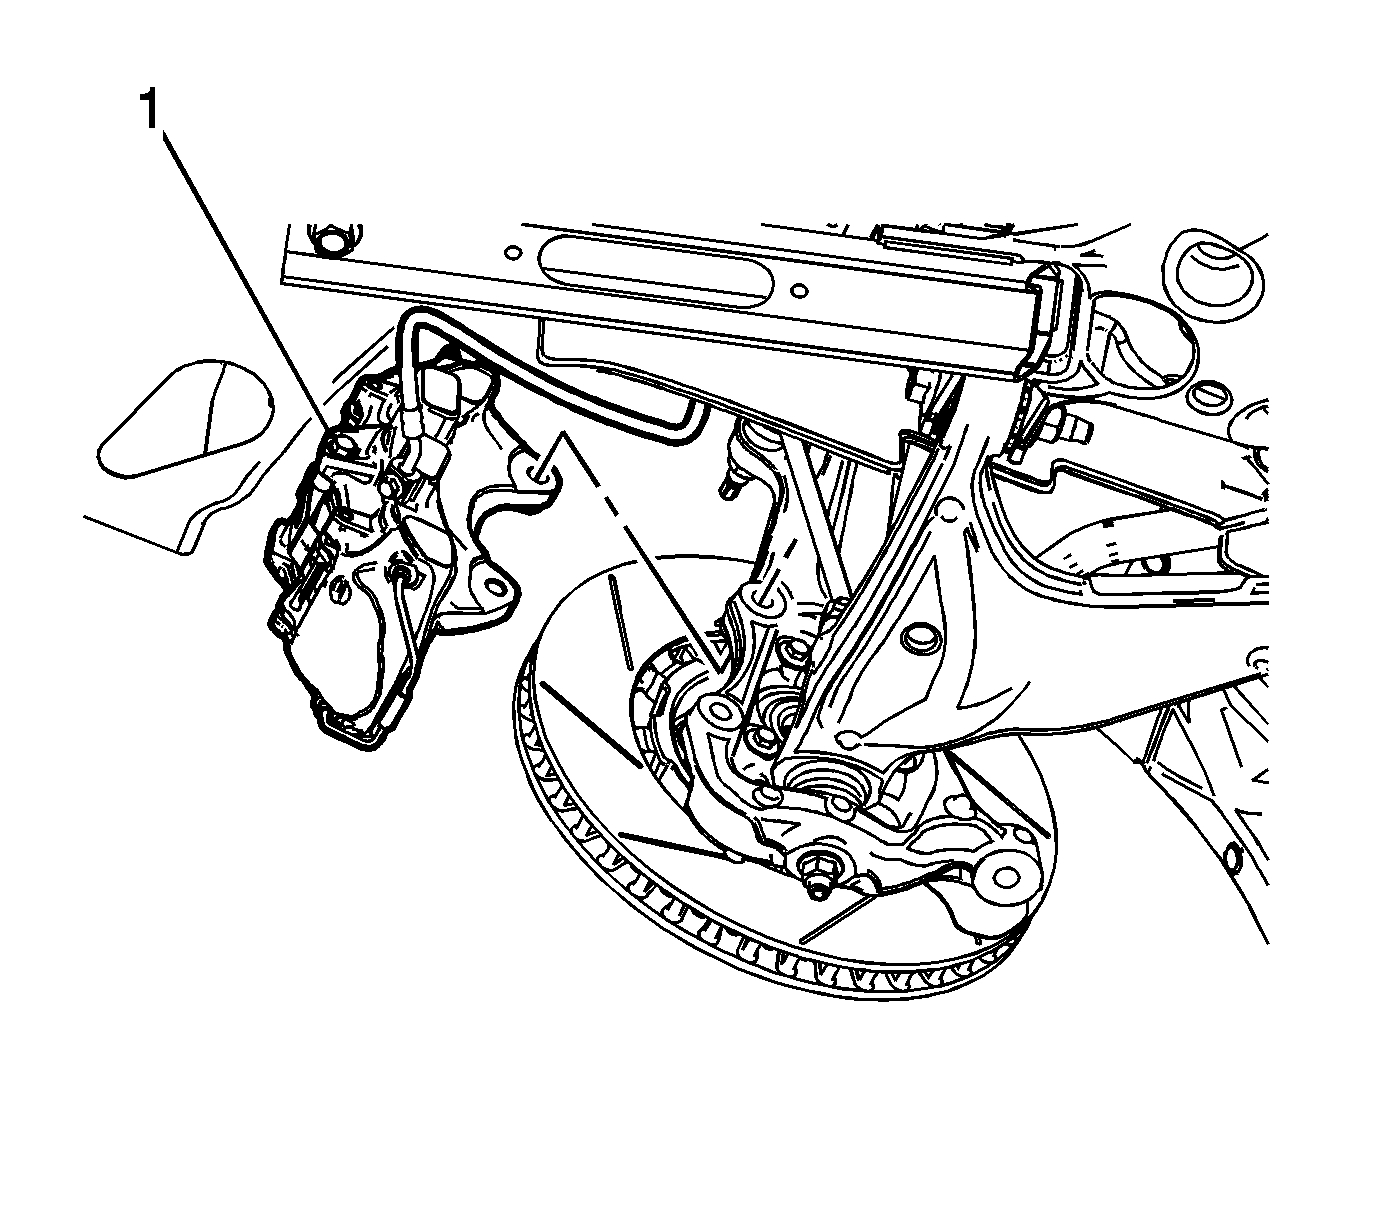
8. Remove the brake caliper (1) and support with heavy mechanics wire or equivalent.
Picture 3
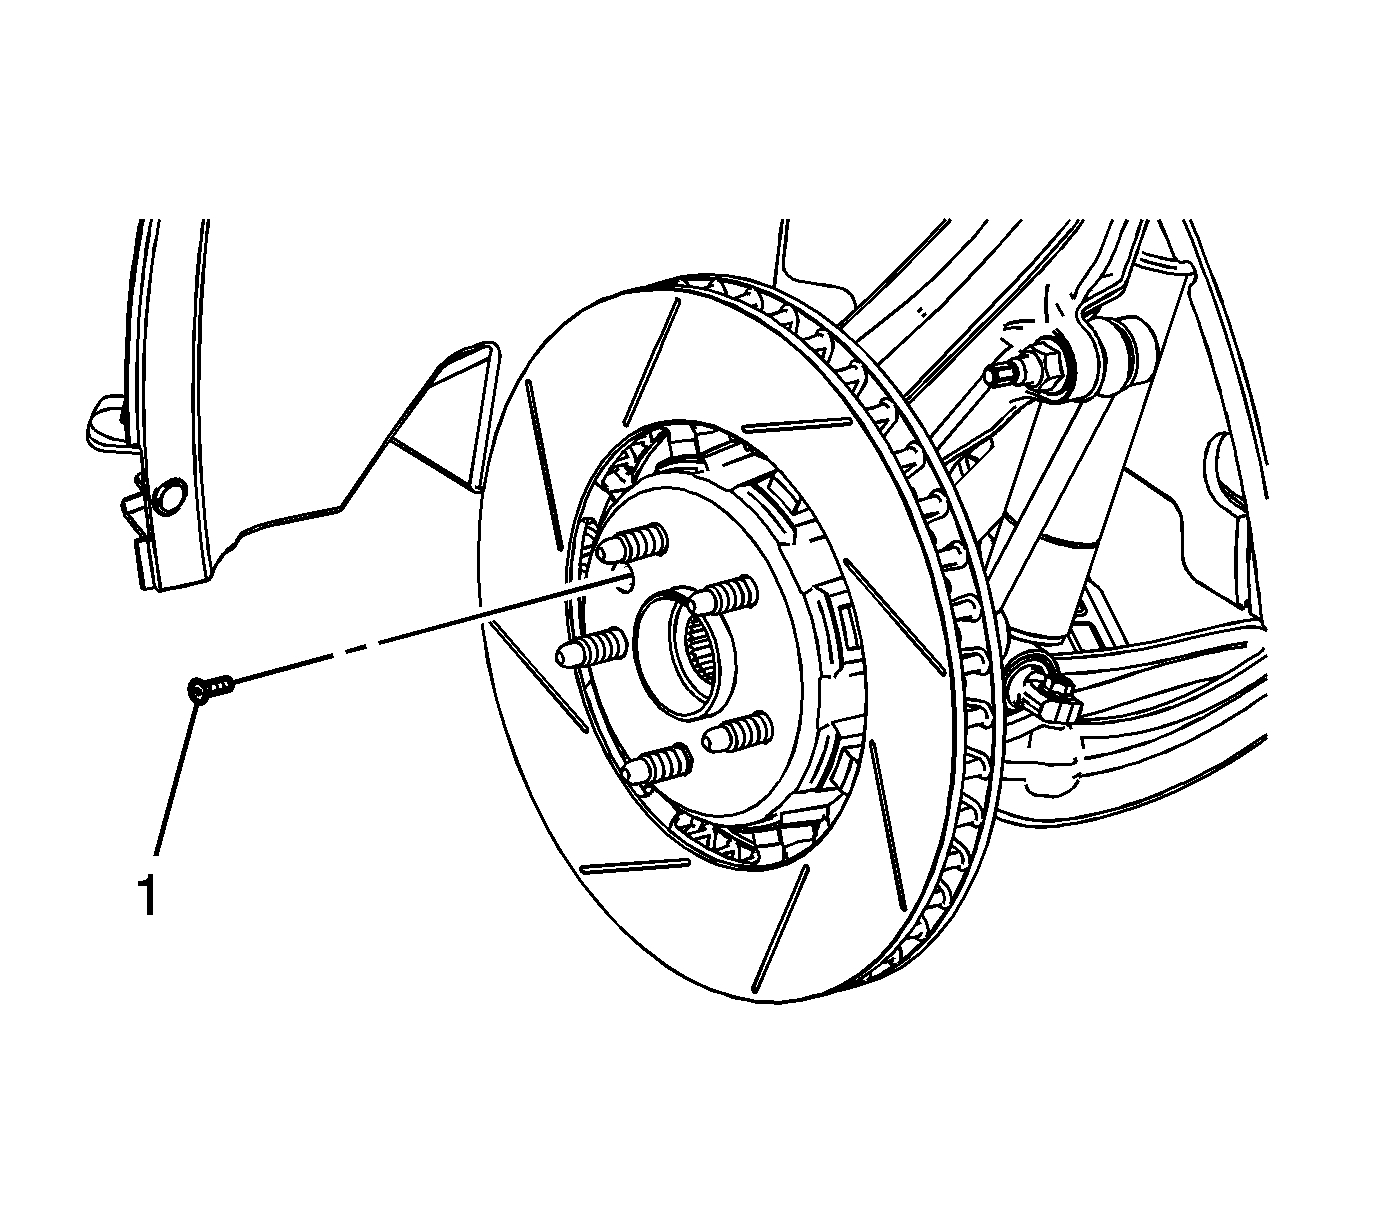
9. Remove the brake rotor screw (1).
Picture 4
10. Remove the brake rotor (1).
Installation Procedure
Note: Whenever the brake rotor has been separated from the hub/axle flange, any rust or contaminants should be cleaned from the hub/axle flange and the brake rotor mating surfaces. Failure to do this may result in excessive assembled lateral runout (LRO) of the brake rotor, which could lead to brake pulsation.
1. Using the J-42450-A - Wheel Hub Resurfacing Kit , thoroughly clean any rust or corrosion from the mating surface of the hub/axle flange.
2. Using the J-41013 - Rotor Resurfacing Kit , thoroughly clean any rust or corrosion from the mating surface and mounting surface of the brake rotor.
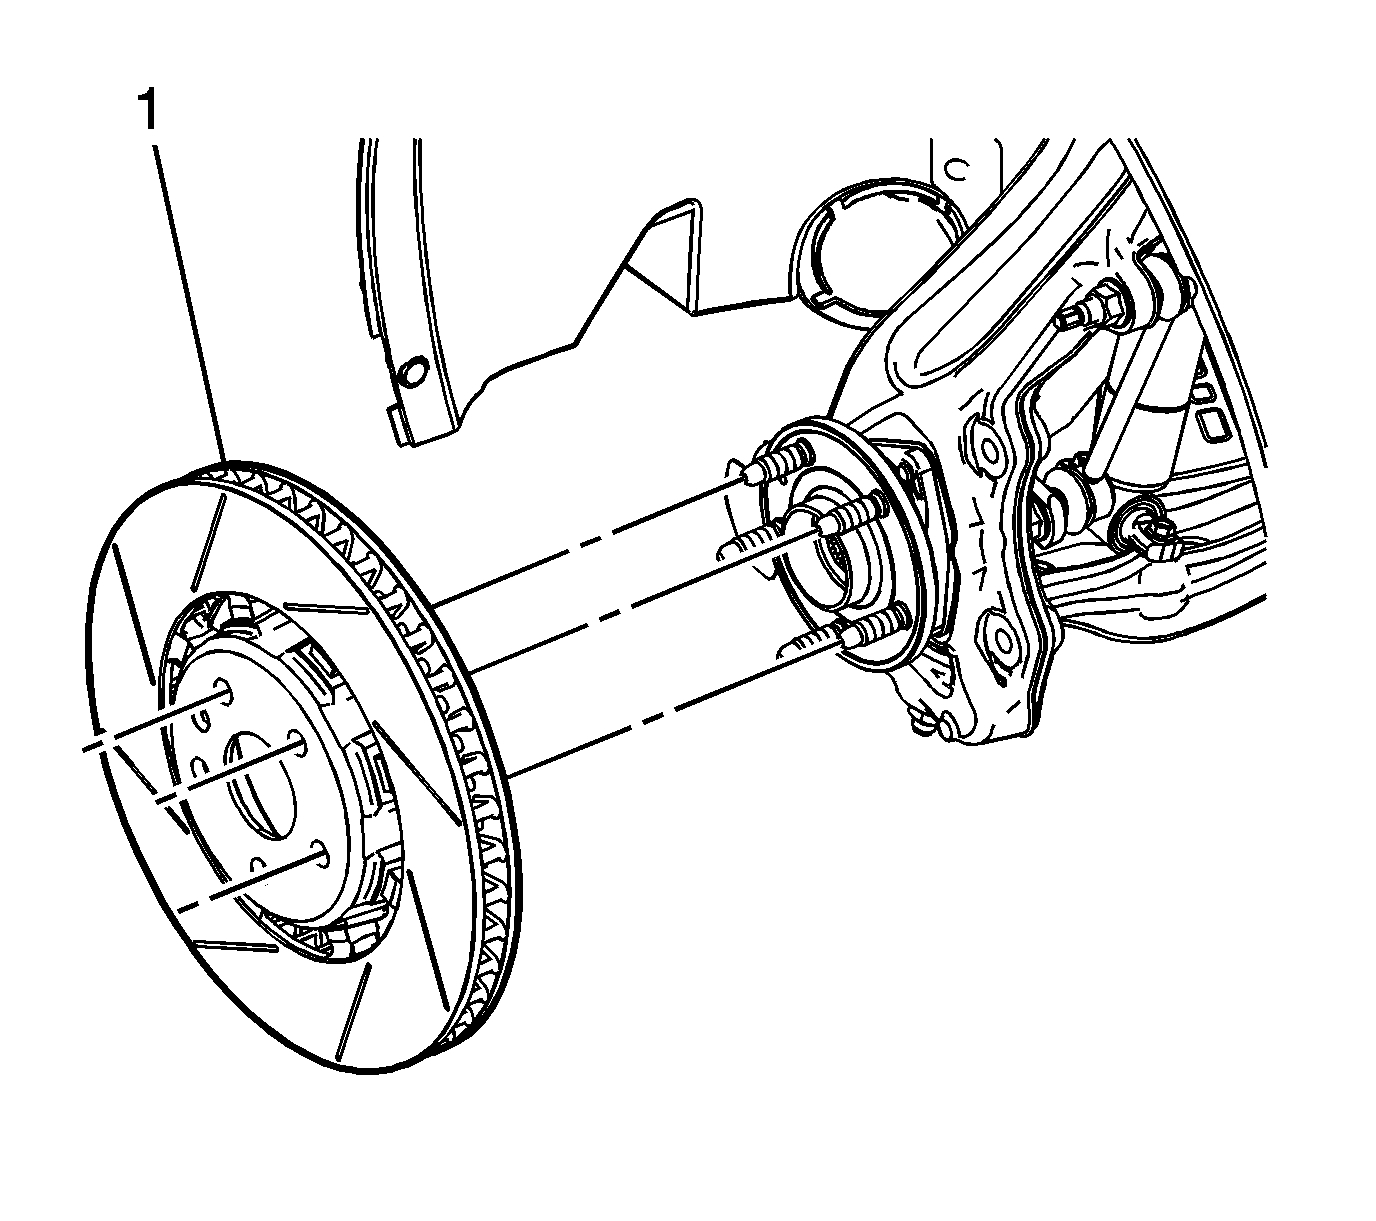
Picture 5
3. Install the brake rotor (1).
Align the match mark made prior to the brake rotor removal, if necessary.
Picture 6
Caution: Refer to Fastener Caution (See: Vehicle > Vehicle Damage Warnings > Fastener Caution).
4. Install the brake rotor screw (1) and tighten to 14 Nm (124 lb in).
Picture 7
5. Install the brake caliper (1).
Note: If reusing the brake caliper to knuckle mounting bolts the threads of the bolts and the threads of the knuckle mounting holes must be free of residue and debris prior to application of threadlocker in order to ensure proper adhesion and fastener retention.
6. Prepare the bolts and the threaded holes for assembly:
* Thoroughly clean the residue from the bolt threads by using denatured alcohol or equivalent and allow to dry.
* Thoroughly clean the residue from the threaded holes by using denatured alcohol or equivalent and allow to dry.
7. Apply threadlocker GM P/N 12345493 (Canadian P/N 10953488), or equivalent to 2/3 of the threaded length of the caliper to knuckle mounting bolts. Ensure that there are no gaps in the threadlocker along the length of the filled area of the bolts.
8. Allow the threadlocker to cure approximately 10 minutes before installation.
Picture 8
9. Install the brake caliper bolts (1) and tighten to 175 Nm (129 lb ft).
10. Install the tire and wheel assembly. Refer to Tire and Wheel Removal and Installation (See: Wheels and Tires > Removal and Replacement > Tire and Wheel Removal and Installation).
11. If the brake rotor was refinished or replaced, or if new brake pads were installed, burnish the brake pads and rotors. Refer to Brake Pad and Rotor Burnishing (See: Brake Pad > Procedures > Brake Pad and Rotor Burnishing).
___________________________________________
Let me know if this helps or if you have other questions.
Take care,
Joe
Images (Click to enlarge)
Feb 25, 2019 at 5:42 PM