Hi and thanks for using 2CarPros.com.
First, here are general directions for replacement. I have to include these for a couple reasons. First, it explains in more detail how to replace one and it includes how to bleed the brake system after a caliper replacement. The bleeding is required and are not included in the removal/replacement directions provided by Alldata. Also, I feel the link will show you clearly what needs done. The directions and pictures I attach will show your vehicle specifically. That way you can easily identify parts.
Here is the link:
https://www.2carpros.com/articles/brake-caliper-replacement
______________
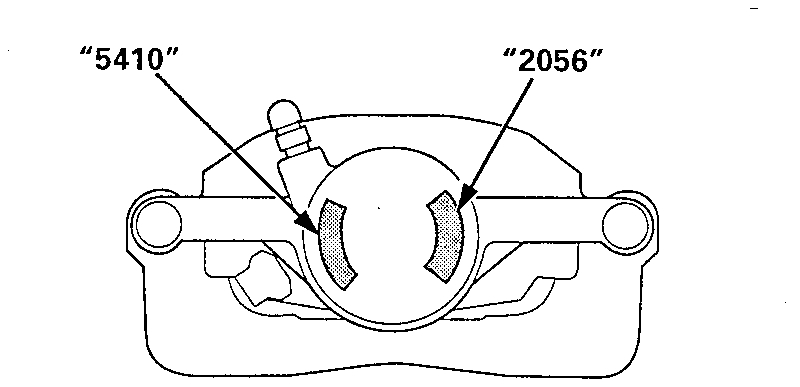
With that in mind, there are two different calipers which could be used on your vehicle. The first picture I attached shows how to identify which one you have. It will either be caliper 2056 or caliper 5410.
_____________________
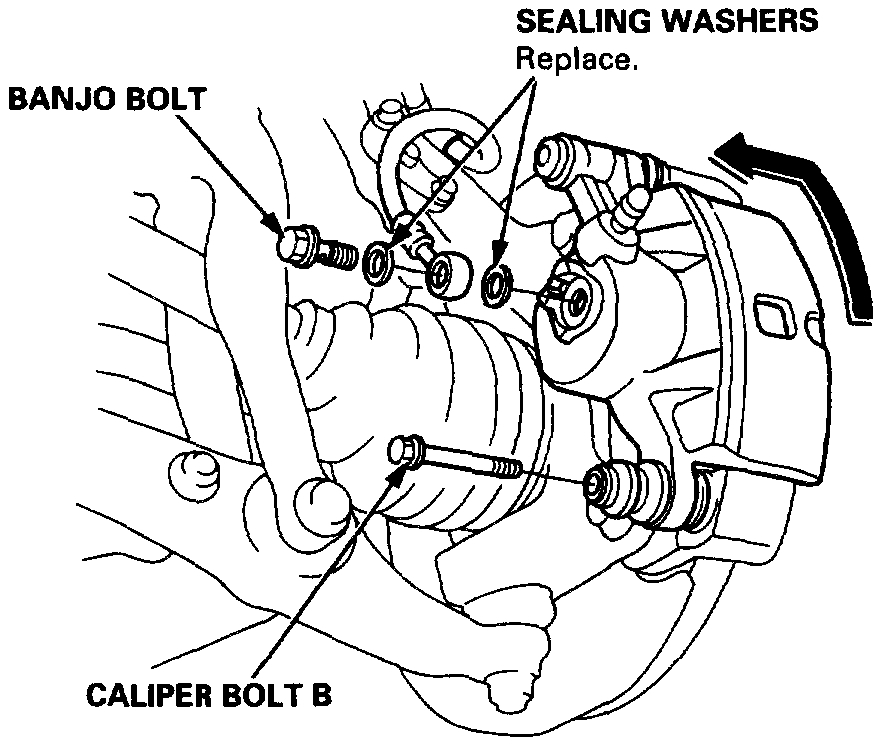
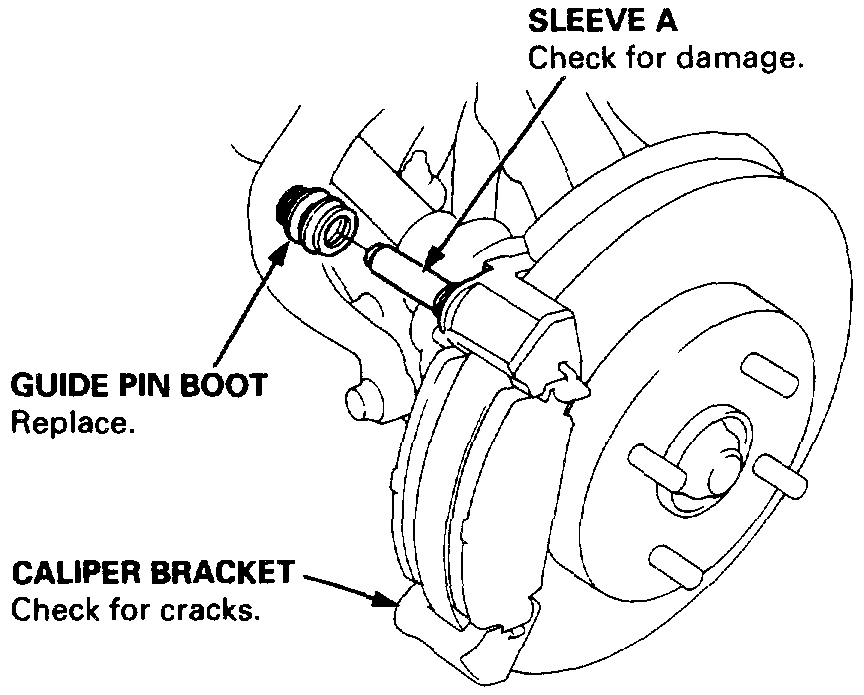
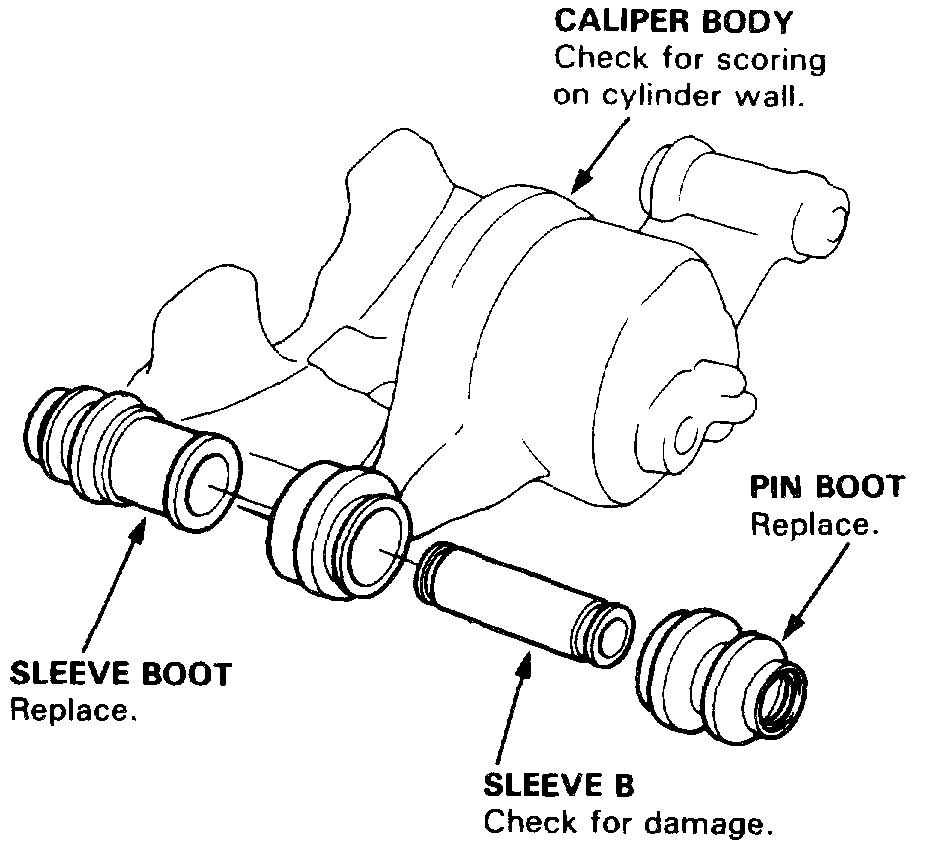
Here are the directions for 2056 (Pictures 2-4)
TYPE 2056
Front Brake Calipers
i
NOTE: There are two types of front brake calipers:
The caliper types can be identified by the "5410" or "2056" stamped on the caliper body as shown. Check the type of the brake caliper before servicing.
WARNING:
- Never use an air hose or dry brush to clean brake assemblies.
- Use an OSHA approved vacuum cleaner to avoid breathing brake dust.
CAUTION:
- Do not spill brake fluid on the vehicle; it may damage the paint; if brake fluid does contact the paint, wash it off immediately with water.
- To prevent spills, cover the hose joints with rags or shop towels.
- Clean all parts in brake fluid and air dry; blow out all passages with compressed air.
1. Remove the banjo bolt, and disconnect the brake hose from the caliber.
2. Remove caliper bolt B. pivot the caliper up out of the way, then remove the caliper from the bracket.
3. Remove the guide pin boot from sleeve A on the caliper bracket.
4. Remove the pin boot, sleeve B and sleeve boot from the caliber body.
Install is reverse of removal.
______________________________
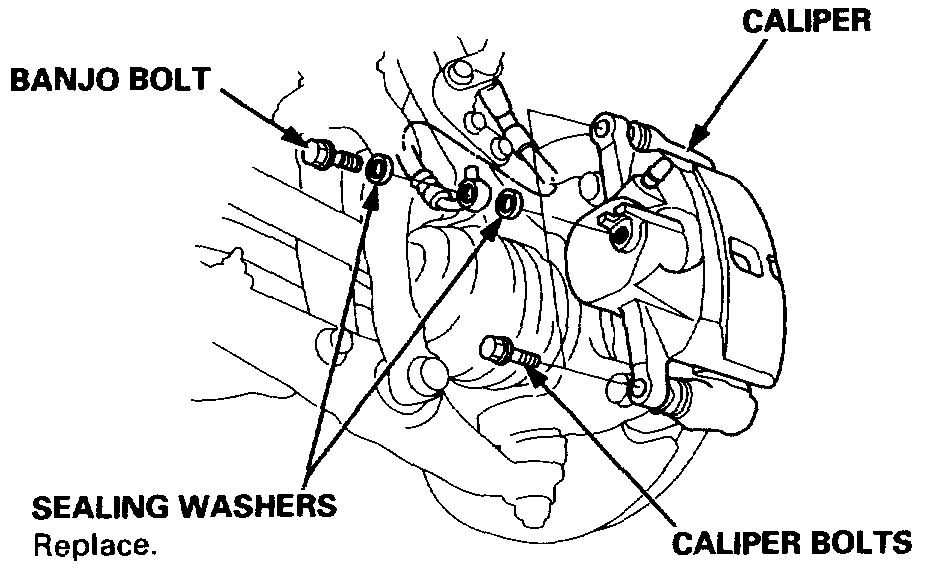
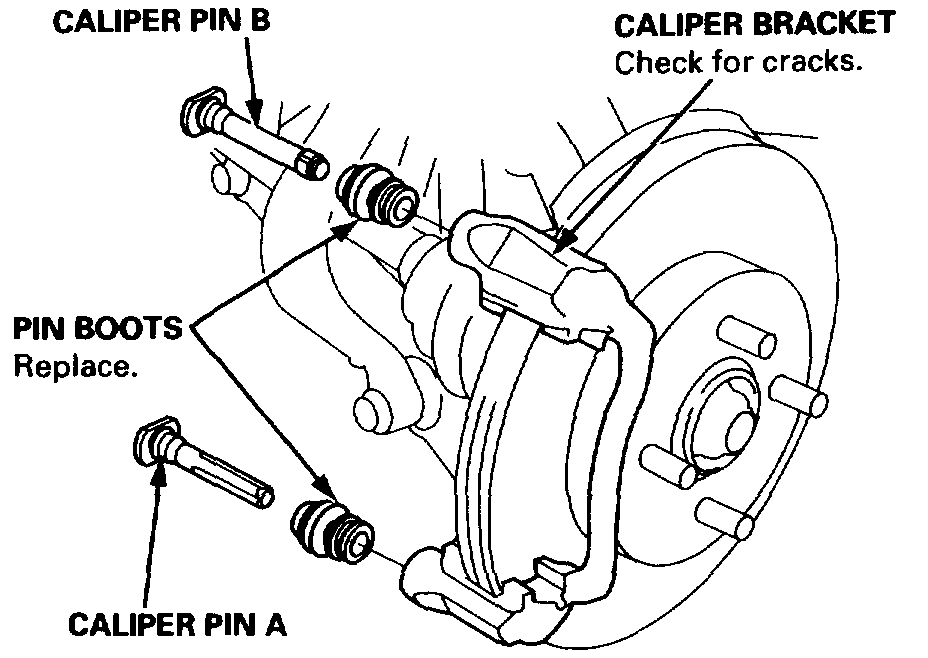
Here are the directions for the 5410 (pictures 5 and 6)
TYPE 5410
Front Brake Calipers
imageOpen In New TabZoom/Print
NOTE: There are two types of front brake calipers:
The caliper types can be identified by the "5410" or "2056" stamped on the caliper body as shown. Check the type of the brake caliper before servicing.
WARNING:
- Never use an air hose or dry brush to clean brake assemblies.
- Use an OSHA approved vacuum cleaner to avoid breathing brake dust.
CAUTION:
- Do not spill brake fluid on the vehicle; it may damage the paint; if brake fluid does contact the paint, wash it off immediately with water.
- To prevent spills, cover the hose joints with rags or shop towels.
- Clean all parts in brake fluid and air dry; blow out all passages with compressed air.
1. Remove the banjo bolt, and disconnect the brake hose from the caliper.
2. Remove the caliper bolts, then remove the caliper from the bracket.
3. Remove the caliper pins and pin boots from the caliper bracket.
Install is reverse or removal
_____________
I hope this is helpful. The bleeding procedures provided in the link pertains to either of these calipers. If you need help, do not be afraid to ask.
Take care,
Joe
Images (Click to enlarge)
Mar 16, 2021 at 11:04 AM