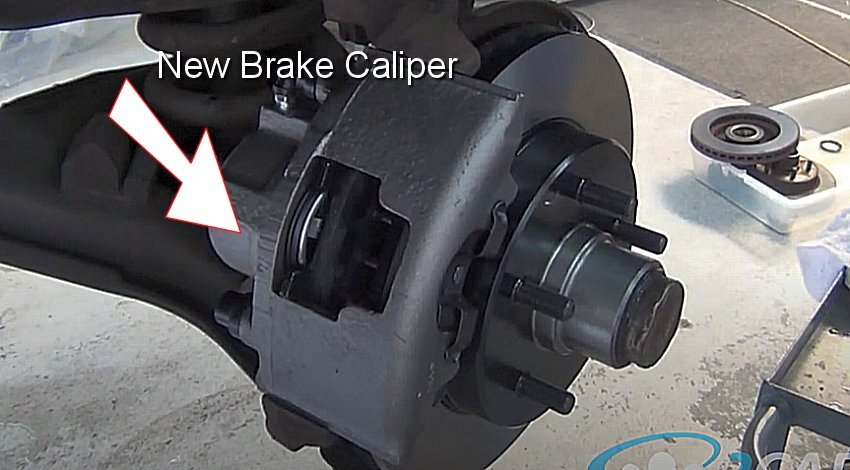
A brake system caliper is responsible for containing hydraulic brake pressure and is then applied to the brake pads which then helps stop the car via the brake rotors. This brake component can be replaced for a few reasons, but mainly it will leak or the caliper piston can become frozen causing a brake pull condition. This is a generic guide meant for instructional purposes, but for most cars the process is the same.
Tools and Materials Needed
- Replacement brake caliper
- Brake fluid
- Jack and jack stands
- Lug wrench
- Ratchet and socket set
- Drip pan
- Brake cleaner
- Shop towels
Getting Started
Before you begin working park your car on level ground, with the engine off, and the emergency brake on. Raise the car safely using a floor jack and secure it with jack stands. Also, we will be dealing with brake fluid so be sure to wear protective clothing, eyewear and gloves. Do not get brake fluid on the car's paint to avoid damage. Replace one caliper at a time to avoid confusion, this will help control the brake fluid leakage and confusion while the job is being done. Also, you will need to remove and reinstall the wheel as well.
Brake Caliper Removal
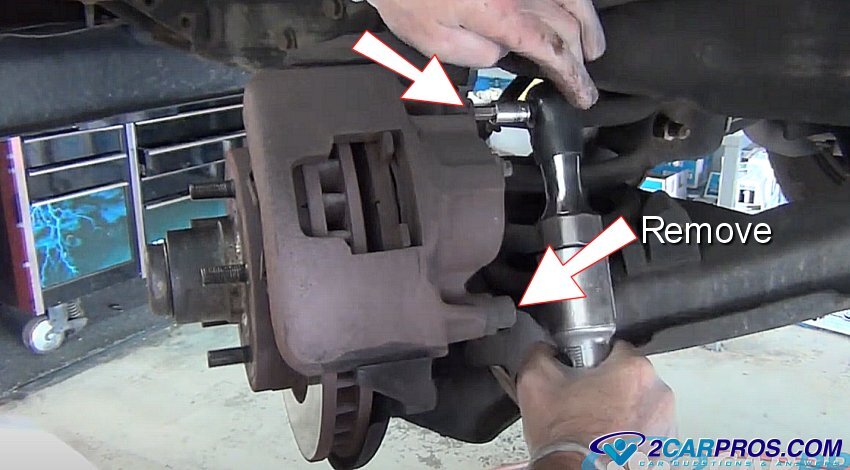
1. Using a wrench or socket remove the caliper slide bolts. These bolts can be tight so make sure the tool is squarely on the head of the bolt before applying pressure to loosen. Then grasp the caliper and forcefully and rock it back and fourth, or wedge a standard screwdriver between the pads and rotor. This is to create a small air gap between the brake pads and brake rotor, grasp and remove the caliper from its mount.
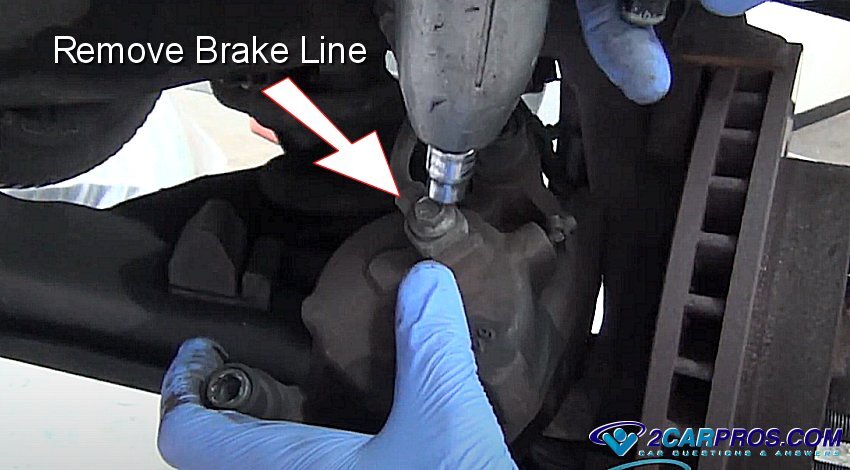
2. Remove the hydraulic brake line from the brake caliper, when this is done brake fluid will run out of the brake line which must be stopped. The preferred method is to remove the brake flex hose from the frame brake line and use a rubber cap to plug it off, an alternative method is to gently use a pair of vise grips with a rubber hose covers on each jaw and gently pinch the rubber brake hose off. Or you can work quickly to replace the brake caliper before the brake master cylinder runs out of fluid which will cause brake bleeding problems.
There will be two sealing washers that are made of copper or aluminum for the rubber brake line bulk head, these will need to be replaced.
New Brake Caliper Installation
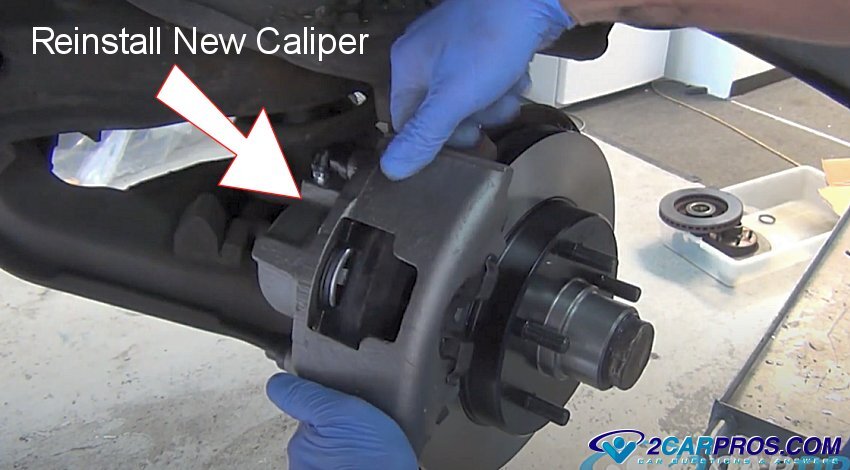
1. Match the new brake caliper to the old one to ensure a proper installation, new caliper slides, sealer washers, brake pads and mounting hardware should be included in the box.
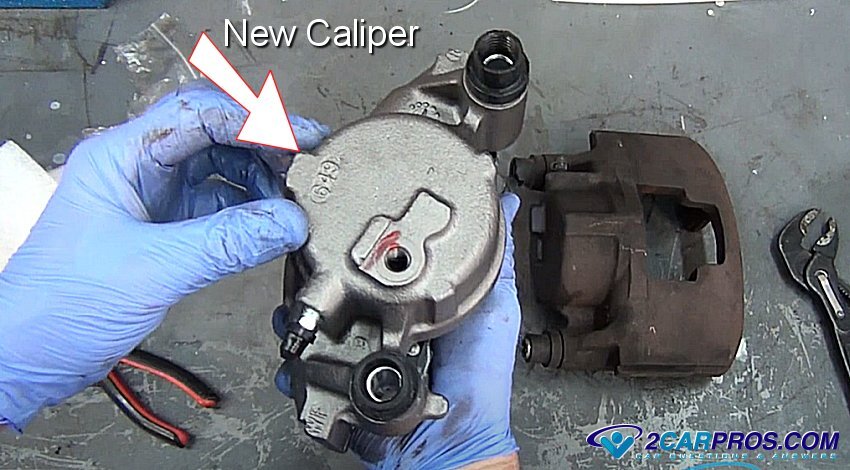
2. Clean the caliper mounting surfaces and the banjo bolt thoroughly using a shop towel and brake cleaner. When reinstalling the hydraulic hose, use the new sealing washers and tighten, use a torque spec for your vehicle, (Don't over tighten because the bolt is hollow and it can break). Also, install new anti-rattle-clips and caliper mounting hardware if any. This will complete the installation preparation and give the job a professional touch.
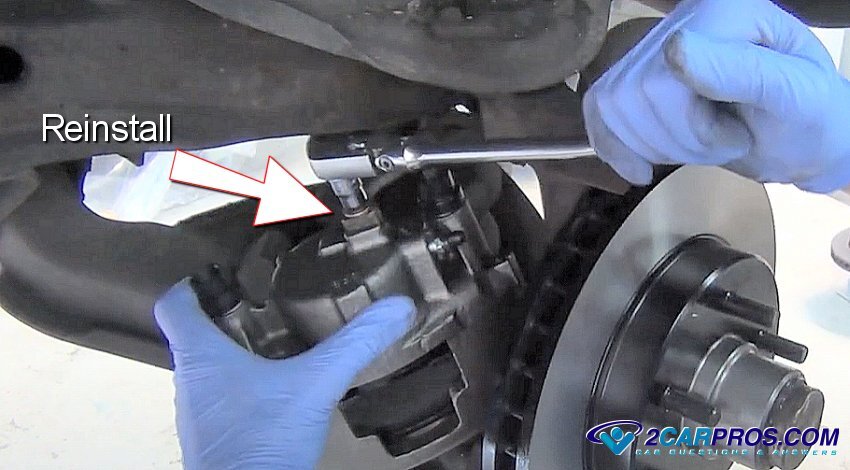
3. Gently set the new brake caliper back in place being mindful of the brake pads and mounting hardware (caliper it should drop into place naturally), then reinsert the brake caliper mounting bolts and tighten, most manufactures will tighten these bolts from 35 to 55 foot pounds so you should look yours up. Now, remove the brake line cap or vise grips and bleed the brake system, after bleeding press the brake pedal to the floor and let up slowly and repeat until brake pressure has returned and you are all set.
Pro Tips
- Watch the brake flex hose for twists while setting the brake caliper into place.
- Never use a hammer to install a brake caliper
- Be mindful of the pads and the rotor to avoid unnecessary contact and clean if necessary.
- Thread new mounting bolts by hand to avoid cross threading
- After bleeding the brakes, inspect all connections for any signs of leaks
- Never drive a car without a good brake pedal
- When driving the car listen for abnormal noises and recheck the job if needed.
Watch the Video!
Please watch this video of the job being done to glean additional helpful information.
Credits
This guide knowledge base was created by the 2CarPros Team, and by Ken Lavacot: Automobile repair shop owner and certified master automobile technician of over 30 years. If you have question or need help please ask one of our experts we are happy to help. Please visit our 2CarPros YouTube Channel.