Blower motor not working properly

Tiny
JR47
  • MEMBER
  • 1999 PONTIAC GRAND PRIX
  • 3.8L
  • V6
  • 2WD
  • AUTOMATIC
  • 275,833 MILES
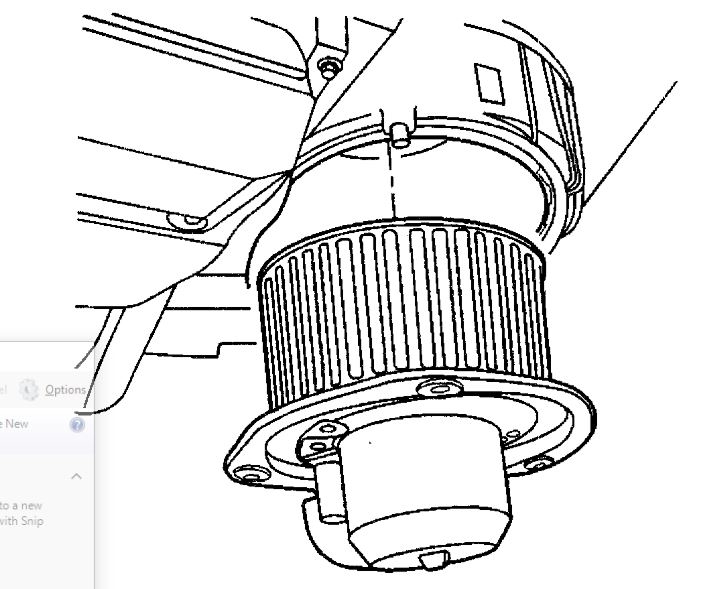
I replaced my blower motor and resistor back in January and for the past two months it would either not work at all or would sometimes only work on certain speed settings. There are times where it works perfectly fine but the main thing that concerned me the most was I did get a little bit of smoke coming out from under the dash. I took the glove box out and didn't find any burnt wires or connections so is it possible to have came from the blower motor itself? I did take it out too and there wasn't anything in there that could have been burning and I did take it apart and found a lot of copper shavings and it did smell like that's what was smoking. Will I need to replace it again and maybe the controls and how would I test the control settings to make sure they are working properly?
Wednesday, October 16th, 2019 AT 9:13 PM

2 Replies

Tiny
ASEMASTER6371
  • MECHANIC
  • 52,797 POSTS
Good afternoon,

Yes, if it smelled like it was burnt and there are shavings from it, the motor is failing.

Replace it with a good quality blower motor.

Roy
Was this
answer
helpful?
Yes
No
Thursday, October 17th, 2019 AT 1:15 PM
Tiny
ASEMASTER6371
  • MECHANIC
  • 52,797 POSTS
Good afternoon,

If the motor was burned, good chance the blower resistor could be the cause of the issue. I would change that as well.

https://www.2carpros.com/articles/how-to-check-wiring

https://www.2carpros.com/articles/how-to-use-a-voltmeter

Check the voltage at the blower motor with it running. It should be battery voltage.

Roy

REMOVAL PROCEDURE

imageOpen In New TabZoom/Print

1. Disconnect the battery negative cable.
2. Remove the right side instrument panel insulator.
3. Disconnect the electrical connectors from the blower motor resistor.

imageOpen In New TabZoom/Print

4. Disconnect the blower motor resistor electrical connector from the blower motor.

imageOpen In New TabZoom/Print

5. Loosen, do not remove, both forward screws.
The blower motor resistor opening is slotted as access is extremely limited.
6. Remove the rearward screw.
7. Remove the blower motor resistor.

INSTALLATION PROCEDURE

imageOpen In New TabZoom/Print

1. Install the blower motor resistor.

NOTE: Refer to Fastener Notice in Cautions and Notices.

2. Install the blower motor resistor rearward screw.

Tighten
Tighten the blower motor resistor rearward screw to 1.5 N.m (13 lb in).

3. Install both blower motor resistor forward screws.

Tighten
Tighten the blower motor resistor forward screws to 1.5 N.m (13 lb in).

imageOpen In New TabZoom/Print

4. Connect the electrical connector to the blower motor.

imageOpen In New TabZoom/Print

5. Connect the electrical connector to the blower motor resistor.
6. Install the right side instrument panel insulator.
7. Connect the battery negative cable.
Was this
answer
helpful?
Yes
No
Tuesday, March 30th, 2021 AT 1:15 PM

Please login or register to post a reply.

Sponsored links