Welcome to 2CarPros.
Based on your description, the blower motor resister has failed. When bad, they only will work in the high mode. Please note that the information below is for a 2005. In your post, you indicate a 2015, but in the heading a 2005. They weren't offered in 2015, so I'm assuming it is the 2005.
Here are the directions for replacing the resister. The attached pictures correlate with these directions.
____________________________________
2005 Chevy Truck Venture FWD V6-3.4L VIN E
Blower Motor Resistor - Primary
Vehicle Heating and Air Conditioning Blower Motor Resistor Service and Repair Procedures Blower Motor Resistor - Primary
BLOWER MOTOR RESISTOR - PRIMARY
Blower Motor Resistor Assembly Replacement
Removal Procedure
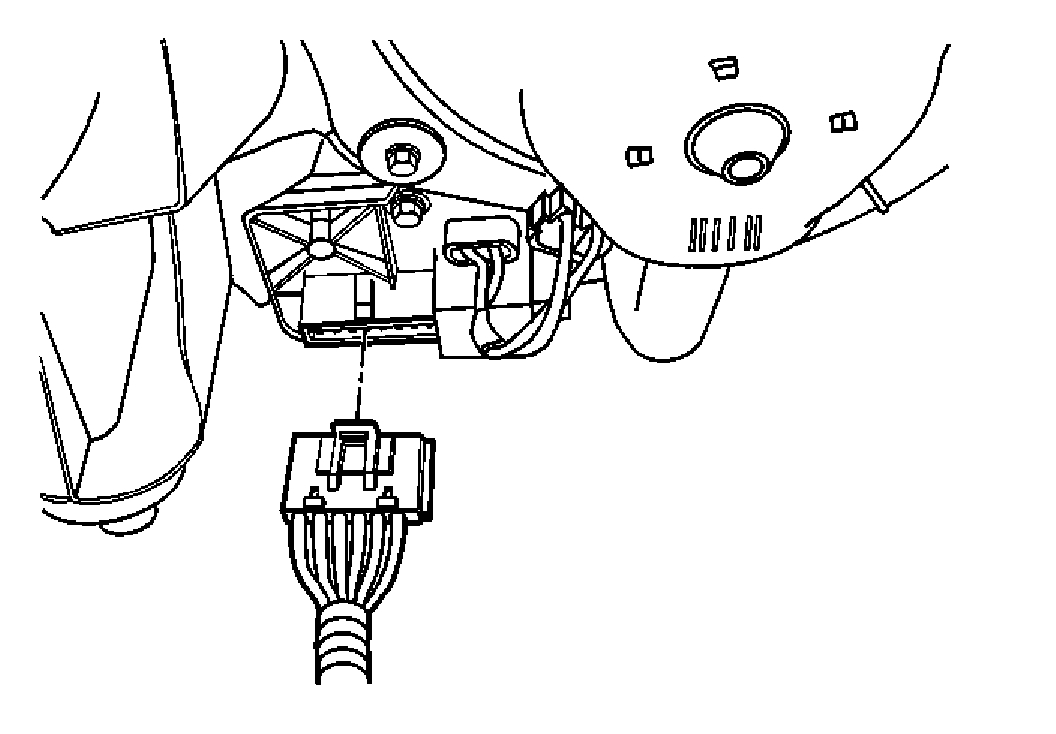
1. Remove the right side I/P insulator.
Pic 1
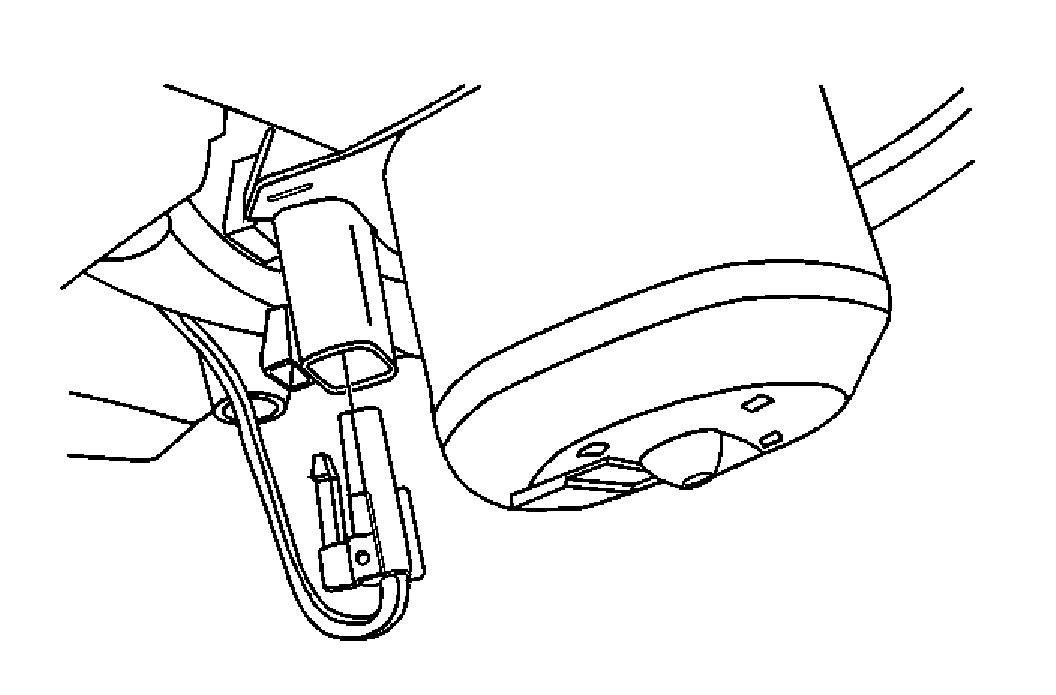
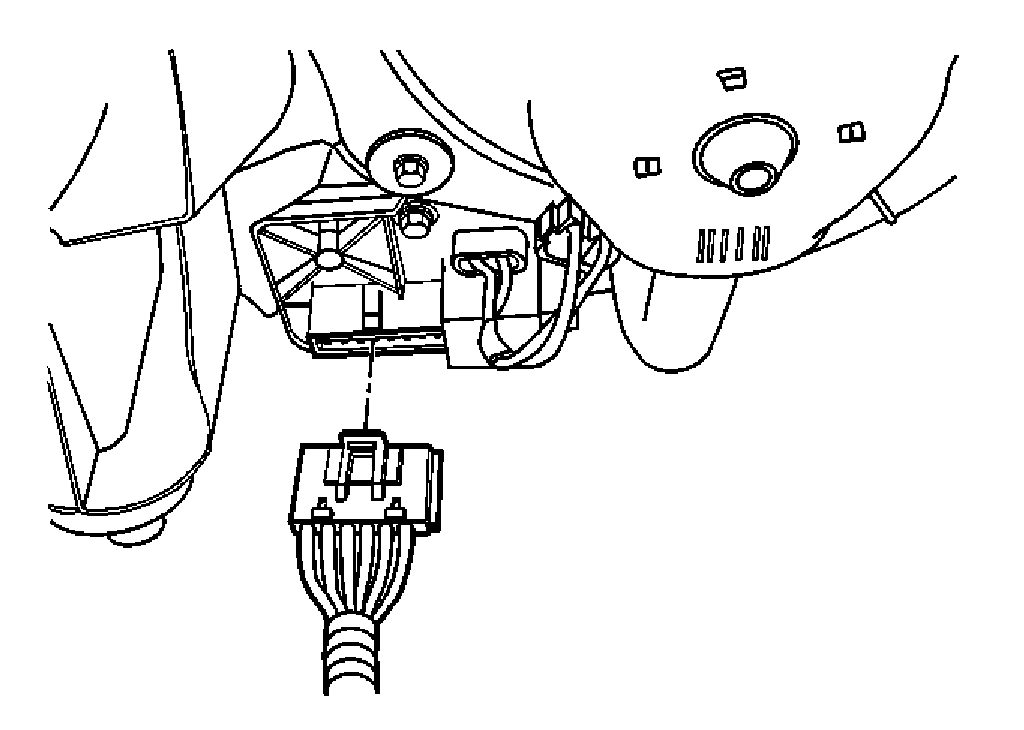
2. Disconnect the electrical connector from the blower motor.
3. Remove the blower motor mounting screws.
4. Remove the blower motor from the HVAC module assembly.
Pic 2
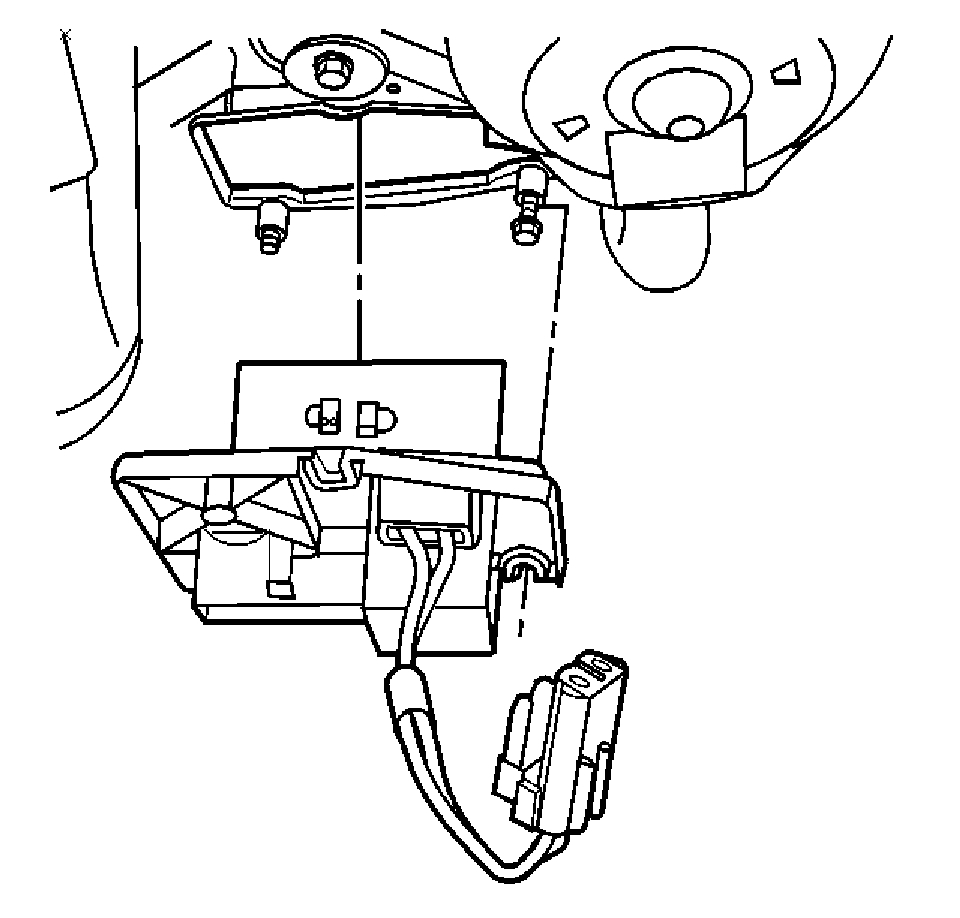
5. Disconnect the electrical connector from the blower motor resistor.
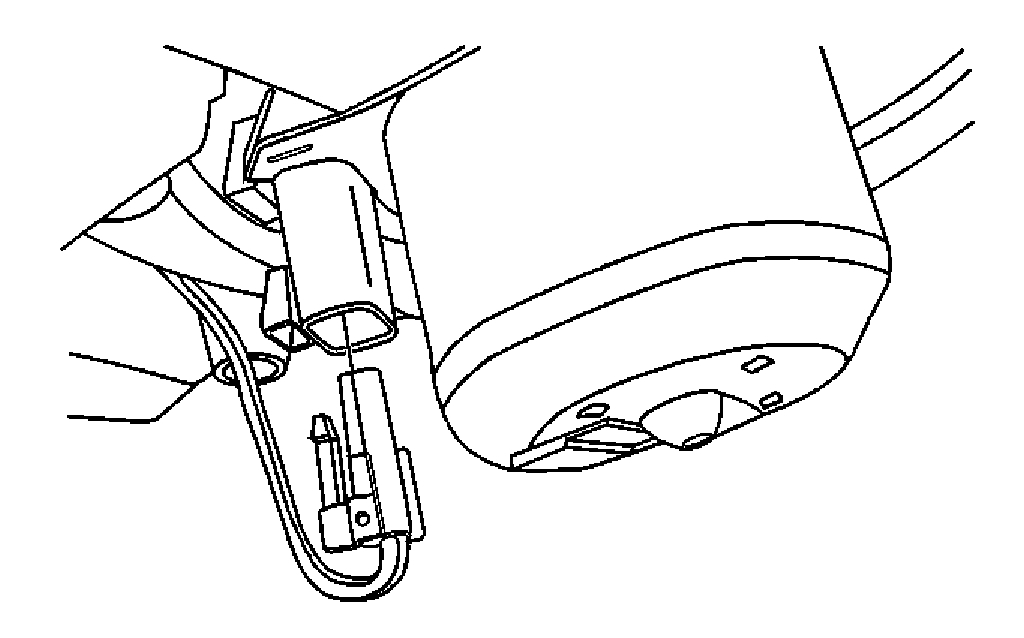
Important: Only loosen both of the forward blower motor resistor mounting screws. The blower motor resistor mounting holes are slotted.
6. Loosen the forward blower motor resistor mounting screws.
7. Remove the rearward blower motor resistor mounting screw.
Pic 3
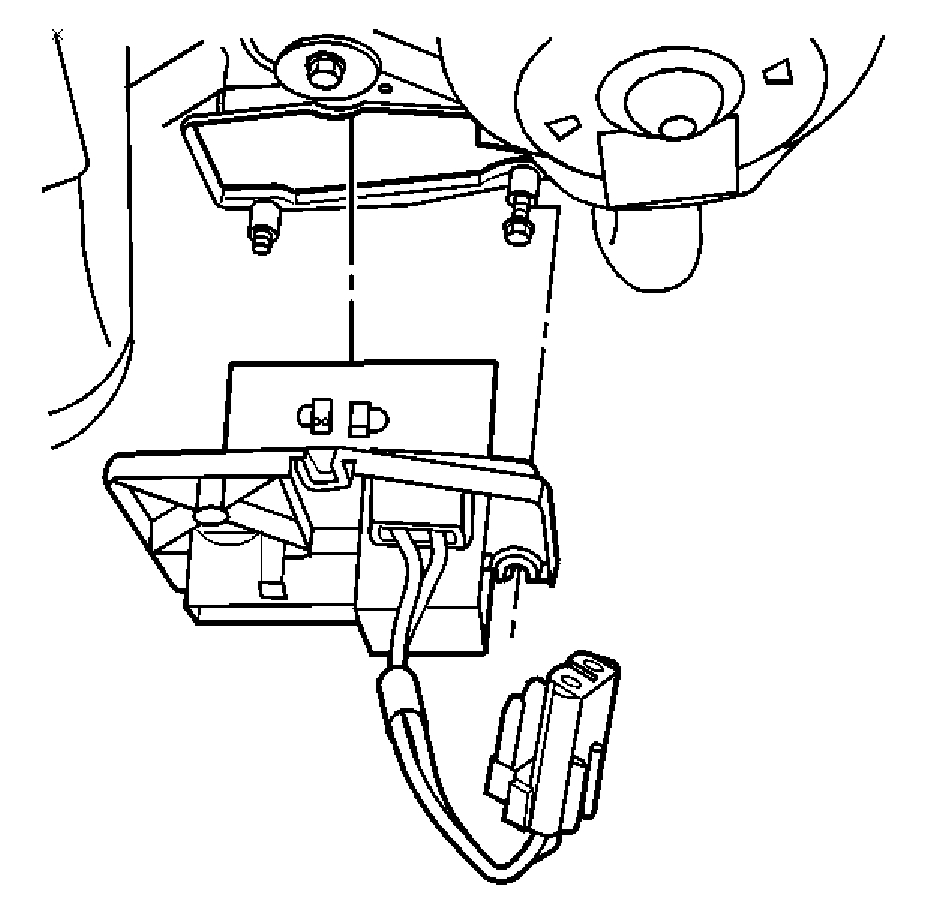
8. Remove the blower motor resistor from the HVAC module assembly.
Installation Procedure
pic 4
1. Install the blower motor resistor to the HVAC module assembly.
2. Install the rearward blower motor resistor mounting screw.
Tighten
Tighten all the screws to 1.8 Nm (16 lb in).
Pic 5
3. Connect the electrical connector to the blower motor resistor.
4. Install the blower motor to the HVAC module assembly.
5. Install the blower motor mounting screws.
Tighten
Tighten the screws to 1.8 Nm (16 lb in).
Pic 6
6. Connect the electrical connector to the blower motor.
7. Install the right side I/P insulator.
___________________________
The part is under the dash on the passenger side of the vehicle. It isn't hard to replace.
Let me know if this helps.
Take care,
Joe
Images (Click to make bigger)
Friday, October 4th, 2019 AT 6:33 PM