
Aug 15, 2020 at 10:23 AM
(Merged)
Engine shut off while driving?
2006 DODGE CHARGER
Advertisement
I have to be honest, I can't see why they would shut the engine down. I think there is a wiring issue. Something may have been knocked loose or damaged.
Hi I have a 2006 Dodge Charger R/T 5.7. The car keeps stalling on me. When the car is cold I can drive it all over until it reaches operating temp, then it stalls. There was a p1521 code so I changed oil and cleared. Now there is a P0300 multiple misfire. I have replaced fuel pumps, Crank sensor, Cam sensor, Plugs, Air filter and ECT sensor. Before the car stalls the ETC light flashes and stability light is solid. If I let the car cool down it will start and run again til it is warm. Please help where do I go next?
Aug 15, 2020 at 10:23 AM
(Merged)

Hello,
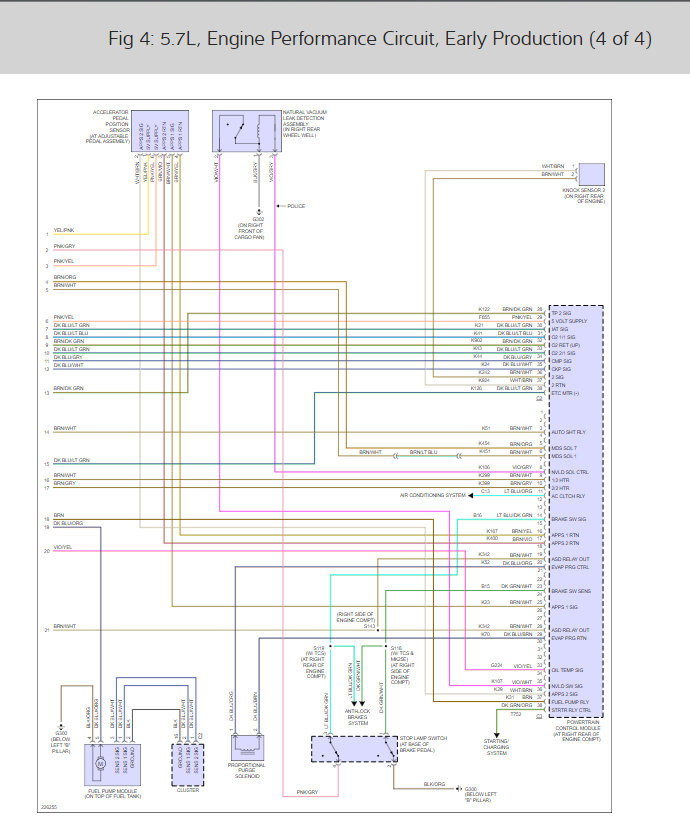
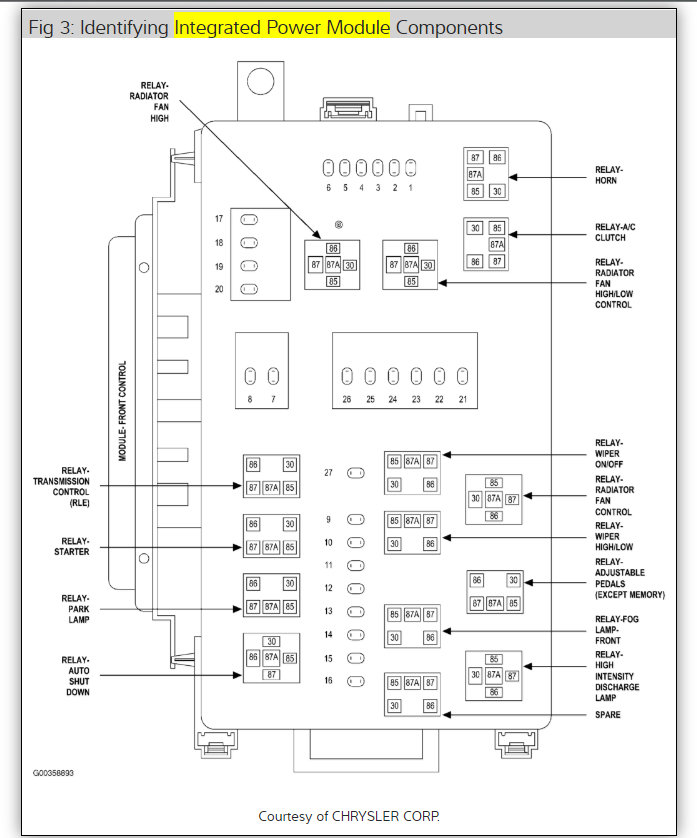
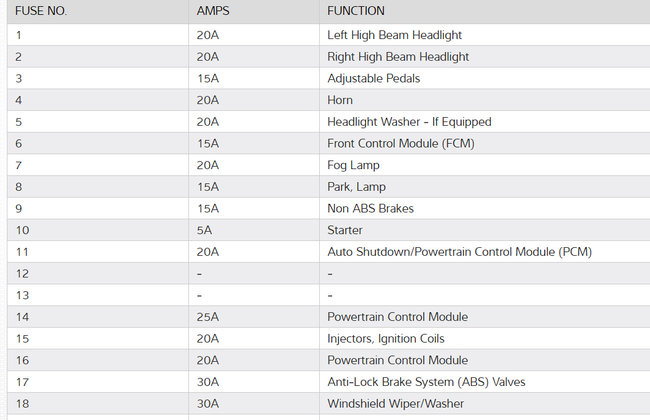
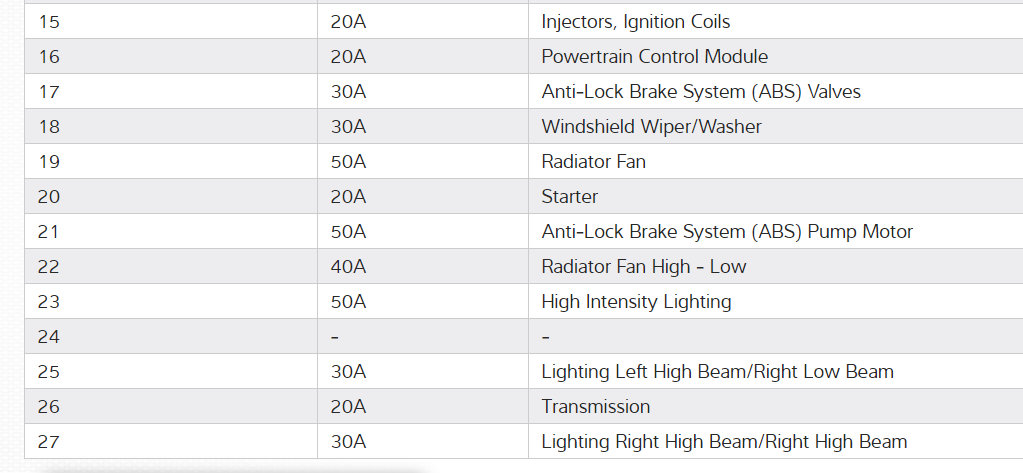
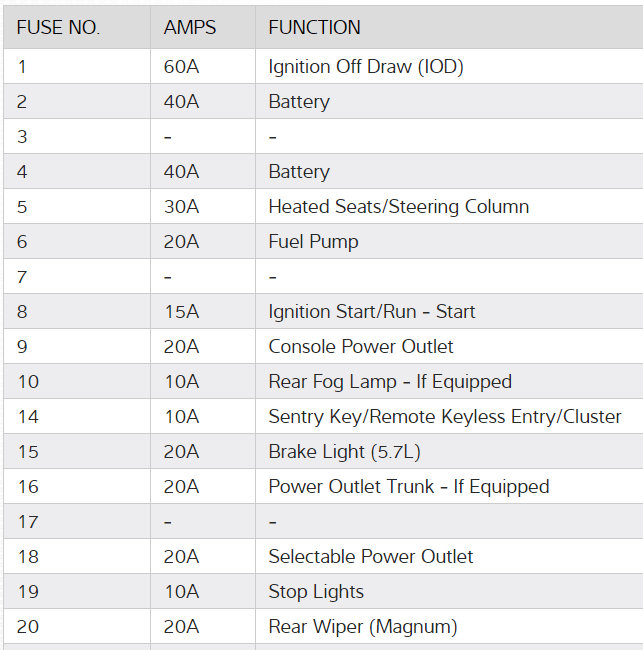
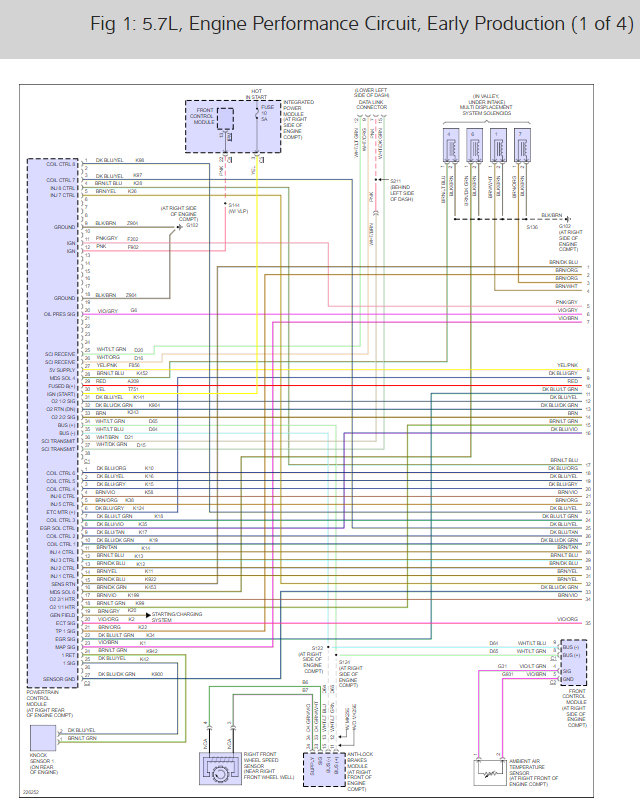
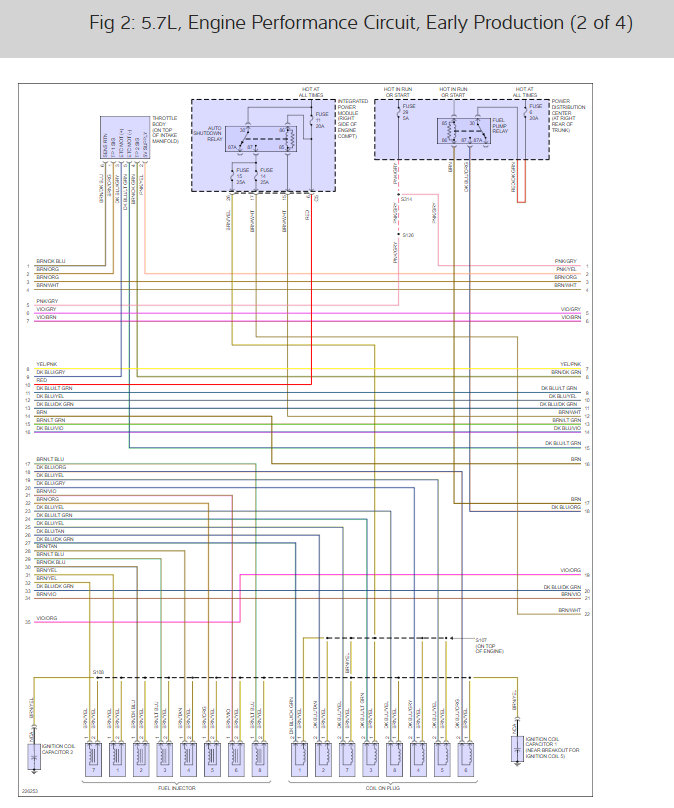
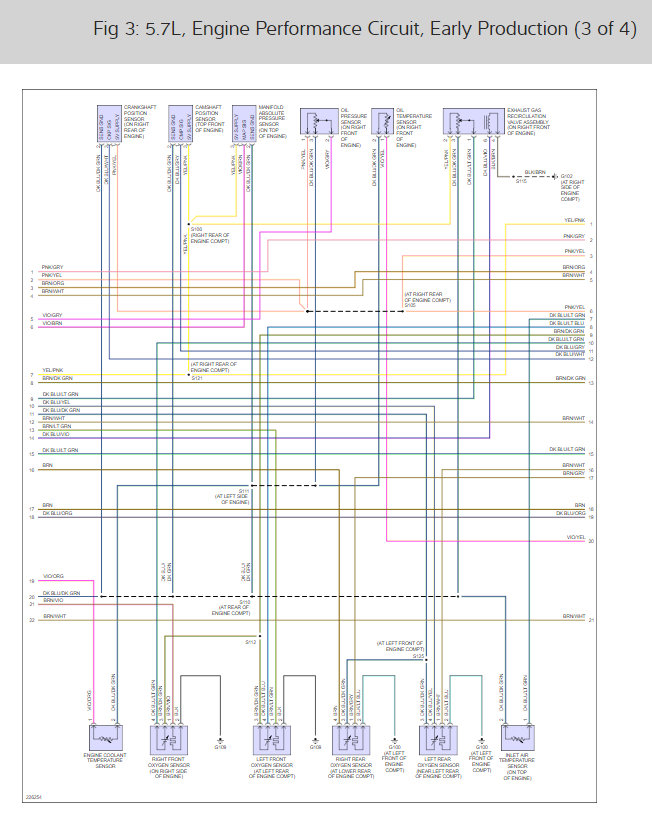
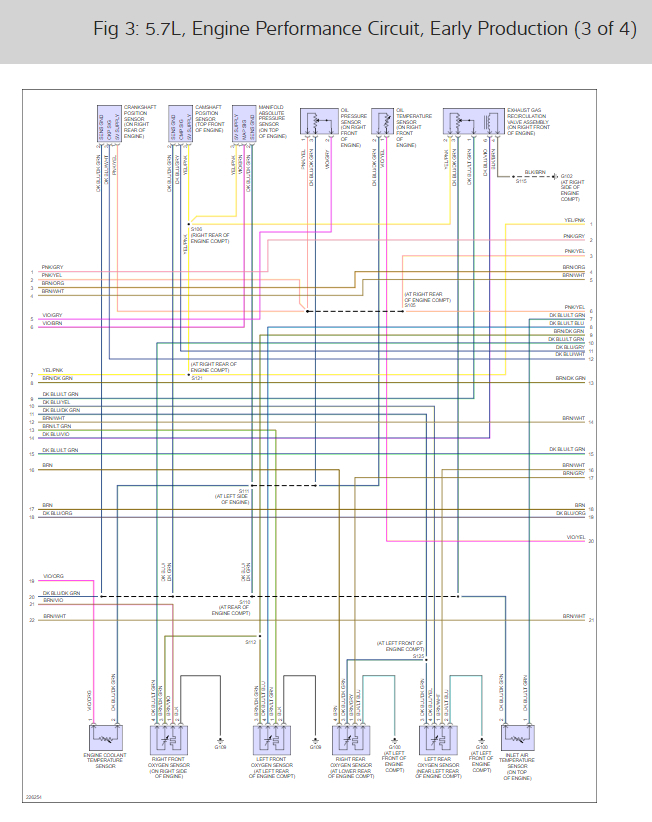
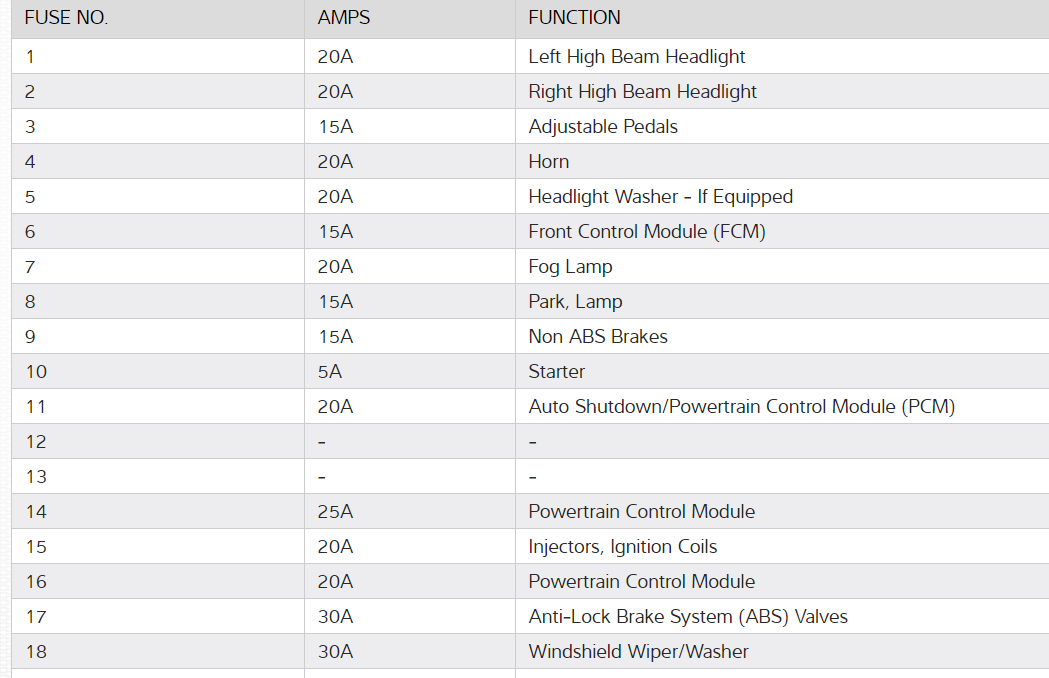
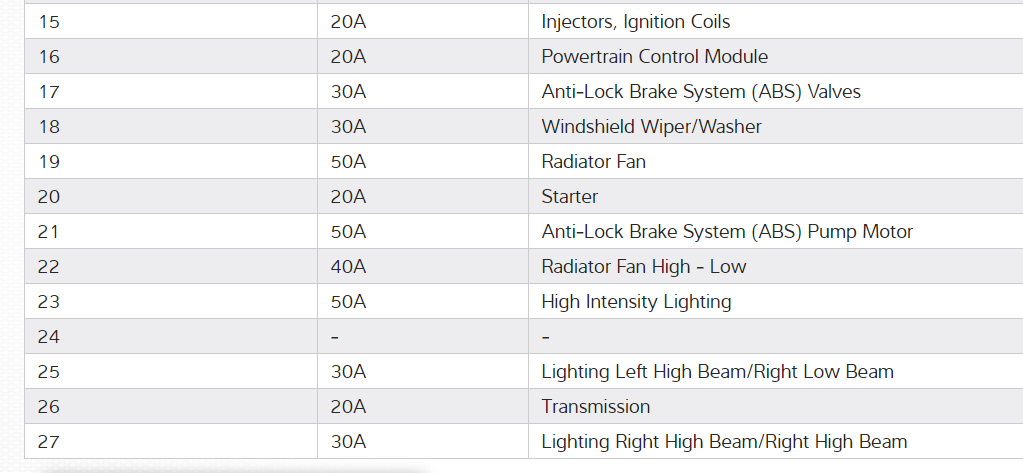
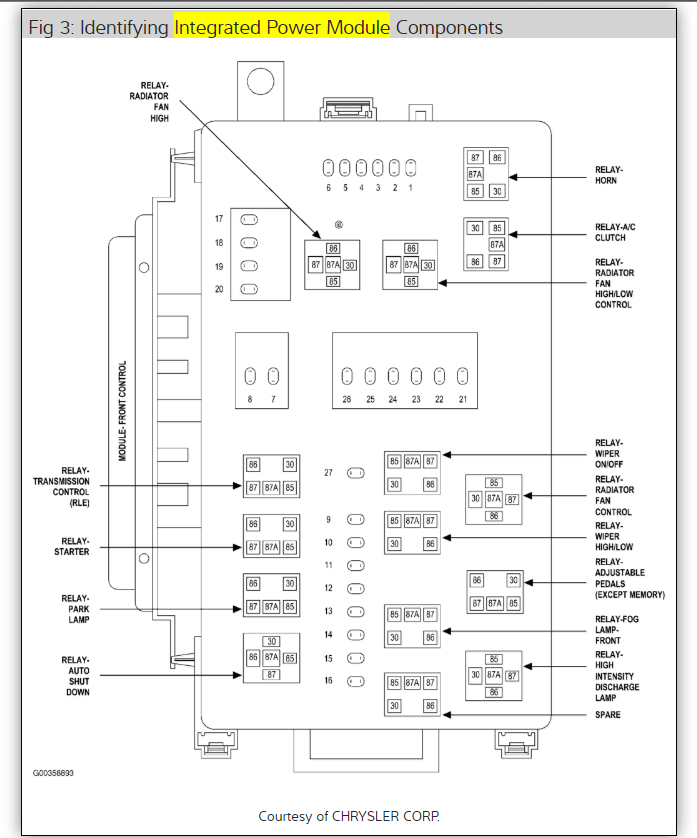
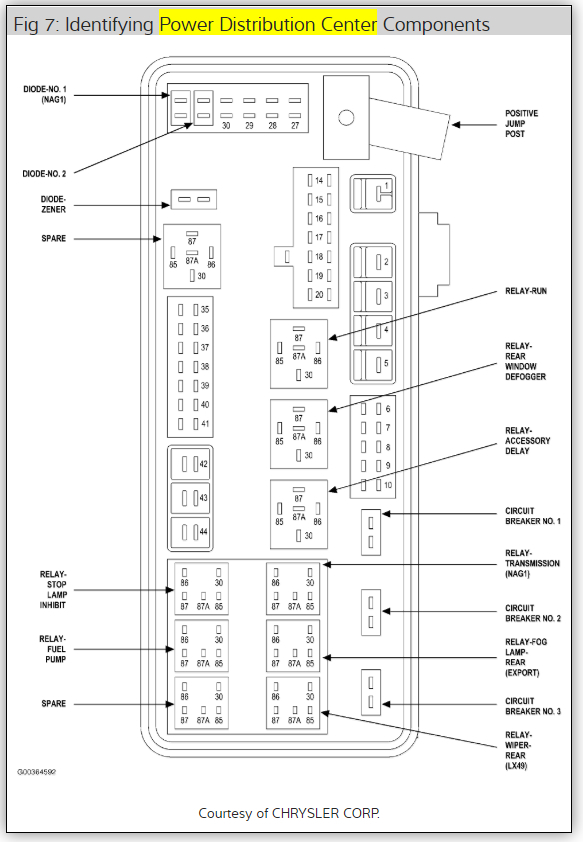
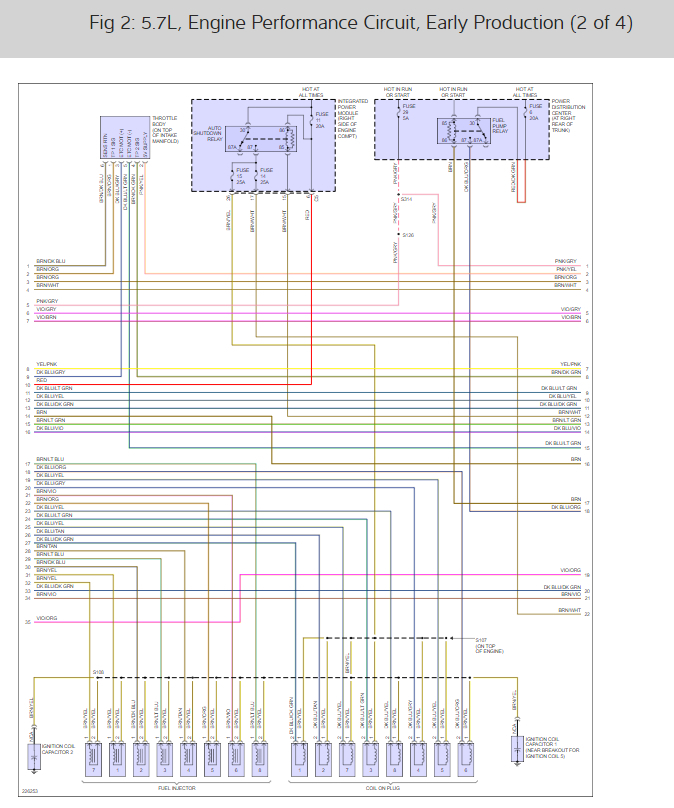
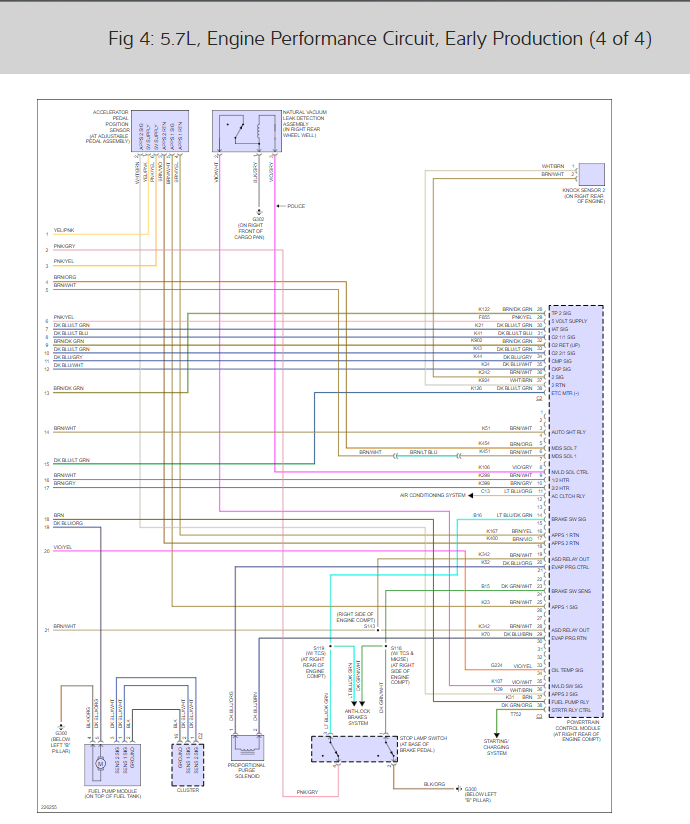
This sounds like the ASD relay is getting hot and shutting down the engine here is a guide to help you confirm the issue and the engine wiring diagrams so you can see how the system works along with the ASD relay locations.
https://www.2carpros.com/articles/how-to-check-an-electrical-relay-and-wiring-control-circuit
Check out the diagrams (Below). Please let us know what happens.
Cheers
Images (Click to enlarge)


Aug 15, 2020 at 10:23 AM
(Merged)
I have checked fuel pressure readings are normal 59psi. fuel pressure regulator and filter are on the new fuel pumps. All coils are firing as they are supposed to be. I work at a shop and have pretty much did everything including a back pressure test. I have done a smoke test and cannot find any vac leaks. I have done everything, but flash the computer. I don't think it is a computer issue though.
Aug 15, 2020 at 10:23 AM
(Merged)
Have you checked the ASD relay? I don't think it's a fuel pump issue.
Aug 15, 2020 at 10:23 AM
(Merged)
I have figured out The 2006 Dodge Charger 5.7 Hemi stalling issue thanks for the tip on the ASD it fixed the problem :) I love this site.
Aug 15, 2020 at 10:23 AM
(Merged)
Glad you could get it fixed, that kind of problem can be tough. Please use 2CarPros anytime we are here to help
Cheers
Cheers
Aug 15, 2020 at 10:23 AM
(Merged)
car runs for a while then stalls, doesn't do constantly, may happen one day then not again a for a few days.
Aug 15, 2020 at 10:23 AM
(Merged)
Get ready for the motor that runs the fuel pumps to go out.
Aug 15, 2020 at 10:23 AM
(Merged)
Mine was doing the same thing yours was doing. Thanks for the help!
Aug 15, 2020 at 10:23 AM
(Merged)
Repair Safety Notice: This information is for general instructional purposes only. Vehicle repair can be dangerous. Verify all information, follow manufacturer service procedures, use proper tools and safety equipment, and consult a qualified repair shop when needed.