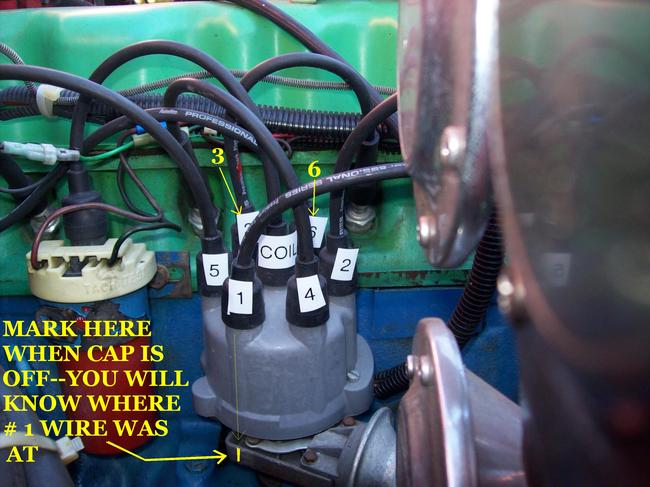
Remove the dist cap
Tie/ hang it well out of the way
Crank the engine.
Does it turn?
Does it turn "smoothly" or is it jumpy/ erratic?
Let's get it to slow motion.
Hide your keys/chock your wheels/ go to neutral.
Remove number one spark plug.
Stick it back in , maybe two threads (instead of your thumb).
Rotate the engine with a wrench or ratchet.
Clockwise as viewed from the grill.
When you hear the "hiss" coming by number one plug stop! (a friend may be helpful to hear this at number one (as the other cylinders hiss internally (usually fainter) when you rotate the engine.
Now, we are on compression stroke (coming up)
We are not up yet!
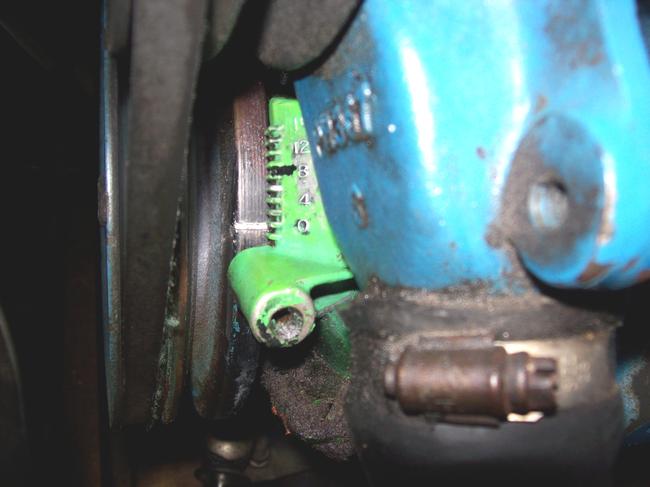
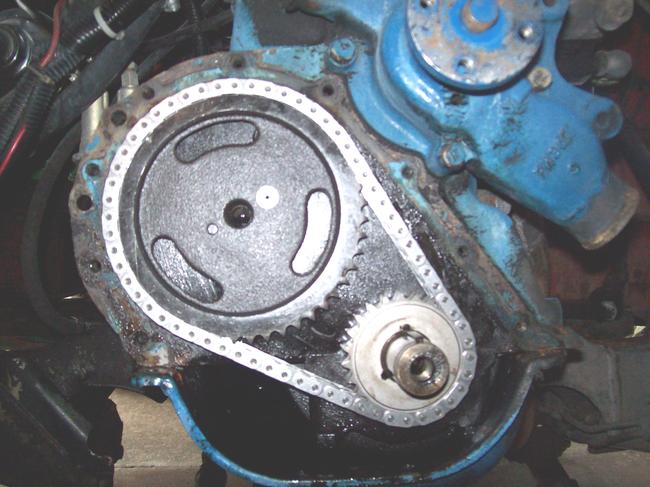
Ever so slowly rotate the engine (clock wise) until your timing mark (line) lines up with zero.
Stop!
I have found that using the starter for the "bumping" usually results in "overrunning" the marks.
Then you mistakenly rotate on around 180 degrees from where you should be (not saying bad things, but if you are new to this, it is an easy mistake!).
Okay, back to our slow-motion.
Now look at the rotor button,
it should be facing the "mark" you put on the distributor,
or which ever tower you chose to be number one (textbook or not).
The engine/cam/crank don't care which one it is.
As long as you were at TDC, you placed number one spark plug wire on "that tower" (the one that rotor is pointing to).
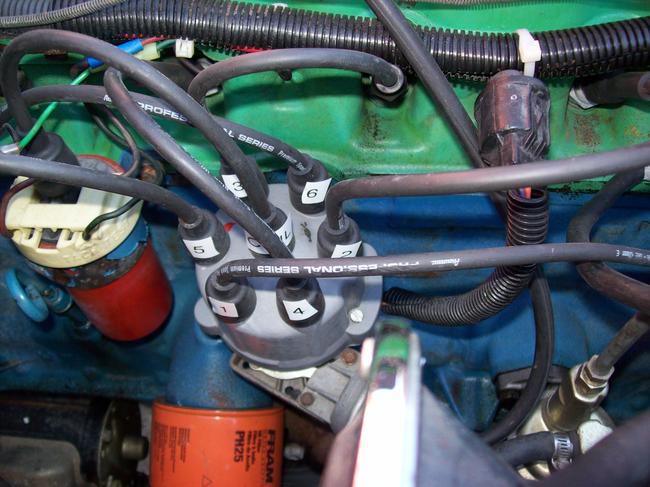
And your 1-5-3-6-2-4 firing order starts there- and runs the sequence clockwise (looking down on the 'stributor cap).
Installing it "textbook" cuts down on confusion later on, as you may have forgotten the "deal"- simply hooking it all up like it shows in the book will make it easier in eight months. (but you have to install it textbook now)
Let me know if you are sure at "TDC" and the rotor is pointing at number one wire.
Continuing to diagnose without the valve train being in time (mechanically) is going to have us chasing our tails forever until we come back to this point.
This is a quick reminder of how this thing works:
http://www.youtube.com/watch?v=_y6PS-2j2Ug&feature=related
If you are confident it is right two teaspoons of gas down the carburetor, then attempt a start.
"exactly" what does it do or does not do?
Lets do keep in mind and we are talking not really common, but does happen (as things do to me) Yes, you could have jumped timing (or previous guy installed it all wrong), the harmonic balancer could have slipped (i have post discussing that too). which would put your timing mark in the wrong position to the crankshaft.
But let's stay on the assumption that it did run well was not tinkered with/just has a tuning or bad part. checking the other "wild" stuff would be time consuming right now.
The MEDIC
Sep 28, 2014 at 9:14 PM