EV's and gas power cars are equipped which tie rod ends which is needed to connect the rack and pinion or steering box to the spindle and front wheels that control the direction the vehicle is headed in, a vehicle will have one right and one left outer tie rod end which is part of the steering system.
What Goes Wrong?
A tie rod end is a universal pivot that is threaded on one side, on the opposing side there is a taper fit shank which is bolted to the spindle, over time and usage the tie rod can become loose which can cause the steering wheel to shake at freeway speeds or when the brakes are applied. It will also cause irregular tire wear and when neglected it can disconnect from the front wheel which can cause an accident.
How Much Does it Cost?
Typically replacement parts will cost between $15.00 and $30.00 on Amazon (US) and will require an alignment. Labor time can be between .7 and 1.0 hours at a shop or dealer and does not include the alignment. If exact times or procedures are needed you can ask our experts to supply you with the information (free), or consult an online resource such as AllData DIY (pay) but this guide and video will be sufficient in most cases.
Let's Jump In!
It is easier to replace the tie rod end if the
tires have been removed,
also the vehicle must be raised
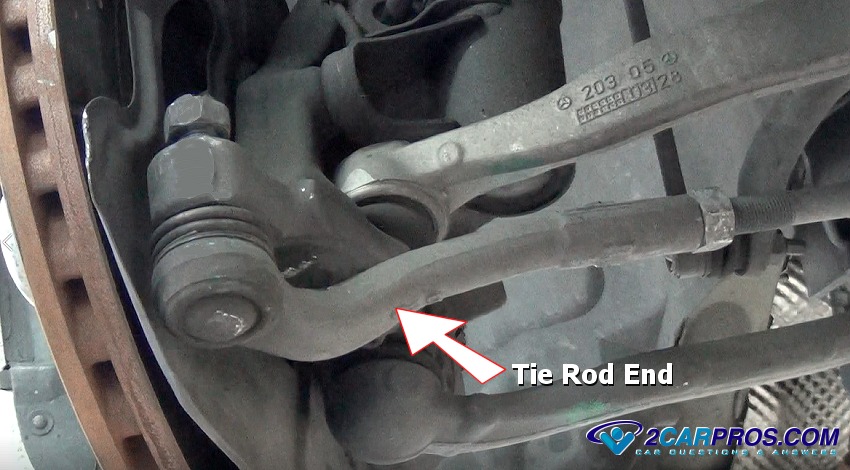
and supported on jack stands. In the image below we show you what a tie rod
end looks like.
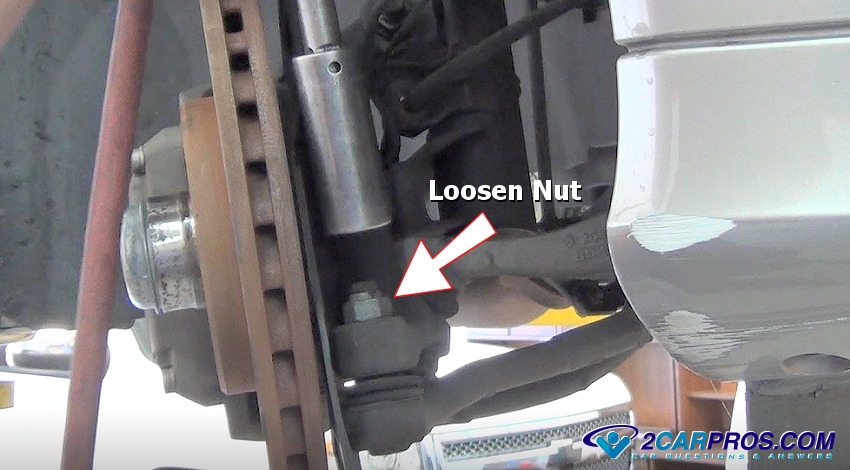
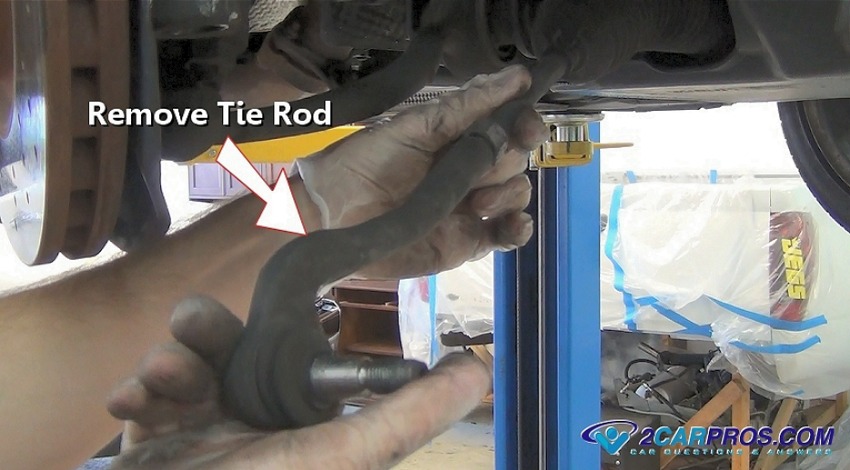
To start, use a wrench or air impact to loosen the tie rod nut at the spindle,
leave the nut on about 3 threads to protect the threads and to hold it in place
during removal. Because the tie rod is being replaced it doesn't matter if the threads
get damaged while removing, but it's good practice while working with steering and
suspension parts.
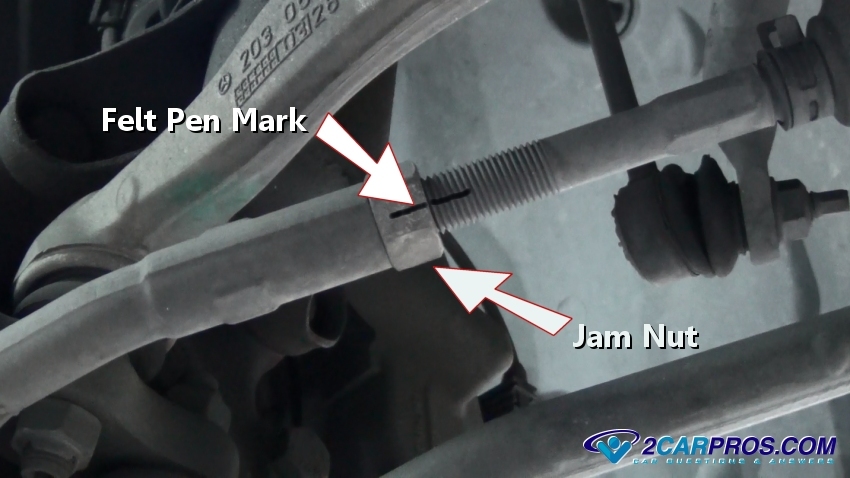
The tie rod has a jam nut which is used to hold the tie rod in place while connected
to additional steering components, use a felt pen to mark the position of the jam
nut, this will give you an idea on where to position the new tie rod.
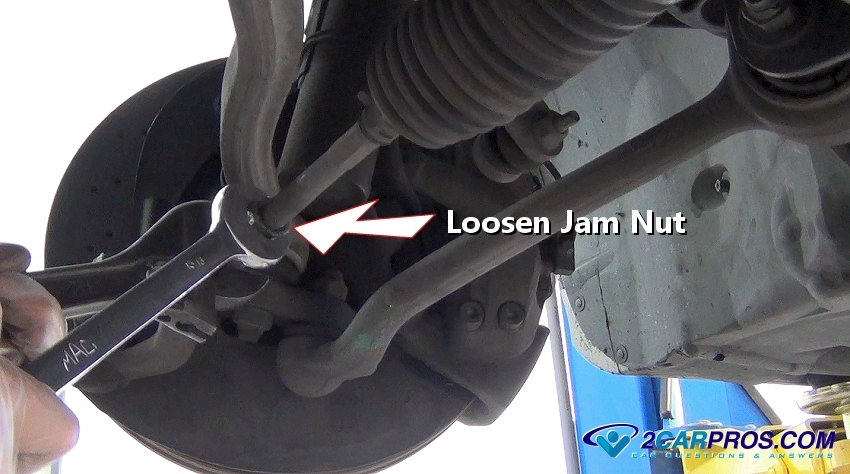
Use a large wrench to hold the tie rod in place while using an additional wrench
on the jam nut to loosen, in this case the wrench size is 13/16, on some tie rod
ends the threads are reversed, tightening will be loosening, so look at the threads
to be sure which way to loosen the nut.
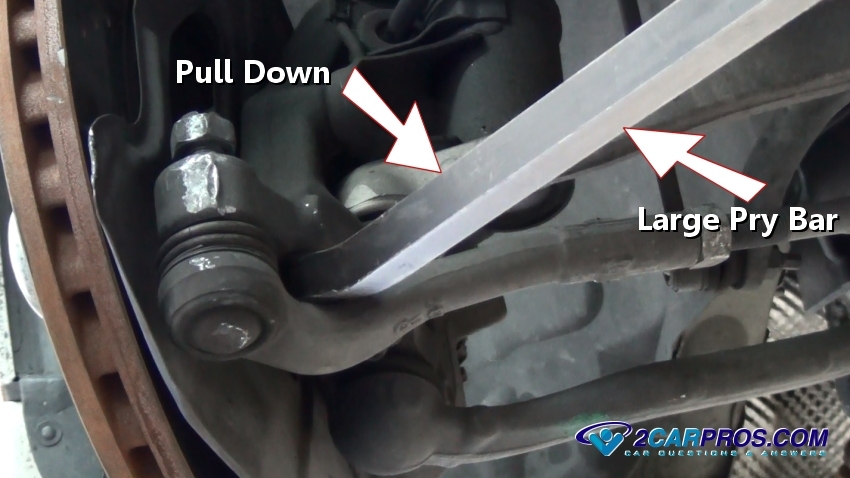
While leaving the nut loose about 3 turns use a large pry bar to apply force
and pressure downward.
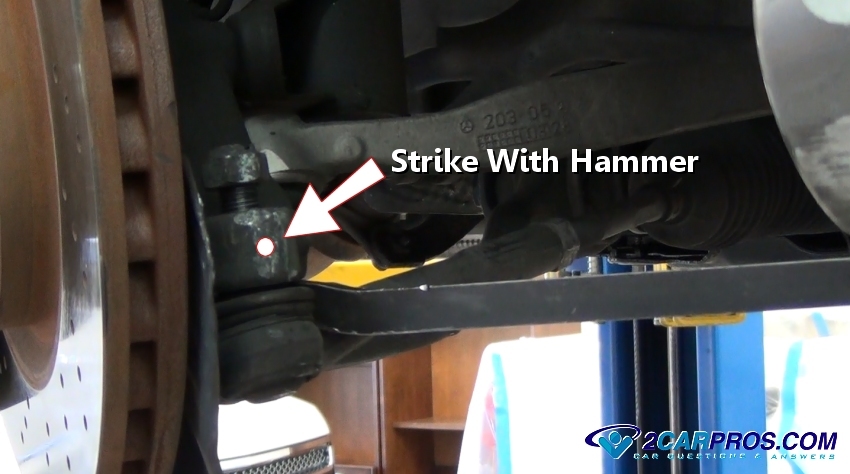
While holding downward pressure on the tie rod end, use a hammer and strike the
spindle bulk head to "shock" the taper fit loose.
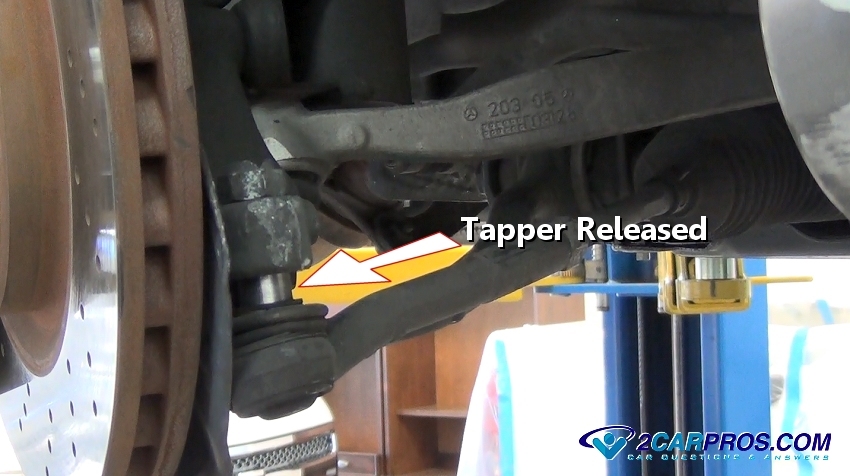
When the taper fit is released it will drop down and show the tapered rod of
the tie rod ball.
Watch the Video!
Please watch this video of the job being done, then continue down the guide to glean additional helpful information.
Now you can fully remove the tie rod end nut.
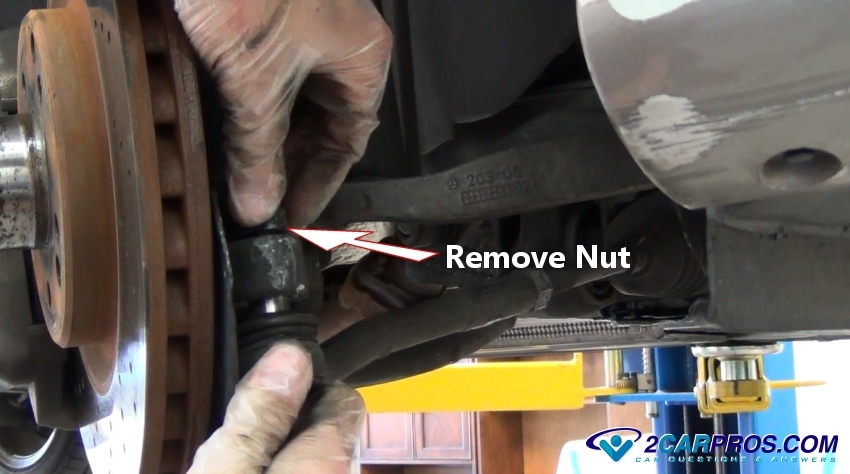
Once the nut has been removed the tie rod will become free and ready for removal,
grasp the tie rod and turn either clockwise or counterclockwise depending on right
or left hand threads.
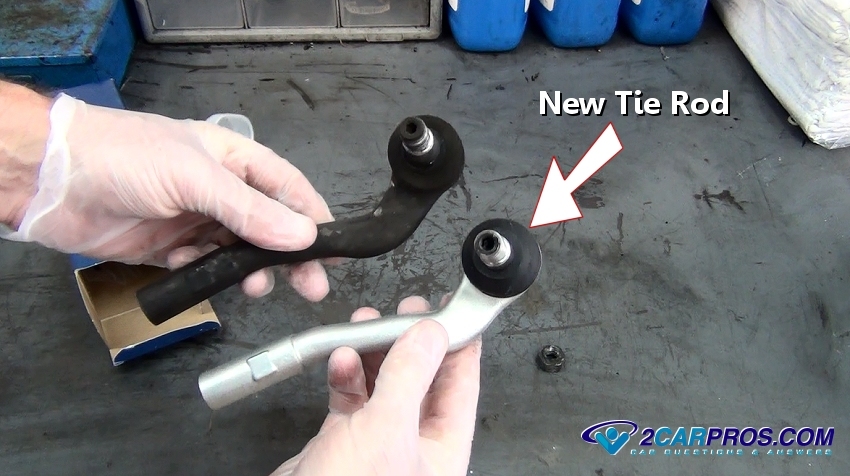
Match the old tie rod to the new unit, they should be identical.
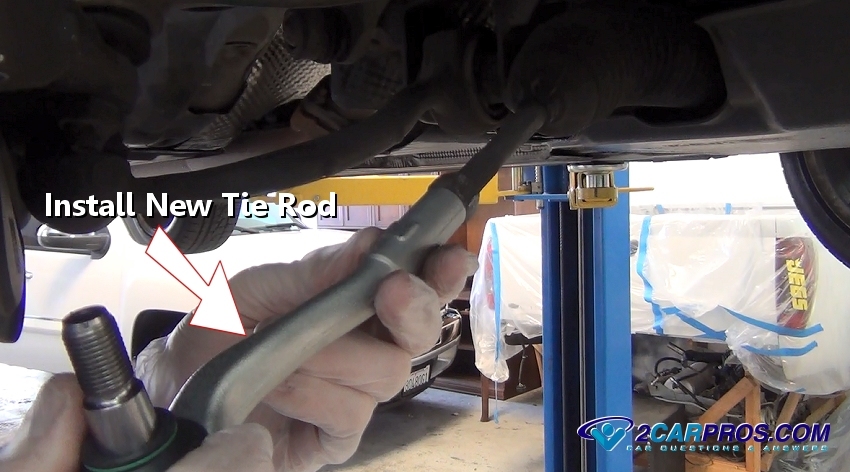
Carefully install the new tie rod into place stopping when the jam nut has been
contacted, be sure to keep the location of the jam nut in place.
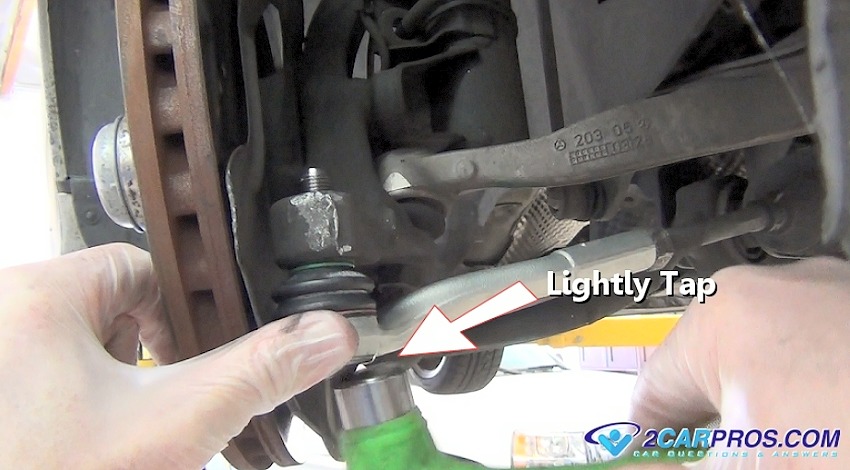
Insert the tapered part of the tie rod end into the spindle bulkhead.
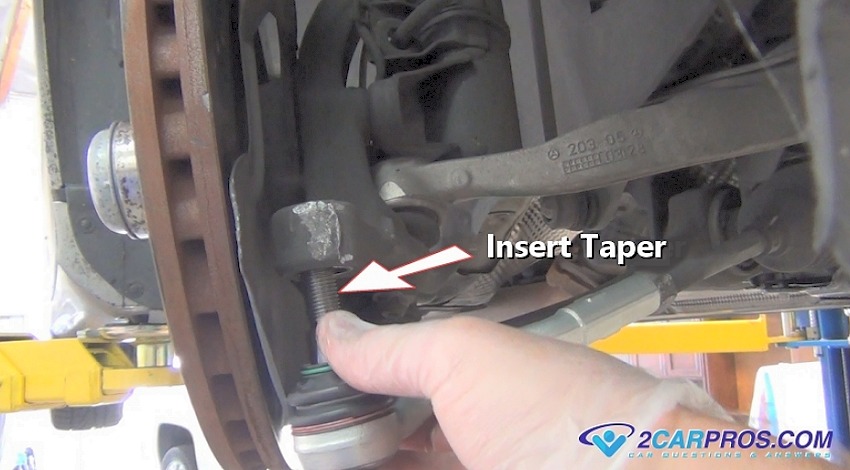
Use a small hammer and tap the tie rod end into place, this will set the tie
rod taper which stops the stud from turning while tightening the nut.
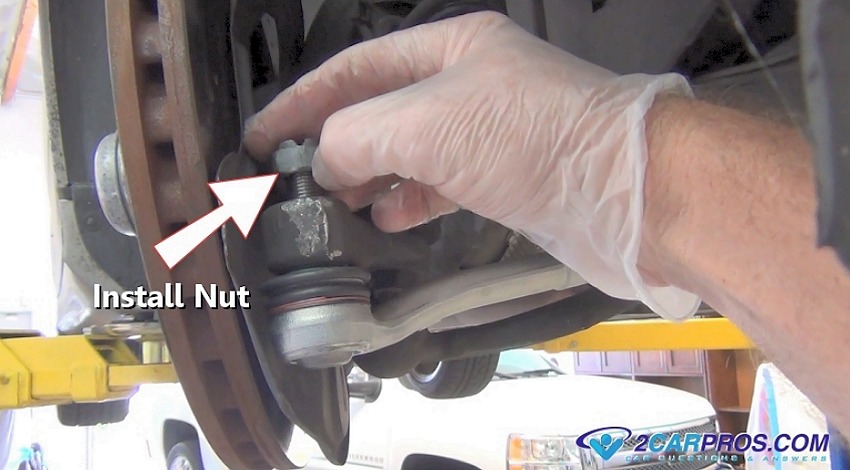
Thread the nut on by hand to avoid cross threading and tighten to spec which
in this case is 28 foot pounds of torque. Some nuts will require a cotter pin to
be positioned through the nut for additional security.
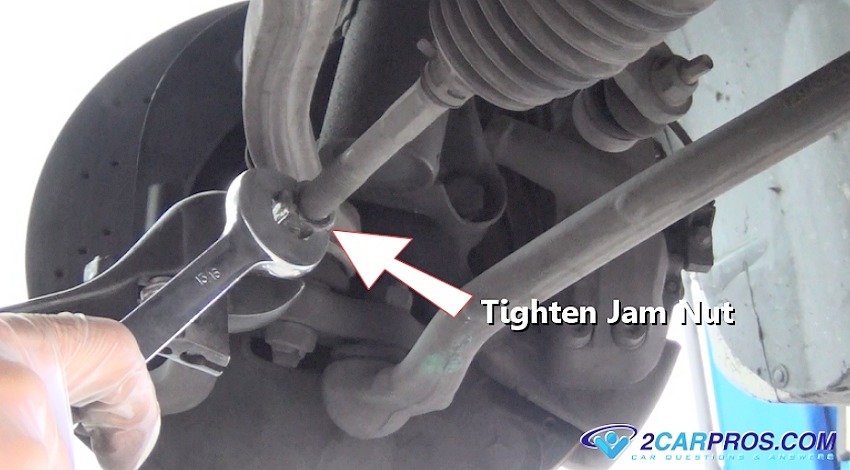
Snug and tighten the jam nut against the tie rod end, there is no torque setting
for this nut but we like to say full arm tight, now the vehicle is ready for alignment.
Questions?
Our certified technicians are ready to answer tie rod end questions for free. We hope you saved money and learned from this guide. We are creating a full set of car repair guides. Please subscribe to our 2CarPros YouTube channel and check back often for new videos which are uploaded regularly.