A power steering pump is driven by the engine and is designed to supply pressure via the steering fluid to the steering box or rack and pinion. This pressure is transferred through the high pressure hose, once used low pressure fluid returns to the pump through the low pressure return hose.
What Goes Wrong?
A steering pump can fail in one of two ways, first it can start leaking fluid or it can stop working by not supplying pressure to the steering system. When the steering fluid is low it can make a moaning noise or make the car difficult to steer.
What's the Cost?
Typically replacement parts will cost between $80.00 and $120.00 on Amazon (US) or RockAuto and can require the removal of the pulley. Labor time should be between 1.2 and 2.7 hours at a shop or dealer. If exact times or procedures are needed you can ask the 2CarPros community to supply you with the information (free), or consult an online resource such as AllData DIY (pay) but this guide and video will be sufficient in most cases.
Let's Jump In!
Start with protective eyewear and gloves,
raise the car and support it
on jack stands if needed. Also, disconnect the negative side of the battery
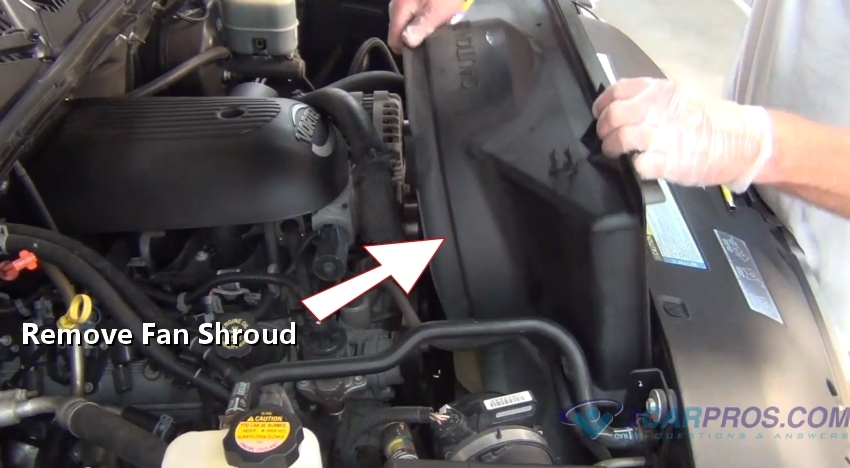
to avoid electrical issues when doing the job. Remove any accessories to gain access
like: air intake tube, fan shroud,
alternator etc.
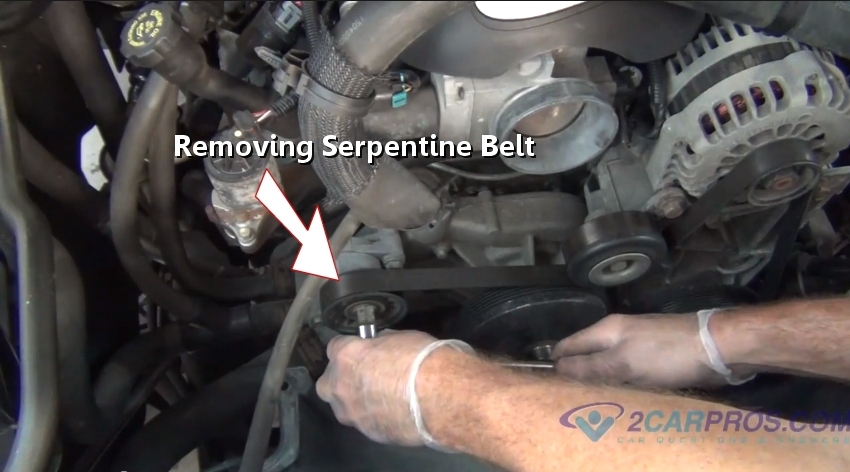
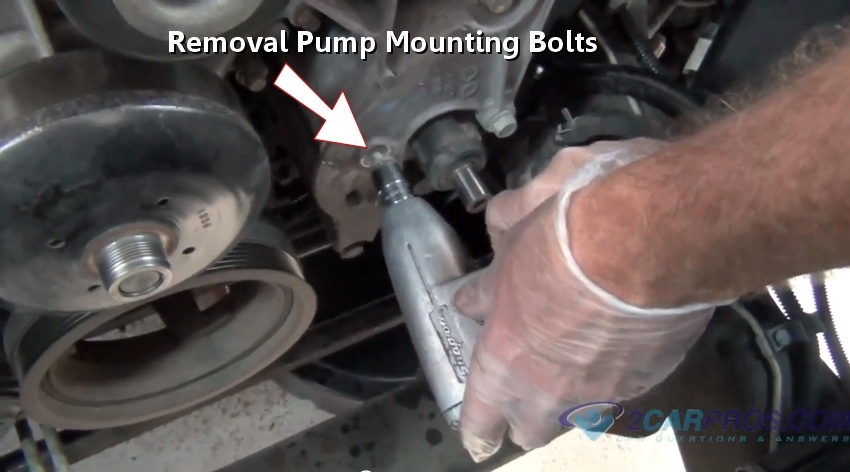
Remove the serpentine belt from
the engine to allow the pump to turn freely so you can access the pump mounting
bolts to remove the pump, check the belt for cracks and replace if necessary.
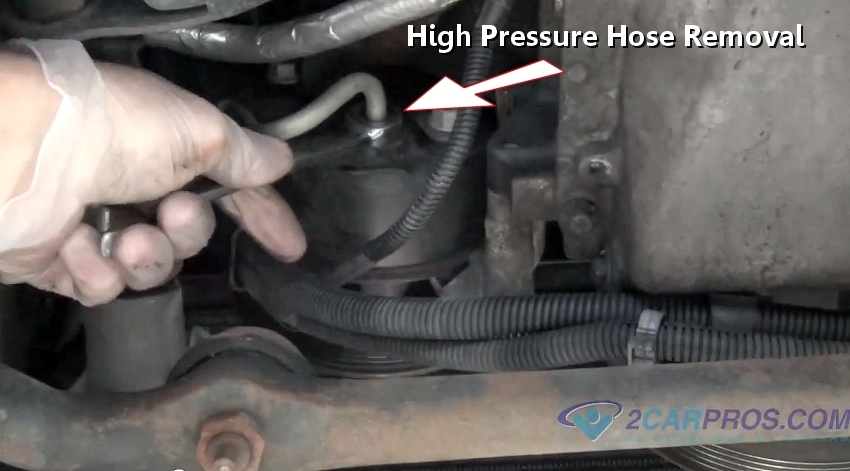
Use a line wrench to loosen and remove
the high pressure line, once loose fluid will start to drip out so have a fluid
catch basin ready.
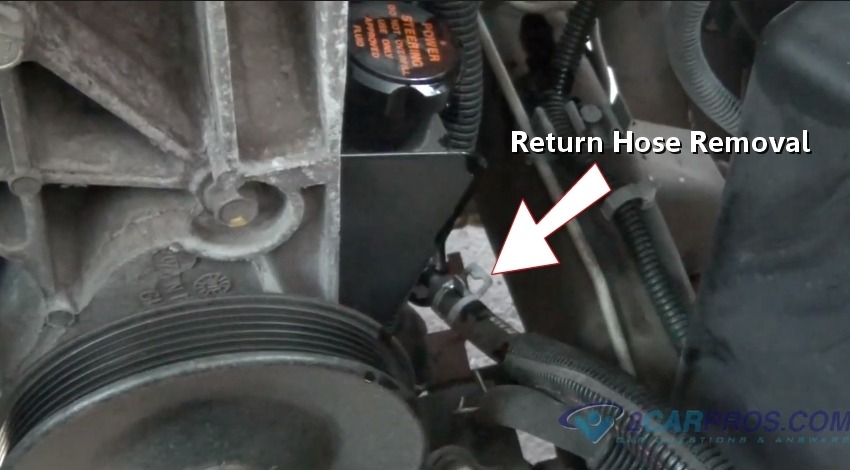
Use a pair of pliers or channel locks to remove the clamp from the low pressure
hose. Then twist the hose to break it loose and remove the hose from the pump.
This step can be different for each application, some steering pumps have pressed on pulleys that must be removed before the pump can be serviced, while others have holes in the pulley to access the bolts. In the video below we show the use of a pulley removal and installation tool.
Watch the Video!
Please watch this video of the power steering pump pulley removal and installation, then continue down the guide to glean additional helpful information.
Loosen and remove all pump housing mounting bolts including rear mounted bolts.
At this point, the pump can be removed.
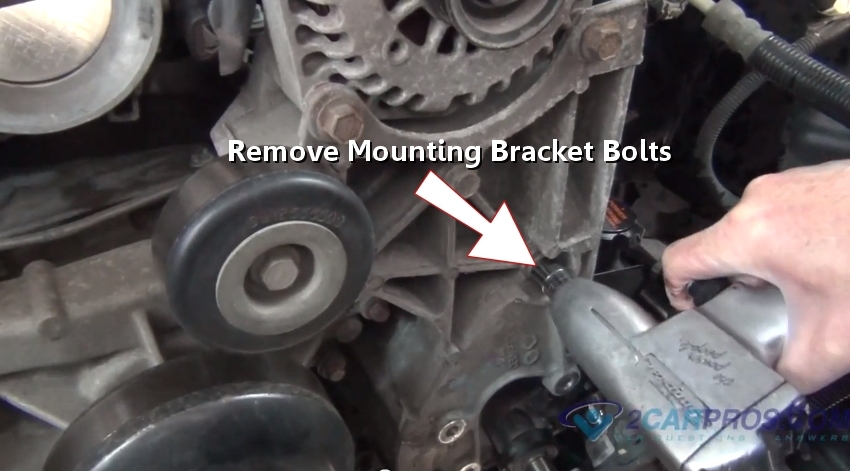
On some models, the main mounting bracket will need to be loosened to finish
removing the pump assembly from the engine bay.
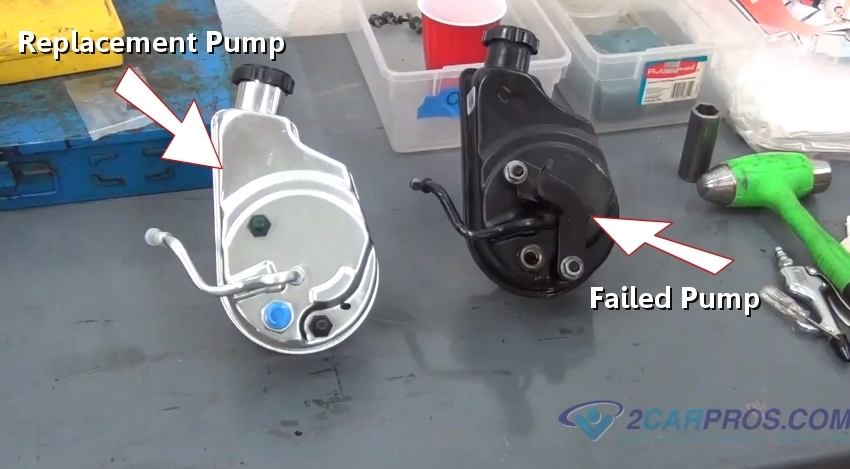
Here are the new and old steering pumps, match the failed pump against the replacement
pump and transfer any mounting brackets.
Position the new steering pump for installation.

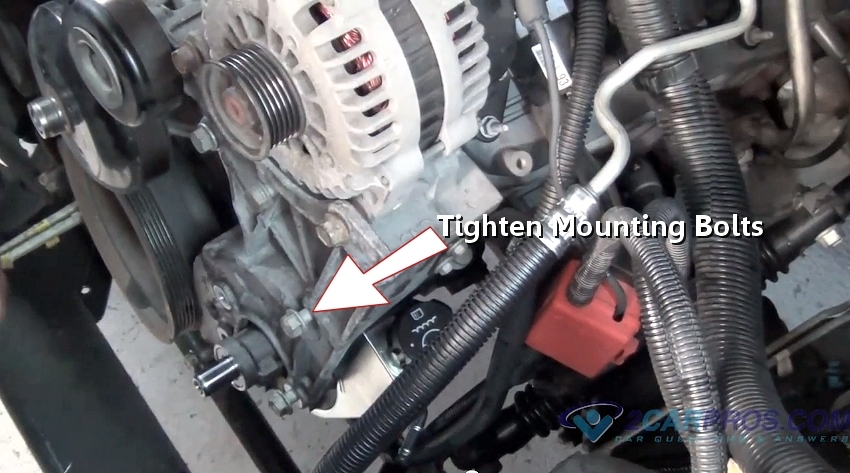
Install and tighten the steering pump and mounting bolts and bracket bolts, including
any rear facing bolts.
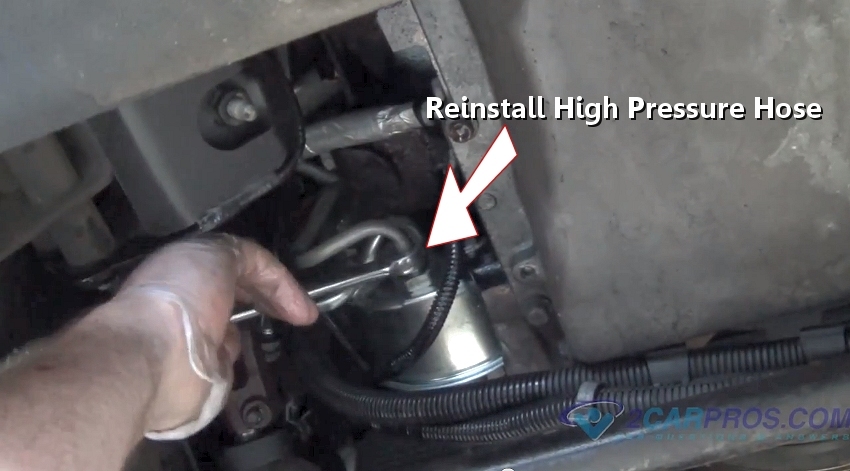
Inspect the sealing O ring on the high pressure hose and replace it if damaged,
then install and tighten the high pressure side hose into the pump, also attach
the low side hose.
Watch the Video!
Please watch this video of the job being done, then continue down the guide to glean additional helpful information.
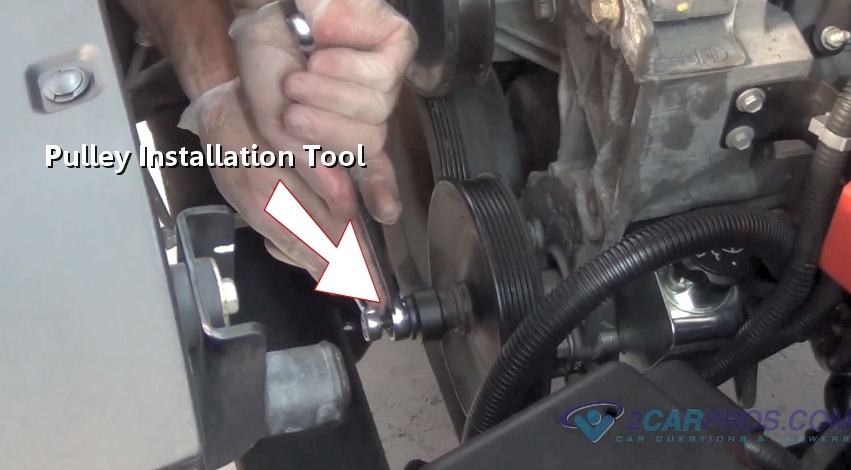
When reinstalling the pulley onto the pump shaft, it helps to warm the pulley
either in the sun or in an oven to expand the metal.
Use the pulley installing
tool to push the pulley back onto the pump main shaft. Do not add grease to
the shaft, this can allow the pulley to slip and come off. Never use a hammer to
install or remove pulley or you will damage the pump or pulley.
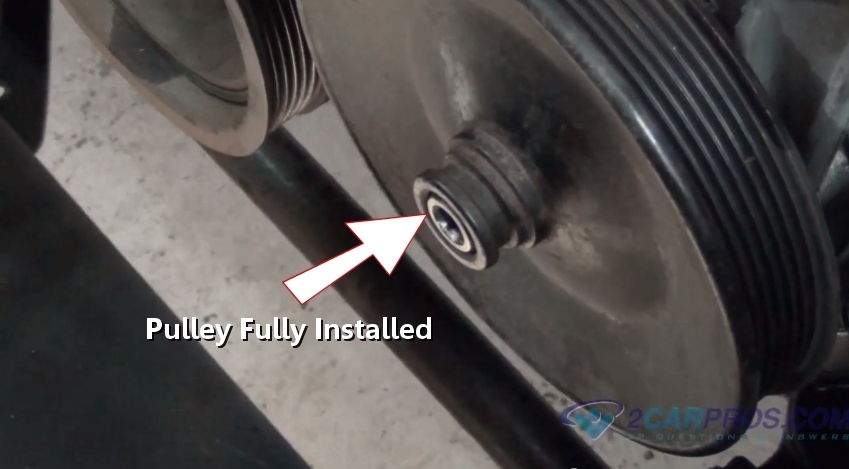
Continue to install the power steering pulley until the pulley is flush with
the end of the output shaft and reinstall the serpentine belt and all accessories
needed to gain access to the pump.
Double check all previous steps to ensure a proper installation, then remove
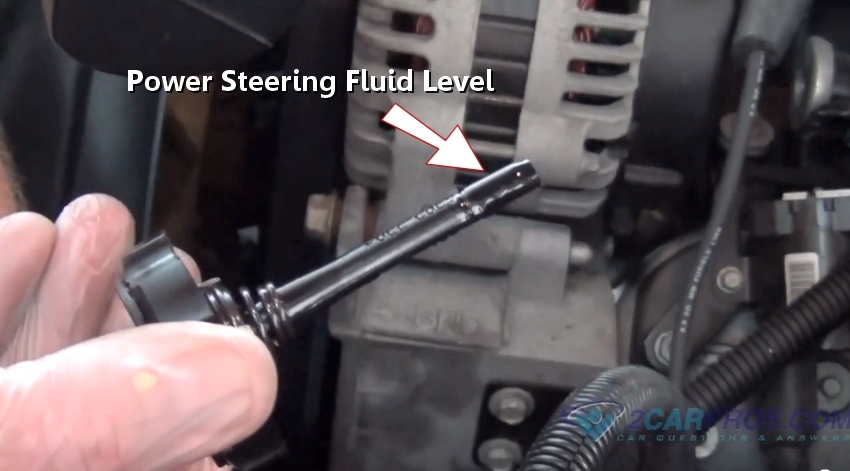
the pump reservoir cap and refill with power steering fluid.
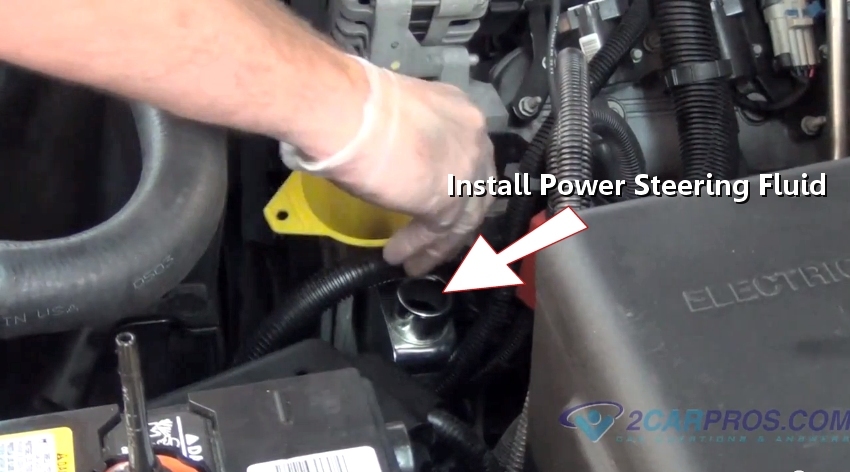
Add fluid to the full line level on the indicator, re-install the cap. Next,
start the engine and turn the steering wheel about a quarter turn in either direction
to help purge the air from the system, the pump may sound a little noisy at first
which is normal. Shut the engine off and recheck the fluid level, recheck the level
again in a few days and you are all set.
When refilling hydraulic pressure systems such as a power steering system it's common for the fluid to become aerated. This condition will cause the pump to make a whining noise which will subside overnight. Once the air has dissipated from the fluid, recheck fluid levels and add as needed. Sometimes the old pump can spread metal flakes throughout the system, in this case it is good to perform a power steering flush to help clean out the system.
Questions?
If you have a car repair question, you can ask the 2CarPros community for help. We hope this guide helped you understand the repair. Please visit our 2CarPros YouTube channel for more helpful repair videos.