A driveshaft is responsible for transferring engine power from the transmission to the differential and onto the drive wheels. A driveshaft can be one or two pieces with a center support bearing in the middle. There are universal joints at either end of the driveshaft which act as flex joints that allow the differential to move upward when the car contacts a bump. A front driveshaft yoke is used to connect to the transmission while a rear driveshaft flange is used to connect to the differential. On older models the rear U joint bolts directly to the differential without using a rear flange. On front wheel drive cars there are two drive shafts which are called CV axles.
What Goes Wrong?
Driveshaft themselves have very little problems with the exception of becoming bent if they come in contact with an obstruction. On the other hand the U joints can cause problems which are a part of the driveshaft such as chirping and clucking when the car is moving or put into gear.
How Much does it Cost?
The cost of removing a driveshaft is incorporated in the cost of the additional repair being performed. If you were to take you car into the have the driveshaft removed as a standalone labor repair it would cost between $55.00 and $75.00 (US). Driveshaft replacement costs will run between $250.00 and $350.00 (US) and are usually a dealer item.
There are two videos at the bottom of this guide one showing a one and two piece driveline being removed.
Let's Get Started
Something you should know that may not be thought of is when a driveshaft is removed the car will no longer be in park. The car will roll because the link between the drive wheels and transmission is removed. You will need to raise the car or truck up using a floor jack and jackstays. Wear protective eyewear and gloves before you begin.
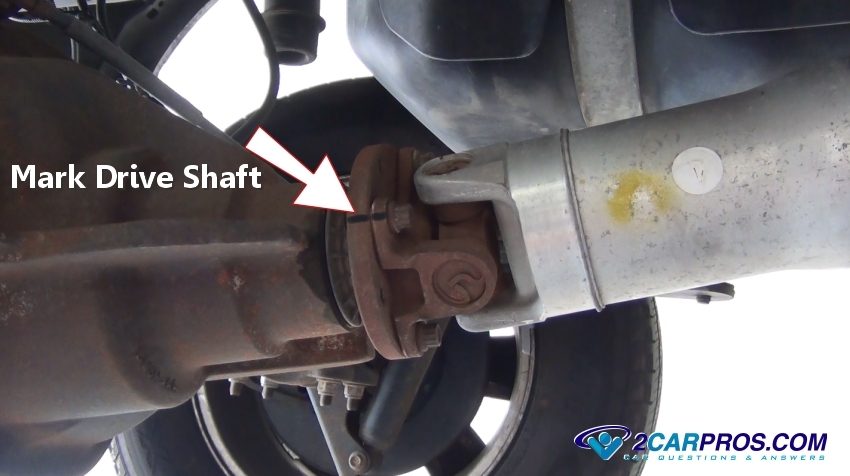
1. Mark the Driveshaft
Mark the driveshaft orientation before beginning. This will help return the driveshaft to its original position on the differential which can help avoid driveline vibrations once the driveshaft is reinstalled.
2. Remove Driveshaft Bolts
Remove the shaft differential flange mounting bolts. These bolts will be very tight so use good quality tools to avoid stripping. Some bolts can head 12 point heads as in this example which used a 13mm 12 point socket to remove. These bolts also use lock tight to avoid coming loose while in operation and can be reapplied when reinstalling.

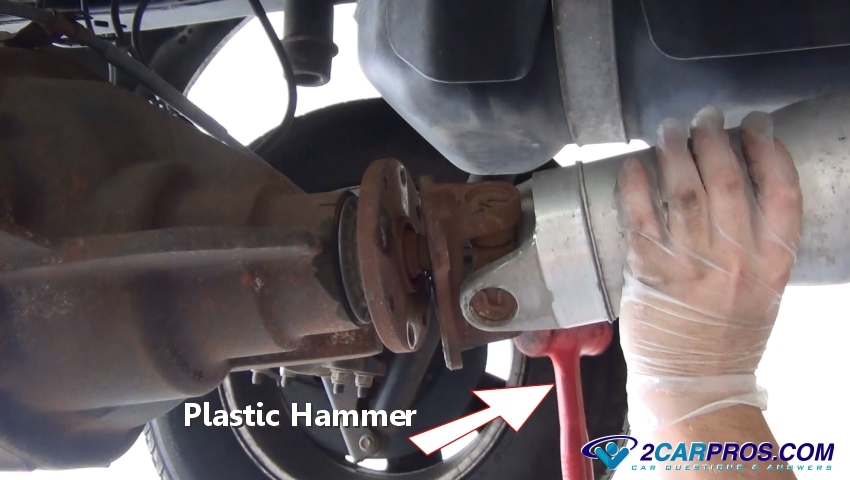
3. Remove Driveshaft Flange
Using a plastic hammer gently shock the driveshaft loose from the differential flange by striking the rear yoke (U joint mount). At this point the back half of the shaft will be free so hang onto it. On some cars there will be a center support which must be undone by removing the two center support mounting bolts. When removing an older vehicle drive shaft use electrical tape to wrap around the u joint cups so they don't fall off and release the cup needle bearings.
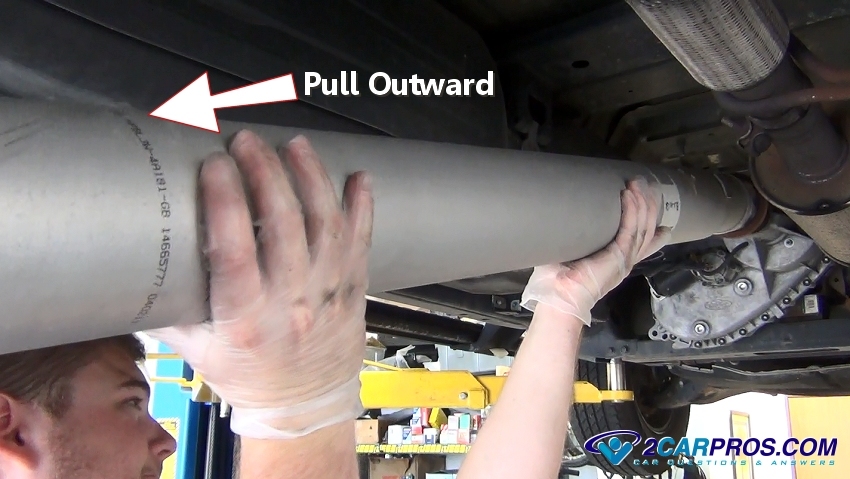
4. Remove Driveshaft
Using both hands gently slide the driveshaft from the transmission or transfer case. A small amount of fluid might leak out so have a fluid catch basin ready. This would be a good time to replace leaking transmission tail housing seal, universal joints or if removing the transmission or differential repairs are needed.
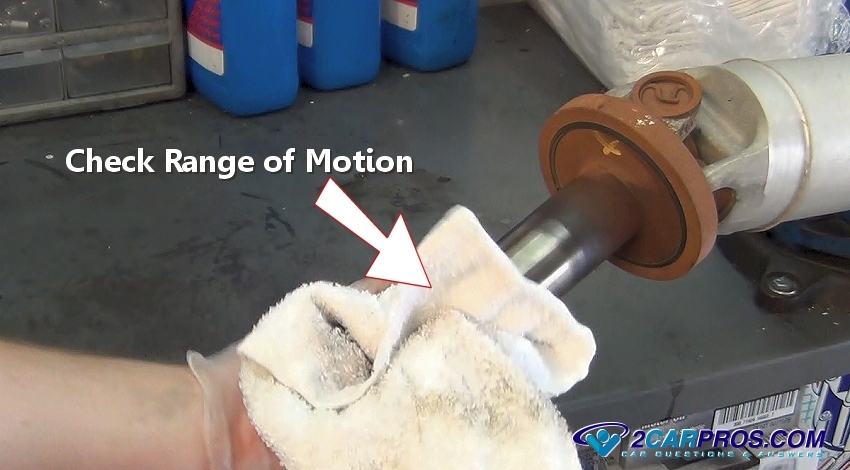
5. Check U joints
At this point the U joint at either end of the shaft should be checked. Grasp the yoke and move it in all directions. It should be a smooth motion with no rough spots or play in any direction. If play or rough spots occur then the U joint needs to be replaced.
Watch the Video!
Please watch this video of the job being done, then continue down the guide to glean additional helpful information.
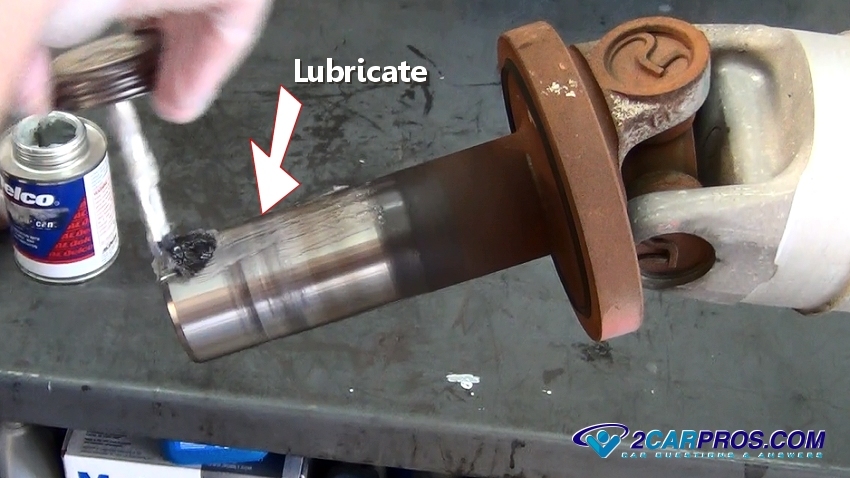
6. Reinstall Driveshaft
Before re-installing the driveshaft apply a small amount of grease to the yoke. This will help lubricate the output shaft seal in the transmission or transfer case.
There is a dust boot along with the rear seal which is incorporated within the transmission or transfer case tail housing seal. This transmission or transfer case output shaft is where the driveshaft connects.
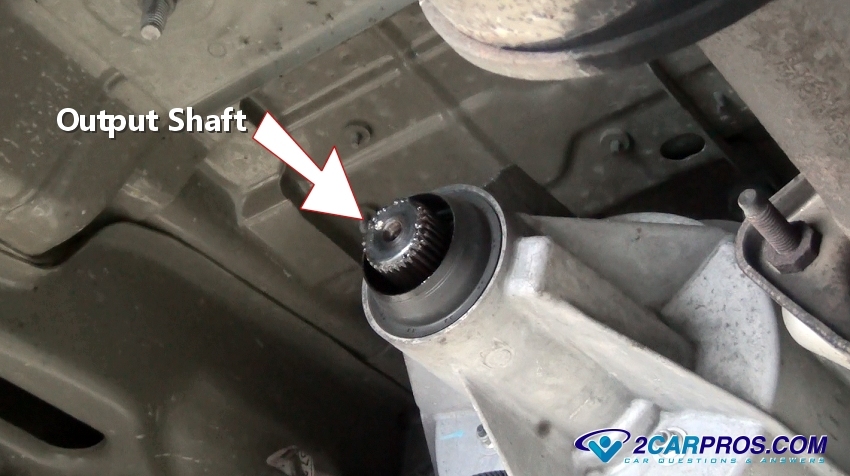
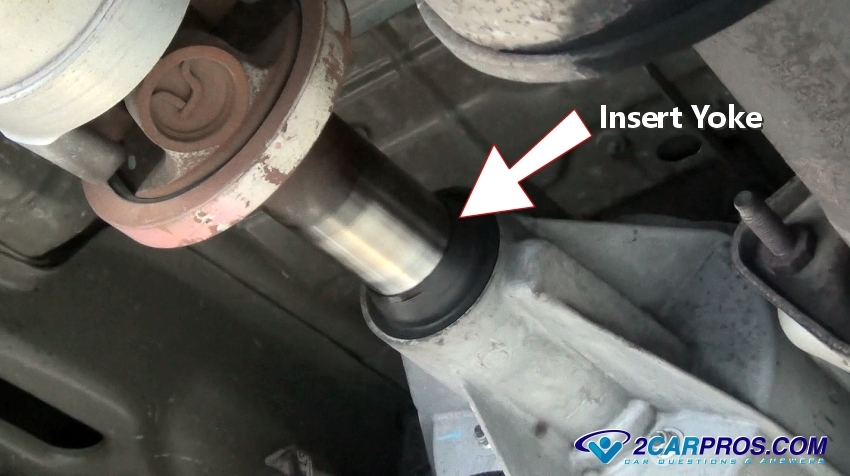
Care must be taken when reinserting the driveshaft yoke as not to damage the seal. Gently guide the yoke into place over and onto the output shaft.
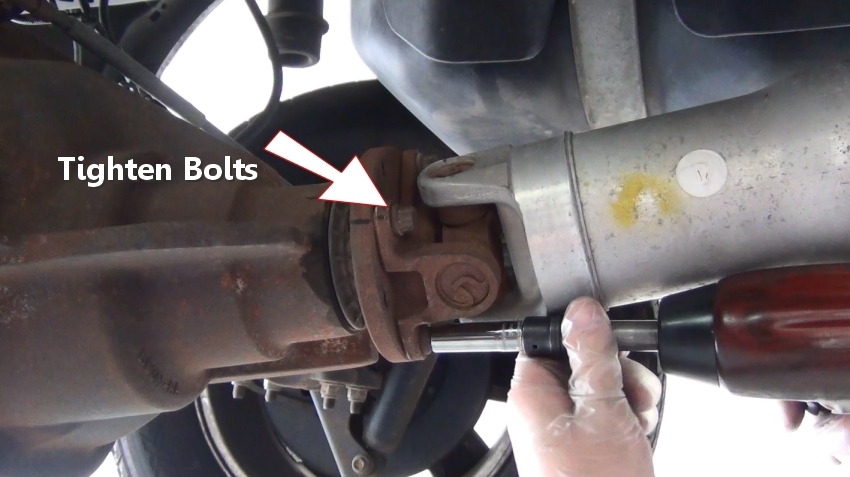
7. Reinstall Flange Bolts
Once the front yoke is installed pull the driveshaft back into place while inserting a mounting bolts by hand to avoid cross threading.
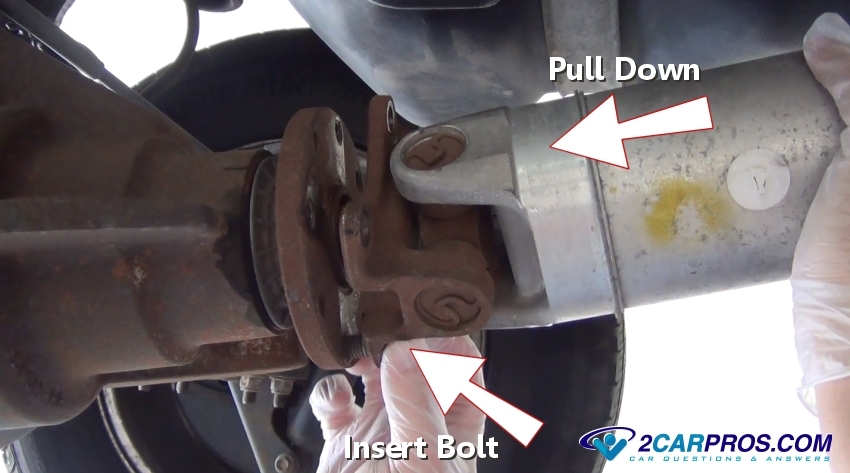
Finish installing the mounting bolts while making sure the alignment marks are together.

Tighten the bolts evenly and in a cross pattern to factory specs which is usually 55-65 foot pounds of torque. If any fluid was lost during the job check and refill the transmission or transfer case after the shaft has been reinstalled and you are all set.
Got Any Questions?
If you have any driveshaft questions, please visit our forum. If you need car repair advice, please ask our community of mechanics is happy to help you and it is always 100% free.
We hope you enjoyed this guide and video. We are creating a full set of car repair guides. Please subscribe to our 2CarPros YouTube channel and check back often for new videos which are uploaded almost every day.