Let's Get Started
The car must be jacked up off the ground and supported on jack stands. You may need to remove the wheel to be able to access the ball joint more freely. There are two styles of ball joint, one faces downwards while the other faces upwards. On some cars there will be a "pinch joint" which does not need to be released.
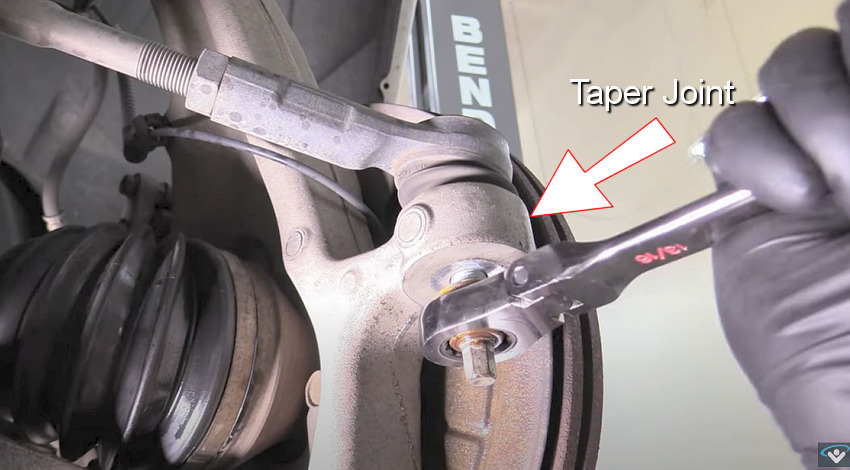
Each are similar and will require different placement of the breaker bar to undo, we will demonstrate both styles in the guide. Some ball joints connections are a tapper fit that must be released to come undone. This guide is for strut style of suspension which has the coil spring encapsulated within the strut.
If this job is being done on a live spring style of suspension the lower control arm must be supported using a jack and then slowly lowered once the ball joint has been undone. A live spring suspension is one that has the spring pressed against the lower control arm. This spring is very strong so caution should be used when dealing with this spring.
Ball Joint Release - Downward Facing
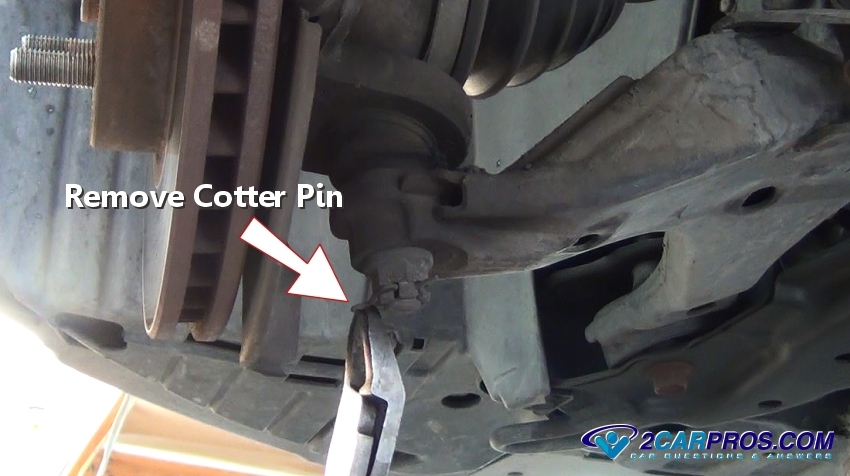
1. There are tow kinds of nuts used to attach the ball joint, a castle or a resistance (lock) nut. The castle nut uses a cotter pin in case the nut comes loose, while the lock nut uses resistance and must be "wrenched" off even after the nut is broken loose. The nut in the image below is called a castle nut which has 6 places in which the cotter pin can hold the nut from moving. Use a pair of side cutters to remove the cotter pin from the castle nut which will enable the nuts removal.
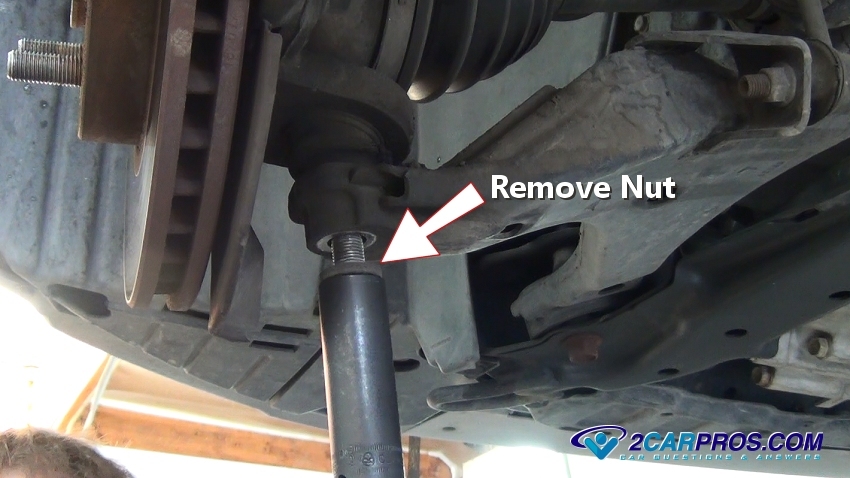
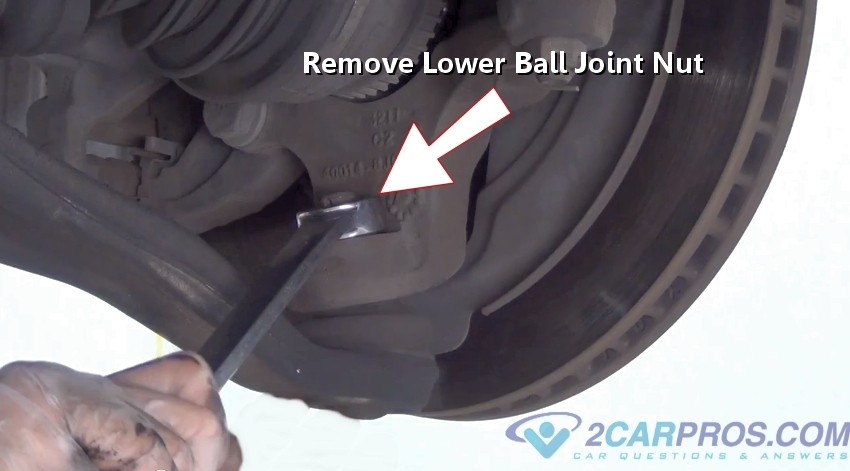
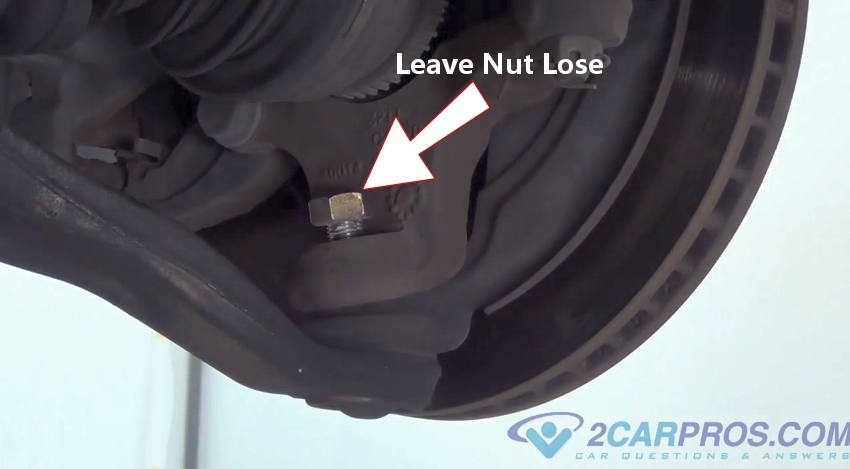
2. Use a 19mm to 22mm wrench or socket to loosen the nut by turning it counterclockwise. These nuts can be fairly tight so make sure the socket or wrench is squarely on the nut before applying pressure to avoid rounding and damaging the nut. Do not fully remove the nut, leave it on the stud about three turns to protect the stud threads when undoing the joint.
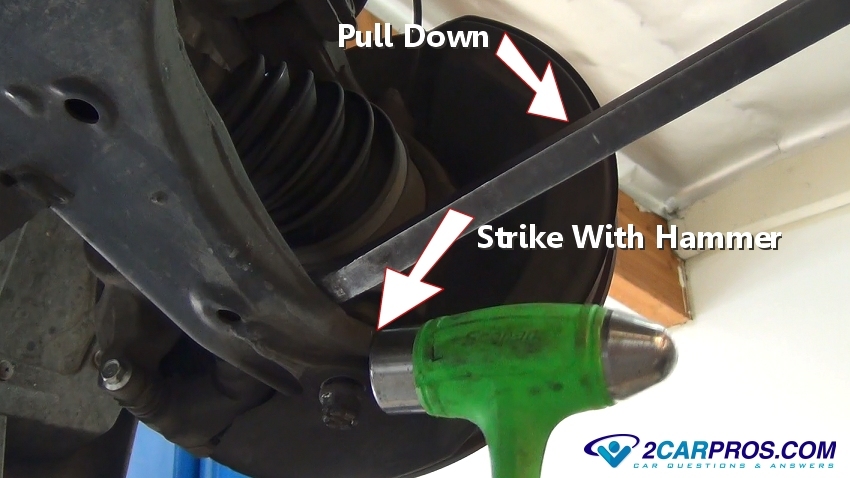
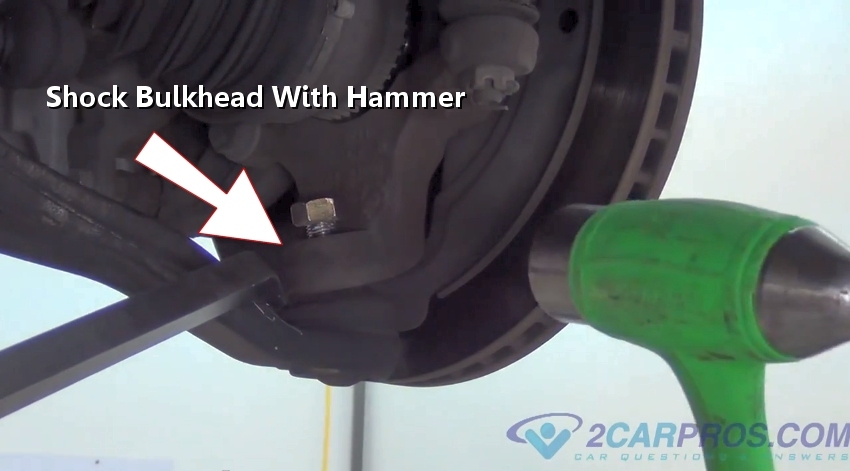
3. Use a large pry bar and wedge it in-between the lower control arm and the spindle bulk head. Make sure the pry bar is in a solid place because you will need to apply pressure to undo the joint.
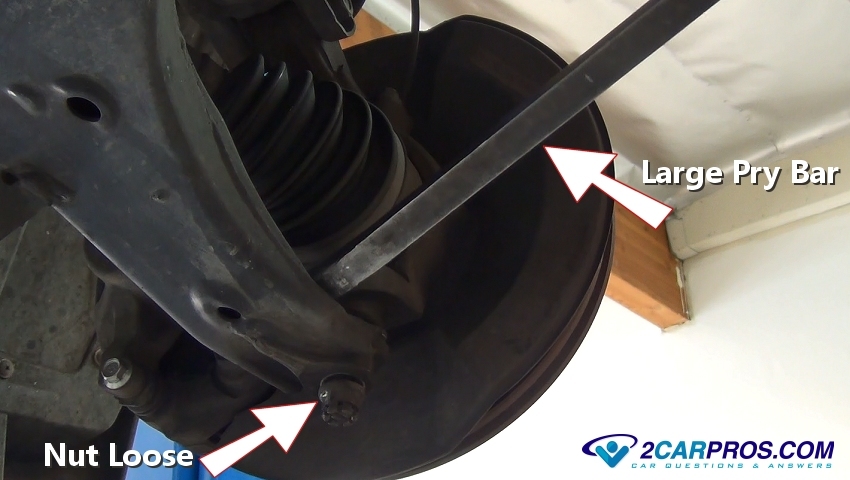
4. While applying force downward strike the lower control arm bulkhead to release the ball joint taper. This will take more than one hammer strike to get the ball joint to release in most cases. If you have trouble with this step have a helper apply additional pressure on the pry bar while using a larger hammer to make the strikes. This will "shock" the joint loose and you should feel a pop when the joint releases.
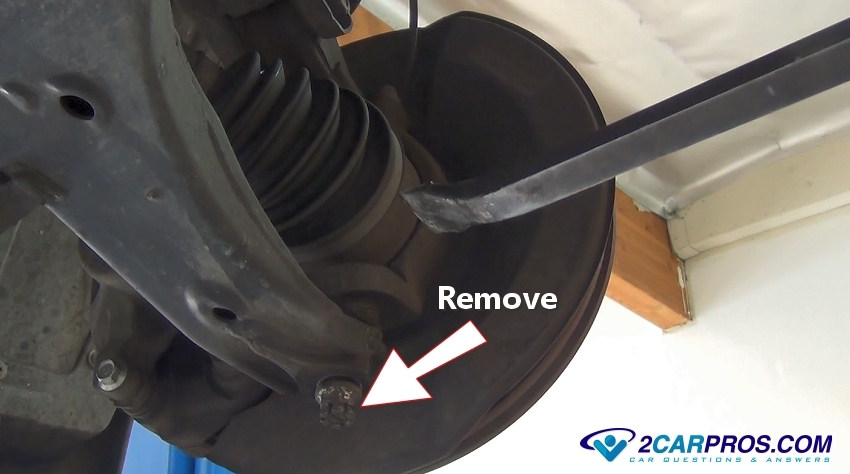
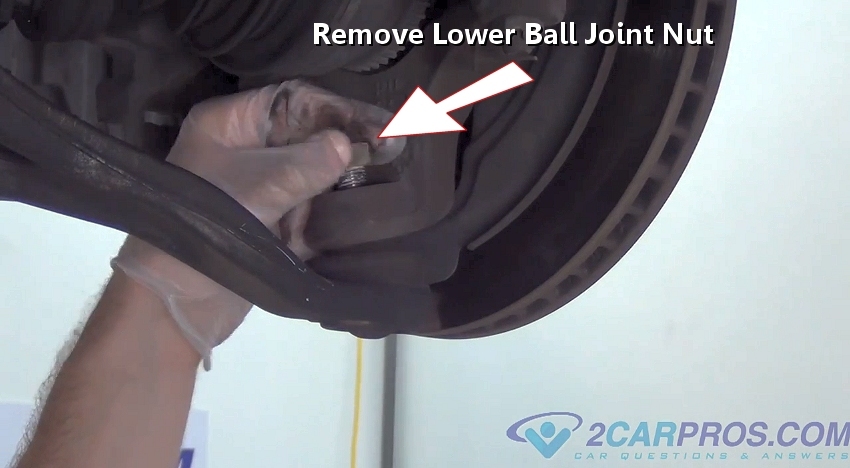
5. Once the ball joint has released finish removing the lower ball joint nut and continue with the repair. We will demonstrate the upward style of ball joint below.
Ball Joint Release - Upward Facing
1. After the cotter pin has been removed use a 22mm to 24mm wrench to remove the lower ball joint nut by turning it counterclockwise, it's okay if the steering system turns during this step.
2. Once the nut is loose do not remove it completely. Leave the nut on the ball joint stud a couple of turns. This will protect the threads when disconnecting the joint.
3. Again wedge a large pry bar while apply downward pressure between the spindle bulk head and lower control arm. While still holding the pressure on the ball joint use a hammer to "shock" spindle bulkhead this time. It may take a couple hits of the hammer but hang in there until the ball joint taper releases.
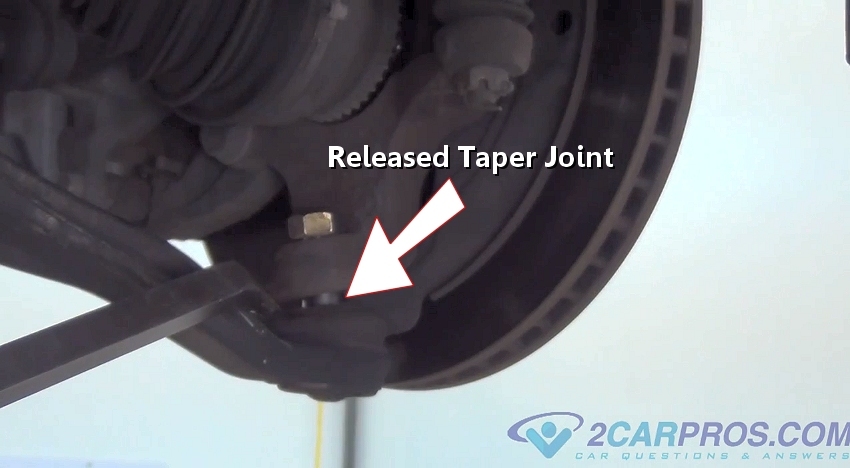
4. When the ball joint taper joint releases, there will be a noticeable gap between the ball joint dust boot and the spindle. The gap between the ball joint nut and spindle will also be gone.
5. Now you can finish removing the ball joint nut.
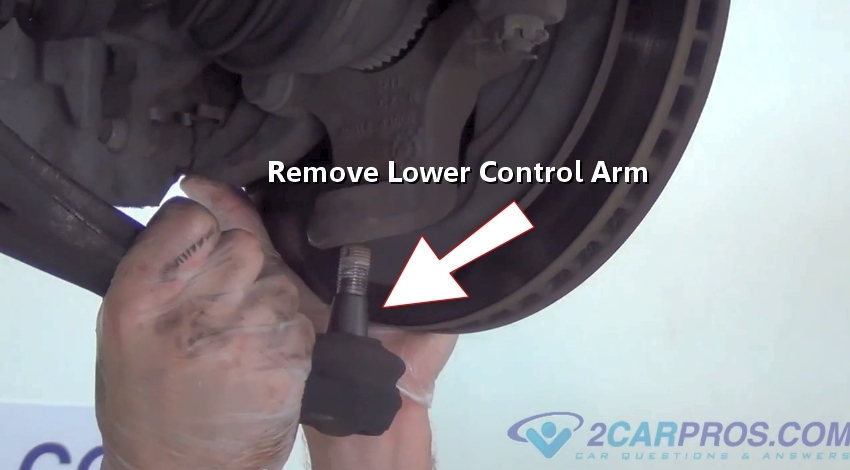
6. Grasp the lower control arm while holding the spindle steady. Pull the lower control arm downward to disconnect it from the spindle. At this point the bottom of the spindle will be able to move around freely. This method will work for both upper and lower control arms.
Watch the Video!
Please watch this video of the job being done to glean additional helpful information.
Credits
This guide knowledge base was created by the 2CarPros Team, and by Ken Lavacot: Automobile repair shop owner and certified master automobile technician of over 30 years. If you have question or need help please ask one of our experts we are happy to help. Please visit our 2CarPros YouTube Channel.