This guide will show you how to use a hydraulic press to install an axle bearing into a spindle which holds a CV axle on either the front or rear of your vehicle. We are a team of 2CarPros automotive repair contributors that have created this guide to show you how you can understand the repair before deciding whether to do it yourself or consult a repair shop or at least see what you are paying for when having the job done.
Though not many people have a press in their garage many machine shops or car repair shops do. You can own one yourself for about $120.00 from Amazon and start getting everything you need to have your own fully equipped repair garage. You will also need a replacement bearing which is also available at Amazon for about $35.00 depending on the application. An auto parts store or an automotive machine shop can do this operation for you from $120.00 to $180.00 labor.
Before you begin you should know that you will be dealing with a lot of pressure so always wear protective eye wear and gloves. Keep your hands always from the bearing area while the press is in action.
Prepare to Press the Hub
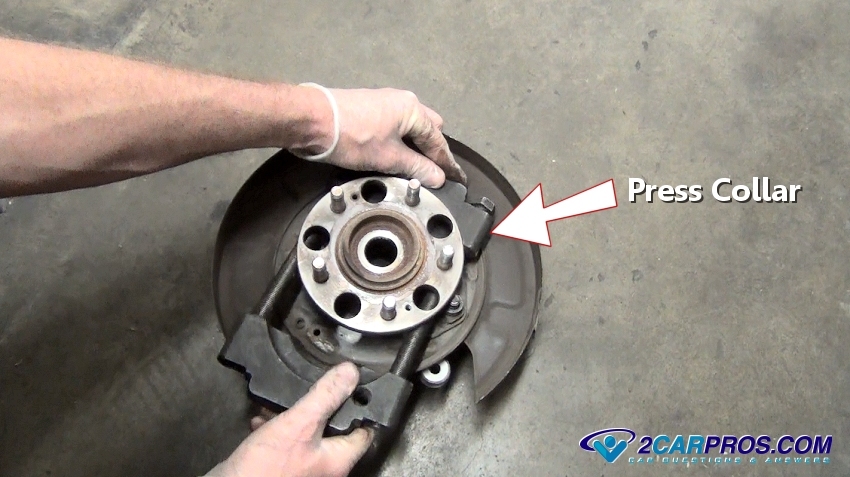
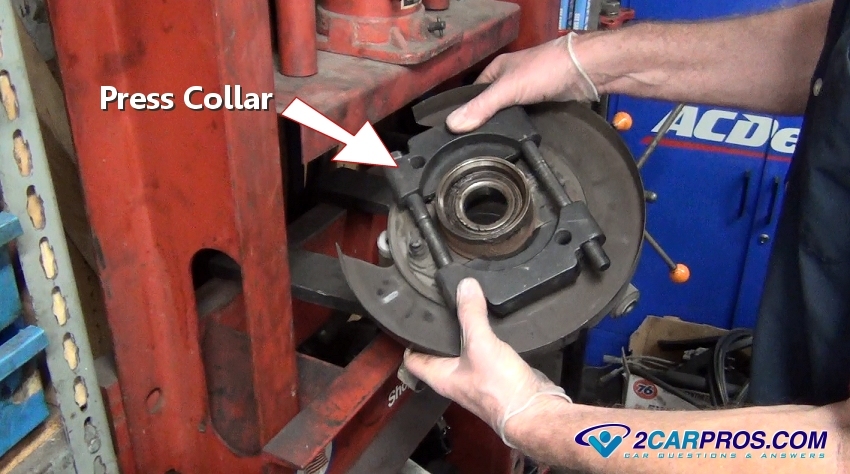
1. Install a hydraulic press collar over the bearing hub and snug it to secure it between hub and bearing plate flange. This plate should not be to tighten so it will allow the hub to slide while being pressed. The collar is what you will be setting in the press to support the load while pressing downward on the wheel hub.
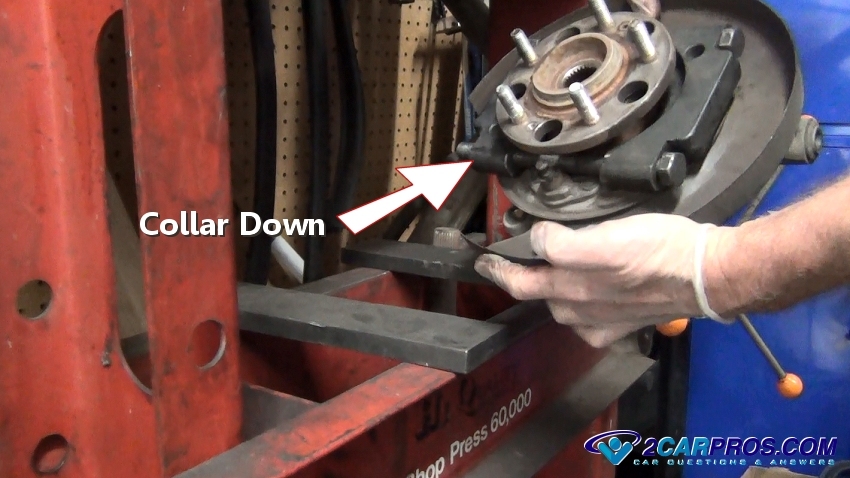
2. Prepare the press by placing two metal bars across the supporting beams. These beams may need to be adjusted up or down depending on the application. Then set the collar and bearing assembly downward into the press while allowing the wheel hub to be free and able to move down through the metal bars and support beams.
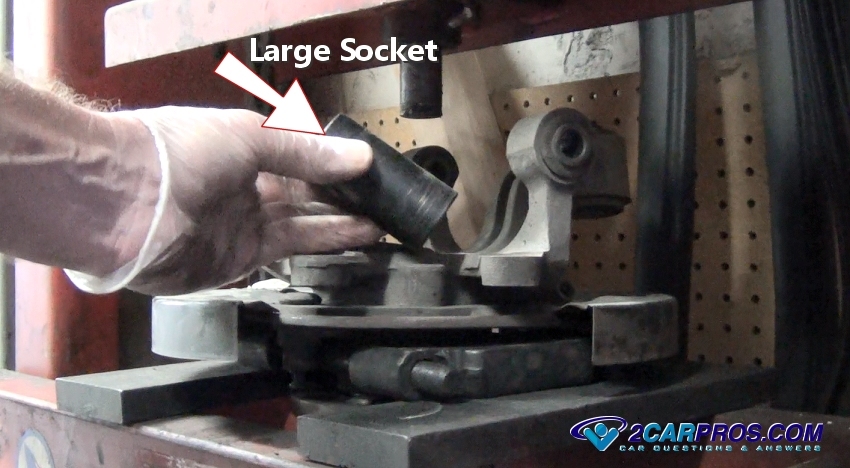
3. Use a steel drift or large socket just smaller than the wheel hub itself. This must be large enough to grab the hub but still be just smaller than the inside of the bearing race. Many presses will have accessories that can be used to do this as well.
Press the Wheel Hub
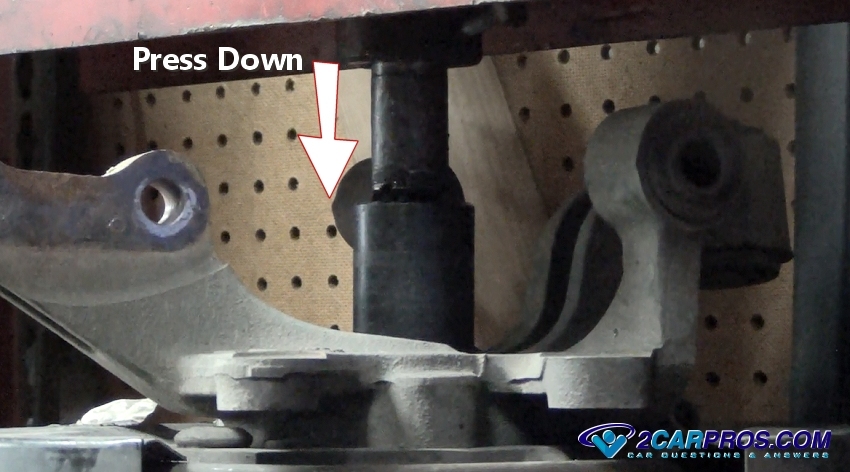
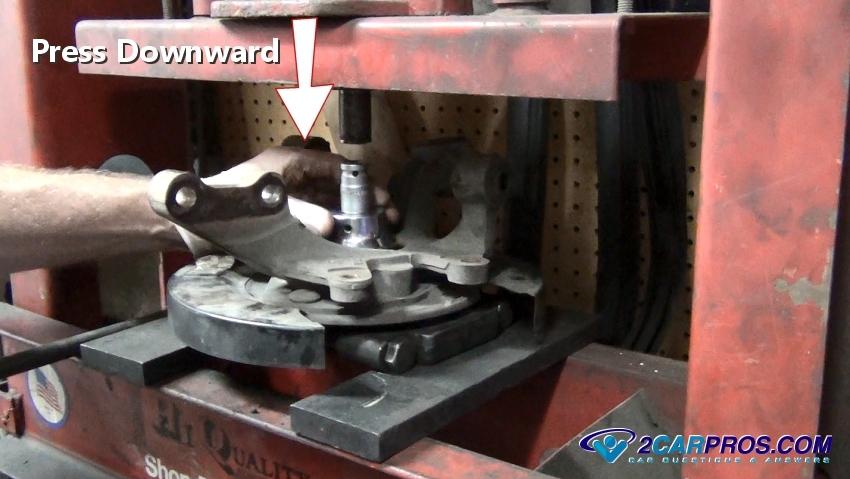
1. Position the bearing, hub and spindle assembly squarely under the plunger. This must be as square as possible to have the press work correctly. You may need to adjust the supporting beams either up or down to be within the throw of the jack.

2. Once the press alignment is correct begin pumping the press jack downward. The plunger will contact the drift or socket while pressure builds, continue to pump the jack. There will be a "pop" as the bearing starts to move outward from the spindle. You should see the hub beginning to move downward between the two supporting beams as pumping the jack becomes easier. If the hub refused to move and you can see and feel excess pressure on the press, release the jack and double check the way you are pressing it and reconfigure the set up.
3. Continue to pump the jack until hub is free from the bearing. After completely pressing the bearing hub it will become loose and fall from the bottom of the press. At this point you can hold your hand under the part and catch it before it falls to protect it from damage.

Prepare to Press the Bearing
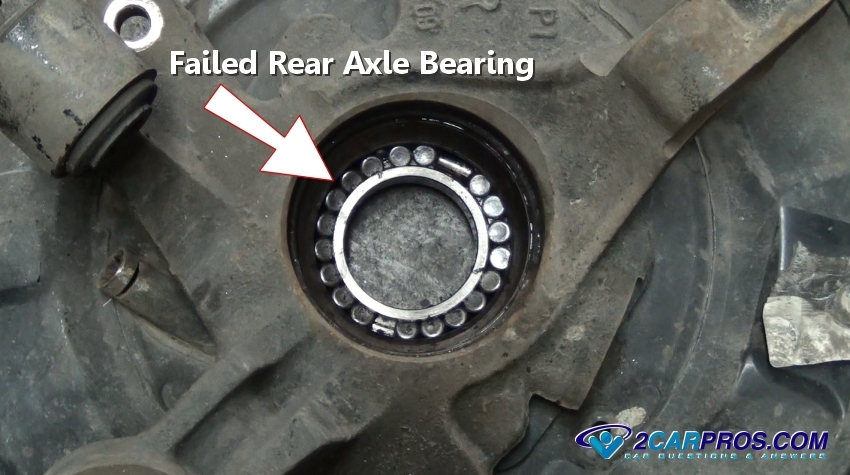
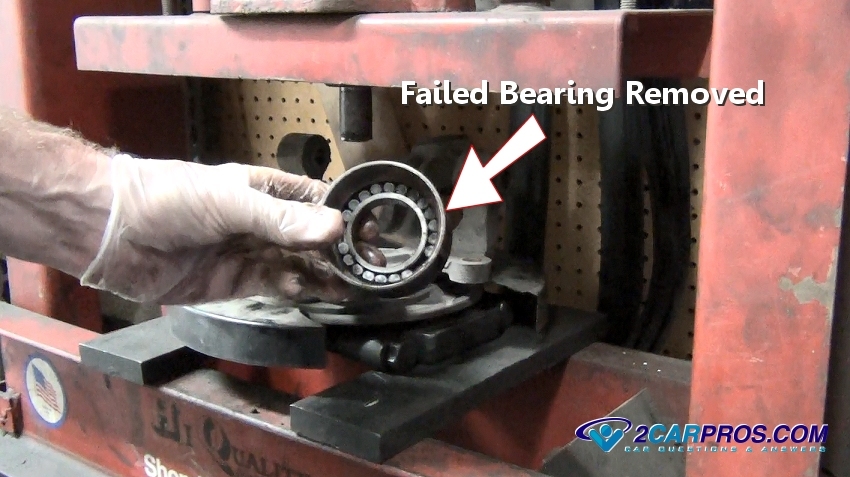
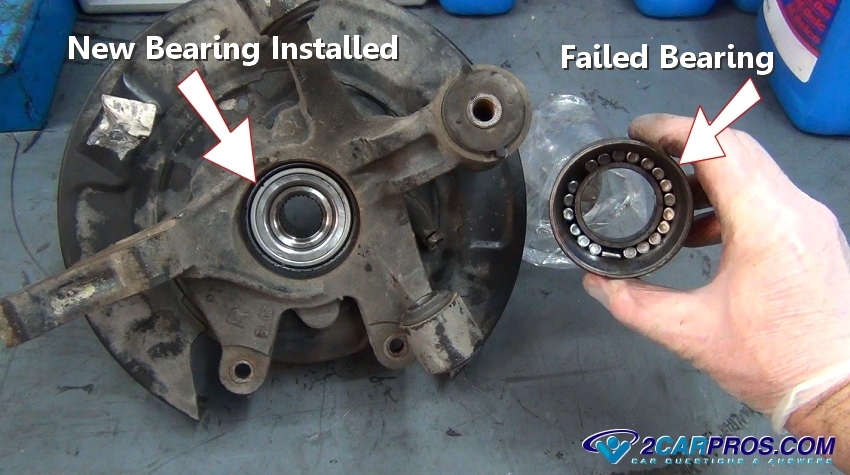
1. After removing the spindle from the press the failed bearing will be exposed. As you can see this bearings rollers have been worn out which warrants the replacement.
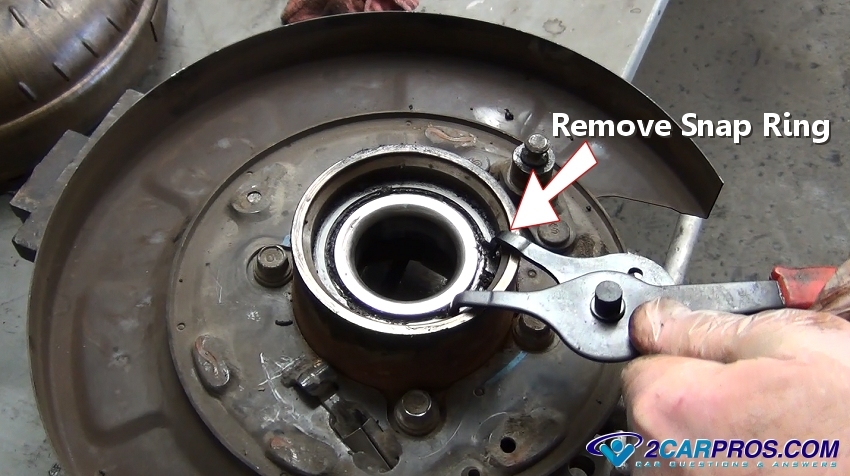
2. Turn the spindle over and locate the bearing retainer snap ring. Using a pair of snap ring pliers remove the ring. These rings can be a little tough to remove due to their spring tension so hang in there.
3. Reinstall the press collar onto the spindle much like you did before when you pressed out the wheel hub. Adjust the collar to a larger size and sung up both collar nuts.
Remove the Bearing
1. Reinstall the spindle back into the press using a larger socket or metal drift. Begin to pump the press jack to force the failed bearing from the housing. Again, there should be an audible "pop" when the bearing starts to move as pumping the jack gets easier.
2. Continue to pump the jack downward. Once complete the failed bearing will fall between the two supporting beams and free from the spindle.
Install the New Bearing
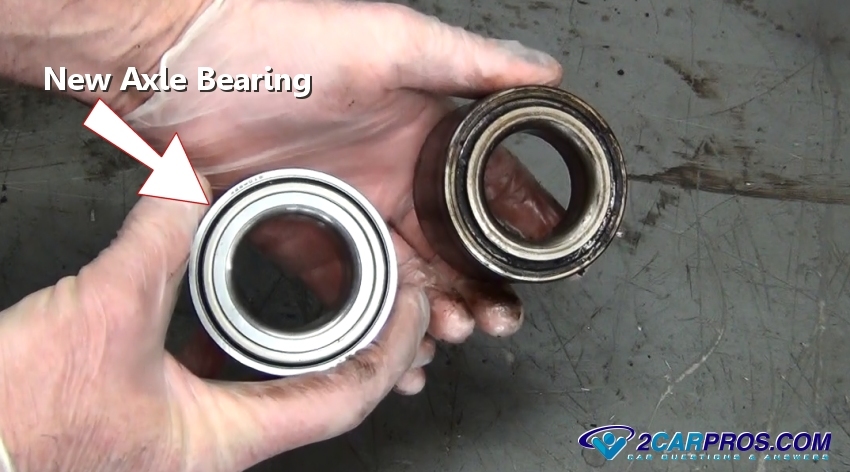
1. Once the removal is complete match the new bearing to the old unit. The inner and out race diameter should match identically along with the width of the bearing.
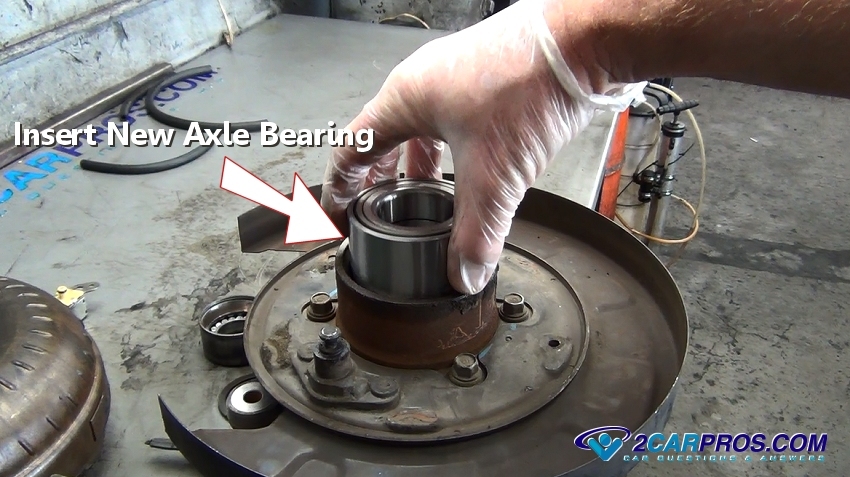
2. Use a shop towel to wipe the spindle bearing housing clean. Use a wire brush to remove any rust if needed. Set the new bearing squarely in place onto the spindle. The bearing is unidirectional and does not matter which side is inward or outward.
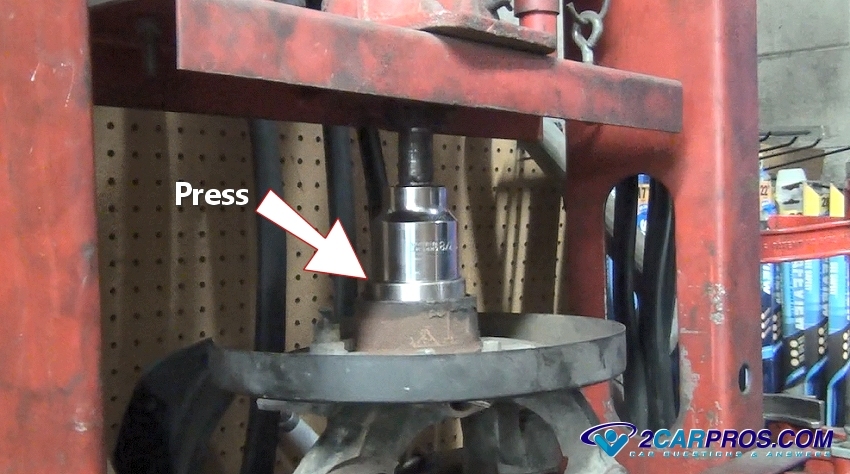
3. Reinsert the bearing and spindle assembly back into the press while using a large socket or drift the will force the new bearing into place. You must support the spindle squarely using metal bars which can take some doing by building a solid platform while stacking metal bars into the supporting beams. Continue to press the new bearing into place until it stops moving. This is letting you know the bearing is fully in place, we used a large socket for this.
4. Remove the spindle assembly from the press and reinstall the bearing retainer snap ring using your snap ring pliers.
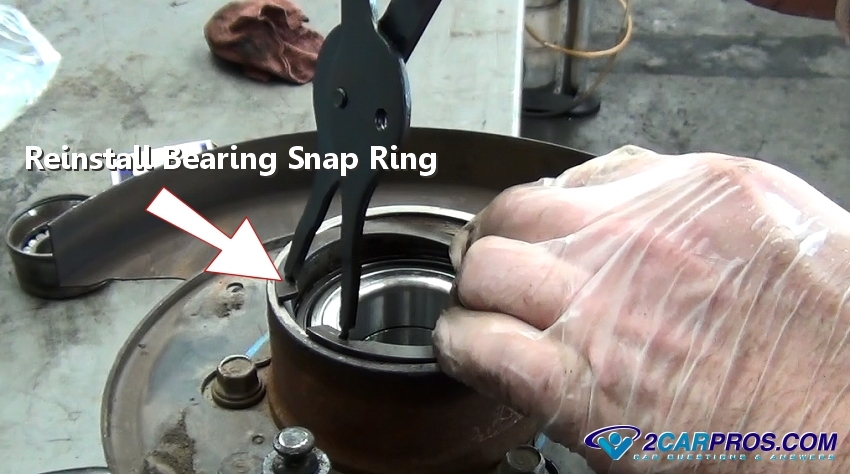
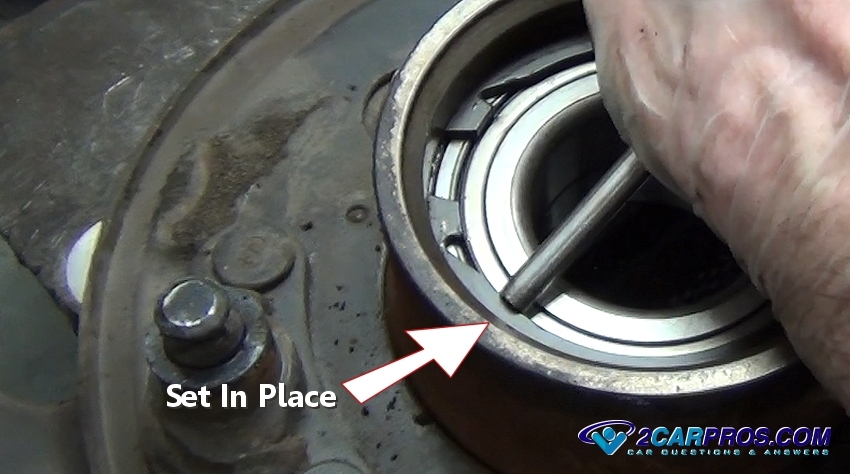
5. Use a small punch and hammer to tap the snap ring into place. This step is ensuring the ring is fully "set" into place within the spindle housing.
Reinserting the Wheel Hub
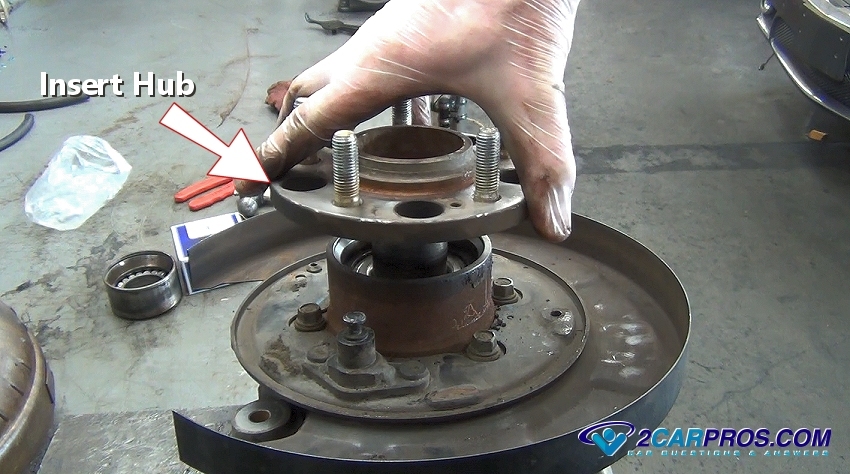
1. Inspect the wheel hub flange and use emery cloth to smooth the outer surface free from scratches or burs that may have occurred from the removal. After wiping the wheel hub clean insert and set the hub squarely into the bearing. Be sure part of the old bearing is not still on the hub. If part of the bearing remains use the press plate and tighten it behind the bearing race collar and re-press the hub.
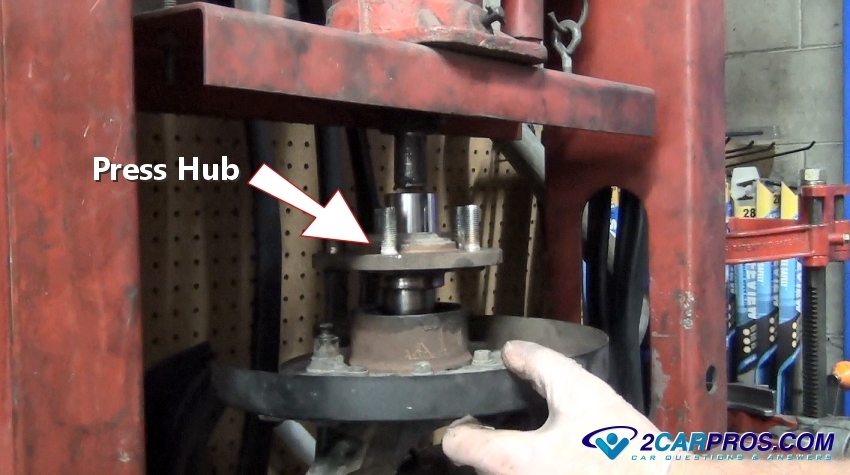
2. You will need to lower the press support beams to allow room for the wheel hub flange to be pressed into place. Align the wheel hub squarely under the press plunger and force it down into the new bearing. The hub will stop moving once it is fully installed.
3. When complete the new bearing and spindle assembly is ready to be reinstalled onto the vehicle. Here is the old bearing with the new bearing installed. This procedure is virtually the same on either the front or rear spindle and used for most CV axle bearing replacements.
Watch the Video!
Please watch this video of the job being done to glean additional helpful information.
Credits
This guide knowledge base was created by the 2CarPros Team, and by Ken Lavacot: Automobile repair shop owner and certified master automobile technician of over 30 years. If you have question or need help please ask a repair question we are happy to help. Please visit our 2CarPros YouTube Channel.