Sputtering and stalls

Tiny
OMAHANATIVE18
  • MEMBER
  • 2005 PONTIAC BONNEVILLE
  • 172,866 MILES
When first starting the car it runs good on idle for a few minutes then it stalls out.
Monday, October 22nd, 2018 AT 3:42 PM

3 Replies

Tiny
JACOBANDNICKOLAS
  • MECHANIC
  • 108,262 POSTS
Hi and thanks for using 2CarPros.com.

There are many things which can cause an engine to stall. If this is something which happens constantly after start-up, suspect a faulty idle air control solenoid. Also, here is a link that shows how to diagnose a stalling issue. Read through the link and see if it helps.

https://www.2carpros.com/articles/stall-at-idle

If you determine the idle air control valve is bad, here is a link that shows in general how one is replaced. Following the link are the directions specific to your vehicle for replacement of the component.

https://www.2carpros.com/articles/how-to-replace-an-idle-speed-control-motor-iac

Specific directions for your vehicle. All attached pictures correlate with these directions _________________________________

PROCEDURES
IDLE AIR CONTROL (IAC) VALVE REPLACEMENT

REMOVAL PROCEDURE
1. Turn OFF the ignition.
2. Remove the fuel injector sight shield.
3. Remove the electrical connector from the idle air control valve.
4. Remove the 2 idle air control valve retaining screws.
5. Remove the idle air control valve from the throttle body.
6. Remove the idle air control valve O-ring from the idle air control valve.
7. Inspect the O-ring for cracks or damage. Replace the O-ring if necessary.

INSTALLATION PROCEDURE

NOTE:The IAC valve may be damaged if installed with the cone (pintle) extended more than 28 mm (1-1/8 in). Measure the distance that the valve is extended before installing a new valve. The distance from the idle air control valve motor housing to the end of the idle air control valve pintle should be less than 28 mm (1-1/8 in). Manually compress the pintle until the extension is less than 28 mm (1-1/8 in).
1. Install the new O-ring to the IAC valve.
2. Install the IAC valve into the throttle body.
3. Install the IAC valve retaining screws.

NOTE: Refer to Fastener Notice in Service Precautions.

Tighten the screws to 3 N.m (27 lb in).

4. Connect the electrical connector to the IAC valve.
5. The powertrain control module (PCM) will reset the IAC valve whenever the ignition switch is turned ON and OFF. Turn the ignition switch ON and OFF.
6. Start the engine and allow the engine to reach a normal operating temperature.
7. Install the fuel injector sight shield.

________________________________________

Let me know if this helps or if you have other questions.

Take care,
Joe
Was this
answer
helpful?
Yes
No
Monday, October 22nd, 2018 AT 7:06 PM
Tiny
OMAHANATIVE18
  • MEMBER
  • 2 POSTS
The idel is fine when first starting the car, but when the car warms up it dies out, when trying to start again it spudders and dies out.
Was this
answer
helpful?
Yes
No
Thursday, October 25th, 2018 AT 6:01 PM
Tiny
JACOBANDNICKOLAS
  • MECHANIC
  • 108,262 POSTS
Welcome back.

Based on your description, it sounds like the crankshaft position sensor is bad. This component is responsible for sending a signal to the computer for ignition and injector timing. When they start going bad, internally the wiring breaks down. As the engine runs and creates heat, the internals expand and you lose spark.Take a look through this link:

https://www.2carpros.com/articles/symptoms-of-a-bad-crankshaft-sensor

If the vehicle eventually fails to restart, check to see if you lost spark to the plugs. Here is a link that shows how that is done.

https://www.2carpros.com/articles/how-to-test-an-ignition-system

If you find there is no spark, my first suspect is the aforementioned sensor. If you find it is the problem, here are general directions for replacement:

https://www.2carpros.com/articles/crankshaft-angle-sensor-replacement

Here are directions specific to your vehicle for replacement. The attached pictures correlate with these directions,

___________________________

CRANKSHAFT POSITION (CKP) SENSOR REPLACEMENT

REMOVAL PROCEDURE
1. Disconnect the negative battery cable.

CAUTION: Refer to Battery Disconnect Caution in Service Precautions.

2. Raise the vehicle on a hoist. Refer to Vehicle Lifting.
3. Remove the right splash shield cover.
4. Remove the crankshaft harmonic balancer.
5. Remove the crankshaft position sensor (CKP) shield (1). DO NOT use a pry bar.
6. Disconnect the sensor electrical connector.
7. Remove 2 attaching bolts from the CKP sensor.
8. Remove the CKP sensor from the block face.

INSTALLATION PROCEDURE
1. Position the CKP sensor to the block.
2. Install the bolts that hold the CKP sensor to the block face.

NOTE: Refer to Fastener Notice in Service Precautions.

Tighten the bolts to 30 N.m (22 lb ft).
3. Install the CKP sensor shield (1).
4. Connect the CKP sensor electrical connector.
5. Position the crankshaft harmonic balancer on the crankshaft.
6. Install the right splash shield cover.
7. Lower the vehicle.
8. Connect the negative battery cable.
9. Perform the Crankshaft Variation Learn Procedure. See: Vehicle > Programming and Relearning

_____________________________________________________

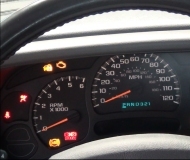
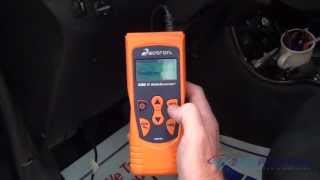
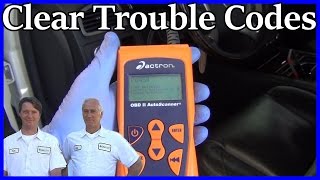
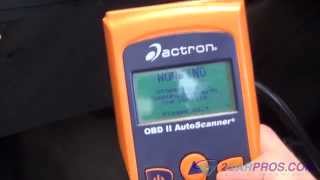
If you haven't already, I suggest scanning the computer to determine if there are any diagnostic trouble codes. Here is a video showing how that is done.

https://youtu.be/YV3TRZwer8k

I would recommend scanning it prior to replacing any parts to confirm where the problem may be coming from.

Let me know if this helps or if you have other questions.

Take care,
Joe

Was this
answer
helpful?
Yes
No
Thursday, October 25th, 2018 AT 6:20 PM

Please login or register to post a reply.

Sponsored links