The idle air control motor or idle speed control motor is designed to adjust the air flow into the intake manifold at engine idle. Engine idle speed is monitored by the PCM which commands the idle air control motor to close or open to achieve the desired rpm. The air bypass port in the throttle body is used to feed the idle speed control motor. When an idle air control motor malfunctions it can cause the engine either to idle too high or too low, or stall the engine all together. This condition will usually illuminates the check engine or service engine soon light.
After the job is complete and the engine has been started, it can take some time before the idle air control can re-calibrate itself, engine stalling, high and low idle are normal until a few run cycles are completed. Occasionally is it necessary to hold the throttle open long enough for the computer to take over control of the valve.
Note: On some Ford vehicles the idle air control motor to will create a "moaning" or "honking" sound when failed.
Best Practices
- A condition called "coking" is a normal occurrence of a thin build up of a tar like substance which is a normal by-product of processing large amounts of air. When this condition is present it must be cleaned with carburetor cleaner and a shop towel. After removing the idle air control motor open the butterfly plate and clean along with idle air control inlet and outlet passages.
Let's Jump In!
How to replace an automotive idle air control motor valve P0505, P0506 and P0507, though appearances may vary the procedure is similar for most vehicles.
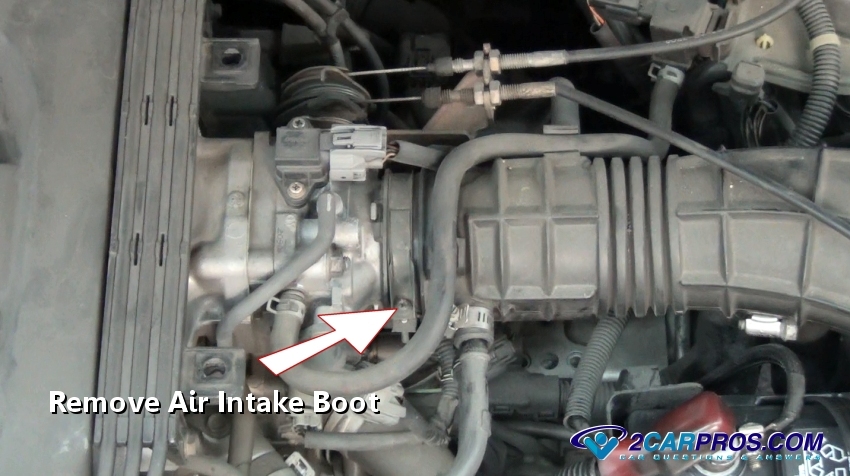
Step 1 - Locate and remove the air intake bore which is attached to the throttle bore and is usually done be loosening the mounting clamp. (Note: some idle air control motors can be replaced without removing the throttle bore.)
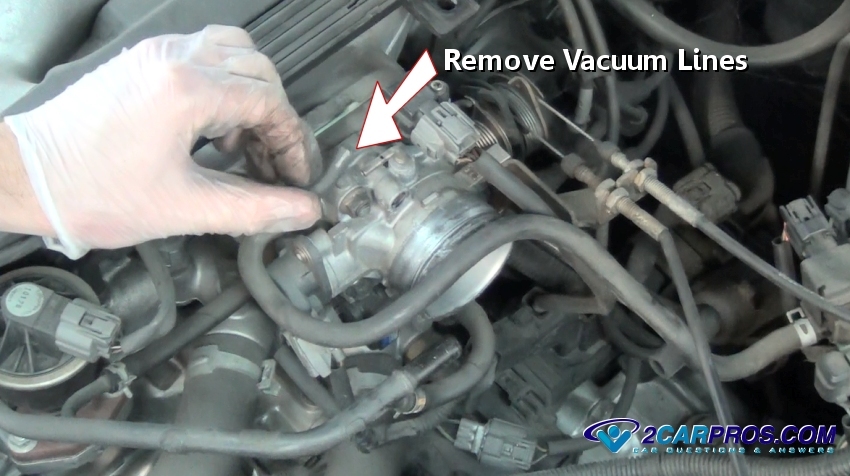
Step 2 - Once the air intake has been removed proceed in removing all vacuum lines from the throttle bore. TIP: Snap a quick pic from your phone to avoid confusion in reassembly.
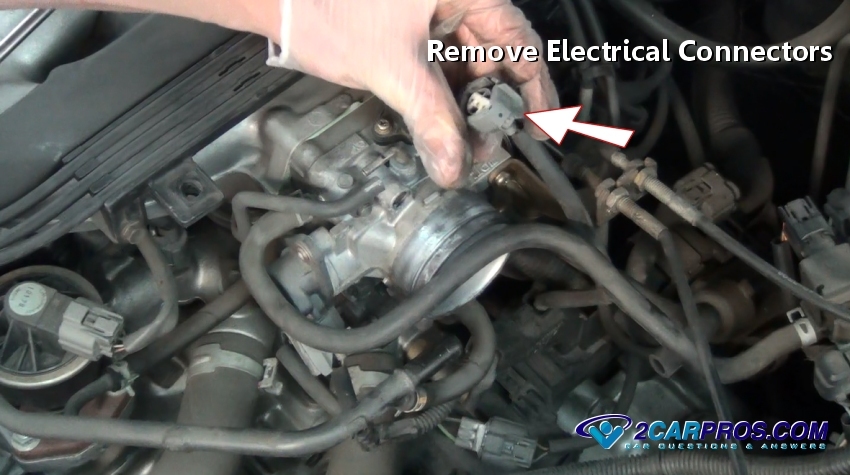
Step 3 - After vacuum lines have been removed, locate and disconnect the sensor and idle air control electrical connectors. Be gentle with these connectors because they can be brittle due to under hood conditions.
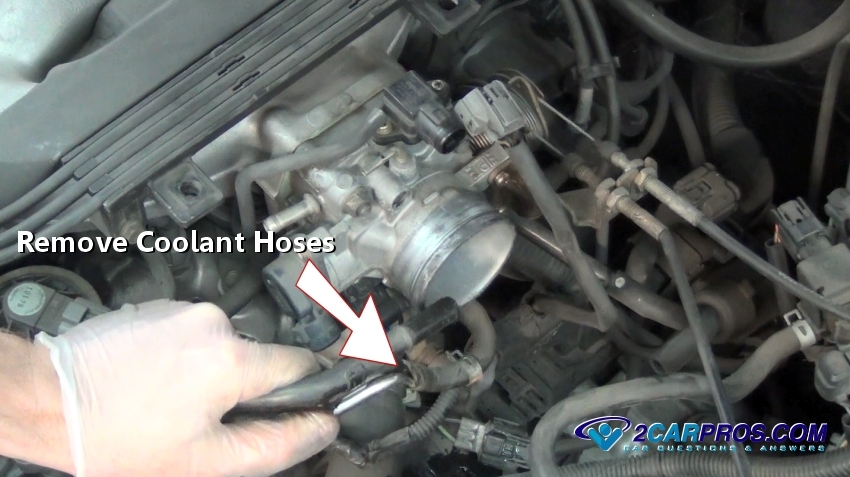
Step 4 - Next, slowly remove the radiator cap to relieve system pressure, then locate and remove all coolant hoses connected to the throttle body.
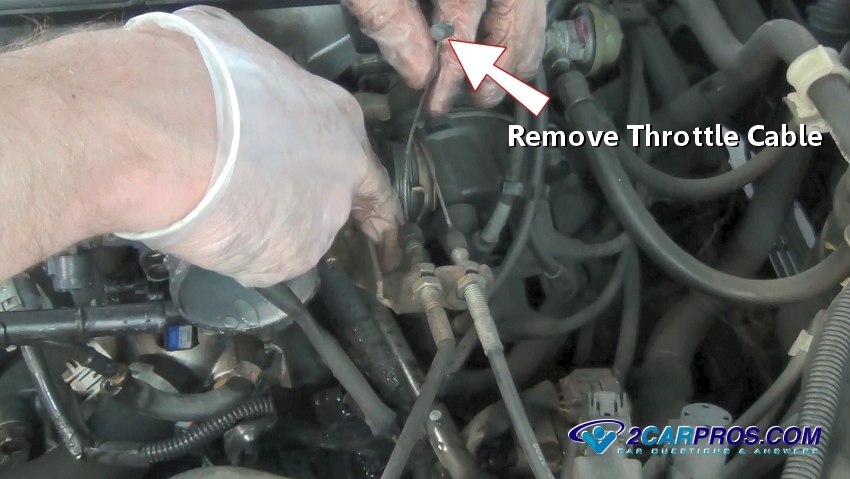
Step 5 - Then, remove both the throttle and cruise control cables from the throttle body.
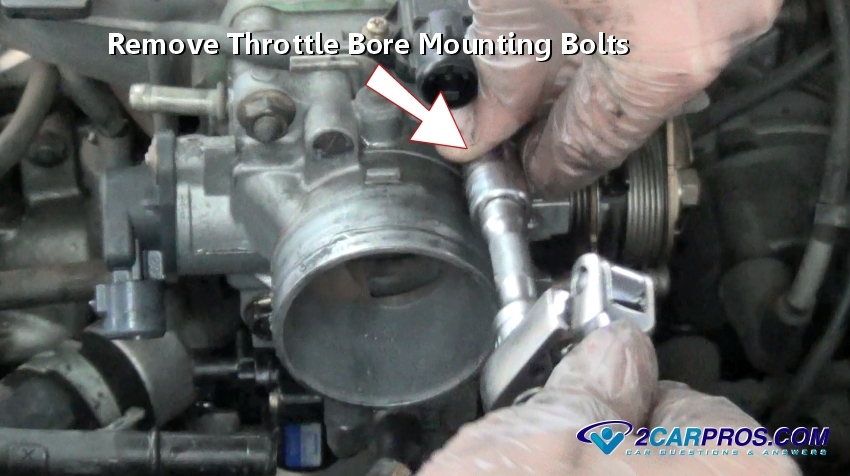
Step 6 - Once all coolant, vacuum hose and electrical connectors have been removed, remove the throttle bore mounting bolts.
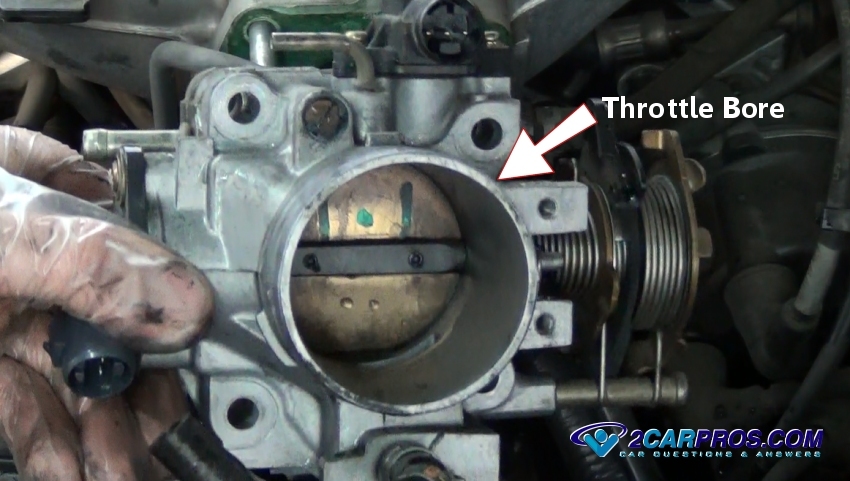
Step 7 - After removing all throttle bore bolts, gently pry the bore loose from the intake manifold. The idle air control valve is attached (bolted) at the bottom of the bore.
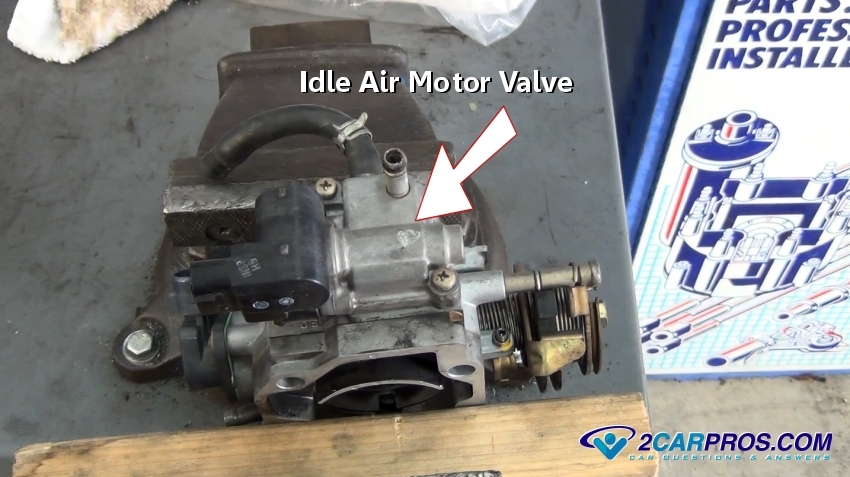
Step 8 - Once removed, hold the unit in a vise to stabilized the valve for removal.
Watch the Video!
Please watch this video of the job being done, then continue down the guide to glean additional helpful information.
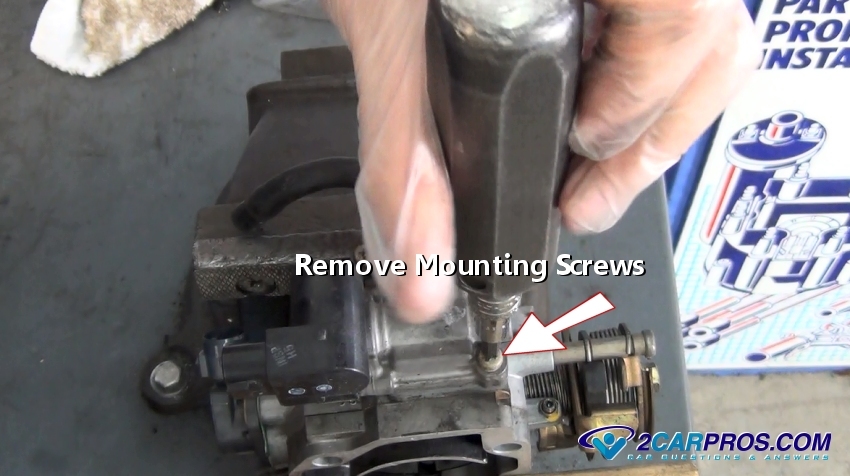
Step 9 - Using an impact screw driver to remove the idle air control valve mounting screws.
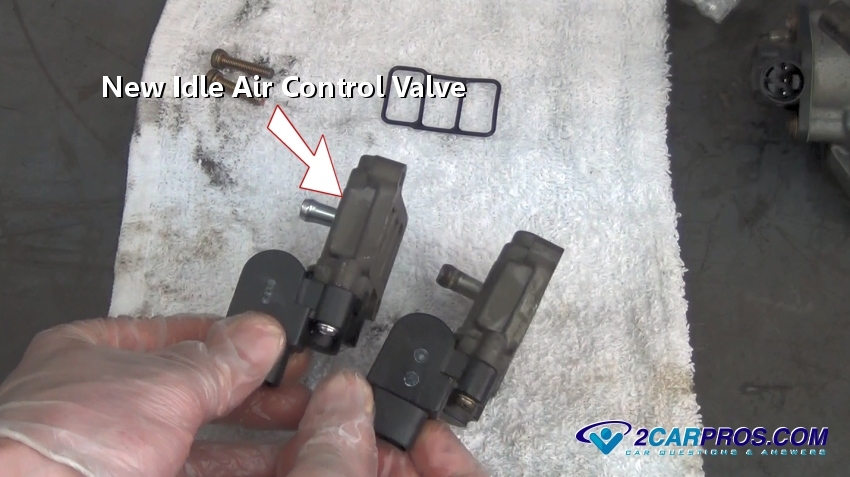
Step 10 - After the screws have been removed, gently pry the idle air control valve off of the throttle bore, be sure to remove the gasket as well, match up the old valve to the new unit.
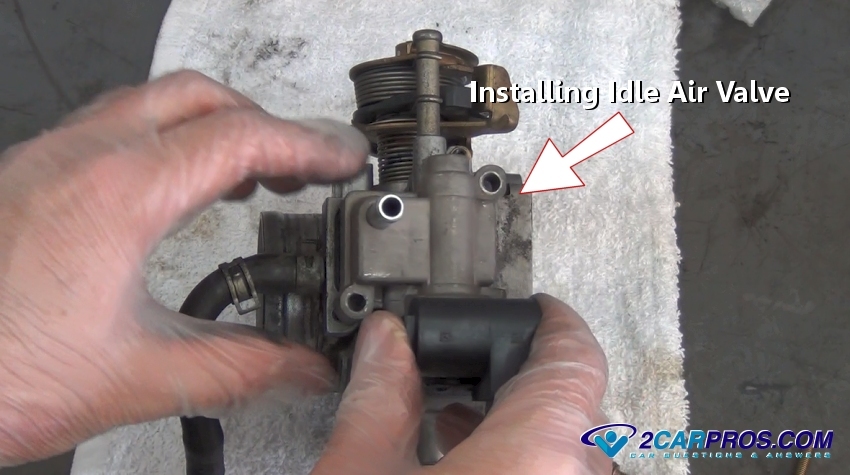
Step 11 - Using a shop towel and carburetor cleaner wipe all gasket surfaces clean to ensure a proper seal. Then, install the new idle air valve to the throttle bore, reinstall and tighten the mounting screws.
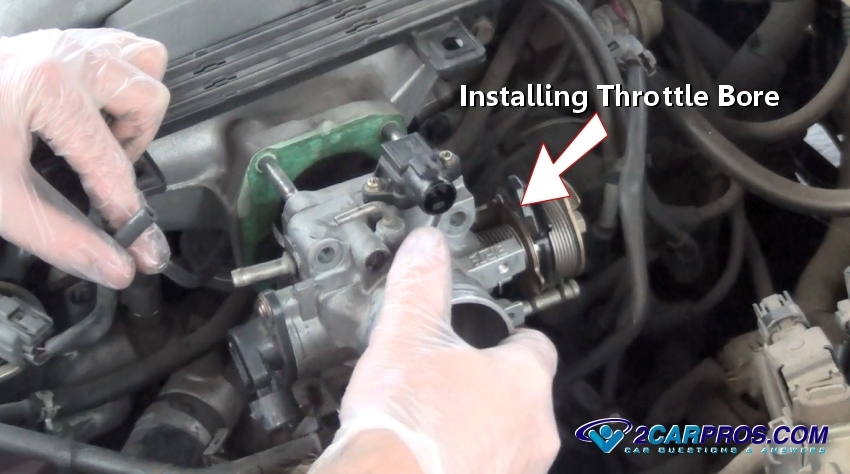
Step 12 - Next, gently reinstall the throttle bore making sure the gasket surface is clean, keep hoses and wiring clear from the mounting surface.
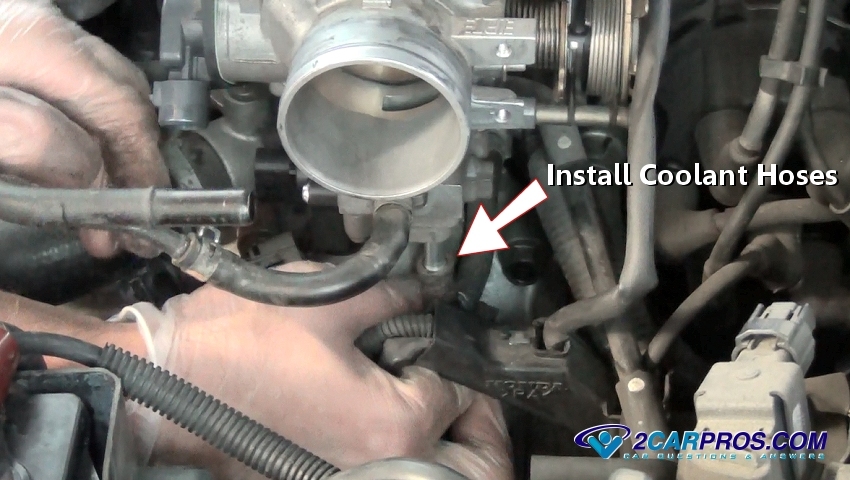
Step 13 - After reinstalling the throttle bore and tightening the mounting bolts evenly, reattach the coolant hoses with clamps.
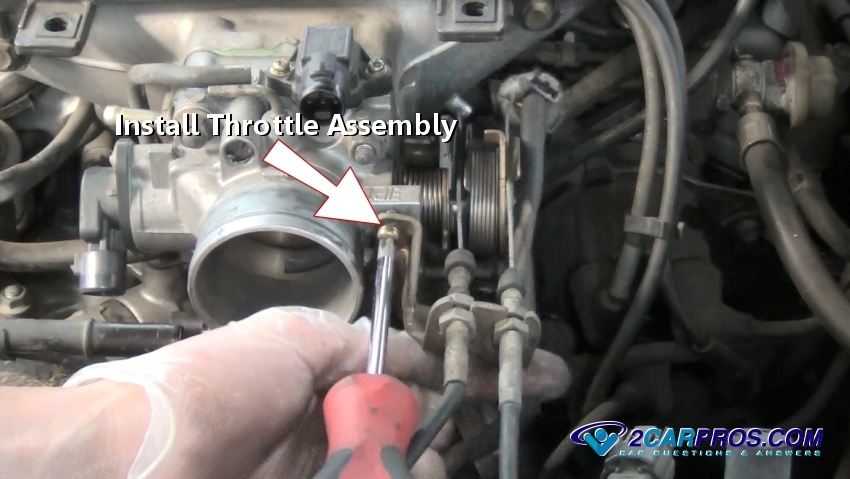
Step 14 - Once coolant line are connected, reattach the throttle cable assembly by installing and tightening the mounting screws.
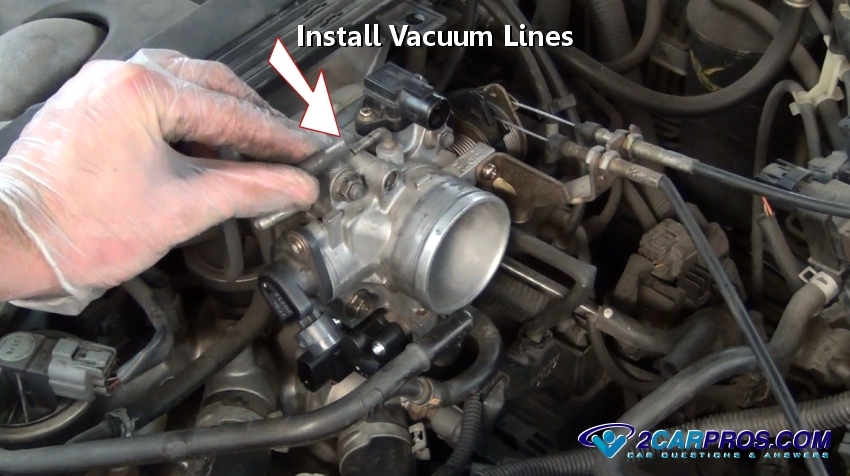
Step 15 - Next, Reattach all vacuum lines to the throttle bore.
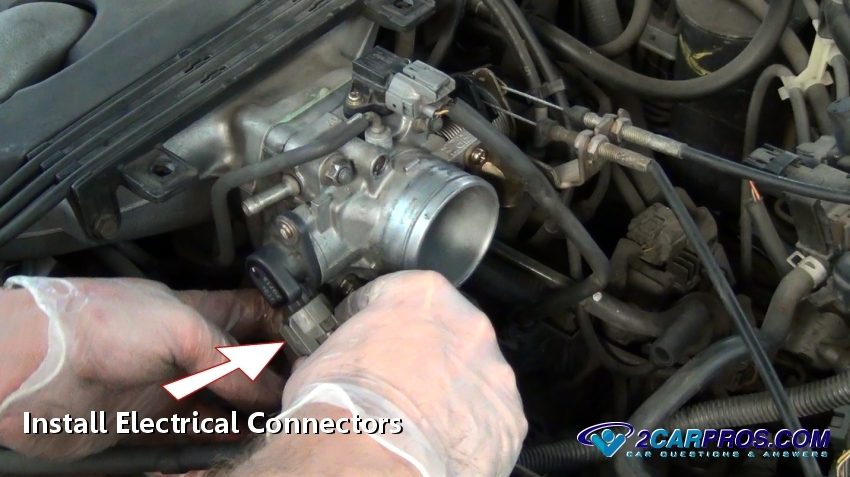
Step 16 - Then, reinstall all electrical connectors to the throttle bore and idle air control motor.
Step 17 - After installing all vacuum, coolant and electrical components position the air intake tube for reinstallation.
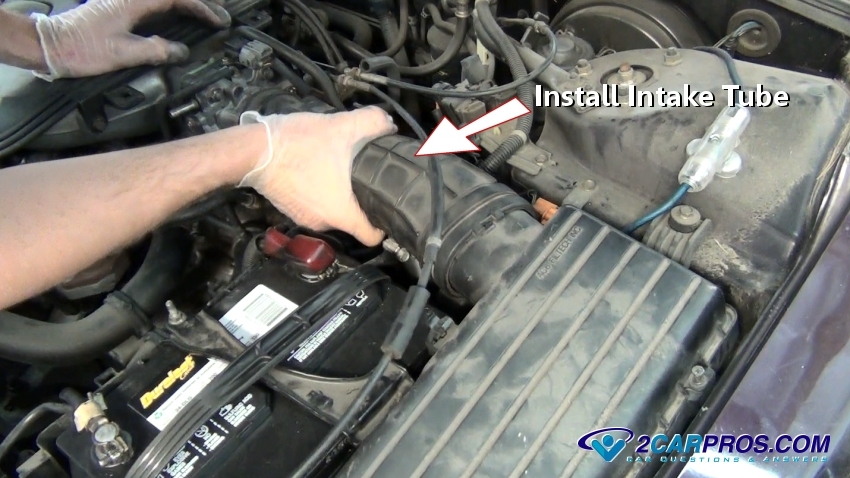
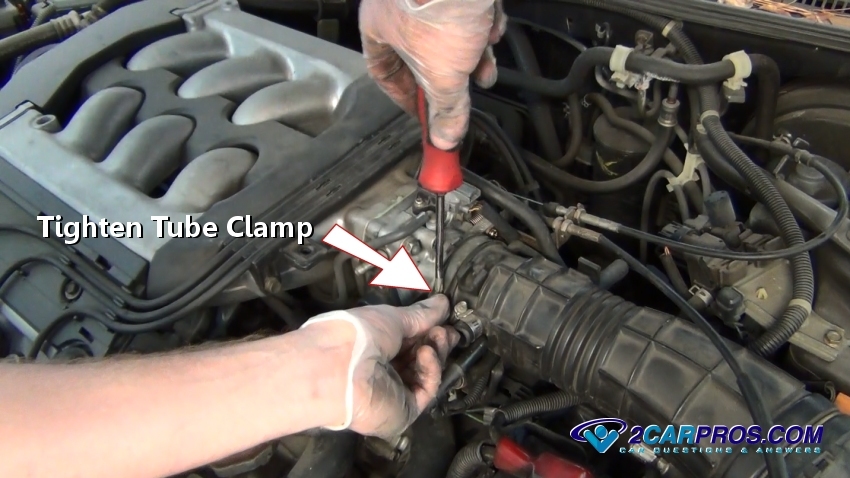
Step 18 - Reinstall vacuum and transfer hoses to the intake tube, then tighten the mounting clamp.
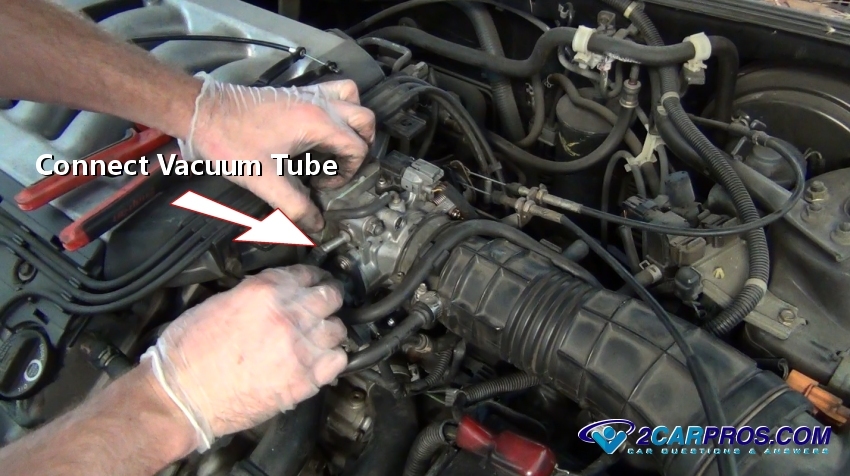
Step 19 - Once the air intake tube has been reinstalled, continue to install the remaining vacuum lines.
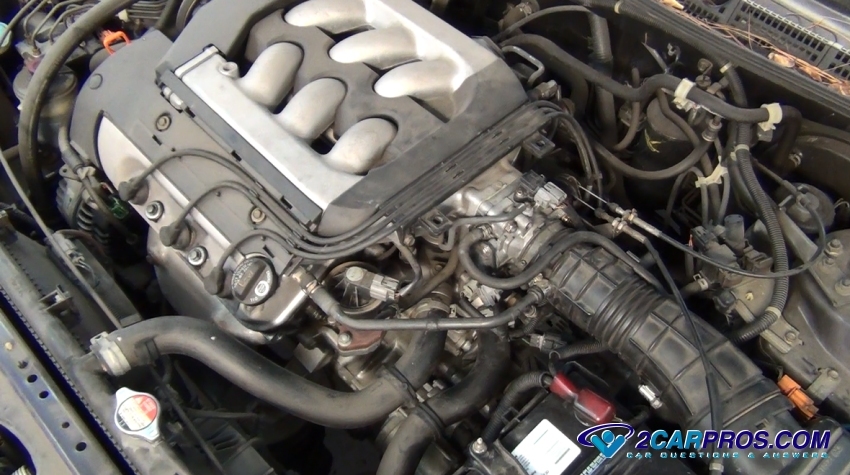
Step 20 - Idle air control valve installed job complete, double check all work and clear any codes that have been set, refill any coolant that has been lost.
Questions?
If you have a car repair question, you can ask the 2CarPros community for help. We hope this guide helped you understand the repair. Please visit our 2CarPros YouTube channel for more helpful repair videos.