An engine tune up is required between 35,000 to 75,000 miles depending on driving conditions and the vehicle's manufacturer recommendations. This service comprises many individual operations which we have listed below, this list can vary depending on engine ignition and fuel system designs.
What Goes Wrong?
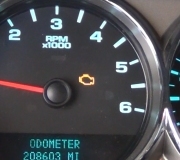
As the engine operates service items such as, spark plugs, spark plug wires, ignition coils, throttle body, distributor cap and rotor, fuel and air filters start to wear or get dirty, and when left unattended can cause low power, engine misfires, limp mode, stall at idle, hesitation, hard starting or a check engine light.
What's The Cost?
When a tune up is performed there can be many variables which affect the parts and labor price. Some shops consider just a spark plug replacement as a tune up which by itself is incomplete, so it best to get a full list of what is included with the service, an engine oil change can be included as well. By looking under the hood you can see if the engine has coil over spark plugs (COP) set up that uses no spark plug wires, this is one configuration example which will cause price fluctuations. When purchasing tune up parts let it be known there are quality variables that affect price and the performance of each item. If exact times or procedures are needed you can ask our experts to supply you with the information (free), or consult an online resource such as AllData DIY (pay).
Let's Jump In!
Spark plugs are the most major part of a tune up which must be replaced without
fail. Before removing the spark plugs use compressed air to clear the plug well
free of dirt and debris which will help stop internal contamination of the cylinders.
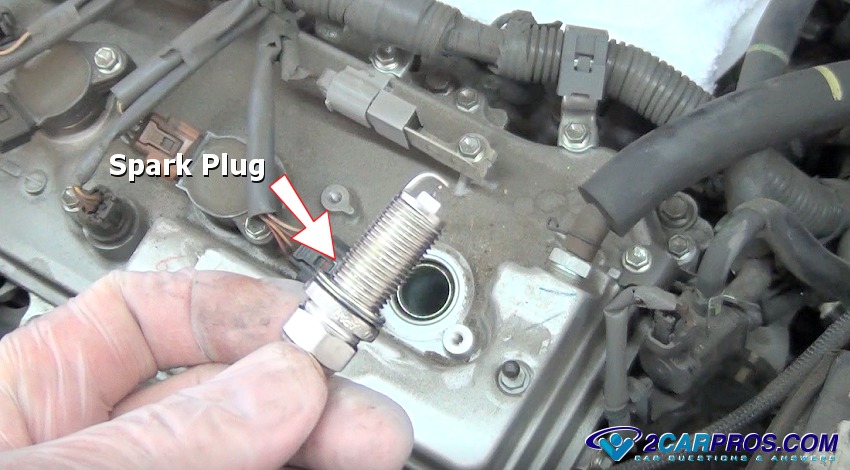
Remove the ignition coil or plug wire from the spark plug, if engine oil is present
on the outside of the plug the valve
cover gaskets need replacement. Most spark plug gaps are pre-set and ready to
install but because of shipping conditions the gap can become mal-adjusted, confirm
the proper gap by using a spark plug gap
tool. Inspect the new spark plug's porcelain for cracks and isolator condition
before installing (new spark plugs can be defective). If the ignition system uses
plug wires, replace the spark plugs
and wires one at a time to avoid confusion, mark the wires clearly while confirming
proper length of each wire, also twist the plug wire boot to help break the seal
which will assist in the wire removal.
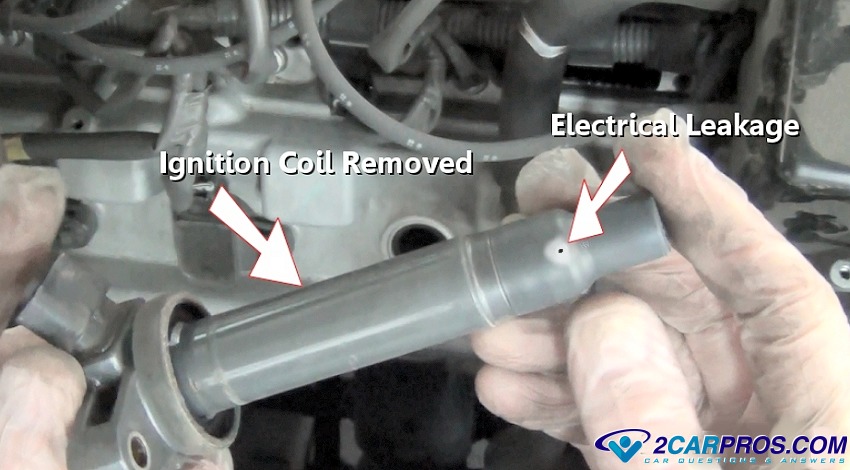
After the ignition coil has been removed (COP systems), inspect the coil for
dark or light markings which indicates electrical leakage failure warranting coil
replacement, also inspect the coil low voltage electrical terminals for corrosion
or signs of heat which indicates failure.
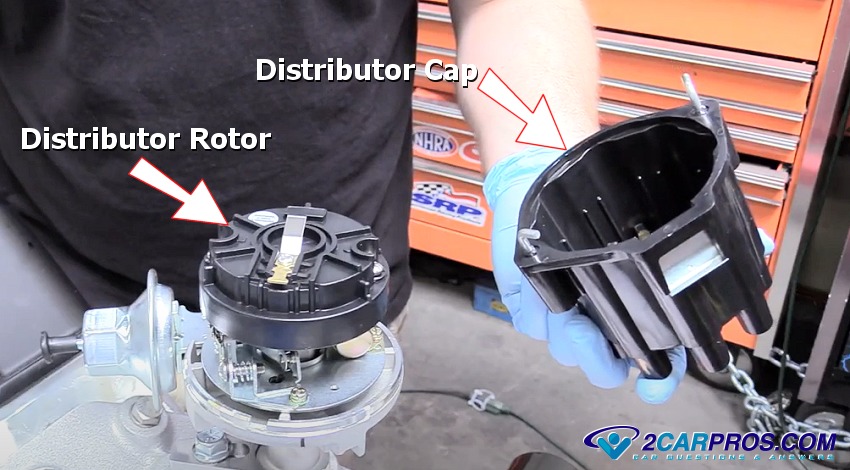
An ignition system can be constructed with an distributor cap and rotor which
is responsible for distributing the ignition spark from the coil to the individual
cylinders, over time the electrical terminals can become burnt and corroded and
should be replaced as part of the tune up.
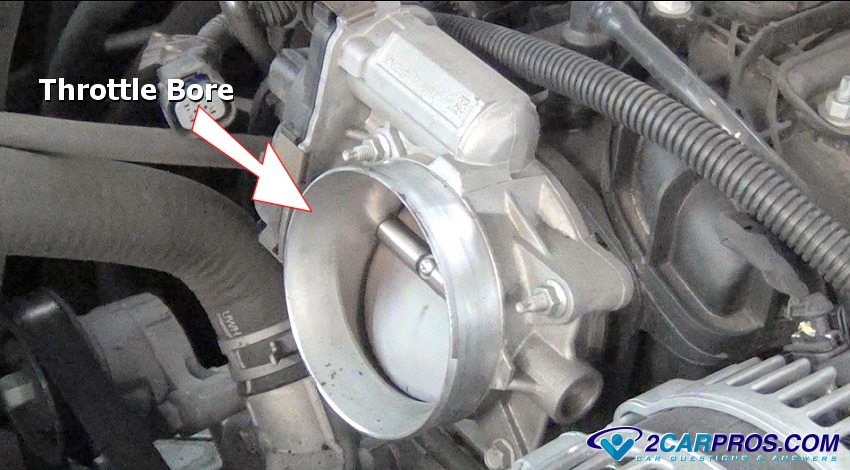
An engine processes large amounts of air while in operation, this will cause
the throttle actuator to get dirty, a condition called Coking, this is where heavy
air particles are left behind hindering the actuators performance. An engine tune
up should include a throttle bore
actuator cleaning service.
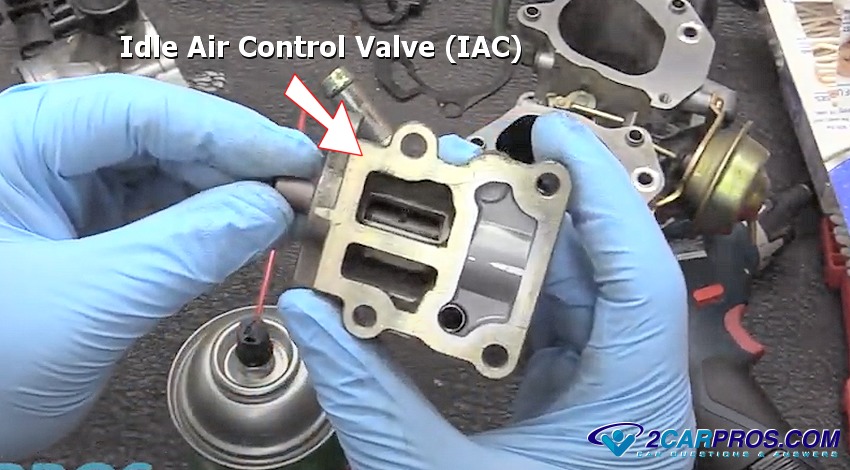
Manually controlled actuators use a throttle cable which utilizes an
idle air control valve (IAC)
to adjust engine idle speed via the
engine computer. Much
like the throttle bore actuator the IAC is subject to the Coking condition as well
and should be cleaned within the tune up service to ensure proper operation.
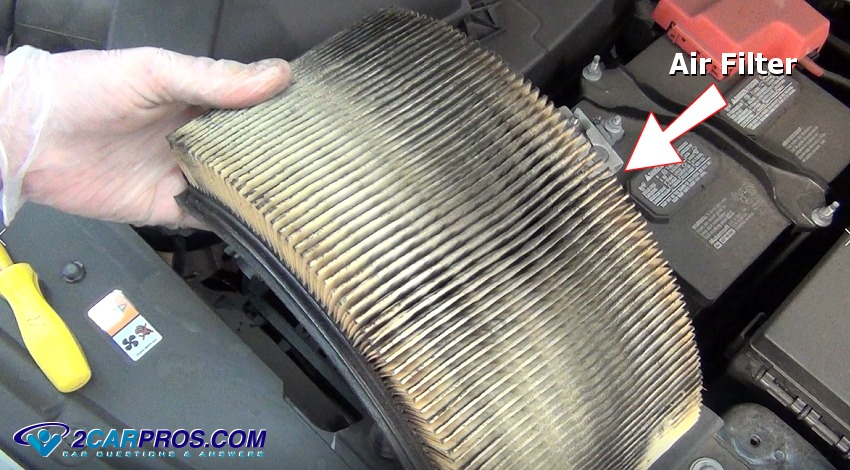
The engine air filter is used to help keep dirty and debris from entering the
engine, this too will become dirty which cases engine performance to suffer, inspect
and replace the air filter
as needed.
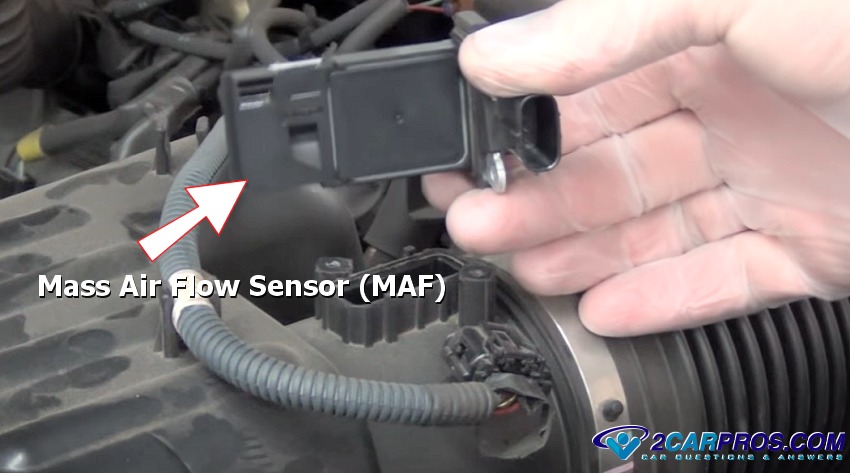
Some engines are equipped with a
mass air flow sensor
(MAF) which provides feedback information to the engine computer by monitoring the
amount of air that enters the engine. This is also subject to Coking which contaminates
the sensor wire located internally inside the sensor. Remove the sensor and use
MAF cleaner to alleviate the sensor wire (hot wire) from dirt and air contaminants
to help return the correct sensor operation.
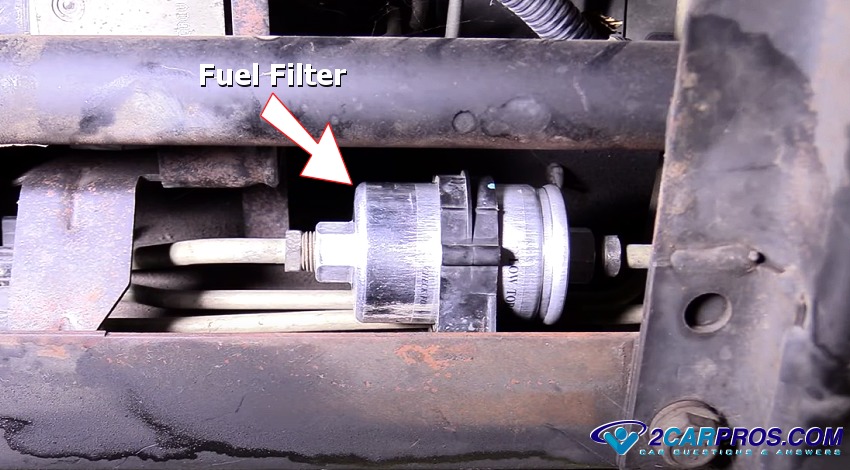
Vehicles can be equipped with a
serviceable fuel filter (not
inside the fuel tank) which should be changed out during a tune up service. This
fuel filter is used to remove fuel impurities before being processed through the
fuel injectors allowing the fuel system to stay clean and trouble free. This filter
is optional and will vary per vehicle manufacturer.
Questions?
Our certified technicians are ready to answer car repair questions for free. We hope you saved money and learned from this guide. We are creating a full set of car repair guides. Please subscribe to our 2CarPros YouTube channel and check back often for new videos which are uploaded regularly.
Article published 2022-03-08