A fuel filter is designed to remove partials and contaminants from the fuel before they enter the fuel injection system. Most cars have one or two filters, the primary filter is located in the fuel tank attached to the inlet of the fuel pump and can sometimes be called a strainer. The secondary filter is located on the fuel pressure line headed from the tank to the engine and more specifically the fuel rail.
What goes wrong?
As with any filter when the capacity of the membrane is exceeded it diminishes flow capabilities. Restricted fuel pressure/flow equates to engine runnability problems such as low power, hesitation and hard starting.
Fuel filter
- Can clog causing low engine performance
- Is located at the inlet of the fuel pump or inline
- Removes particles from the fuel system
- May need a special tool to remove
- Is part of an engine tune up
- May cause the fuel pump to go out.
Where is it?
The strainer or primary fuel filter is located the fuel tank attached to the inlet of the fuel pump. Some manufactures design a tap door to access the filter while others designed require the fuel tank to be removed. This filter is considered to be lifetime although it rarely makes it that long. Secondary filters have gone by the wayside in most cars and some trucks. If your car has one it will be located by the engine compartment or under the car on the frame or sub frame rail on the driver's side, or near the fuel tank. Diesel powered vehicles have multiple filters which act as a water separator that must be changed regularly. (Need to know where a filter is ask us).
What's the cost?
The cost of a fuel filter will range from $15.00 to $35.00 in most cases, diesel fuel filters can run a little more. Labor for the job can vary greatly depending on the filter location.
Let's Get Started
It's a good idea to use rubber/vinyl gloves and safety goggles when working with fuel. Inside the fuel system there can be residual pressure which will be relieved when disconnecting the fuel pressure line from the filter. Be ready to control dripping fuel with a small container and/or shop towels.
Lifting your car maybe necessary to access the filter, use a jack and jack stands for safety.
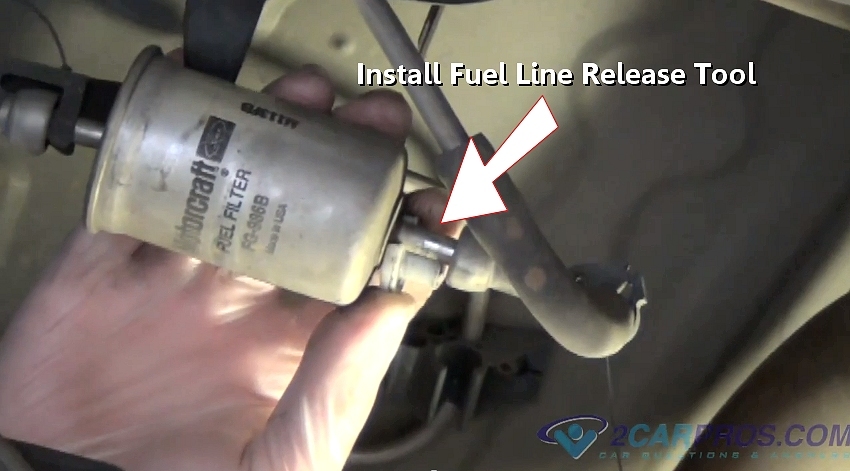
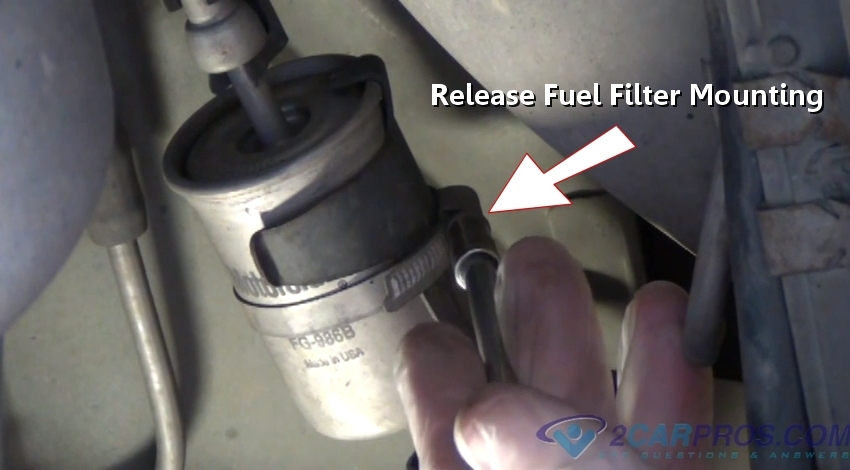
Use a line removal tool, line wrenches or hose clamp and loosen the fuel lines from the filter. Then remove the mounting clamp or bolts to free the filter from the vehicle.
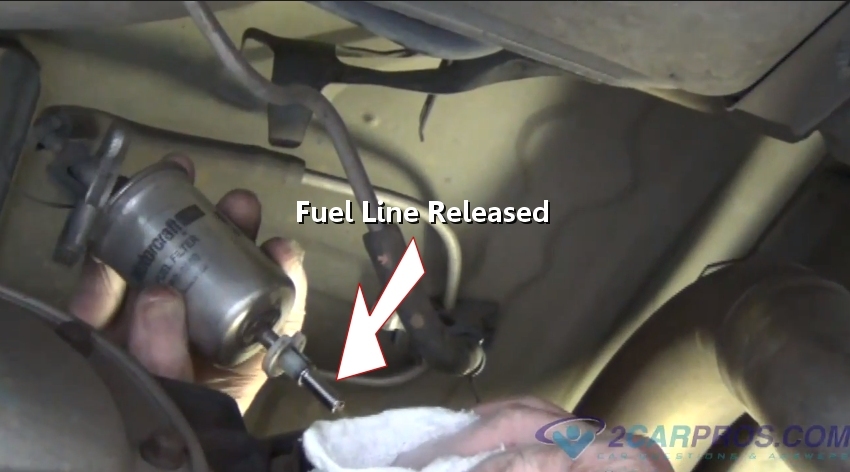
Finishes removing the fuel lines keeping mind fuel will leak out.
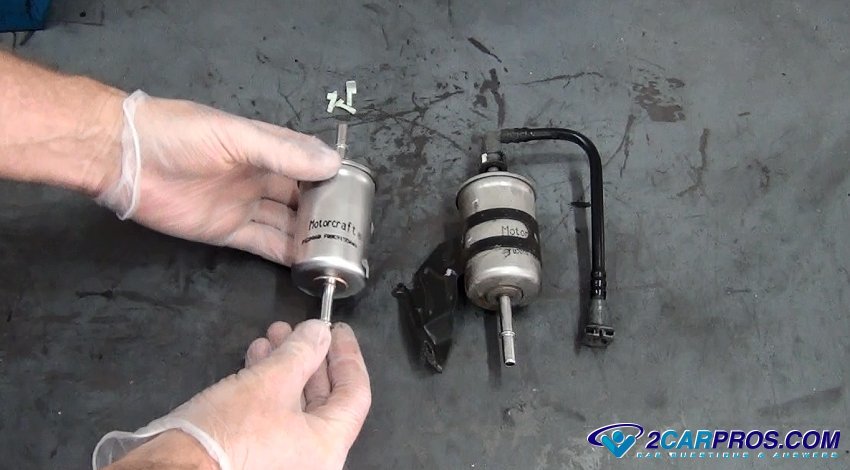
Match the old fuel filter to the new filter and install. Most fuel filters will have a directional arrow which must point toward the engine.
Primary filter replacement requires the tank to be removed in some cases and is the same job as replacing the fuel pump.
When starting the engine for the first time after filter replacement cycle the ignition key on without cranking the engine. This will fill the fuel filter and help pressurize the fuel rail. It might take a couple of tries to get the engine started.
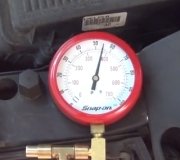
Check the fuel system and filter for leaks.
Let's see!
Release or remove the fuel lines, fuel may drip out be ready with a small container or shop towel.
Remove the fuel filter mount.
Once released pull the fuel line away from the filter, small amount of fuel will leak when line is removed, match and reinstall the new filter.
Watch the videos!
Diesel fuel filters and water separator replacement
Primary filter/strainer replacement
Inline fuel filter replacement
Fuel filter removal tool
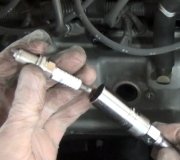
What's inside a fuel filter?
Questions?
Our certified technicians are ready to answer fuel filter questions for free. We hope you saved money and learned from this guide. We are creating a full set of car repair guides. Please subscribe to our 2CarPros YouTube channel and check back often for new videos which are uploaded regularly.
Article published 2023-06-14