A spark plug is a vital part of the engine's ignition system and is responsible for starting the combustion process. As a part of an engine tune up, spark plugs should be changed according to the manufacturer's instruction, which is generally between 40,000 and 70,000 miles. This is greatly due to the material a spark plug is made of such as titanium. Fortunately, spark plugs are easily changed and can be done with everyday tools.
What Goes Wrong?
When spark plugs are neglected the electrode can wear out causing a cylinder misfire, bad engine performance and poor gas mileage. Once removed, if one of the spark plugs electrodes is dark gray in color and the remaining plugs are light tan, that particular cylinder is having a problem such as low compression or a leaking fuel injector. A spark plug is constructed of a metal housing and a porcelain insulator which is very brittle and if broken or cracked will cause a misfire, so use care when handling.
Before You Begin
Start the engine and allow it to warm up for about two minutes, if the engine is hot allow it to cool down before starting the job. Use compressed air to remove any dirt and debris from the spark plug well before work begins. If your car has spark plug wires use small pieces of tape with numbers on them to help identify the plug wire location, or use a cell phone picture for reference. Only install manufacturer's recommended spark plugs, incorrect plugs can cause engine performance problems or internal engine damage.
Let's Jump In!
In the example below the engine is designed with a plastic cover for aesthetics,
this may pull straight off with clips or small screws or bolts which will facilitate
the removal. Here you can see the ignition coils exposed, in this example we are showing three
cylinders of a Toyota V6 engine designed with a COS system (coil over spark plug)
which uses no spark plug wires.
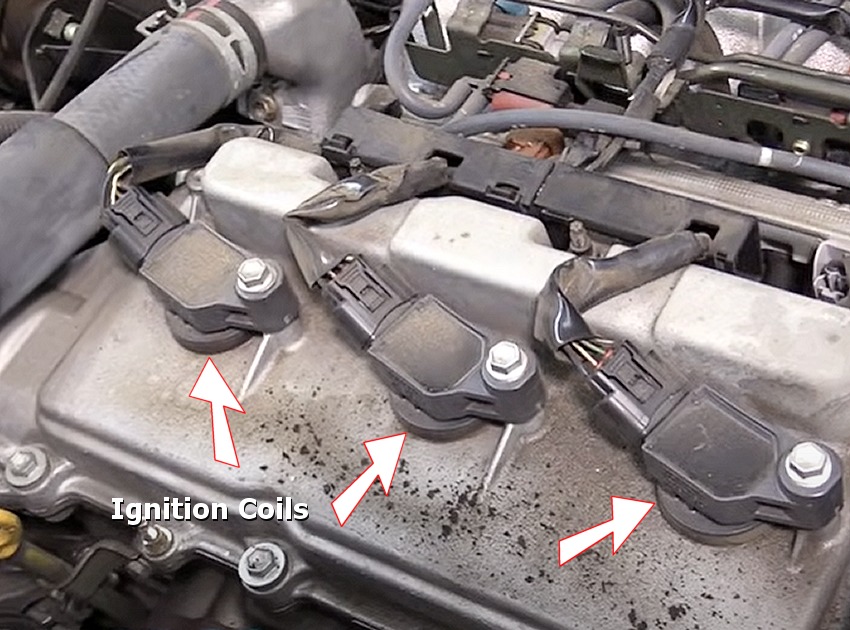
Although you may be able to remove the coils without disconnecting the wiring,
it makes for a cleaner job if you unclick the wiring connector safety and remove
the wiring connectors from each coil. Remove the coil mounting bolts which is usually
a 10mm as in this case, then remove the ignition coils and inspect for corrosion
or signs of arcing, replace as needed.
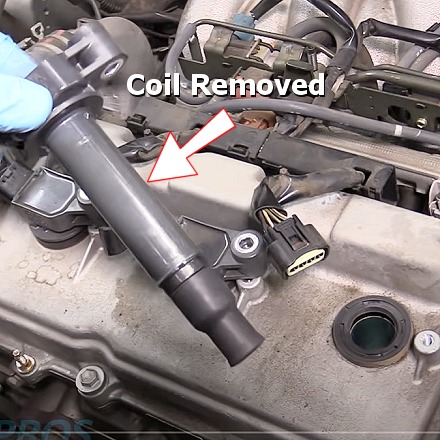
The spark plugs are now exposed and ready for replacement. Use a spark plug socket
which is lined with a rubber cushion to safely support the spark plug insulator,
a ratchet and extension is used to reach down inside the spark plug well.
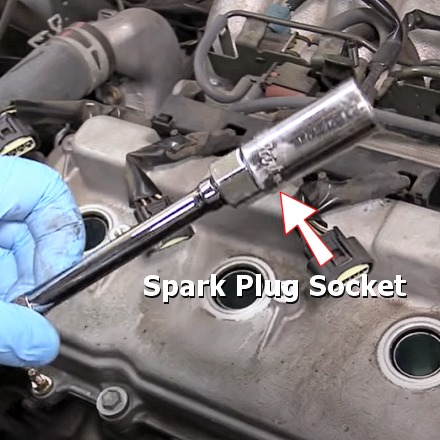
Insert the socket and extension down into the spark plug well. Ensure the socket
is completely on the spark plug before removal to avoid stripping the plug hex.
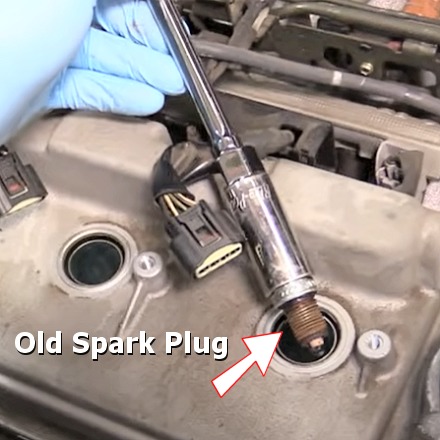
Grip the socket wrench firmly and turn the spark plug counterclockwise to remove
it from the cylinder head.

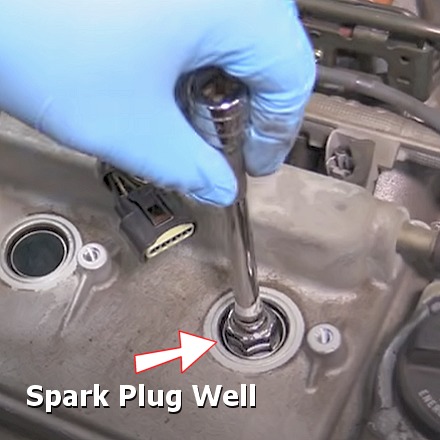
The old spark plug will be held in the socket via the rubber insulator, inspect
the plug for damage and wear. Be careful not to drop anything into the spark plug
well.
Watch the Video!
Please watch this video of the job being done, then continue down the guide to glean additional helpful information.
Installing New Spark Plugs
Compare the new spark plugs to the old ones to ensure the correct plug is being
installed.
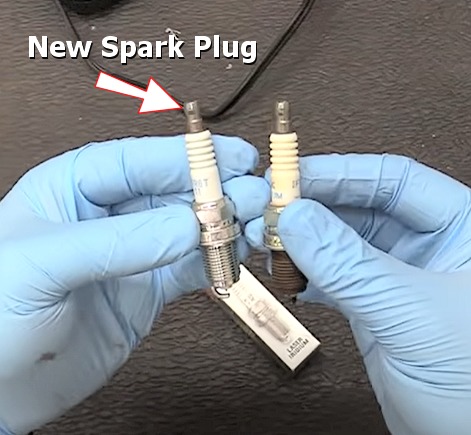
In most cases spark plugs do not need to be re-gaped as they are manufactured to the correct measurement for each application, but this gap should be rechecked and corrected in case it was altered during shipping, the video below will show you how. The gap is important because it determines the amount of resistance used to "time" the ignition system. An incorrect gap can cause low power and poor mileage.
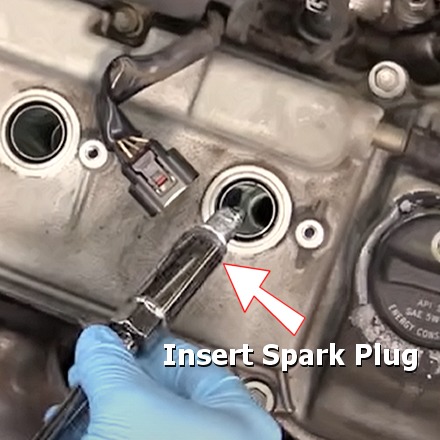
Before installing the new spark plugs, apply a thin layer of lubricant (anti-seize)
to avoid thread galling (stripping). Insert the spark plug into the socket while
ensuring a snug fit, the spark plug shouldn't fall out of the socket on its own.

Gently lower the spark plug down into the plug well (do not drop), continue installing
the spark plug while threading it in by hand.
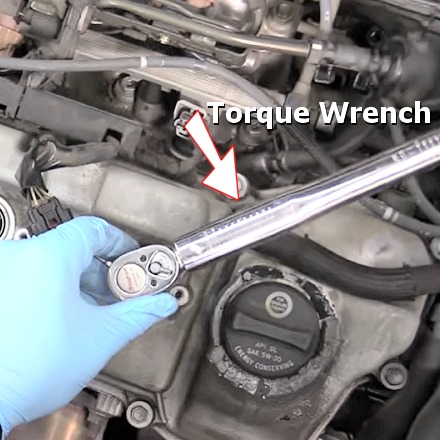
Attach a ratchet to the extension and tighten the plug until snug, then use a
torque wrench to tighten the plug to the correct specification, in this case it
was 19 foot pounds but it will vary, so obtain the correct manufacturers specifications
or ask the 2CarPros communityto help (free), do not over
tighten the spark plug.
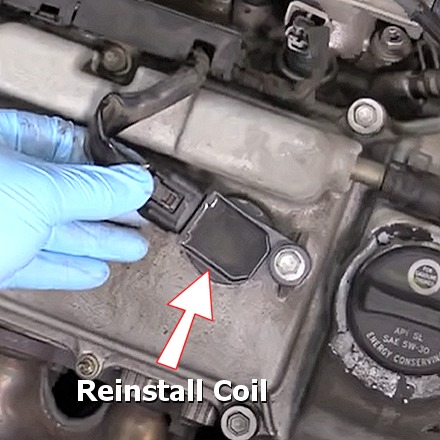
Reinstall the coil into the plug well, making sure the end of the coil is over
the spark plug. After installing the ignition coil, reinsert the mounting bolts
and tighten to spec, which in this case was 7 foot pounds. Reinstall the coil electrical
connector and repeat this process throughout the remaining engine cylinders and
reinstall the engine cover back into place. Start the engine and observe its performance,
if obvious problems exist, retrace the previous steps to discover a damaged spark
plug, ignition coil, or plug wire not installed correctly.
Spark Plug Replacement Videos
- Chevrolet Avalanche
- Chevrolet GMC Trucks and SUVs
- Chevrolet Sonic 1.4L
- Dodge Grand Caravan
- Ford Explorer
- Ford F-150 3.5L Eco Boost V6
- Ford F150 5.4L
- Ford F150 4.6L
- Ford Focus
- Ford Fusion 2.5L
- Ford Mustang 4.6L
- GMC Sierra 5.3L
- Honda Civic 2005-2011
- Honda Civic
- Honda Element
- Hyundai Sonata
- Mercedes Benz C230
- Mercedes Benz ML500
- RAM 1500 5.7L
- Toyota Corolla
- Toyota Highlander V6
- Toyota Rav4
- Toyota Prius
- Toyota Tacoma
- Toyota Tundra V8 4.7L
- Ford Escape V6 3.0L
Questions?
If you have a car repair question, you can ask the 2CarPros community for help. We hope this guide helped you understand the repair. Please visit our 2CarPros YouTube channel for more helpful repair videos.