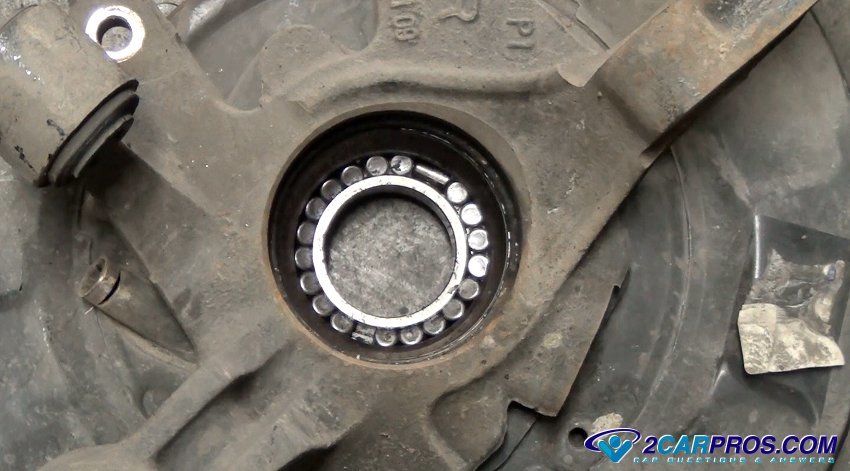
A CV axle bearing incases an inner and outer roller bearing set into one outer race and two inner races with seals at either end. This bearing is used when a car is designed with front or rear wheel drive CV axles. Made of high strength hardened metal a CV bearing is finely machined and capable of withstanding heavy loads while providing a rolling motion and is pressed into the center of the spindle which is held in place by a large C clip. The CV axle is placed through the bearing which rotates allowing the car wheels to turn under the power of the engine. The wheel is bolted to the axle hub which is attached to the end of the CV joint. Once disassembled, this bearing is removed by pressing the bearing from the front or rear spindle.
What Goes Wrong?
Metal pieces start to fracture from the bearing rollers when a failure starts to occur. This contaminates the remainder of the bearing which causes an accelerated failure. When this happens it is usually accompanied by a grumble or whirring sound while the car is being driven and may change in pitch while the car is in a corner or just beginning a turn. The wheel may become loose on its axis causing brake performance issues as the brake pads are pushed from the brake rotor causing an air gap in which case the brake pedal will need to be pumped for the brakes to operate.
SPONSORED LINKS
Before We Begin
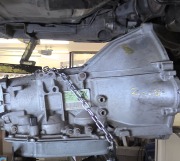
Before you begin working park your car on level ground with the transmission in park. You will need to lift up your car with a floor jack and secure it using jack stands for safety and then remove and reinstall the wheel. Never get under the vehicle unless the jack stands are in place.
The brake caliper will need to be removed along with the caliper mount and the brake pads.
If you are not replacing the brake pads then you don't need to open the bleeder or push the piston back into the caliper for this job.
Let's Get Started
1. Remove the CV Axle Flange Nut
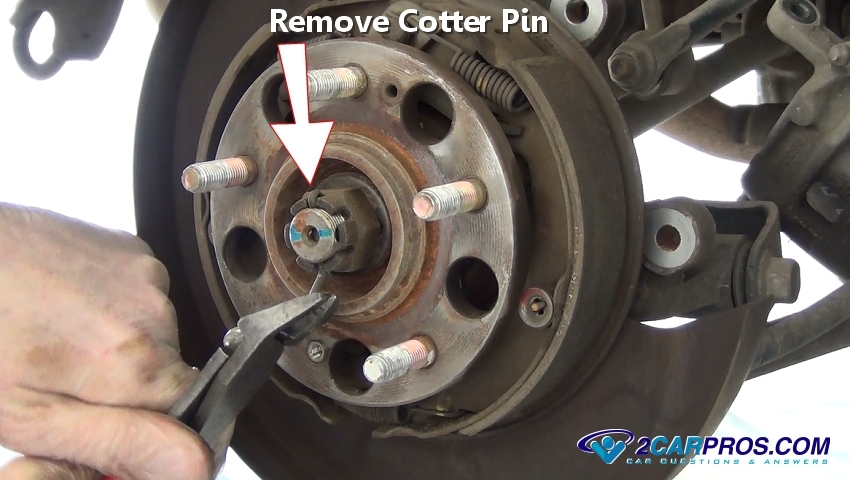
Once the steps in the above guides are complete you will end up with the vehicle looking like this. This repair is in the rear so you will have the emergency brake shoes present which wouldn't be there if the job is being done in the front. Use a pair of pliers or dikes to remove the bearing hub nut cotter pin. If air tools are not being used you will need to do this step with the car still on the ground to hold the wheel from spinning while loosening the nut. These bolts are fairly tight so you will need to use a breaker bar to loosen it.
SPONSORED LINKS
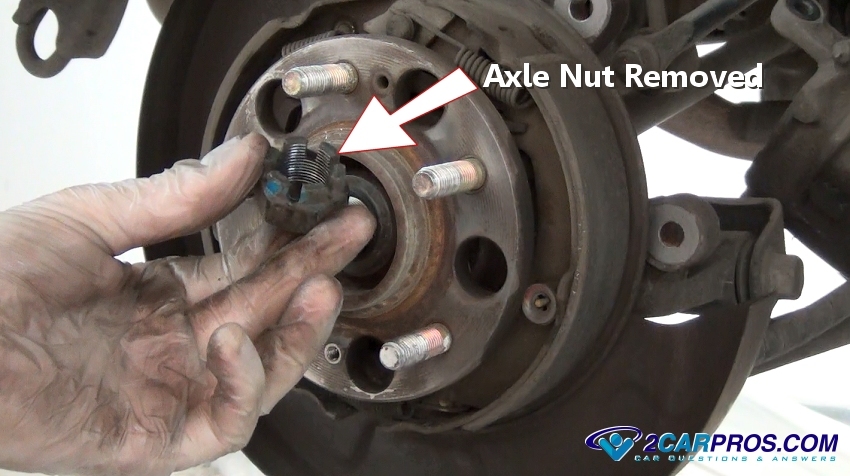
Using a large socket remove the axle nut from the bearing hub, we are using air tools so it makes the job easier. They have rechargeable impact guns that don't use compressed air which cost about $70.00 on Amazon.
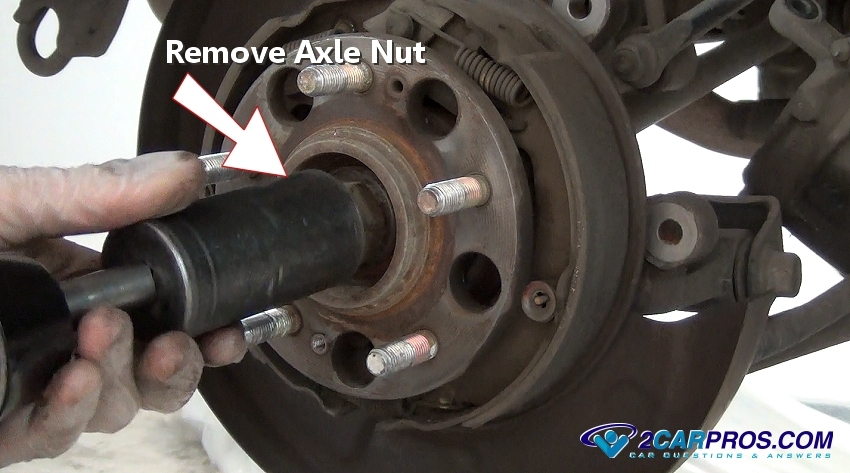
Once the nut is broken loose you can remove the nut completely.
SPONSORED LINKS
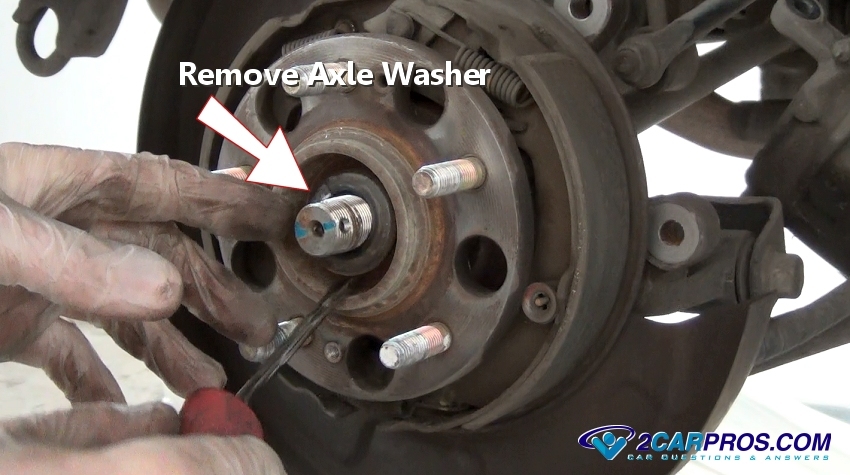
This will expose the lock washer which will still be on the CV axle against the wheel hub. Use a small screwdriver or pick to help remove the washer.
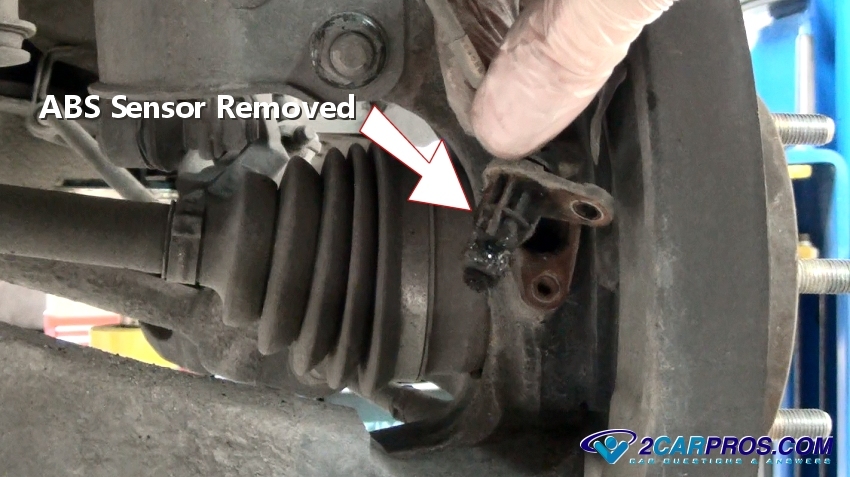
2. Remove the ABS Sensor and Parking Brake
If the vehicle is equipped with ABS the wheel speed sensor will need to be removed either at the mount or at the electrical connector. This will ensure the sensor does not get damaged during the repair. After removing the mounting bolt grasp the sensor and remove it you might notice fine metal particles over the magnetic end of the sensor. This is from the bearing failure and should be cleaned off before reinstalling the sensor.
3. Remove the Parking Brake Cable
SPONSORED LINKS
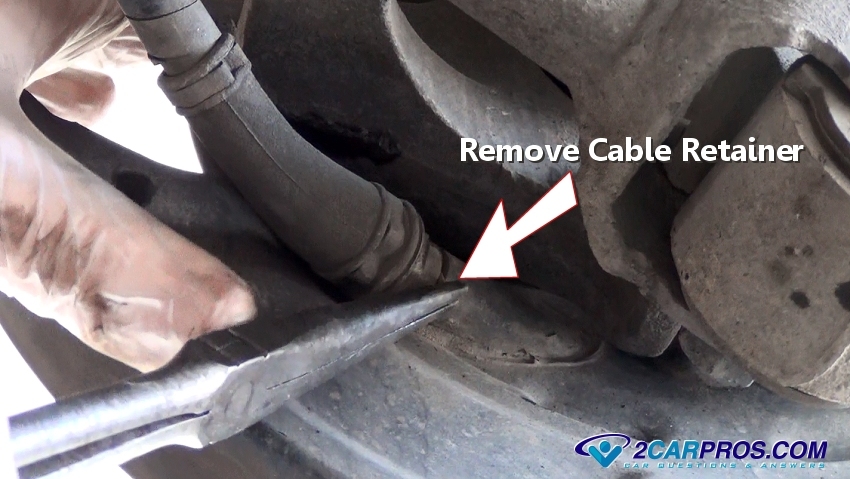
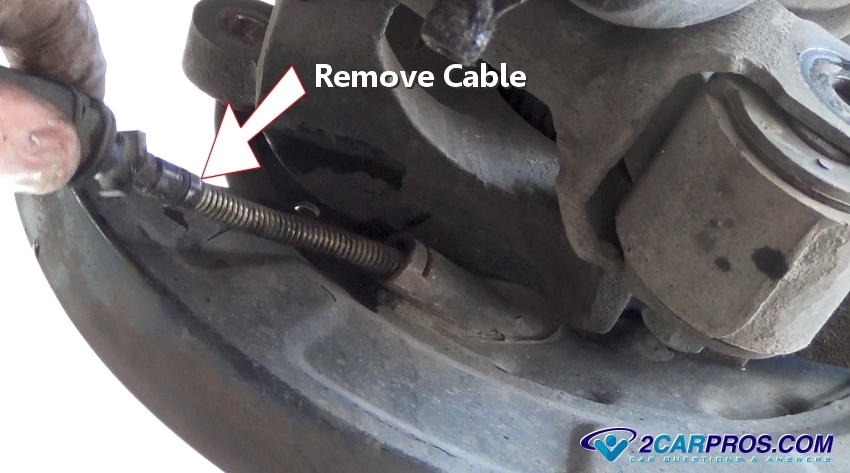
If you are doing this job on the rear of the car you must remove the emergency brake shoes. Once the shoes and springs have been removed you must remove the cable from the backing plate. Locate and remove (release) the cable housing retainer clip. This step will vary by way of a multi fingered retainer which is released from the outside of the backing plate which is found mostly on American built vehicles.
Grasp the emergency brake cable firmly and pull it outward from the backing plate. Pliers can be used to help in the removal.
4. Remove Suspension Bolts
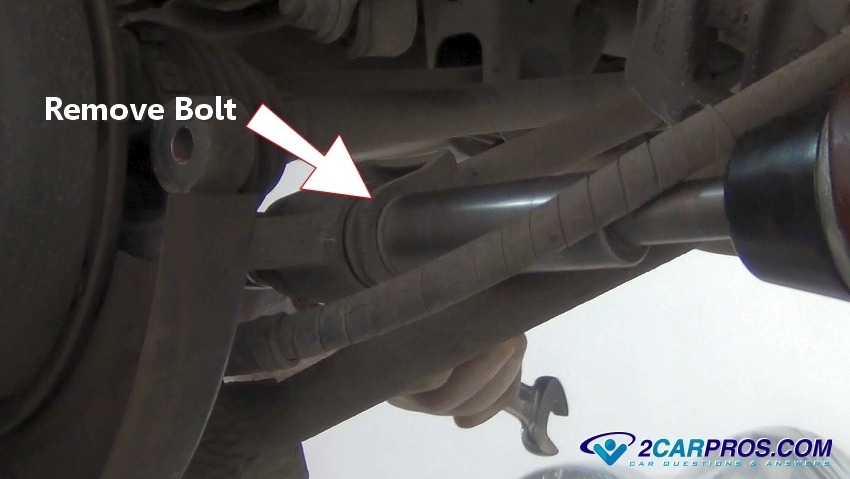
While using a wrench to back up the rear swing arm nut use a socket to remove the through bolt.
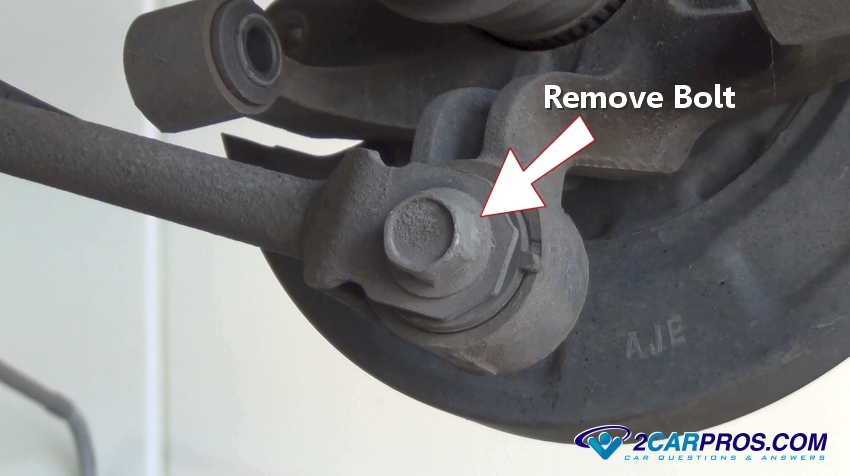
Remove the forward swing arm bolts from the bearing housing knuckle.
SPONSORED LINKS
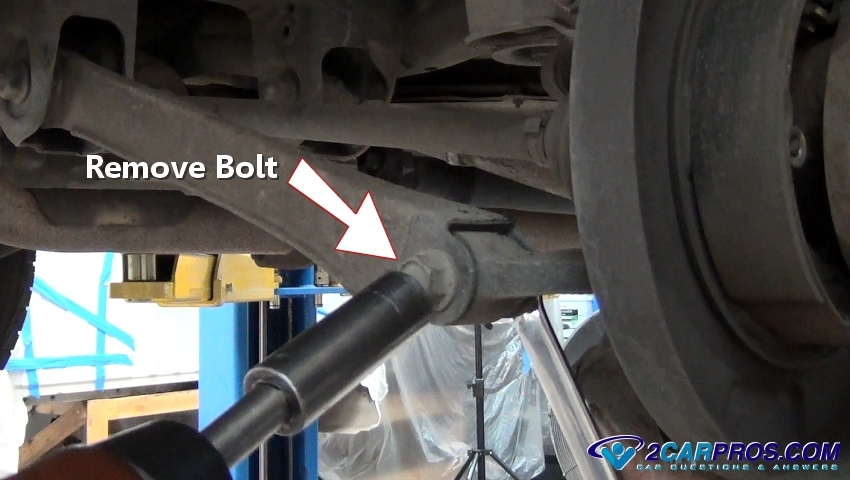
Locate and remove the trailing arm mounting bolt from the lower spindle mount.
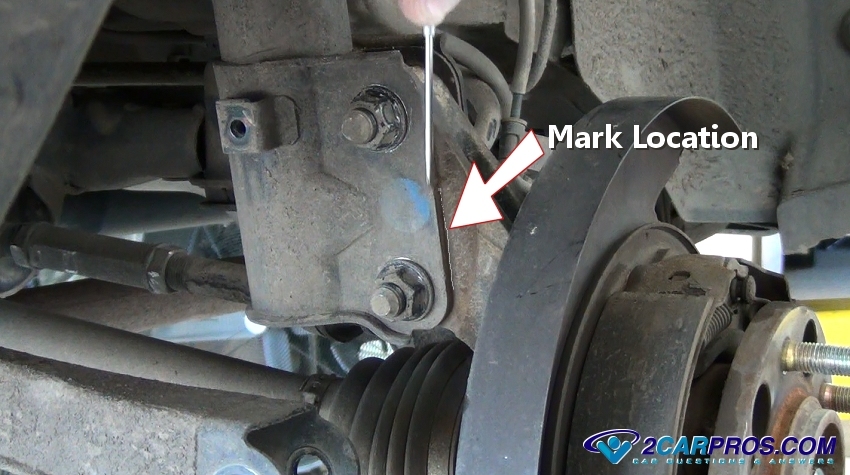
Use a sharp object such as a scribe mark the location of the strut mounting bolts so they can be reassembled in the same location.
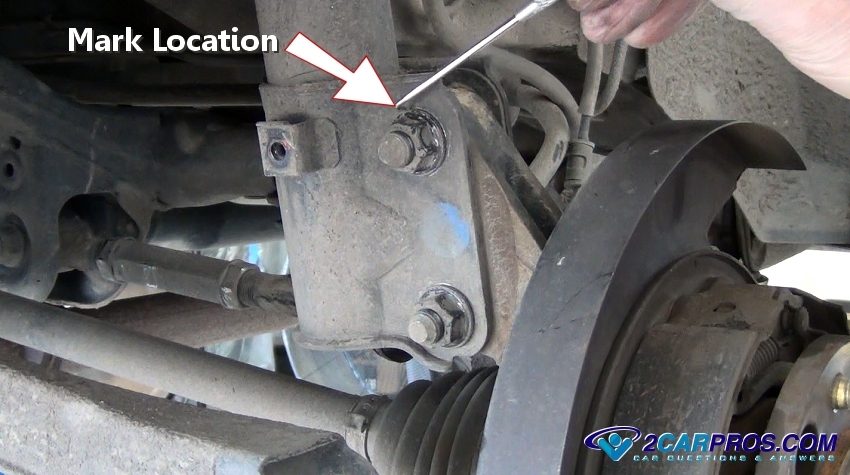
Mark the strut to spindle alignment which also helps preserve the rear camber adjustment if any (alignment).
SPONSORED LINKS
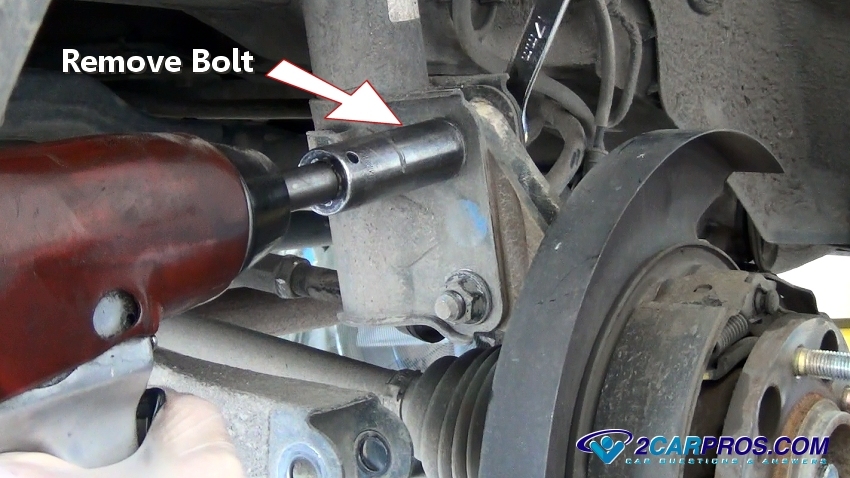
Use a socket and wrench to loosen and remove the strut mounting bolts. Leave the top bolt in without the nut. The spindle can become loose so keep your hands on it.
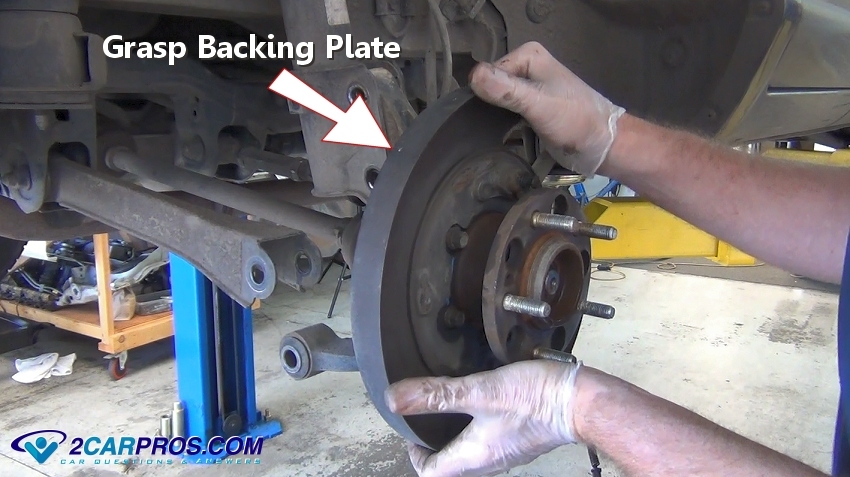
5. Remove the Spindle
After all mounting bolts have been removed grasp the bearing housing and spindle and work it outward and away from the axle. The CV joint snout can get stuck in the bearing hub and may need to be pushed outward through the hub. Once the spindle is loose there are two options. Either you can take the unit to an automotive machine shop to replace the bearing or you can press the CV axle bearing out and replace it yourself.
6. Reinstall the Spindle
SPONSORED LINKS
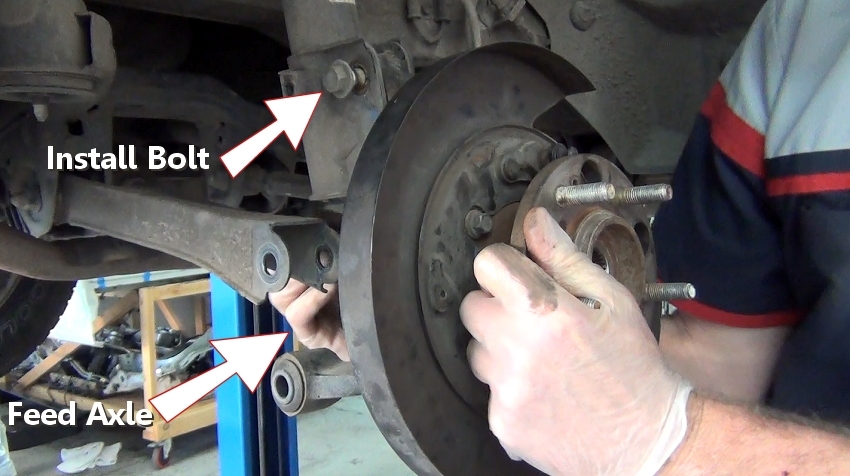
After the new bearing has been installed lift the assembly into place. Slide the upper strut bolt through the spindle bolt hole while feeding the axle through the wheel hub. Spin the hub to help align the axle splines.
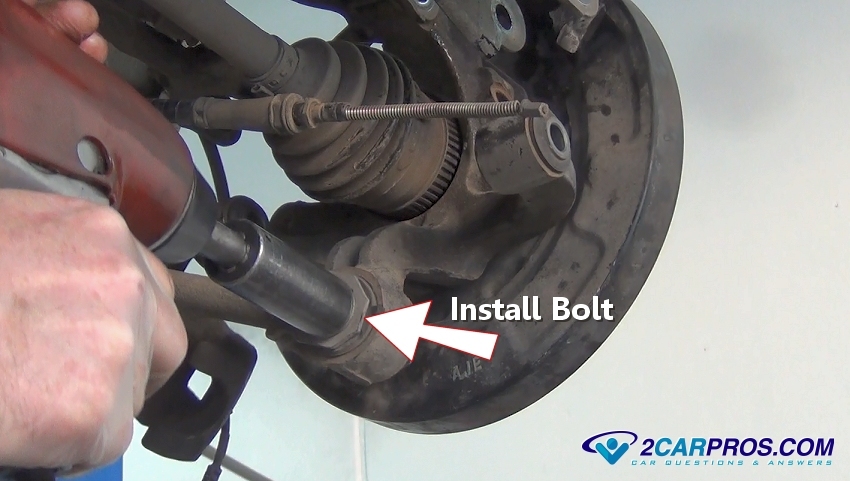
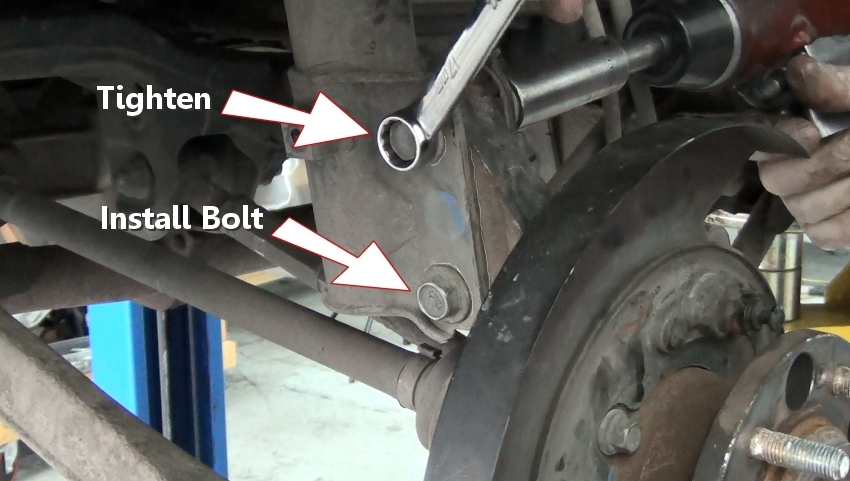
Insert and tighten the lower trailing arm bolt using a wrench or socket. This bolt should be fairly tight, about 70 foot pounds of torque. You can use thread lock to ensure it doesn't come loose.
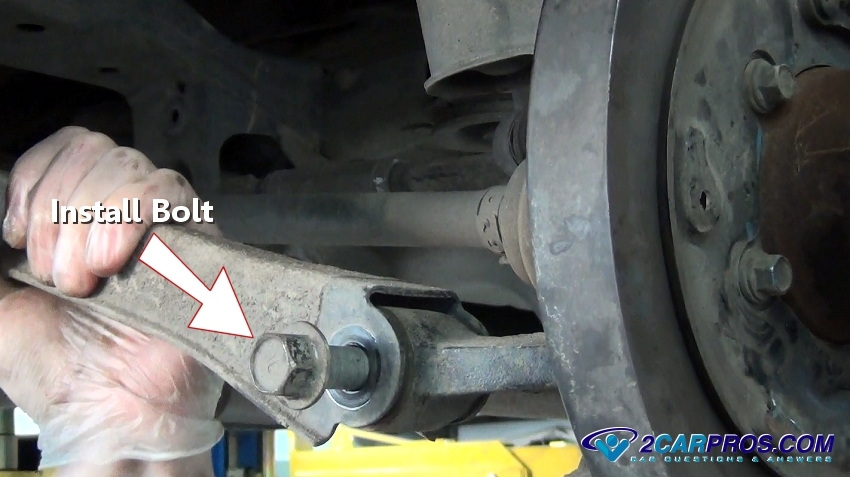
Then align the rear swing arm bolt hole and install and tighten the bolt and nut assembly.
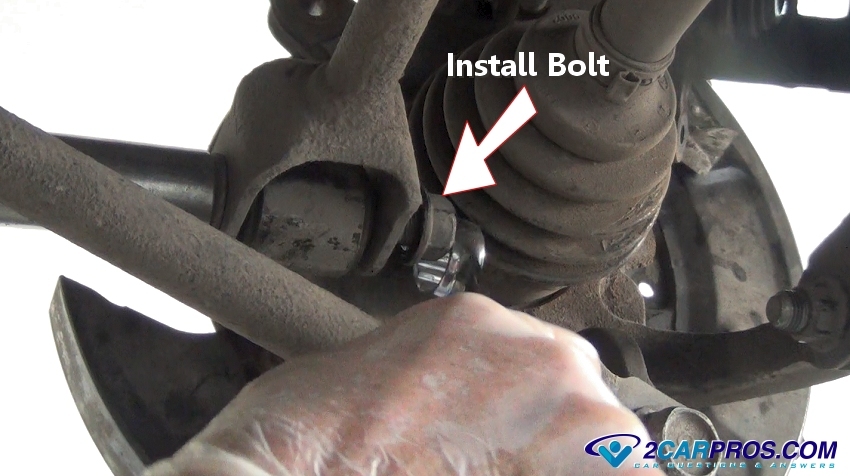
Install and tighten the front swing arm bolt and nut.
SPONSORED LINKS
Finally install the bottom strut mounting bolts and nuts. Tighten both while keeping the scribed line in alignment with the strut to retain the camber adjustment. This should conclude the suspension arm reassembly portion of the repair. Double check all suspension arm bolts for tightness to ensure proper operation.
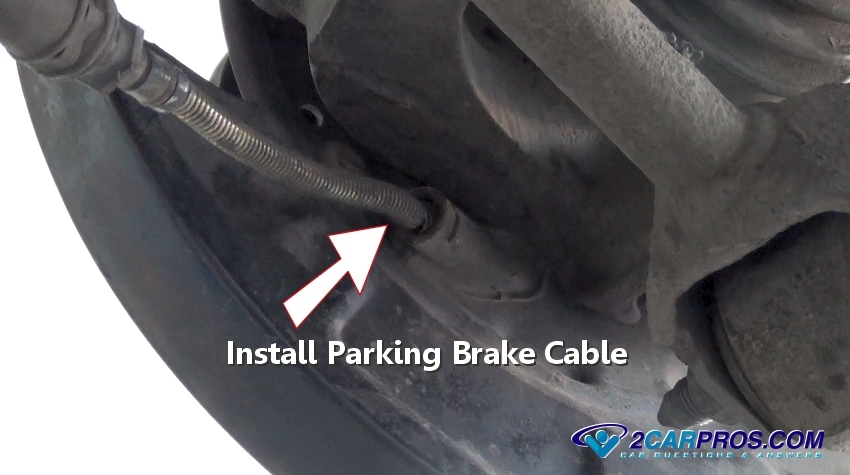
7. Reinstall Parking Brake Cable
Install the parking brake cable into the backing plate housing and reinstall the retainer clip if equipped. On some designs the cable simply pops into place and is held in position by spring loaded retainer clips.
SPONSORED LINKS
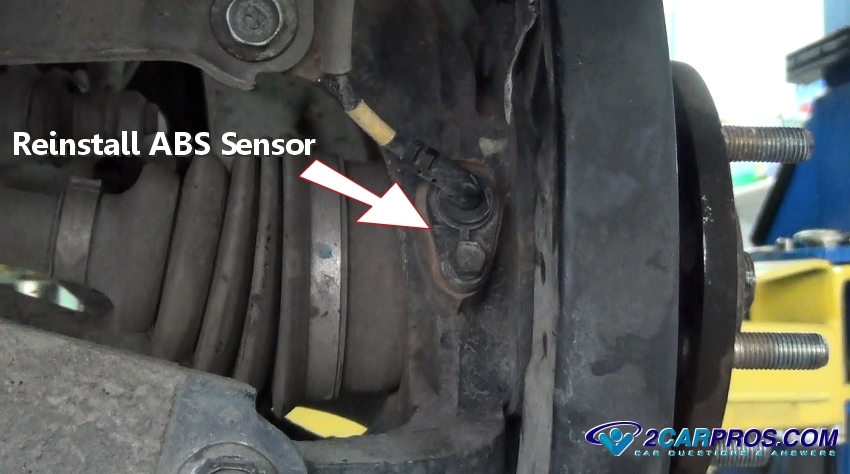
8. Reinstall ABS Sensor
After cleaning the sensor free from metal particles install it back into the spindle. Then install and tighten the mounting bolt and reattach the wiring harness into the retainer clips.
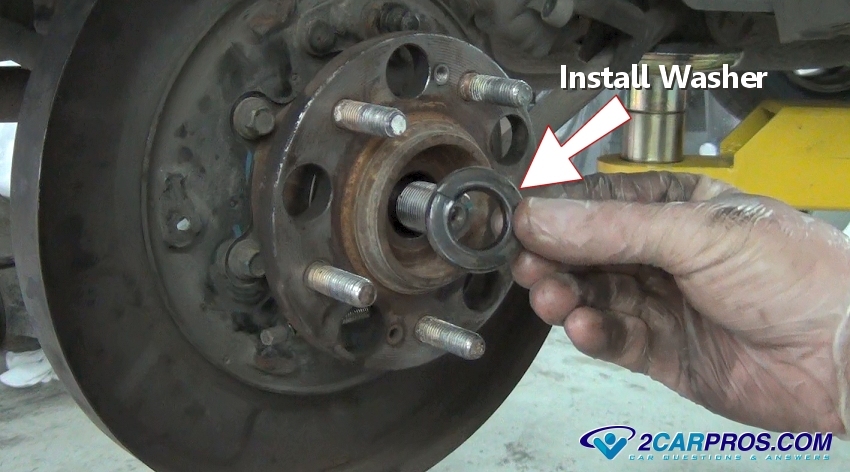
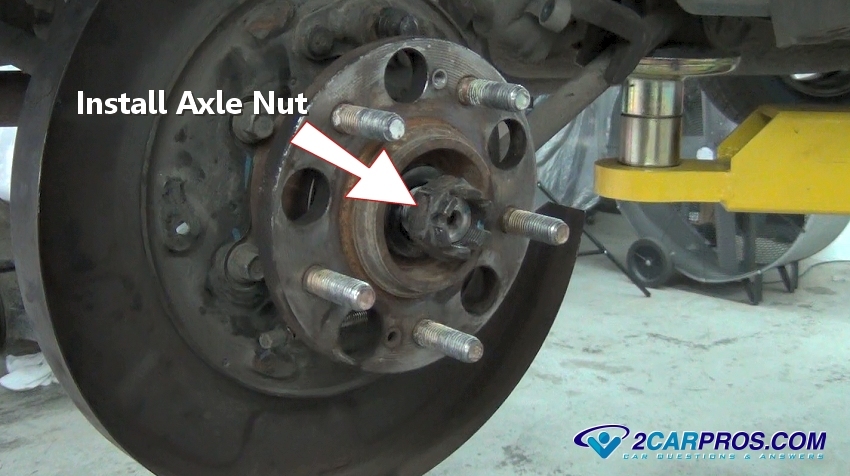
9. Reinstall Axle Nut
After all suspension bolts are tight reinstall the axle wheel hub washer. This washer is unidirectional and can be install either way. Sometimes these washers can be damaged in which case it should be replaced.
SPONSORED LINKS
Install the axle nut by hand to avoid cross threading.
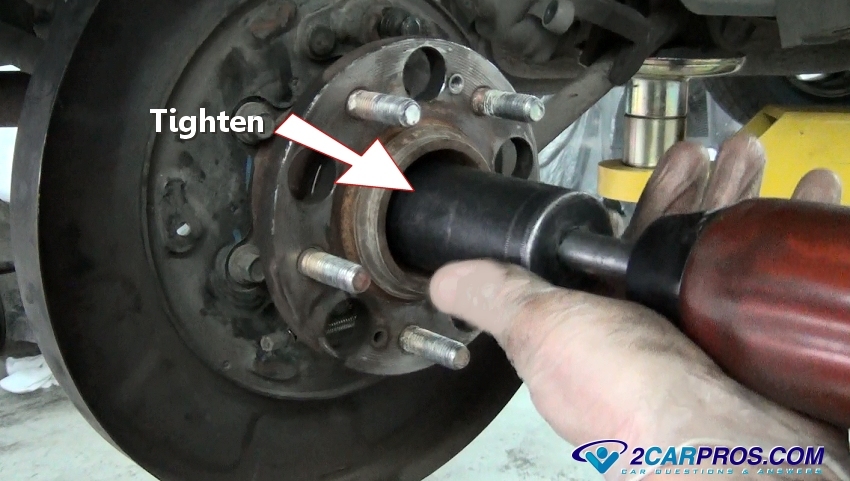
Using a torque wrench tighten the axle nut to manufacturers specifications (usually 120-160 torque pounds). This can be completed once the tire is on the ground to help hold the hub in place.
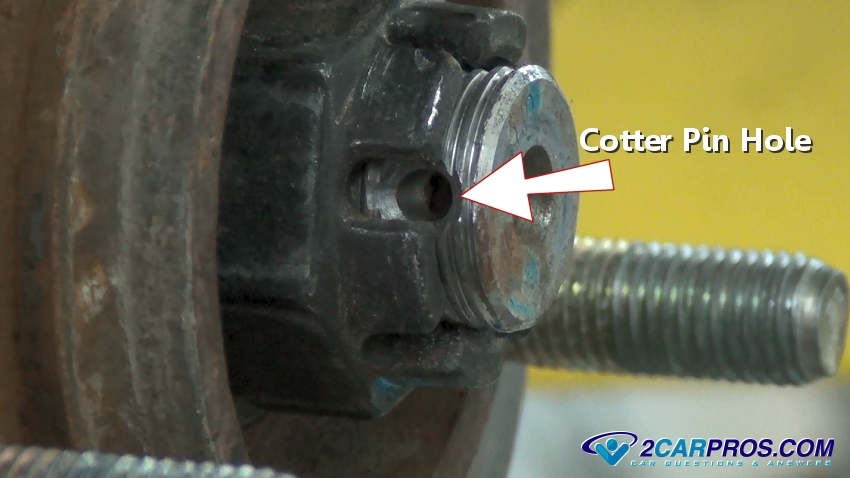
Once the nut gets close to the desired tightness align the cotter pin holes for easy installation while reaching the proper torque.
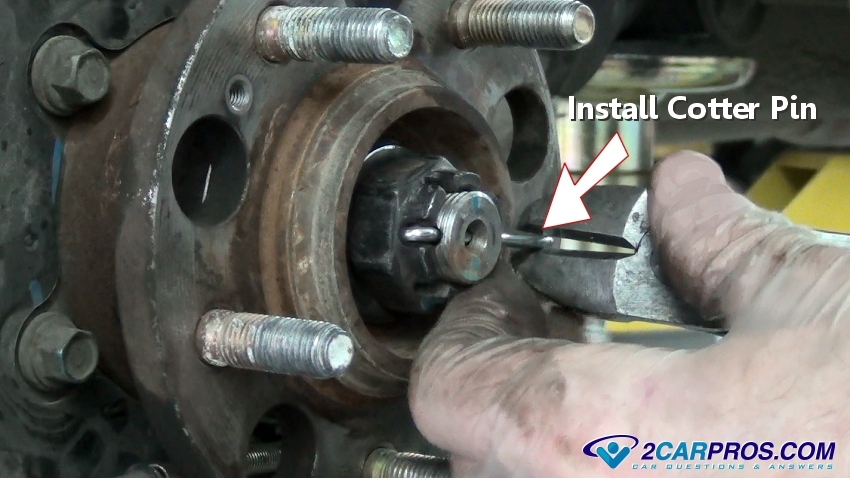
Insert a new cotter pin and use dikes to bend and cut the long side of the pin to hold it in place. Continue to reinstall the parking and disc brake assembly. Also reinstall the wheel and torque it to manufacturer specifications and you are all set.
Questions?
Our certified technicians are ready to answer CV axle bearing questions for free. We hope you saved money and learned from this guide. We are creating a full set of car repair guides. Please subscribe to our 2CarPros YouTube channel and check back often for new videos which are uploaded regularly.
SPONSORED LINKS
Article published 2022-03-12
SPONSORED LINKS

Axle Seal Replacement

Axle Bearing and Seal Replacement