An automatic transmission is designed to transfer power form the engine to the drive wheels while shifting gears automatically. The following is a guide showing the step by step procedure on how to remove and reinstall the transmission safely.
What Goes Wrong?
An automatic transmission is designed with many internal parts which over time can fail causing the unit to malfunction. In this case the unit must be removed for a rebuild or replacement. There are other reasons for removal as well such as a rear main seal or engine oil pan gasket replacement.
How Much Does it Cost?
A shop will charge "book time" on a job like this which can range from 5 to 9 hours depending on the vehicle's configuration. When doing this job yourself 4 jack stands, a hydraulic jack and a set of tools are needed along with a transmission jack rental from the local auto parts store. For exact labor times and instructions on specific models please visit AllData DIY or ask one of our experts to help.
SPONSORED LINKS
Let's Jump In!
Start with the vehicle on level ground and safely up on four jack stands, be sure to have plenty of clearance to work under the vehicle. Have the negative battery cable disconnected. A fluid catch basin will be used as well to gather any fluid that might spill during the job. Also, put the vehicle in neutral with the parking brake off.
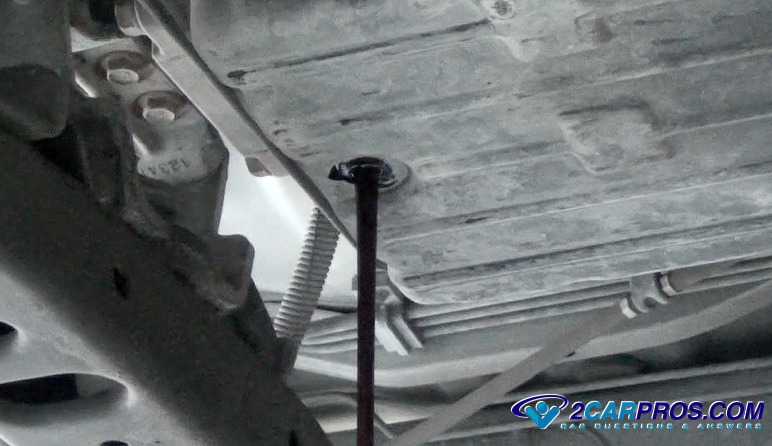
Start by removing the
transmission drain
plug to help drain the fluid from the unit, have the fluid catch basin ready.
If a drain plug is not featured, loosen the transmission pan and allow the fluid
to drain, once complete retighten the pan.
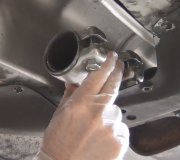
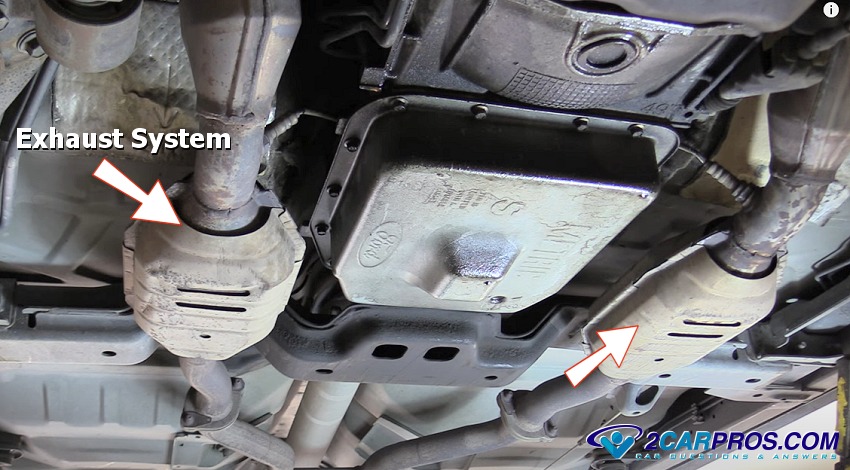
Spray the exhaust mounting bolts with WD40 or equivalent to aid in the
removal of the exhaust system. This
will add clearance helping to make the job easier and more accessible. Start by
removing the oxygen sensors or wiring connectors, once the system is removed set
the system off to the side.
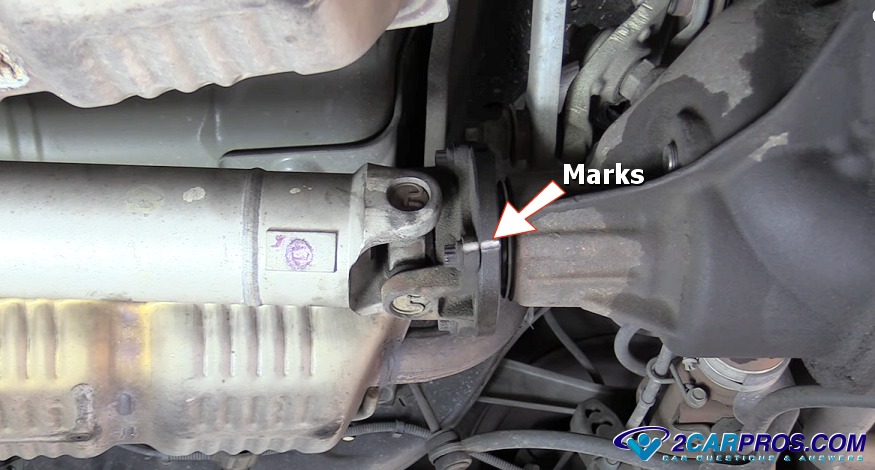
Use a marker or piece of chalk to scribe a line to help keep the orientation
of the driveshaft in relation to the differential. This helps keep the driveline
balanced which avoids vibrations while the vehicle is operating. Remove the bolts
from the driveshaft and gently side it out of the transmission tail shaft.
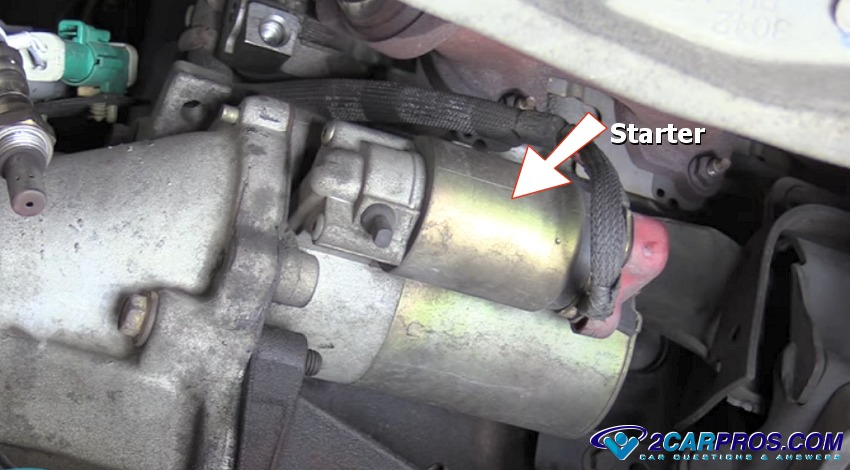
Remove the starter motor,
this is why the battery needs to be disconnected to avoid electrical sparks. There
will be an upper and lower mounting bolt or nut, also use care when removing the
battery cable and trigger wires to not crack the solenoid. Carefully remove the
starter and set it to the side.
SPONSORED LINKS
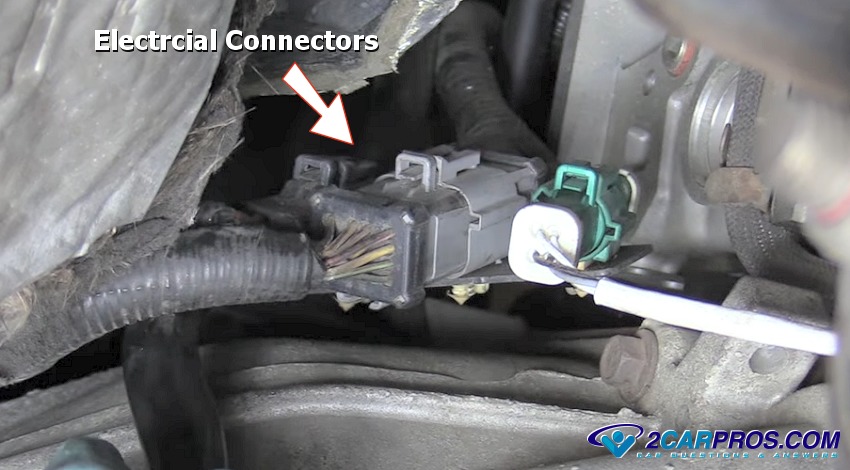
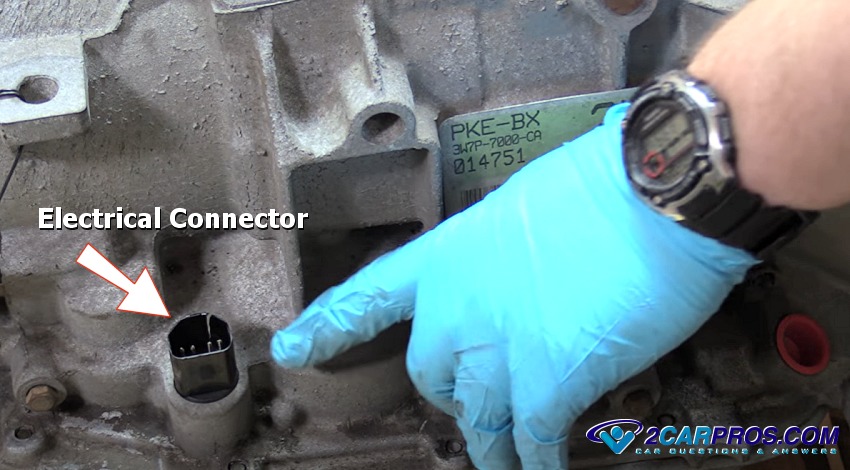
There will be an electrical connector which controls the transmission and various
sensors which will need to be disconnected. These connectors can be mounted on the
transmission or slightly away somewhere in the wiring harness.
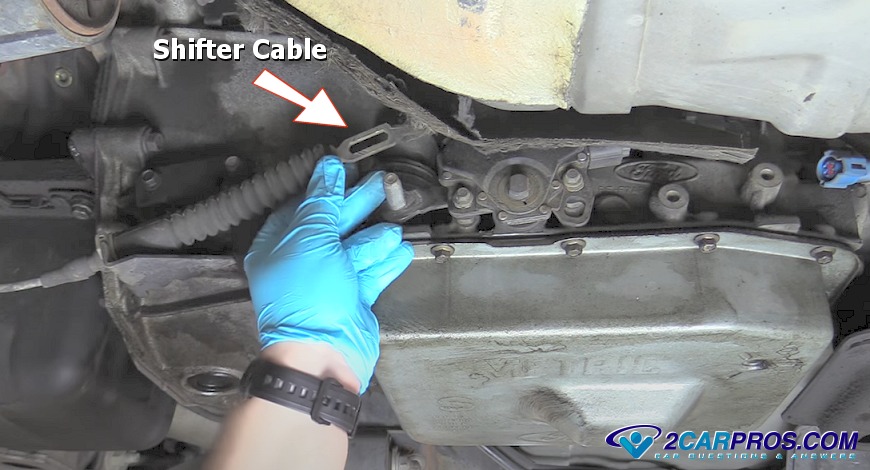
On the drivers side there will be a shifter cable which comes from the inside
of the car that controls which gear you are in. Remove the mounting clips or bolts
to disconnect the cable (electrically shifted vehicles do not have this feature).
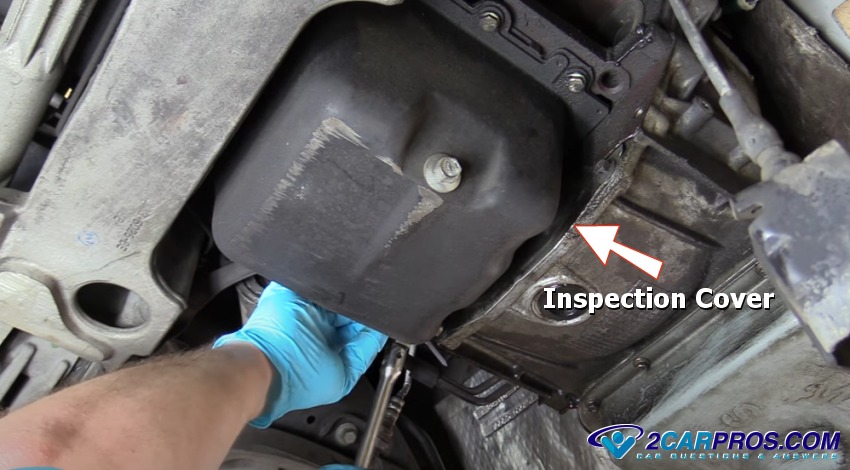
There is an inspection cover which is used to access the torque converter mounting
bolts or nuts that needs to be removed. Some transmission will have a torque converter
cover which serves the same purpose.
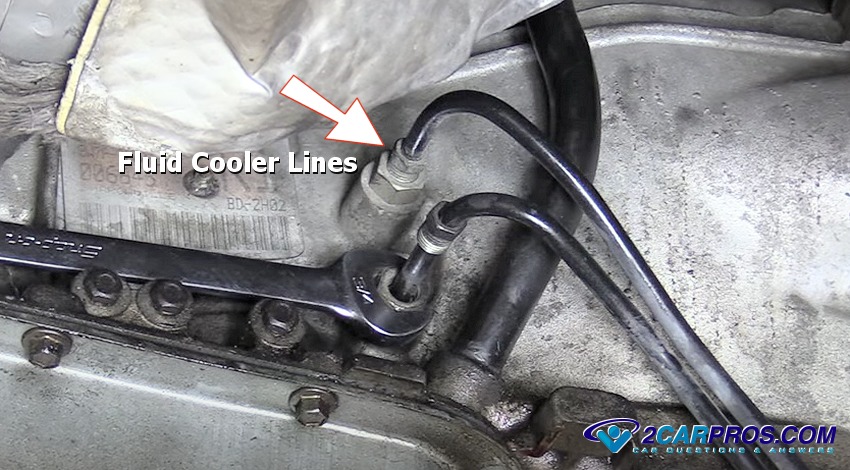
Fluid cooler lines run from the transmission to the radiator. Use a
line wrench (not shown)
and back up the line fittings with a normal wrench (shown), remove both lines, a
small amount of fluid may drip out.
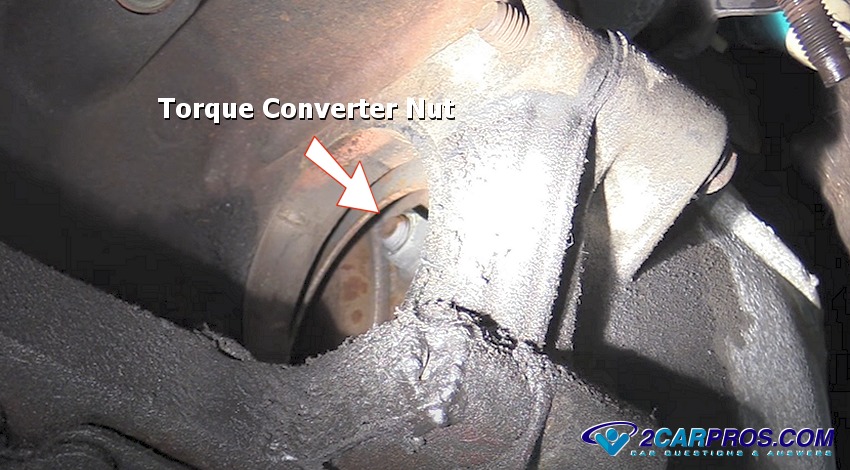
The transmission torque converter is attached to the flex plate of the engine.
This is achieved by nuts or bolts, first remove the access port (if equipped). If
you don't see the nuts or bolts, a breaker bar can be used at the front of the engine
(balancer bolt) to rotate the engine (clockwise only) until you can see the fasters,
there will be three or four, continue until all are removed.
SPONSORED LINKS
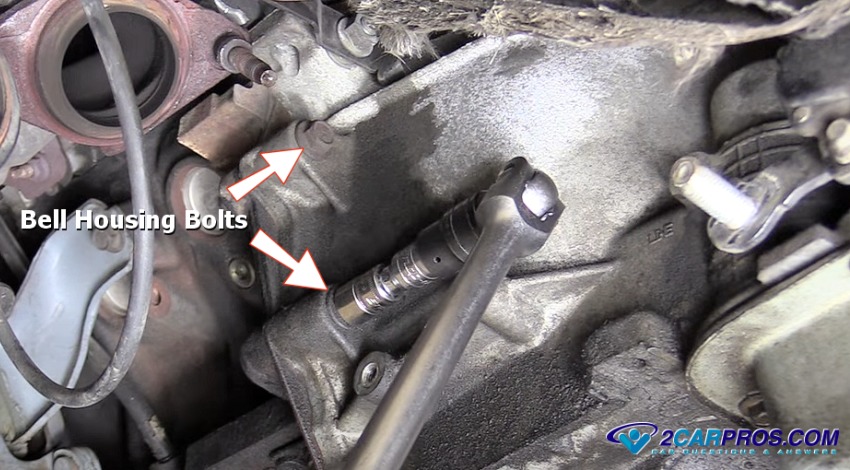
Bell housing bolts are used to hold the transmission to the engine, there will
be two on the left side, two on the right side and two on the top (most cases).
These must be removed or loosened in stages, loosen the bottom bolts one on each
side, then remove the remaining bolts on each side. The top bolts we will address
further down this guide.
Watch the Transmission Removal Video!
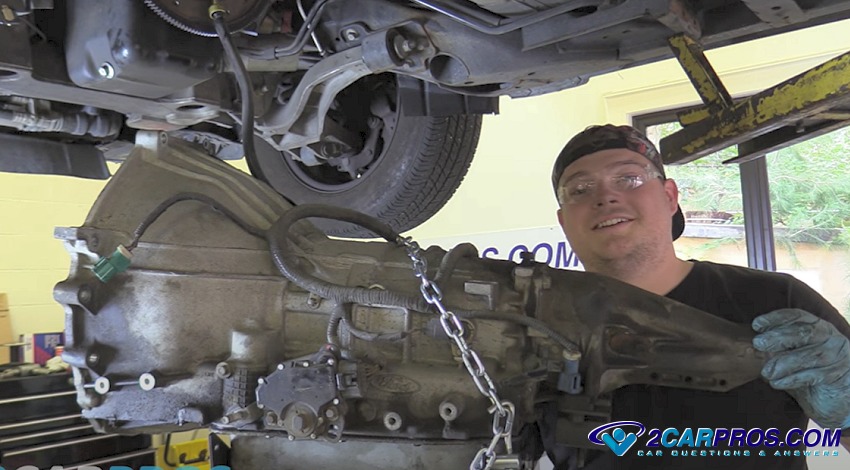
When completed continue down the guide for additional helpful informationA transmission jack will need to be used at this point of which there are two
types. The one featured in this guide is the type that is used with a car lift,
most likely the one you will be using is a floor model which is much shorter.
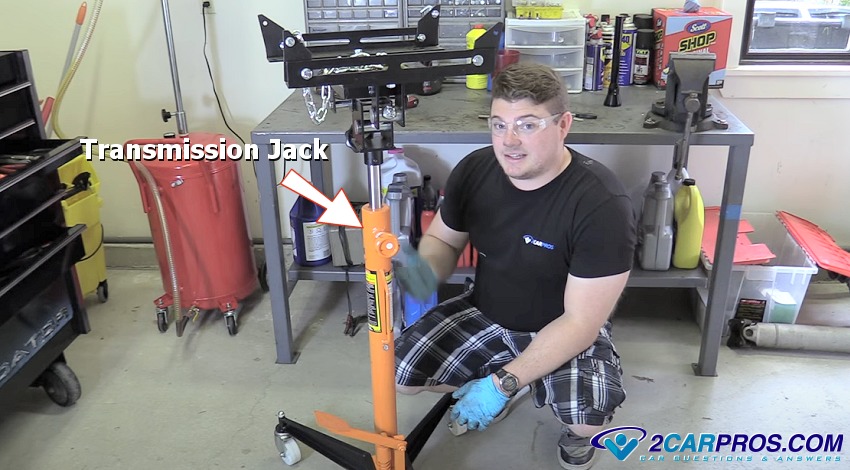
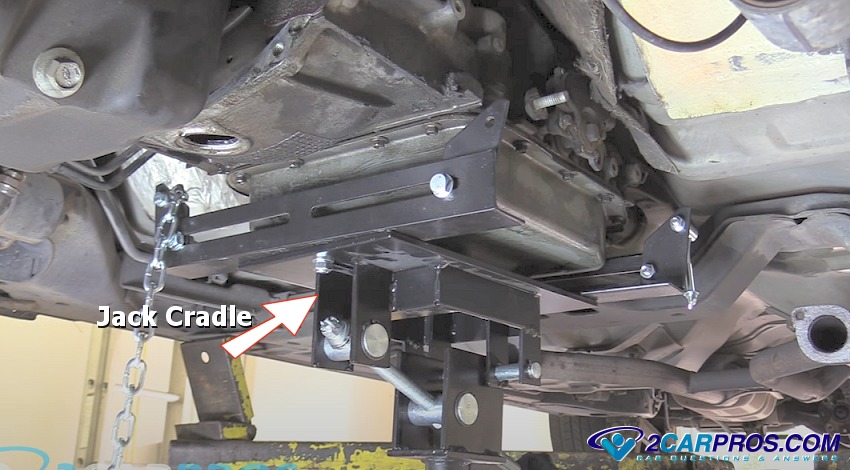
Position the jack cradle under the pan and secure it using a chain or strap which
will keep the transmission from wandering around on the jack while maneuvering it
during removal. Raise the transmission slightly to take the weight off on the crossmember.
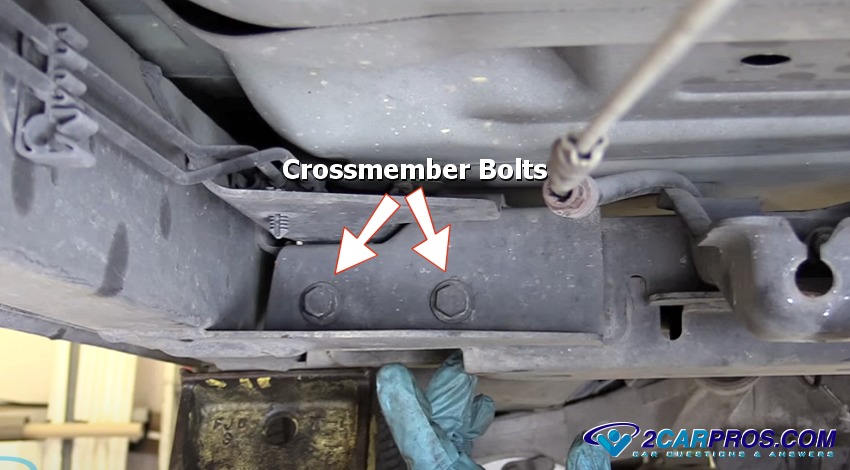
The rear of the transmission is mounted to the vehicle by the transmission cross
member and transmission mount. Remove the mounting bolts both at the frame and at
the transmission mount and remove the crossmember.
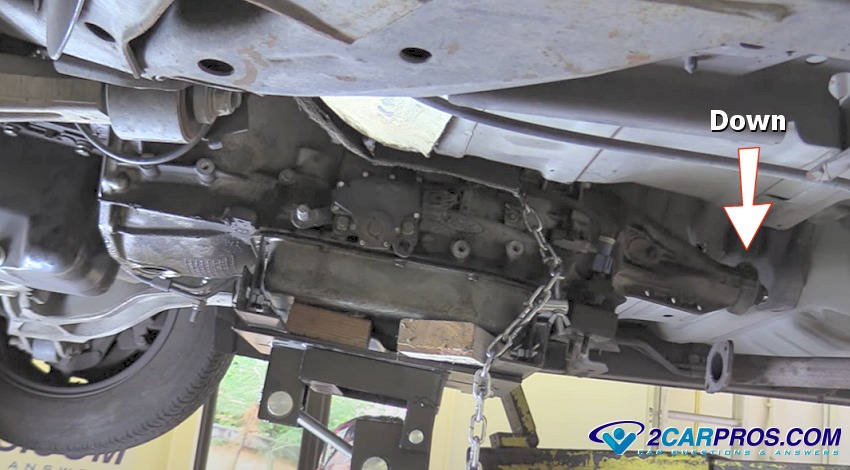
Now, we can lower the rear of the transmission which will help us gain access
to the top two transmission bell housing bolts.
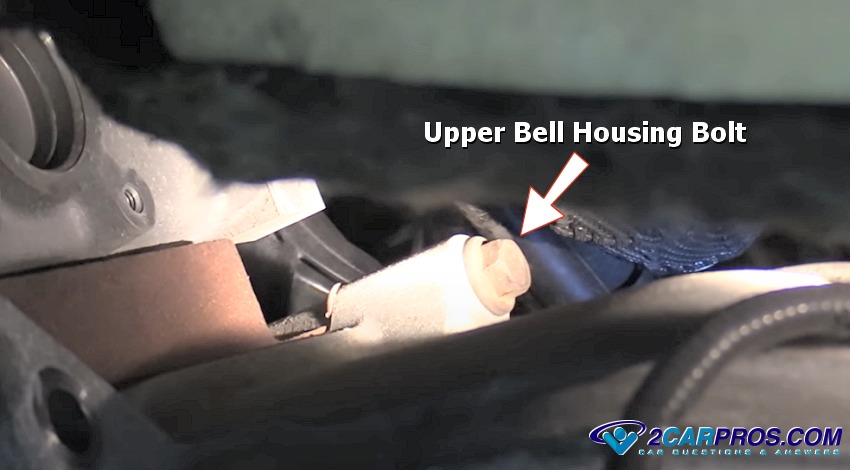
Here is one of the two bolts, use a long 1/2 inch extension and a universal impact
socket, loosen and remove the bolt, repeat this procedure for the opposing top bolt
as well.
SPONSORED LINKS
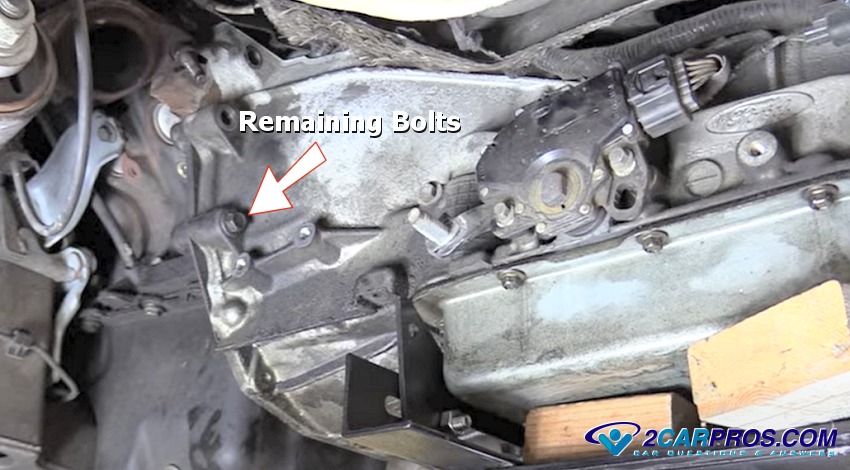
These are the last remaining bolts before the transmission will come out from
the vehicle, one on each side, remove the bolts and wiggle the rear of the transmission,
it should break loose from the engine and be freestanding on the transmissions jack.
You may need to use a large pry bar between the engine and transmission and if that
doesn't work recheck making sure all bell housing bolts have been removed. The transmission
will need to be slid back slightly before it detaches from the engine.
Now, gently lower the transmission while looking for any wiring or cables that
you might have missed. Also, hold the torque
converter in place so it doesn’t fall forward and out of the transmission.
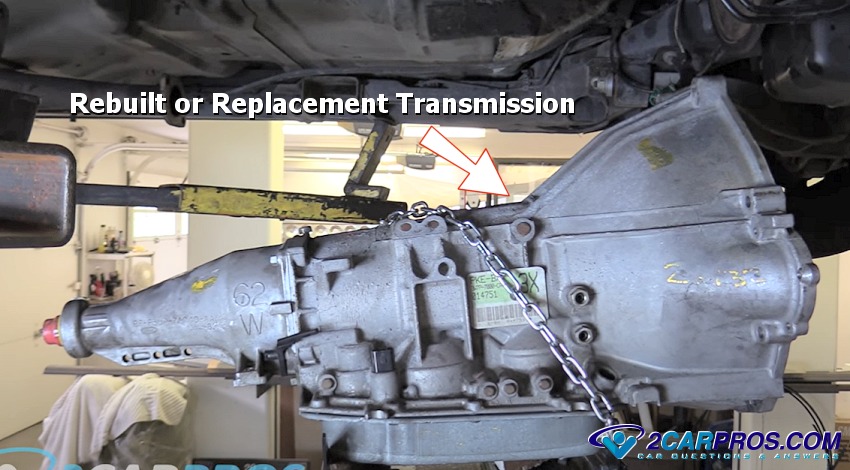
If you are rebuilding or having the transmission rebuilt there is no worries
when reinstalling the unit, but if you have a replacement transmission make sure
they are the same by checking the driveshaft spline, torque converter mounting studs
or bolts and the electrical connectors.
Reinstall the new or rebuilt transmission onto the transmission jack using the
safety hold downs.
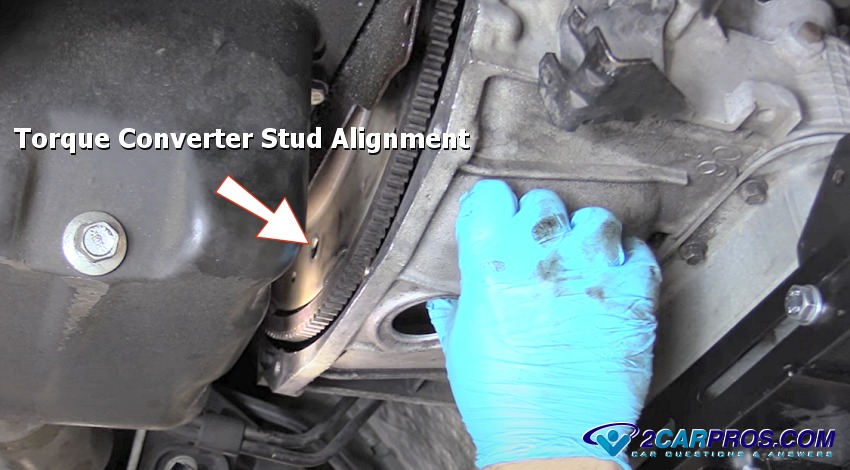
If your torque converter is designed with studs you must line them up with the
holes in the flex plate before you start installing the bell housing bolts or you
will damage the transmission.
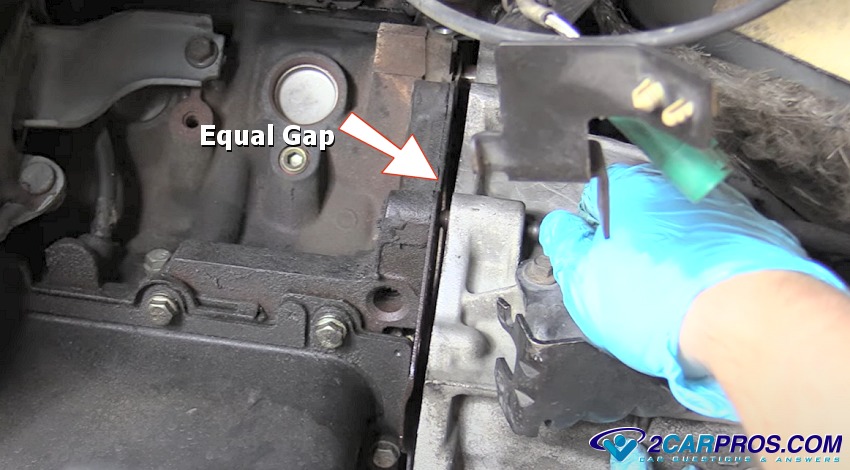
A main point when reinstalling the transmission is the alignment from the engine
to the transmission, when correct it makes the installation much easier. This is
done by eyeballing the gap between the engine and transmission, also make sure any
loose wiring does not get caught between the two.
Reassemble the remainder of the job in reverse order of the removal, once complete
reconnect the battery while checking for heavy sparks (which is telling the starter
wiring is attached incorrectly), then tighten the cable. Pour the correct type of
transmission fluid (about five quarts) into the dipstick tube using a funnel. Some
transmission's will not have a fill tube, in this case the fluid is pushed into
the transmission through a fill port on the side or pushed upward from a port in
the fluid pan. Then start the car and allow it to idle, finish filling the transmission
with fluid until full. Recheck the job for leaks and then the fluid level after
several miles of driving.

Helpful Information
When replacing an automatic transmission consider changing the transmission fluid cooler as well. This cooler is located inside the radiator and can contain metal partials from the old transmission so it's a good idea to replace the radiator so it does not affect the new unit. Transmissions are heavy and a little awkward but removing a transmission is not as difficult as it sounds. A transmission can fail in many ways but some of the most popular malfunctions include clutch slippage, internal breakage and fluid leaks. While some repairs can be done with the transmission in the vehicle for major repairs the transmission must be removed.
SPONSORED LINKS
After Start Up
Inspect under and inspect for fluid leaks, recheck fluid levels.
Listen for strange noises or irregular shifting patterns and report them to the manufacturer or builder.
Additional Transmission Removal Videos
Questions?
Our team of experts is ready to help with any car repair questions you might have, 100% free.
Transmission Questions and Answers
SPONSORED LINKS
Article published 2022-03-08