You will need to remove the wheels and raise the vehicle off of the ground by using a floor jack and securing it safely using jack stands. Next the brake pads, caliper, caliper mounting bracket and rotor will need to be removed before you can replace the emergency (parking) brake shoes.
Let's Jump In!
Step 1: Preparing to Remove the Parking Brake Shoes
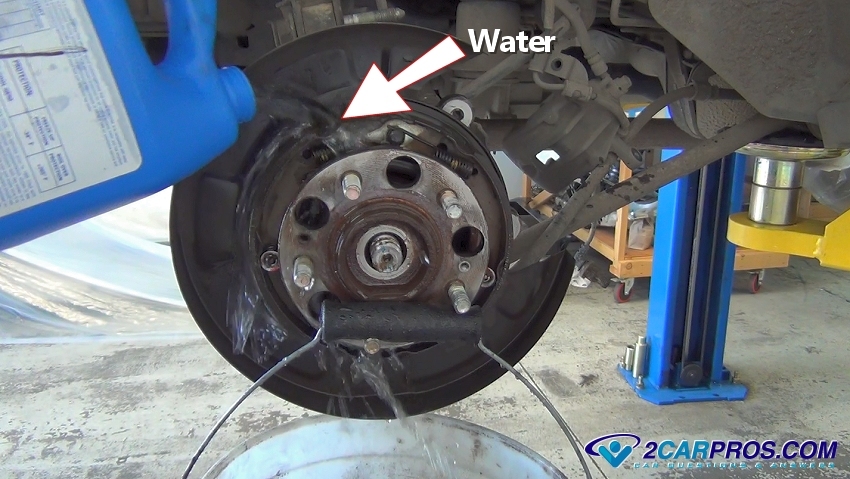
Parking brake shoes like regular brake shoes which deal with asbestos that should be cleaned off. The best way to remove this dust is to use regular water and rinse the area clean. Attach a bucket under the parking brake shoes. Use water to clean the shoes before disassembly.
Step 2: Removing the Parking Brake Shoes
A brake spring removal tool is needed to help remove the brake shoe return springs. You can use a pair of side cutters to grasp the spring and pull it but it is much more difficult that using the correct tool.
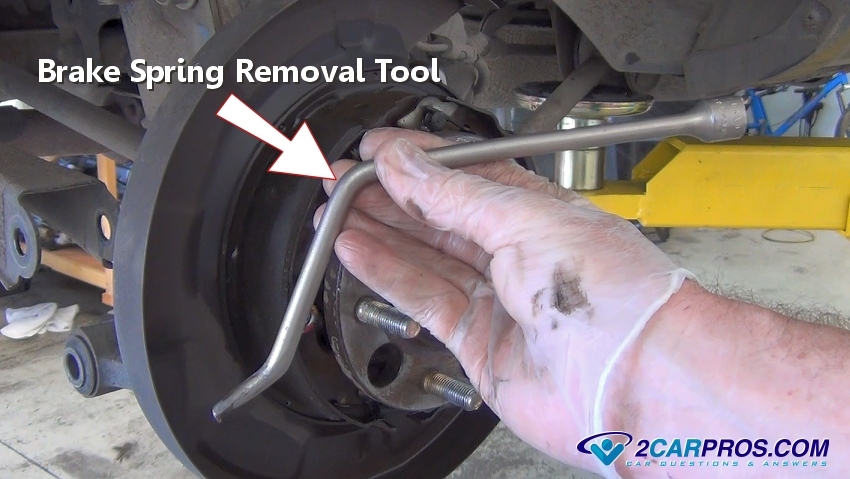
The tool will have a tang on the round part which catches under the spring and forces it from the backing plate. Insert the tool over the brake shoe return spring pivot and twist to release. Do this for both forward and rear facing shoe springs.
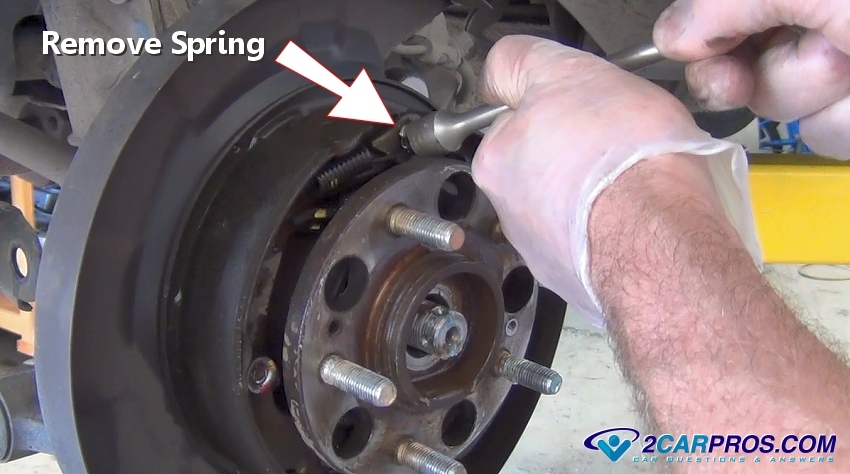
These shoes are held to the backing plate by a small spring, pin and retainer assembly. Both of these must be undone to remove the shoes.

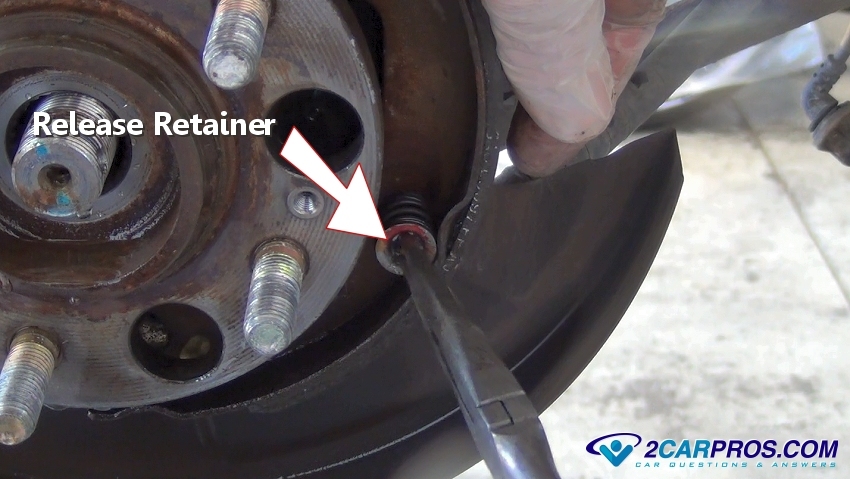
Hold the rear of the spring pin toward the backing plate. Use needle noise pliers or a brake spring retainer removal tool and push inward while twisting the retainer to release. Perform this for both shoes.
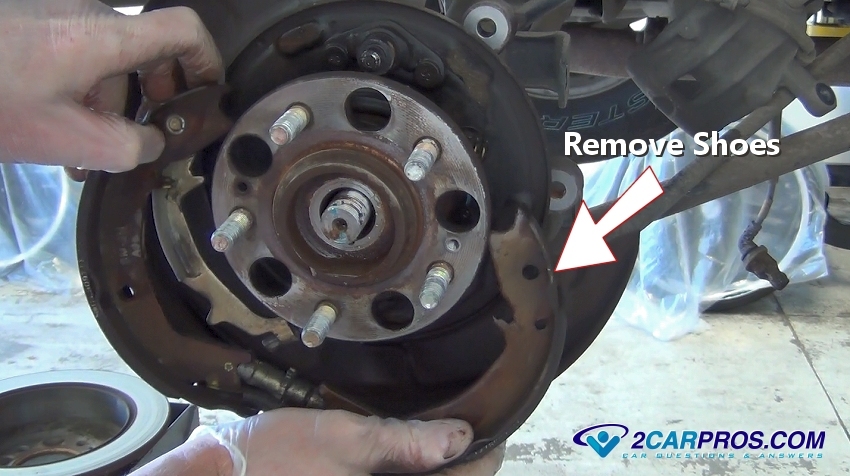
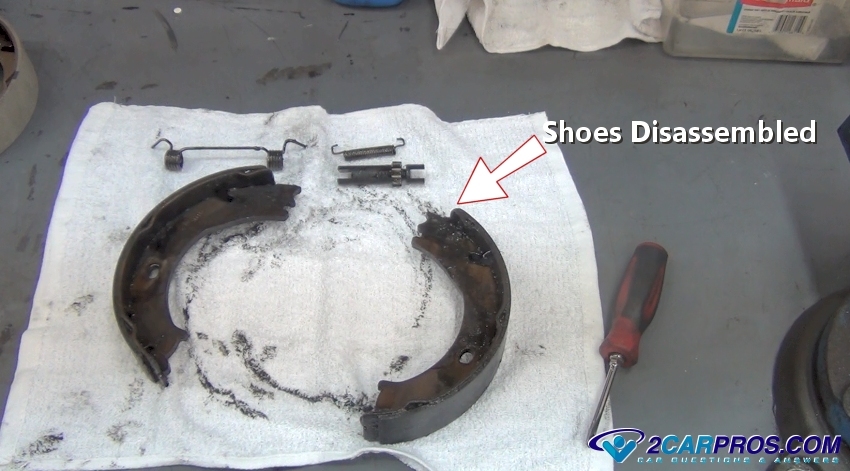
Once all mounting springs have been removed, grasp the emergency brake shoe and remove them from the backing plate. There will be an adjuster with a spring at the bottom of the shoes which hold them together which will now come apart at this point.
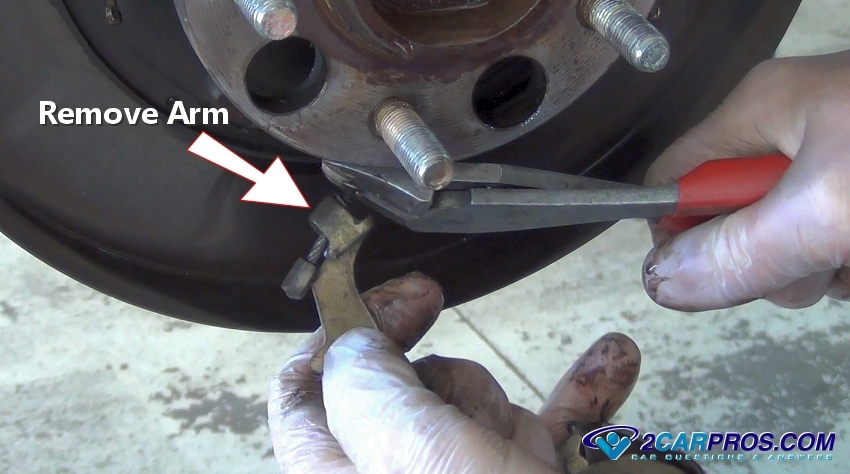
The parking brake actuating lever will still be attached to the rear shoe. While grasping the parking brake cable spring, move it upward on the cable to create room to remove the brake shoe actuator arm from the cable. A pair of side cutters (dikes) works well for this because it will hold to the cable if you clamp down slightly while disconnecting the arm.
Step 3: Installing the New Parking Brake Shoes
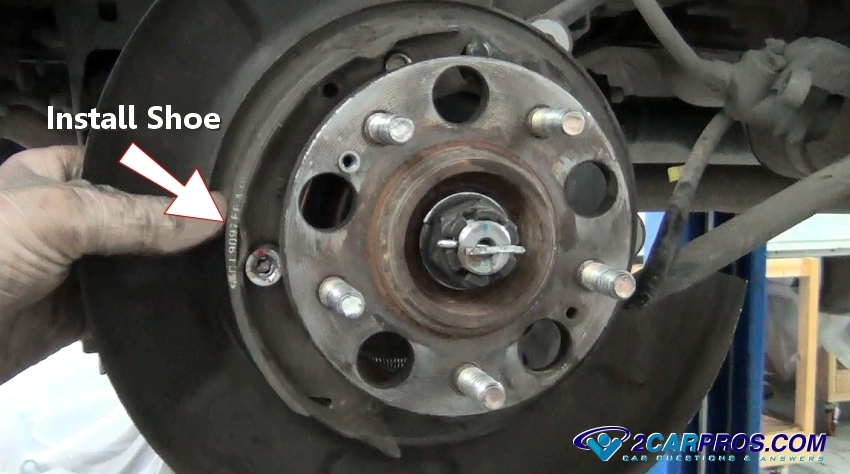
Match the new brake shoes to the old units to make sure they are the same. Then, transfer the activation lever to the new shoe by undoing the metal clip at the top of the lever from the old shoe. Mount the rear parking brake shoe by installing the spring back onto the lever. While holding the rear shoe in place push the spring and retainer to hold the new shoe to the backing plate.
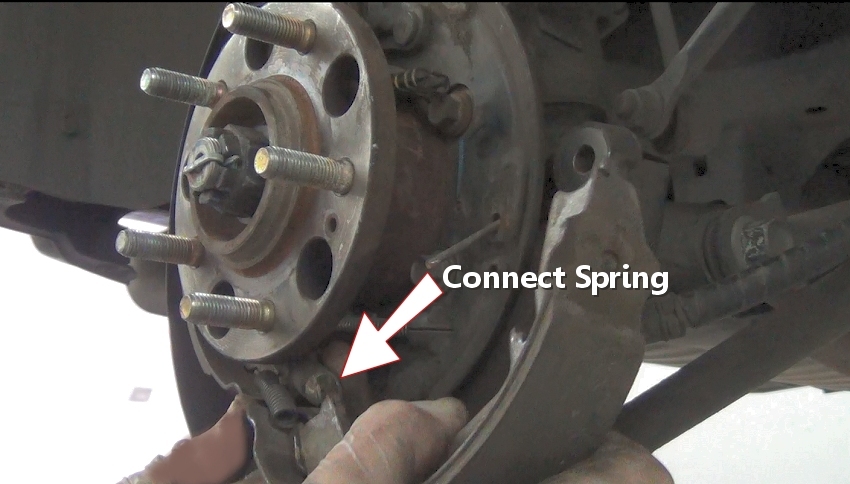
Disassemble the adjuster to clean the threads and lubricate them using brake lube. Hold the adjuster to the rear shoe as you attach the connecting spring to the forward shoe while putting the retainer spring onto the forward shoe to hold it against the backing plate. Make sure the self adjuster stays in place between the two shoes.
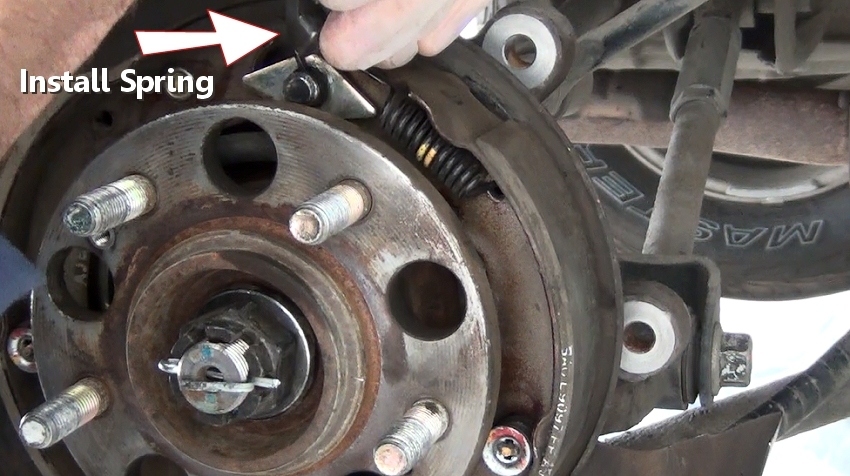
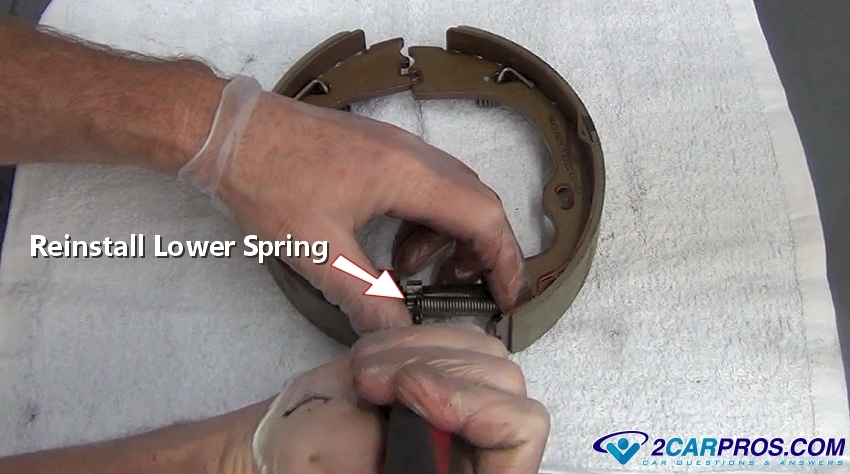
Once the forward shoe has been installed, insert the upper return spring and the pivot retainer washer.
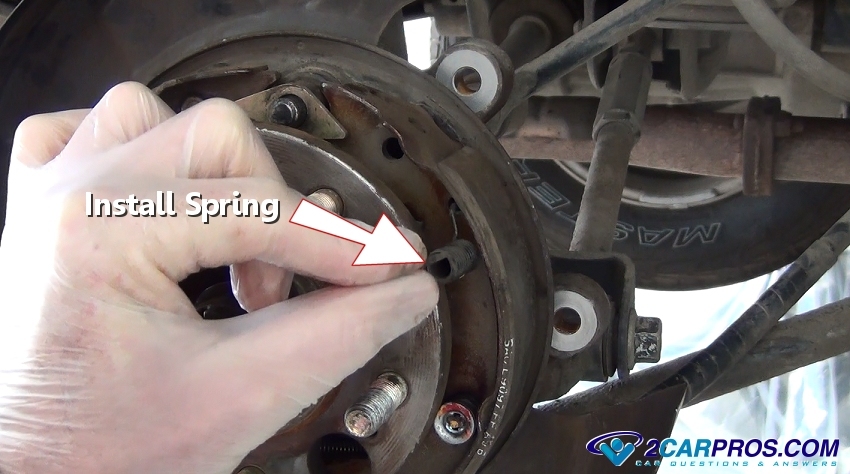
Next, use a pair dikes to grab the spring and pull it into position. You can also use the opposite end of the brake tool. Repeat this operation for the rear spring as well.
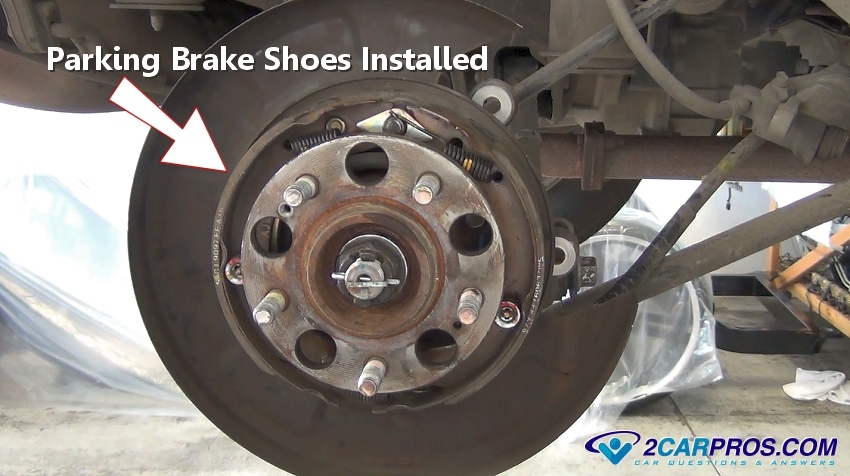
Once completed double check all of the return and retainer springs are secure and in place.
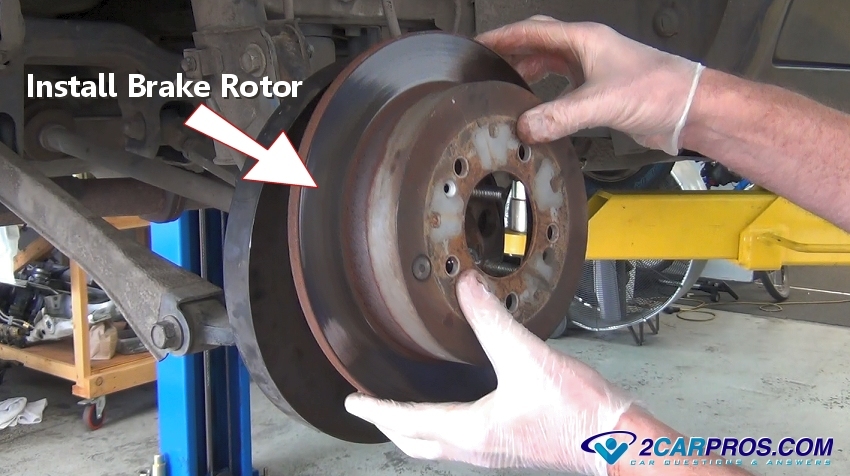
The shoe adjuster will need to be adjusted to fit the drum inside of the rotor. Twist the adjuster outward while fitting the brake rotor over the shoes. Jog the rotor back and fourth over the shoes to check the air gap between the shoes and the rotor. Move the adjuster until the gap is about 1/8 of an inch (3mm). Then reinstall the rear brake rotor onto the wheel hub. Check the emergency brake handle's throw and readjust if needed.
Guide 2: Replacing Parking Brake Shoes On 1/2 Ton Truck or SUV
You will need to remove the wheels and raise the vehicle safely off the ground by using a floor jack and securing it safely using jack stands. Before replacing the emergency (parking) brake shoes the brake pads, caliper, caliper mounting bracket and rotor will need to be removed. Here is a video to help you see the repair. Once you are done watching please read down through the guide for more information and tips. Let's get started
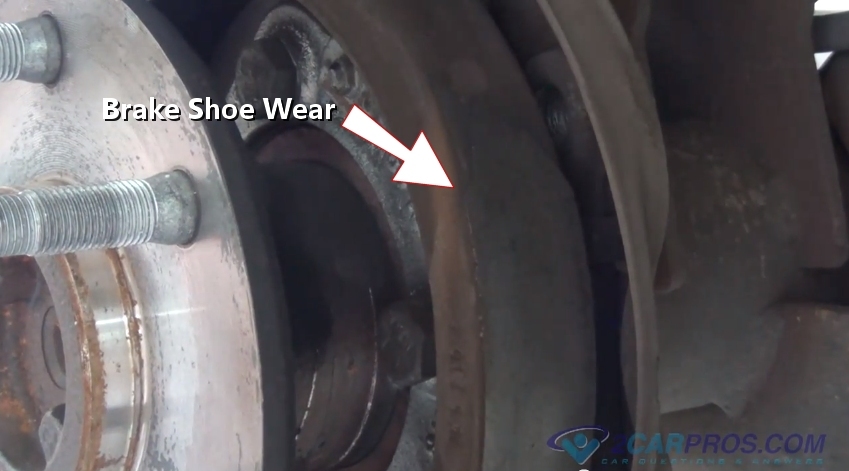
Step 1: Inspecting the Parking Brake Shoe
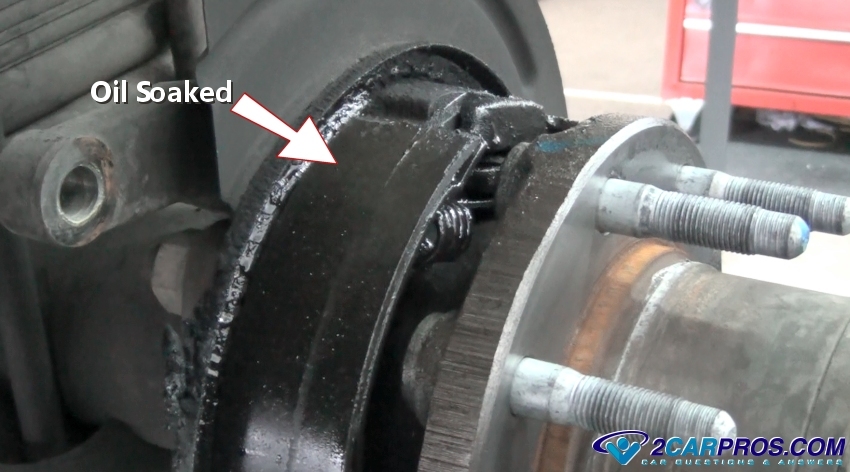
Once the brake rotor has been removed, inspect the parking brake shoe for wear. This style of emergency brake uses an "all in one" style of set up apposed to a primary and secondary shoe set up. If you see the brake material missing like in the picture below its time to change the shoes. If the shoe is down to the metal the rotor should be replaced or re-machined as well.
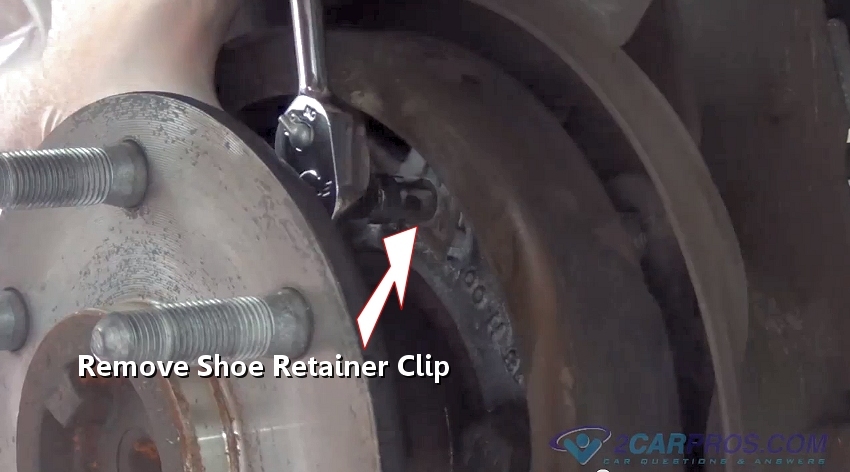
Step 2: Remove the Shoe
This style of shoe is held on using a retainer bolt and clip that needs to be undone to remove the shoe from the backing plate. After inspecting the shoe lining, remove the anchor bolt which holds the parking brake shoe retainer clip in place.
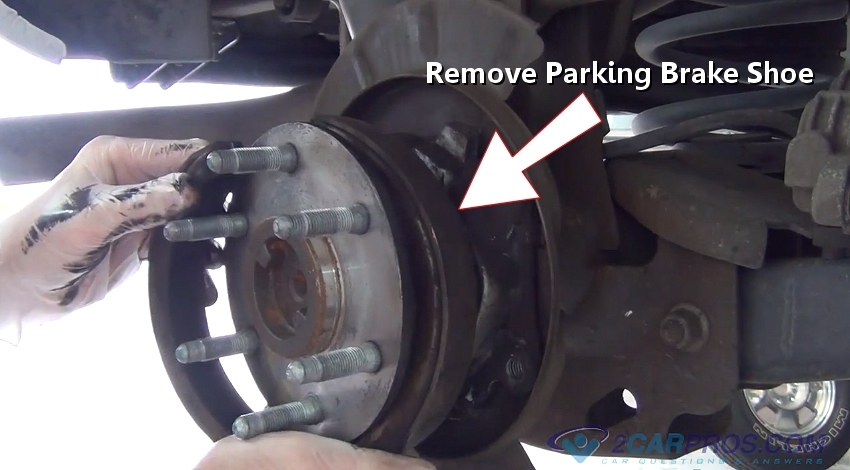
The parking brake shoe will become loose which will allow the removal of the shoe. You must remove the shoe much like a cork screw, start at the top while pulling outward and work the shoe around the axle flange.
This can be a little cumbersome so hang in there, reference the video above to watch how it is done.
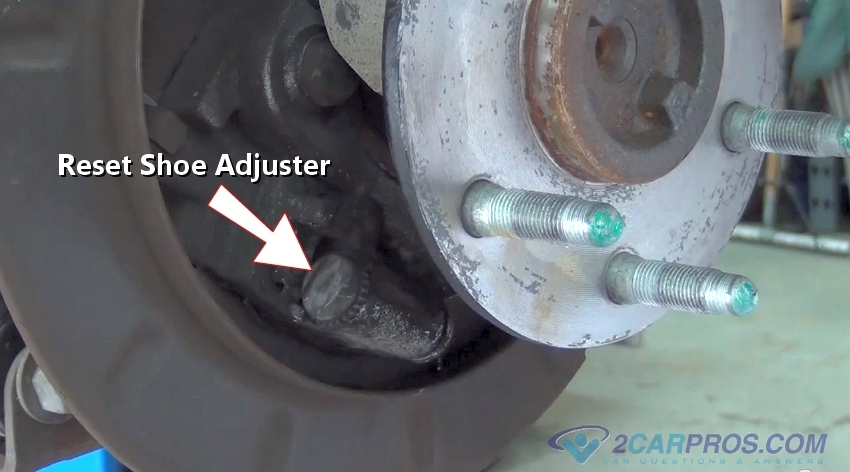
Before installing the new brake shoe, service the adjuster by cleaning the threads and lubricating them with brake lube. Reset the self adjusters by turning the plunger inward.
Step 3: Install the New Emergency Brake Shoe
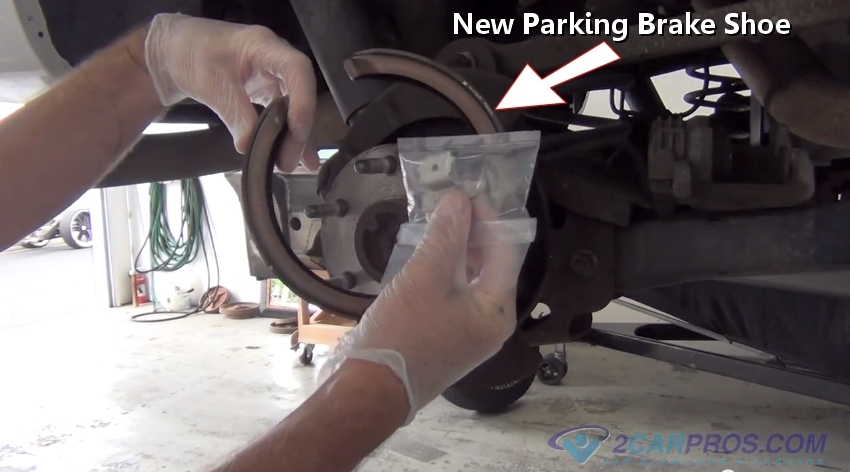
Compare the worn brake shoe to the replacement shoe. Also, install any new hardware that is included with the replacement shoe set. On the GM shoes an updated clip is included which helps prevent the shoe from dragging against the rotor when the parking brake is not engaged.
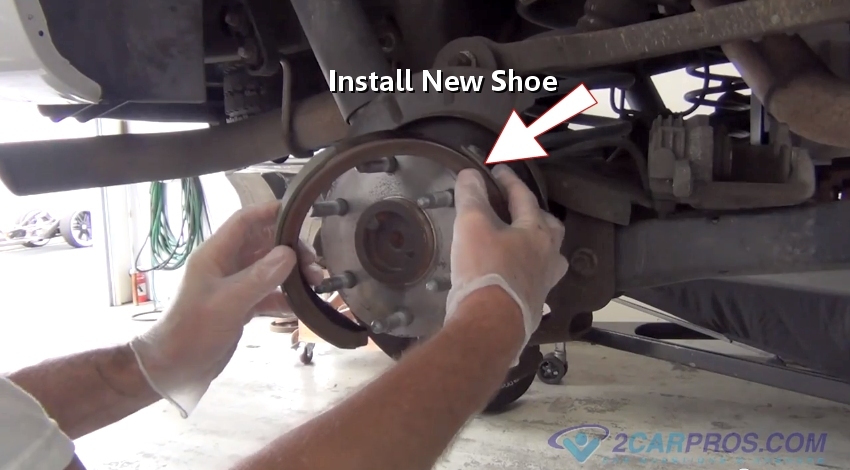
Gently place the new shoe over the axle flange and rotate it into position. Start with the lower part of the shoe over the axle flange and work it around. Be careful not to get grease on the new brake shoe material. Use new gloves for this operation.
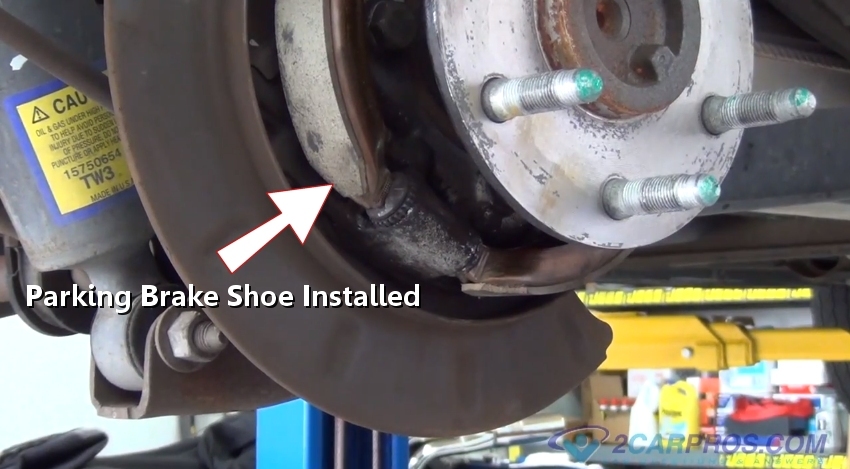
Once in position guide the shoe into the self adjuster plungers and reinstall the retainer clip. Then, check the adjustment by fitting the rotor over the shoes while moving the rotor back and fourth to check the air gap. Readjust the self adjuster until you get about and 18/ or 3mm air gap. If once both shoes are replaced and the emergency brake pedal or handle is too high or too low readjust the shoes to lesson or increase the air gap.
Guide 3: 3/4 and 1 Ton Parking Brake Shoe Replacement
This guide pertains to both the 3/4 ton and 1 ton vehicles. The only difference between the two is the size of the brake drum and shoes. Also the 3/4 ton set up supports just one wheel whereas the 1 ton generally has two wheels per side (dully). In this video the rear oil seal is leaking which has contaminated the parking brake shoes. This example shows how to replace the shoes and the seal. After you finish watching read down through the guide to pick up on additional information and tips. Let's get started.
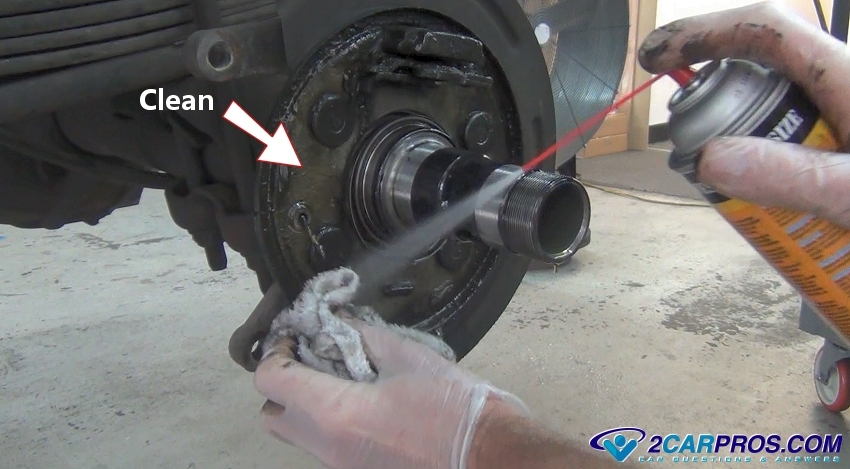
Step 1: Prepare to Remove the Parking Brake Shoes
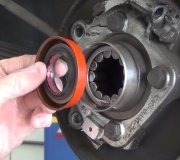
Because these shoes are gear oil soaked replacement is needed. This happens when the seal between the bearing hub and the differential fails allowing gear oil to leak onto the shoes and rotor.
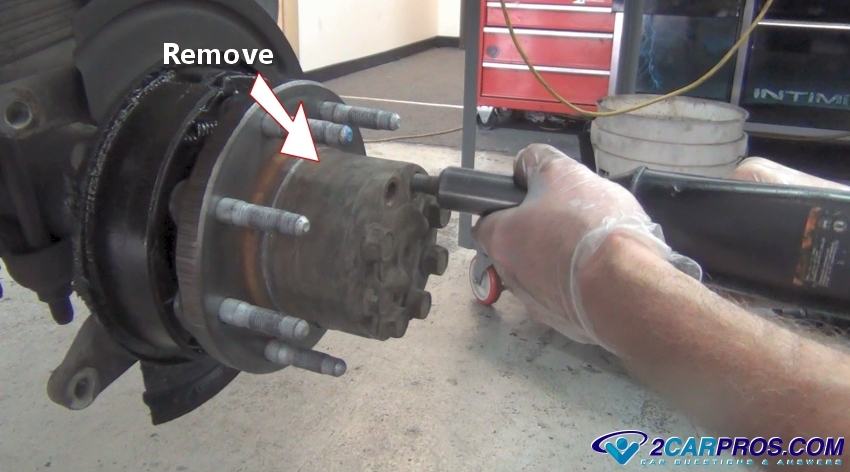
To remove these shoes you must remove the bearing hub which is detailed in the video above. This will take some time but since you need to replace the seal anyway it needs to be done. Even if the seal is not leaking you should replace it when servicing the parking brake shoes. Learn more: How to Replace an Axle Seal
Step 2: Remove the Parking Brake Shoes
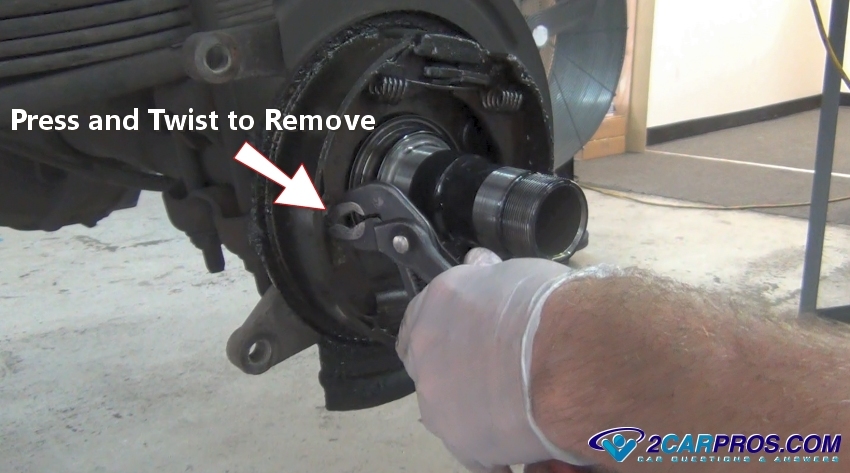
Locate the shoe retainer clips and pins, one should be on each side of the shoes. Use a pair of pliers to push downward on the clip and with the twisting motion release the clip. Complete this for both shoes.
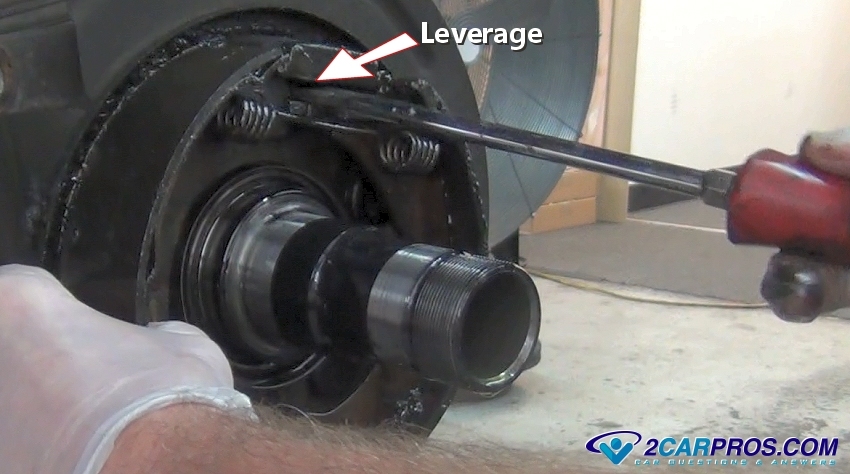
Use a large flat blade (standard) screwdriver to leverage the shoe from the pivot mount on the backing plate. Wedge the blade behind the shoe and push the screwdriver handle left. This will offset the spring pressure and allow you to pull the shoe free from the backing plate.
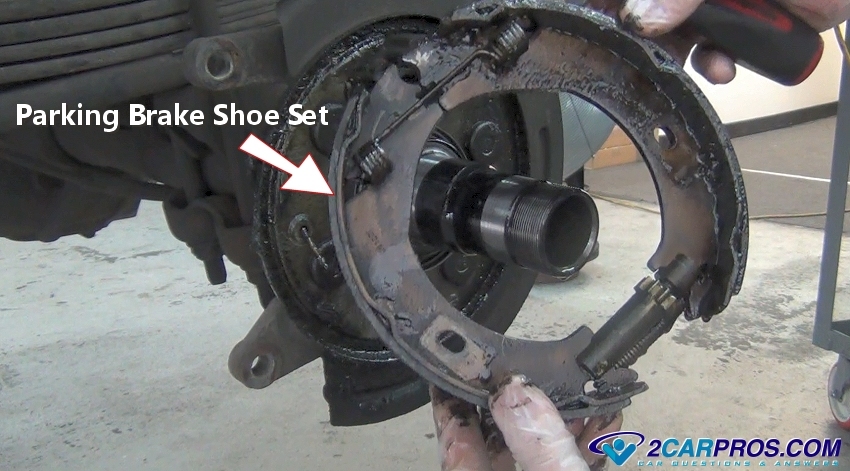
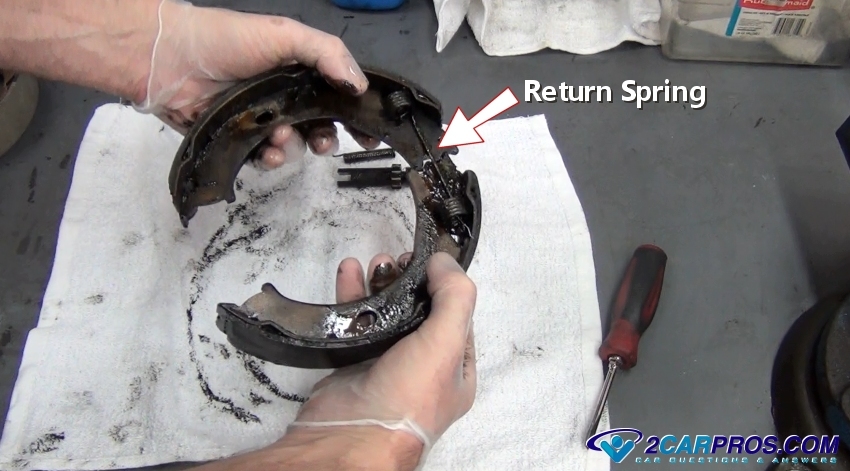
Here is what the shoe set looks like when they are removed. An upper and lower spring holds the two together along with the adjuster wheel. They are now ready for replacement. If needed you can take a picture of this assembly with your phone to make sure you get the direction of the adjuster wheel and springs in the right place once you have taking it apart to replace the shoes.
Step 3: Cleaning the Backing Plate
Now that the shoes have been removed, the backing plate will need to be cleaned before the new shoe set can be installed. Use carburetor or brake cleaner or cleaning solvent and the shop towel. This oil can be a little tough to remove so hang in there. Once you are done cleaning through the towels away, you do not want to wash them in your clothes washer it will ruin the machine.
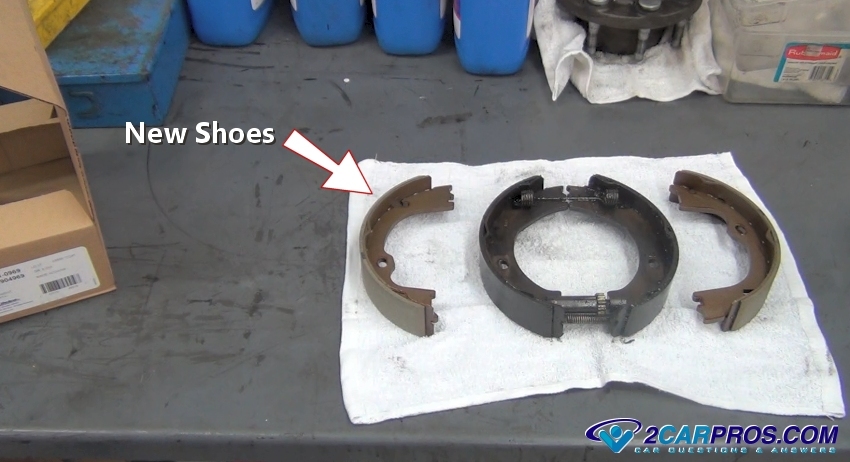
Step 4: Prepare to Install the New Shoes
Take the new shoes out of the box so you can match them to the old shoes. Be carful not to get gear oil on the new shoes. Check the size and width of the shoes.
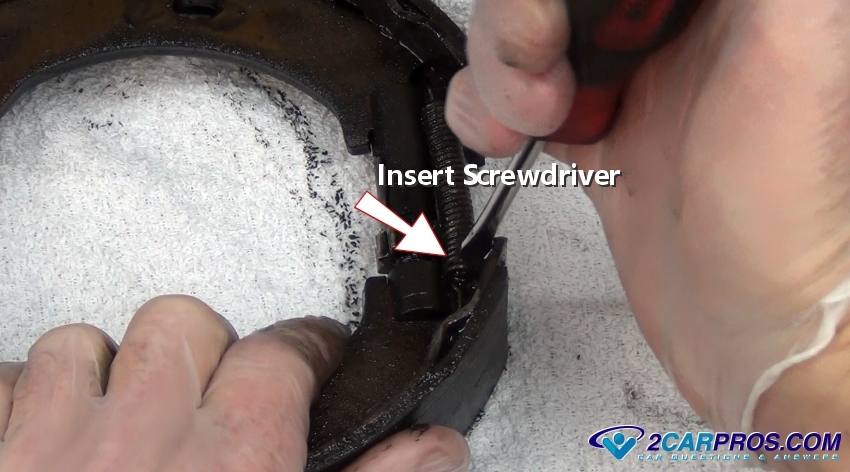
To disassemble the shoes from one another you must remove the return springs that holds them together. Insert a flat blade (standard) screwdriver into the last coil of the spring and pull it toward you. This will take some doing so hang in there, unhook the spring from the shoe. Once this is done the bottom part of the shoes will come apart which will allow you to remove the adjuster wheel. Take note on the direction the adjuster is sitting in the shoes and reinstall it in the same direction.
Now the top spring can be undone easily by pushing the shoes inward with a rotating motion to disconnect the spring.
Here are the separated pieces that make up the shoe assembly. One top spring and the one bottom spring along with the adjuster.
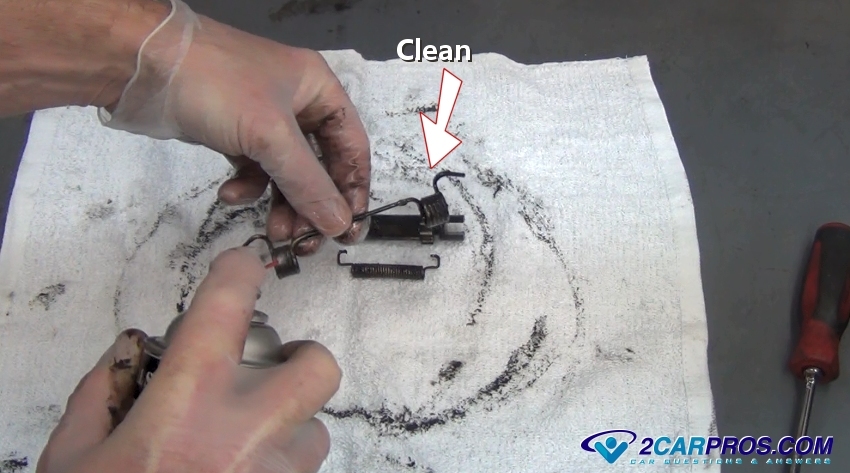
Use carburetor or brake cleaner to remove the excess oil from the parts. This is so we don't get oil onto the linings of the new shoes.
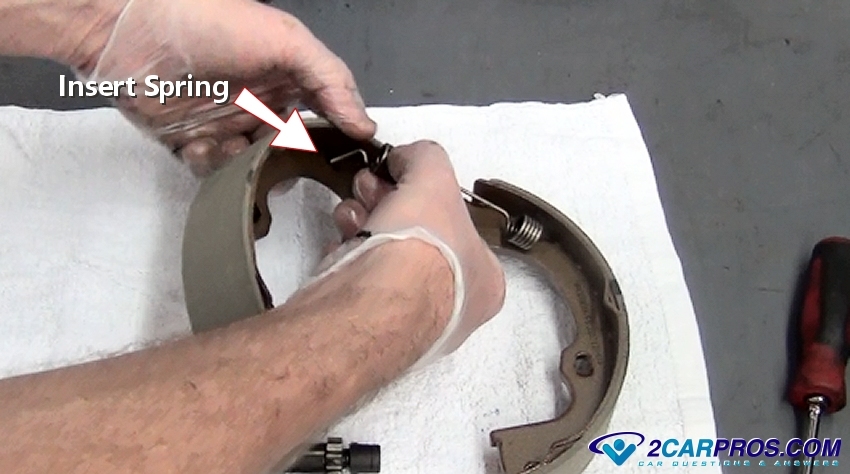
Start the reassemble process by inserting the brake return spring into the new parking brake shoes.
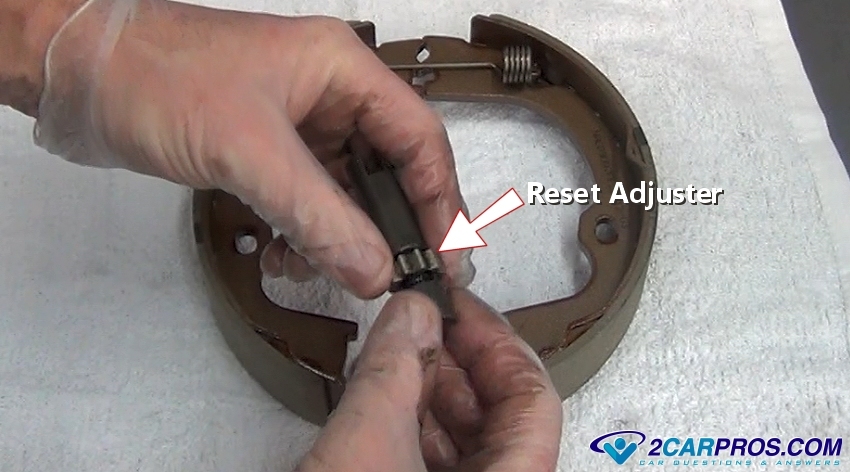
Next, reset the shoe adjuster and make sure the threads can be moved easily. This adjuster is what you will be turning to make the emergency brake pedal have more or less travel once the job is complete.
Turn the shoes over and insert the lower spring in the same way you removed it using a standard screwdriver. Make sure the adjuster wheel is in the same position as when you took it apart.
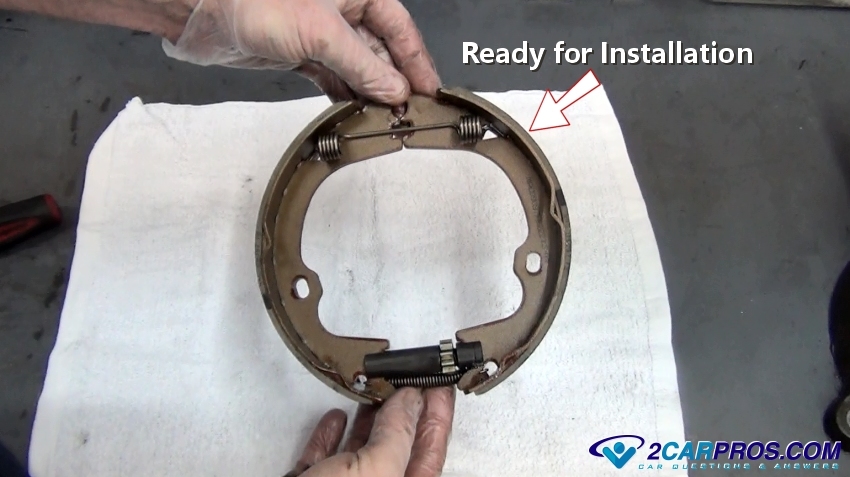
Now the parking brake shoes are ready for installation, cleaned up and ready to go.
Step 5: Install the New Parking Brake Shoes
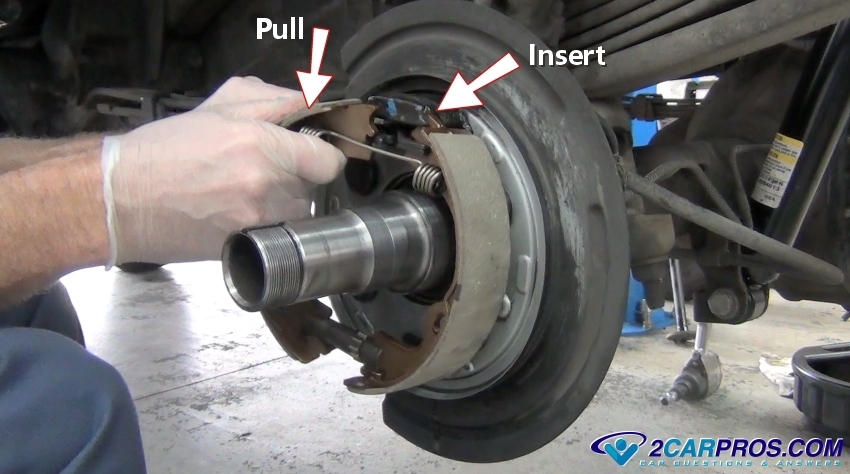
Insert the rear shoe into the pivot mount. Next, grasp the forward or primary shoe by pull it over the pivot flange. Brace yourself while pulling to help overcome the spring tension.
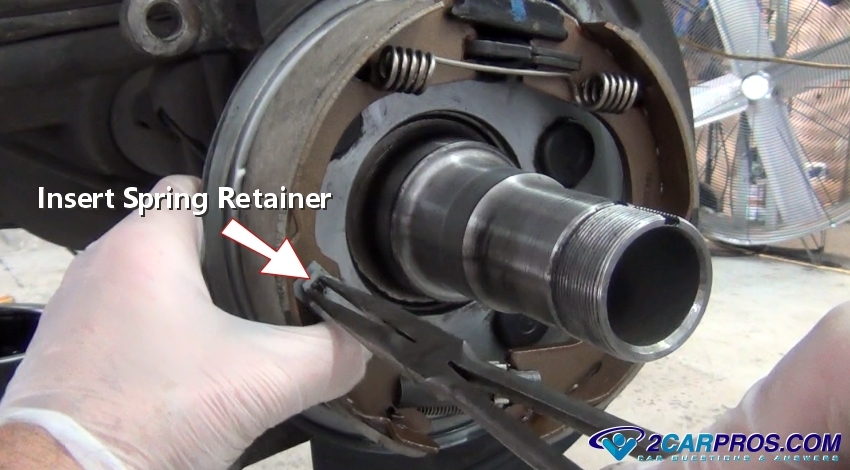
Use a pair of needle nose pliers to push down on the retainer spring while holding the backing plate pin inward. Once the spring is depressed, twist the pin or clip to lock it against the shoe. Complete this for both shoes. Now the remainder of the job is ready for reassembly of the axle bearing hub and brake rotor.
Learn more: Installing axle bearing hub and brake rotor assembly
Step 6: Shoe Adjustments
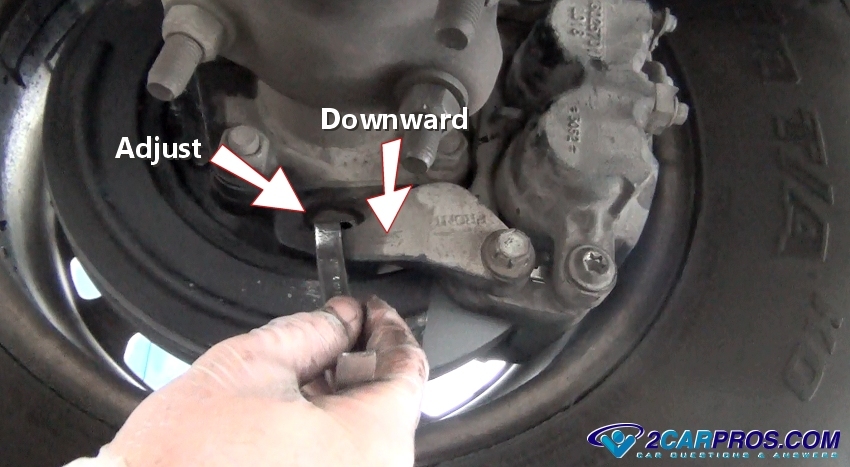
Once the rotor has been installed use a standard screwdriver or brake shoe adjusting tool to set the air gap between the shoes and the drum inside the rotor. Work the adjuster downward to extent the adjuster until you hear it contact the rotor and then back it off slightly. The adjuster has regular threads unlike a self adjuster on one side of the vehicle using a self adjusting brake shoe system. Once complete check the throw of the emergency brake pedal and readjust as needed.
Once the job is complete and while driving the vehicle, listen for weird noises. If any abnormal noises are present this is an indication of a potential problem. Disassemble the side that is making the noise for inspection. Look for any springs that have come undone along with any shiny spots where metal has been contacting metal.
Helpful Information
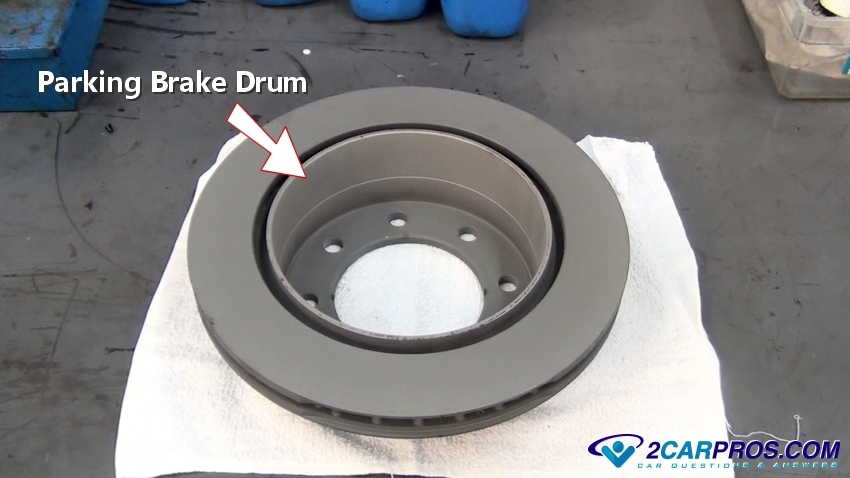
The emergency/parking brake or "E" brake is used to securely hold the vehicle when parked. This secondary brake system is also designed to stop the vehicle in case the primary brake system fails. On many vehicles with four wheel disc brakes the parking brake has been integrated within the rear brake rotor in the form of a drum on the inner part of the rotor.
This system is similar to the traditional drum brake systems with the exception of a wheel cylinder. Some parking brakes are self adjusting. If the parking brake pedal seems low or if the brake does not hold the vehicle there could be a problem and the shoes may need replacing.
Questions?
Our certified technicians are ready to answer parking brake shoe replacement questions for free. We hope you saved money and learned from this guide. We are creating a full set of car repair guides. Please subscribe to our 2CarPros YouTube channel and check back often for new videos which are uploaded regularly.
Article published 2022-03-10
How to Replace a CV Axle Bearing

Axle Bearing and Seal Replacement