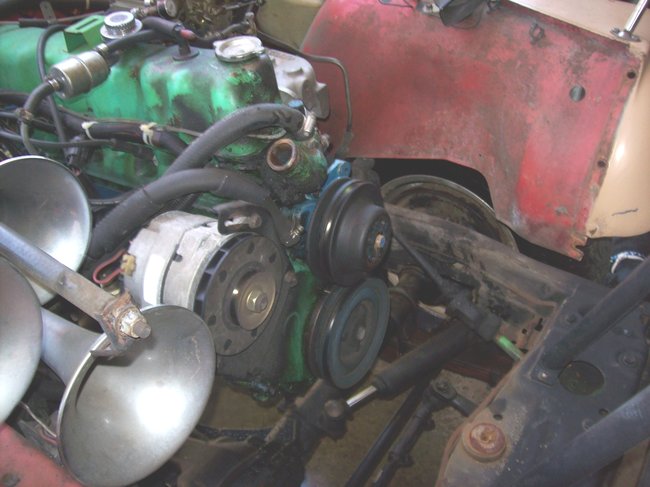
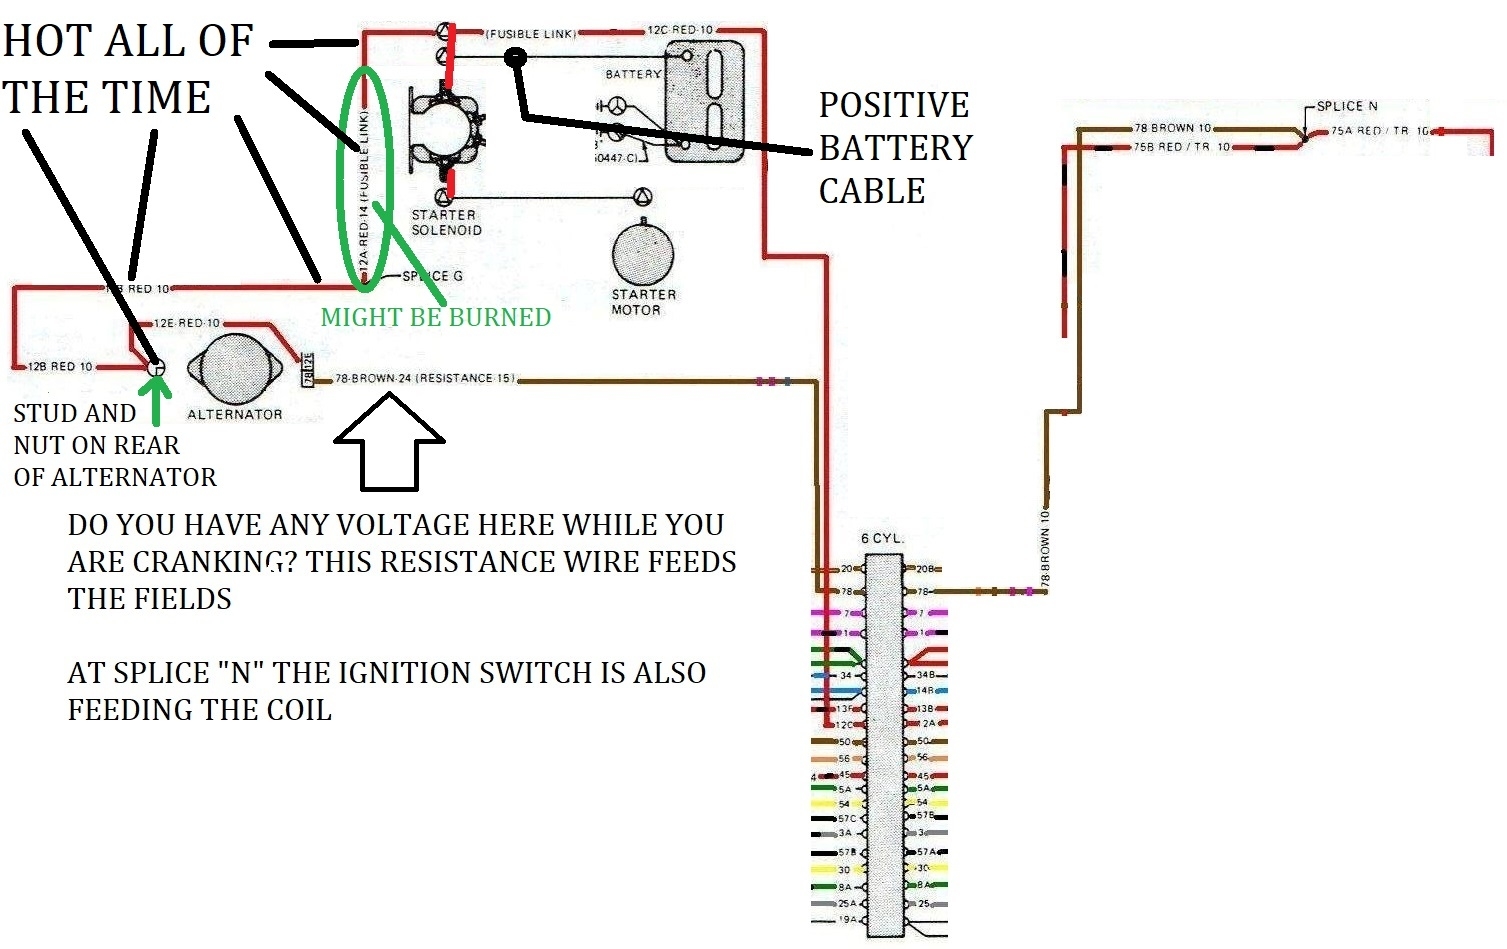
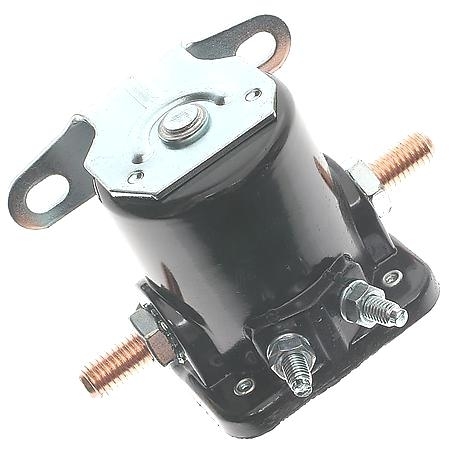
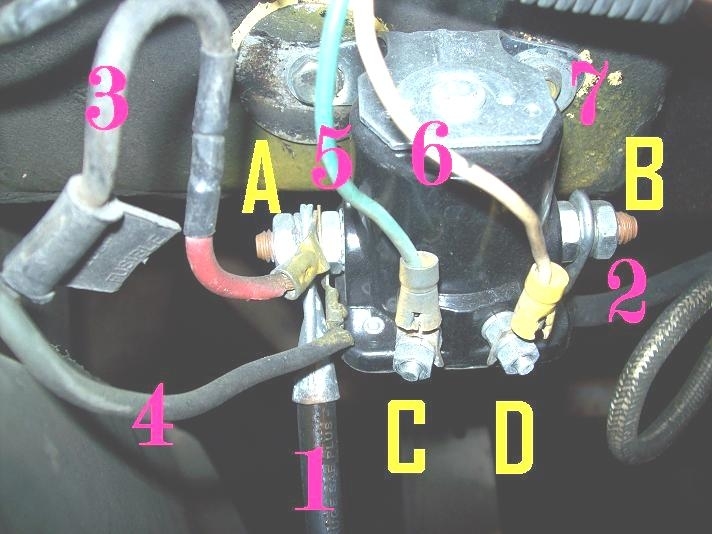
Ford (starter) solenoid mounted on fender.
We will orient it as in picture 1.
The 2 little studs we will call the front.
The one on the left is "S" (and always will be!) the one on the right is "I" (and always will be)-I don't care if you turn it around or upside down.
Usually the "S" and "I" are marked in/ on the plastic above the little studs.
To make this short and sweet!
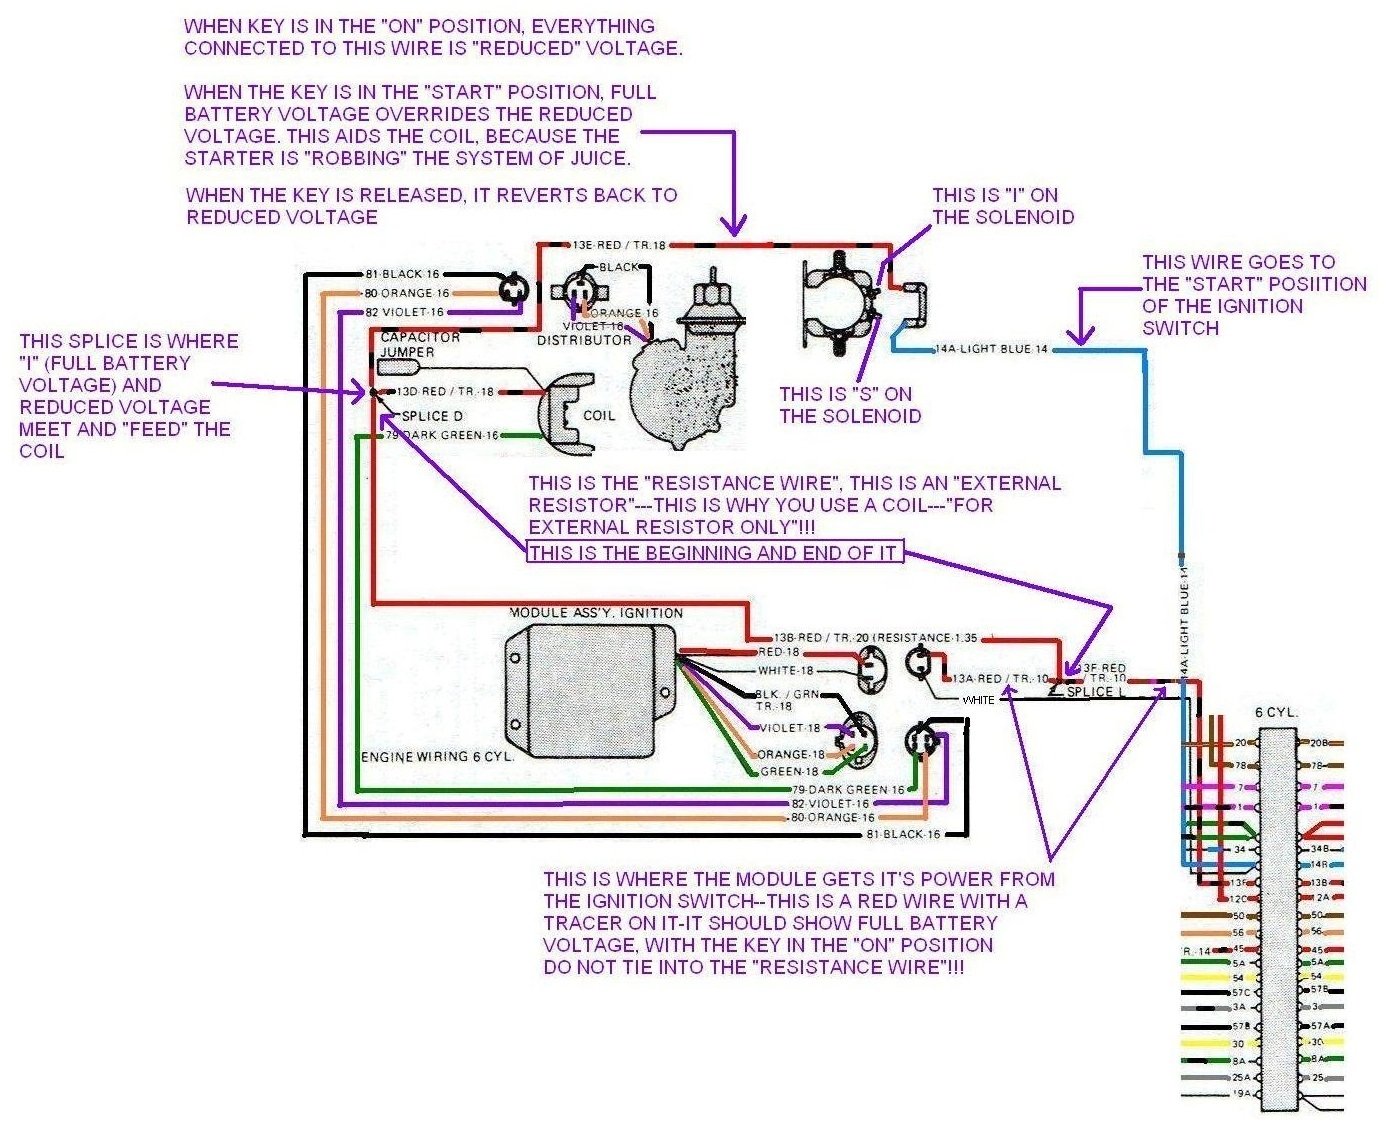
"S" is dead until 12 Volts is fed to it by way/ route to the ignition switch.
When the ignition switch gives it 12 volts (or you fake it out/ bypass the switch) the solenoid "activates" or engages the copper plates with in it.
These "so-called" plates are actually (in a manner of speaking) The big ole stud on the right temporarily connecting to the big ole stud on the left.
If the starter is not hooked to the solenoid at all, the solenoid will make a heavy click each time the key is turned to "start".
If everything is "right" and the starter is connected, turning the key to start should make the stater start spinning!
"I" ?
"I" gets power from the solenoid, it get's 12 volts, this 12 volts "assists" the coil with full voltage while the Jeep is being started (many Jeeps will not start without this assist)
Once you let go of the key, "I" 12 volts dies!
However, the voltage that now feeds the coil when the Jeep runs (Like let's say 7 volts) will travel down the "I" wire and will show 7 volts at the "actually dead" "I" terminal. I threw that in because at one time I did not understand why if it were dead, why does it have voltage?!
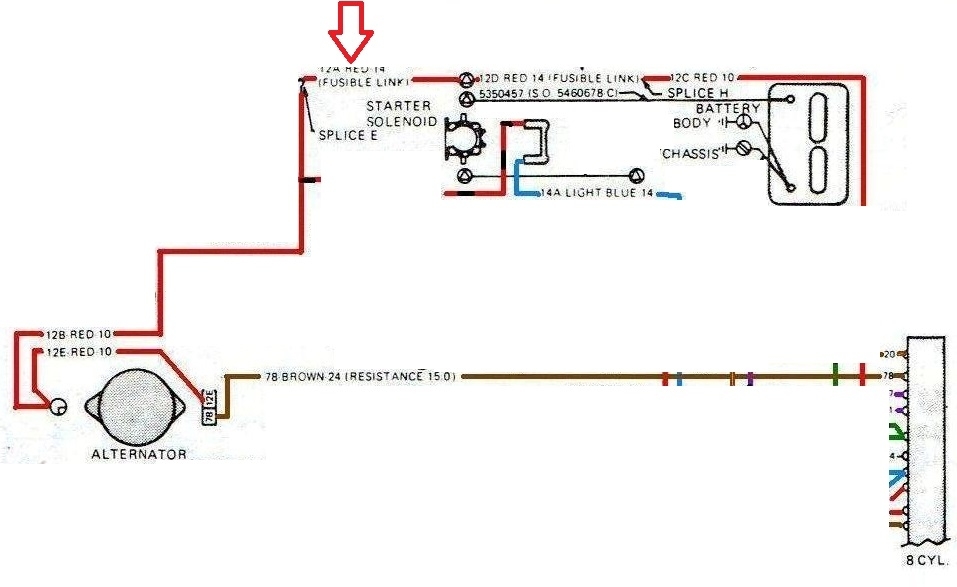
You can see why at the "tee" in my last diagram. That's the red wire off of the coil.
Now then
The funny part!
Those 2 big studs on the left and right.
Thinking in stupid terms.
Those two studs normally in the static position act like a solid bar with a cut down the middle (not connected to each other)
When the solenoid is activated, they act like "one" solid bar (connected together)
Here's the thing:
The solenoid does not care which side is which!
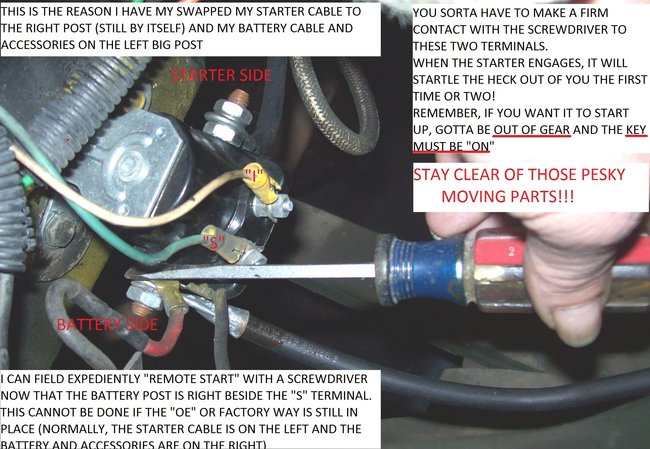
In fact, most Fords use the left big stud for the positive battery cable with all 12 volt feeds and the starter is "all by itself" on the right big stud (always by itself wherever you put it)
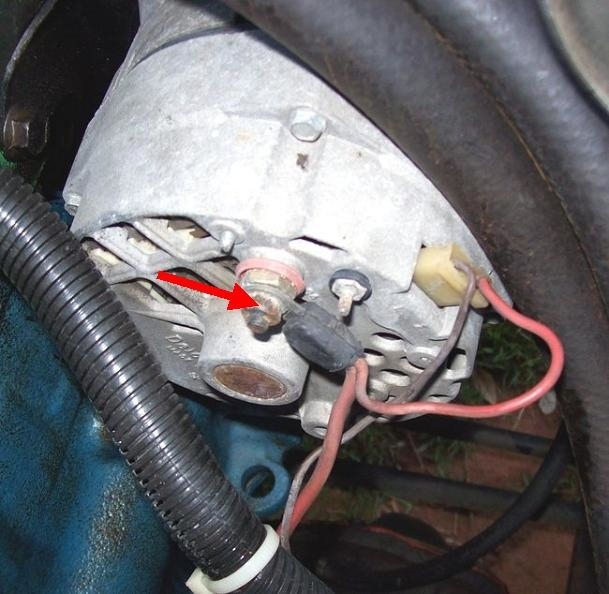
I do my both of my Jeeps this way, even though this is exactly opposite from how the Jeeps came from the factory! I have a good reason why I do this! See pic 2.
AMC (Jeep people from the 80's) Had their positive battery cable on the right big stud with all 12 volt feeds up against it and the starter was on the left big stud (again and always by itself!). All AMC Jeep diagrams show the solenoid connected in this manner. (Still, the solenoid don't care!)
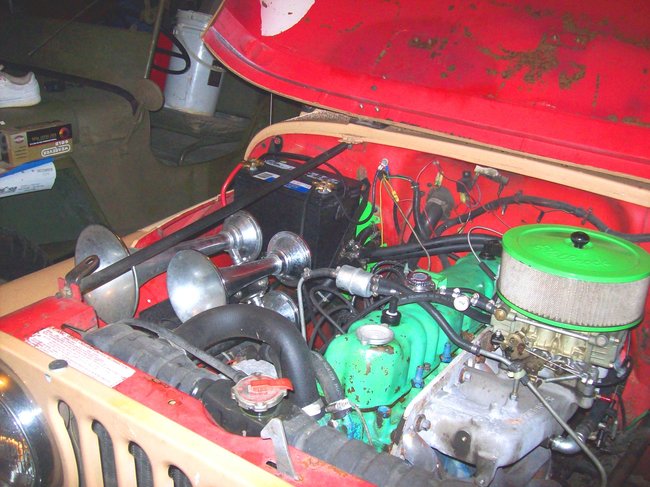
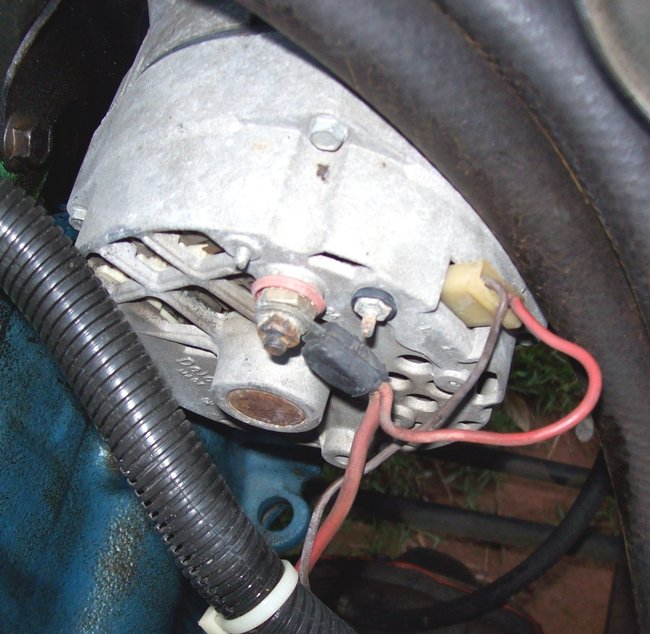
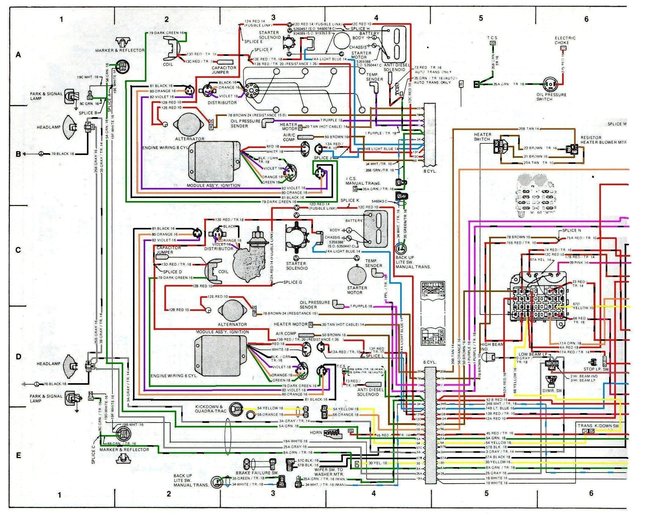
Picture 3 is my 1977
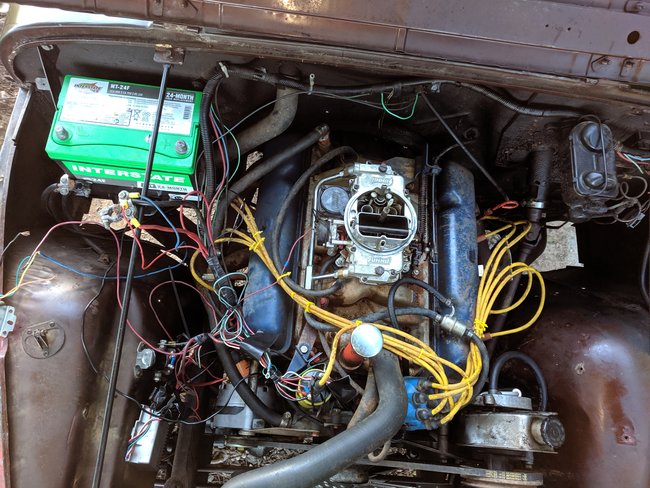
Picture 4 is my 1946 Willy's (which I wired to be mostly like a 1979). Wire "3" and wire "4" are fusible links. One is marked the other is not. The previous pic, 1977 also has fusible links, they are not labeled and are the two wires a little lower than the left big stud.
Moral of the whole long story.
Battery power and anything requiring battery power go together on the same big stud.
The starter goes all by itself on the other opposite big stud.
The Medic
Images (Click to enlarge)
Aug 17, 2019 at 11:22 AM