Welcome to 2CarPros.
The power window motor direction, up or down, is changed by the way power flows to the motor (polarity). So, since it works one way, it, in theory, should work the other. That leads me to saying most likely, either there is a bad switch or one of the wires is damaged or disconnected at the motor.
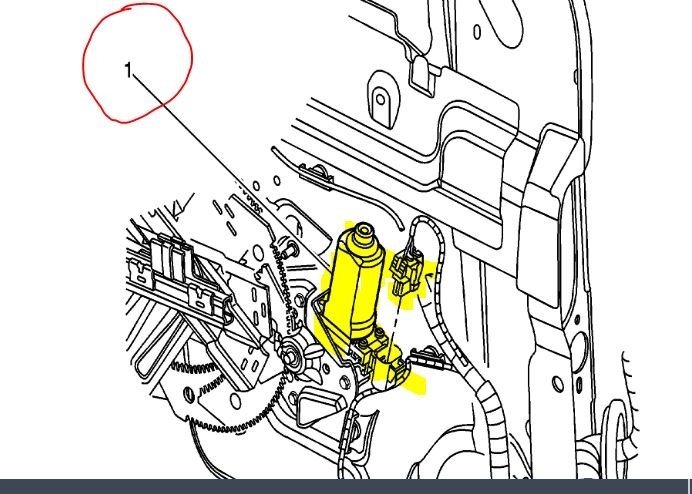
If you look at picture 1 below, I highlighted the window motor and its connection. You need to remove the connection from the motor and check for power. You can use a test light or volt meter to do this.
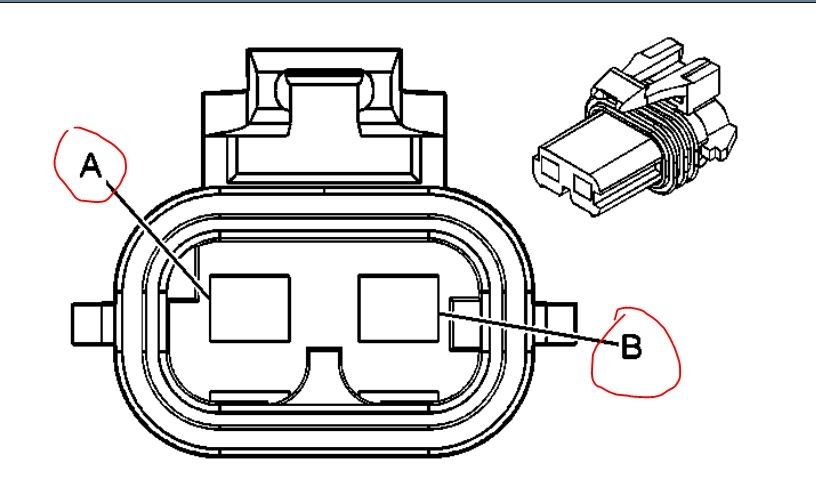
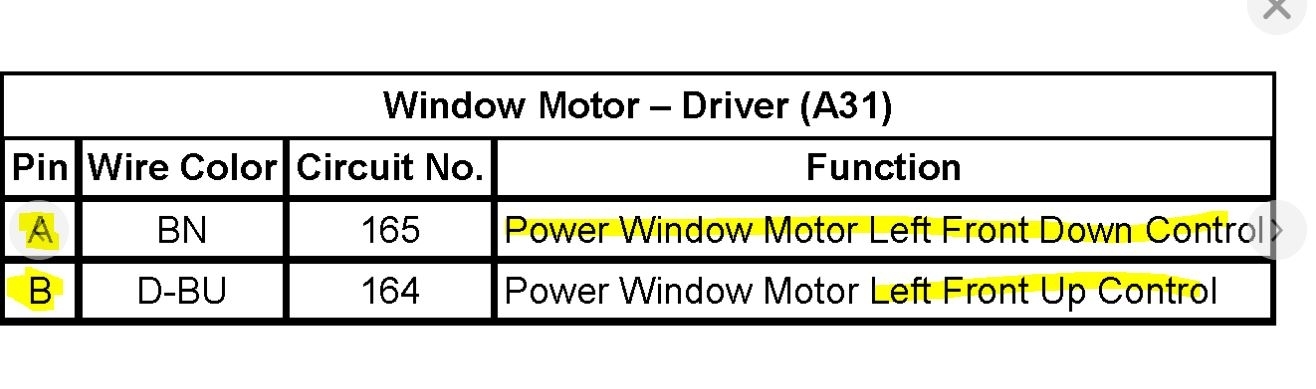
Now here is how this will work. When you remove the plug from the motor, it will look like pic 2. Note in the picture the pins are described as pin A and pin B. When you press the switch for the window to go down, pin A should have power. When you press the button to go up, pin B should have power. Pic 3 below shows the left window but the right one that you have trouble with is the same.
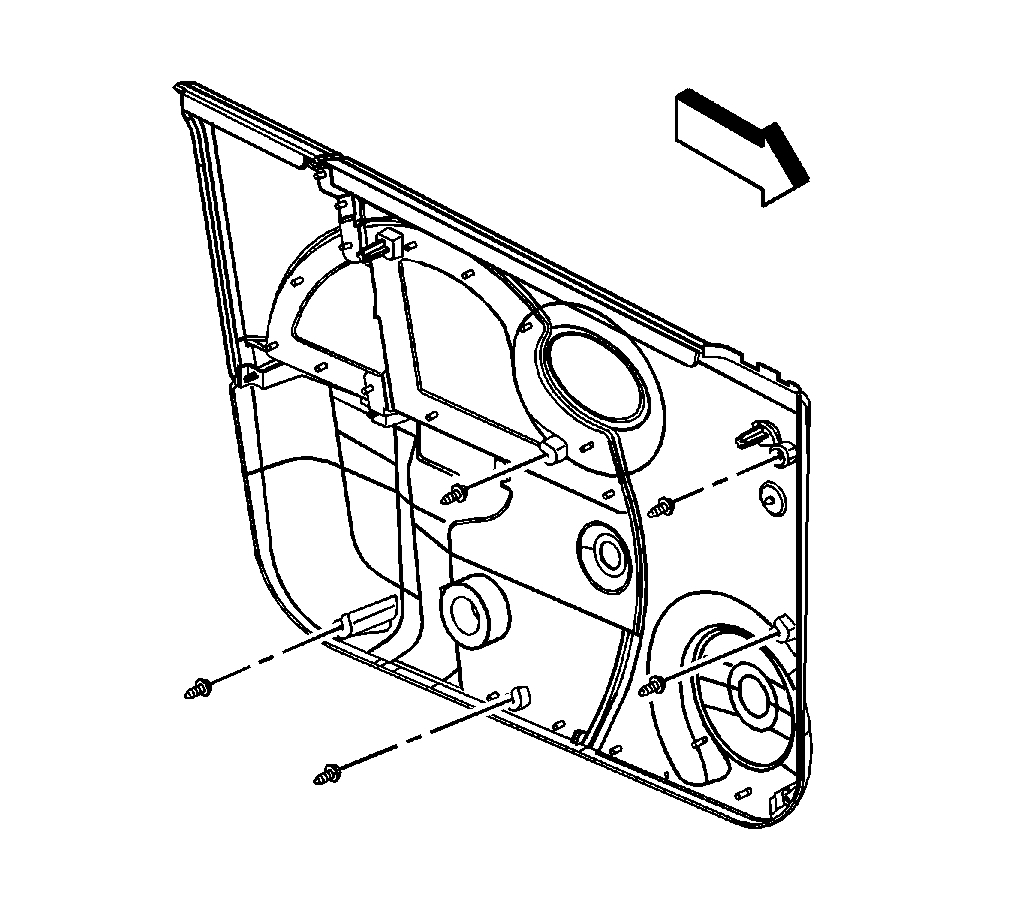
Now, you will have to remove the door panel to access the motor and wiring. Here are the directions for replacement of the door panel. It shows how one is removed and replaced. The remaining pictures correlate with these directions.
_____________________________________________________
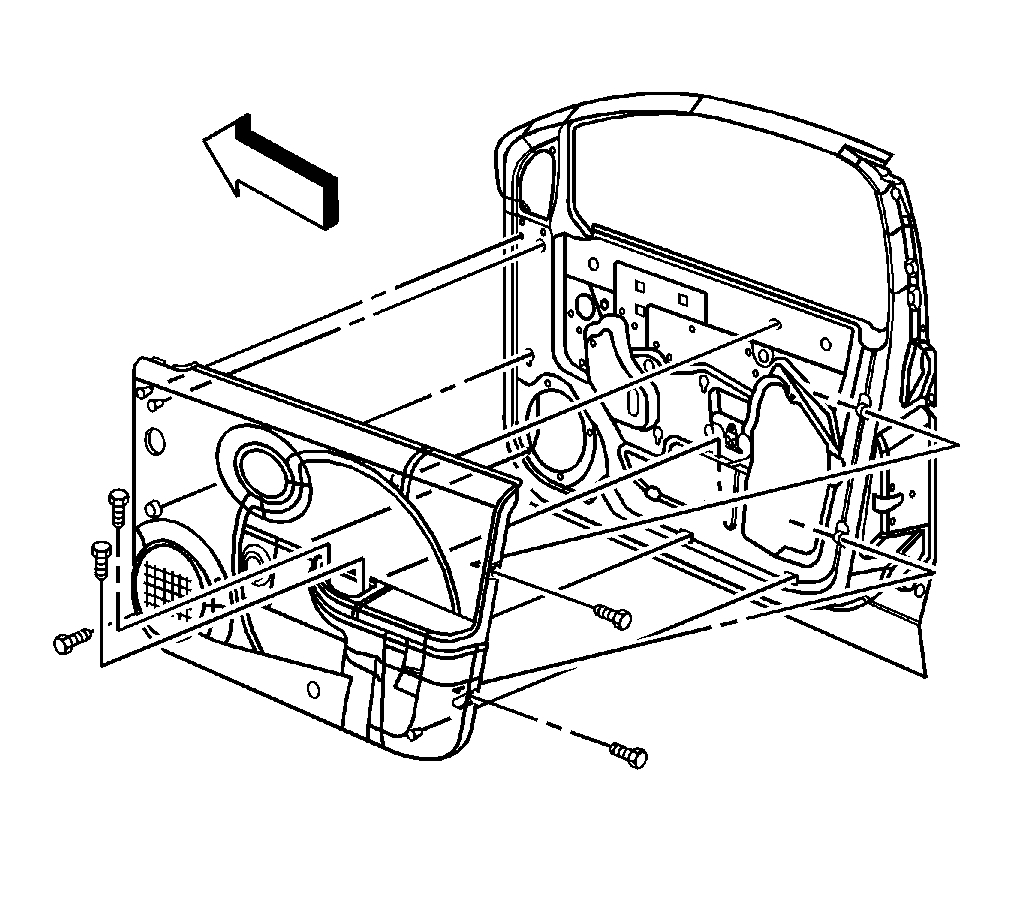
2007 Saturn ION L4-2.0L SC
Front Side Door Trim Panel Replacement
Vehicle Body and Frame Doors, Hood and Trunk Doors Front Door Front Door Panel Service and Repair Removal and Replacement Front Side Door Trim Panel Replacement
FRONT SIDE DOOR TRIM PANEL REPLACEMENT
Front Side Door Trim Panel Replacement
Removal Procedure
1. Remove the upper trim panel.
2. Remove the manual window regulator handle, if equipped.
3. Remove the power door lock switch, if equipped.
4. Remove the pull cup assembly.
pic 4
5. Remove the door trim push-in retainers.
6. Remove the screw from the trim panel.
pic 5
7. Pull the bottom of the door trim out to disengage the clips.
8. Lift up on the door trim panel to disengage the inner belt molding from the door flange.
9. Remove the door trim panel.
Installation Procedure
pic 6
1. Position the trim panel to the front door.
2. Engage the inner belt molding over the door flange and press down.
3. Align the trim panel retainers and press until the retainers are fully seated.
pic 7
Notice: Refer to Fastener Notice.
4. Install the screw to the door trim panel.
Tighten the screw to 2.5 N.m (23 lb in).
5. Install the push-in retainers to the door trim panel.
6. Install the pull cup.
7. Install the power door lock switch.
8. Install the window regulator handle to the door.
9. Install the upper trim panel.
____________________________________________________________
Here are a few links you may find helpful when testing for power.
https://www.2carpros.com/articles/how-to-use-a-test-light-circuit-tester
https://www.2carpros.com/articles/how-to-use-a-voltmeter
https://www.2carpros.com/articles/how-to-check-wiring
_____________________________________________________________
Let me know what you find and if the window works from any of the switches or the problem is limited to just one.
Take care,
Joe
Images (Click to enlarge)
Sep 15, 2019 at 5:17 PM