One of the valve cover baffles has broken off

Tiny
STEVE W.
  • MECHANIC
  • 13,003 POSTS
Whatever lets you turn it over. You could even use the starter if you just set the covers on loose, just use some spray tack on the gaskets to hold them to the cover and set one in place. Then hold it there with a bungee or someones hand, bump it over so it turns 4 times and if you don't feel the cover move and the clay doesn't show impacts, clean it up and install them. Do one side then the other.
Was this
answer
helpful?
Yes
No
Thursday, November 7th, 2019 AT 6:27 PM
Tiny
CITYGUYUSA
  • MEMBER
  • 86 POSTS
I finally had some time to do very basic start. I didn't have enough clay to actually fill even a single side of the valve cover which I wasn't thinking I would need to fill it but the top set of valves are so close to the bottom of the valve cover I barely got an indentation. But I could see where the bolts are. What I noticed was how close the one valve is to the oil baffle. If it's not or wasn't hitting the baffle that would be a miracle. Let me know your thoughts.

Secondly, as we talked about the new covers are a lot lower than these. As you can see by the lower set of valve imprints they are deep. I didn't use a seal because I just wanted to know where to drill through the old valve covers but a seal is what like 1/8" thick? I did check the seating of the new covers they do fit and seem to seat but I haven't rotated the engine yet. You told me that the valves don't move all that much and being stock you wouldn't expect any problems.

I was really curious about your thoughts on the valve and the baffle. It's the 2nd valve from the right. You can see where the baffle used to be by the 2-90 degree straight pieces of metal coming down from the top.
Was this
answer
helpful?
Yes
No
Wednesday, July 15th, 2020 AT 6:38 PM
Tiny
STEVE W.
  • MECHANIC
  • 13,003 POSTS
Easier test. Take a small bit of clay, put it around the baffle so it is about 1/4 inch thick all around it and set it in place. If it doesn't touch you are good to go.
Was this
answer
helpful?
Yes
No
Wednesday, July 15th, 2020 AT 9:01 PM
Tiny
CITYGUYUSA
  • MEMBER
  • 86 POSTS
You're talking about the new covers? I was talking about the old ones because I couldn't figure out how that baffle came apart. It was literally torn off but how long was it like that? And while that valve might explain 1 side of a split baffle it doesn't explain the other side which when I had the cover off the first time was still intact. Even looking at the location of the other 3 valves across the top they are literally against the side of the valve cover.

But yeah, I'll definitely test around both baffles on both sides because they are in totally different places than the old covers.
Was this
answer
helpful?
Yes
No
Thursday, July 16th, 2020 AT 7:00 PM
Tiny
STEVE W.
  • MECHANIC
  • 13,003 POSTS
Most of them are only spot welded in place so if one side was hitting it would tend to keep flexing until the welds failed and it fell off.
Was this
answer
helpful?
Yes
No
Thursday, July 16th, 2020 AT 7:48 PM
Tiny
CITYGUYUSA
  • MEMBER
  • 86 POSTS
Yesterday, I got my weekly update from camaros,net and it just happened to have a post about valve lash. I thought I'd compare notes but the words were getting heated so I thought let me see what other posts are out here and it seems that it's a hotly debated topic about how to accomplish the task after you find out if you have solid or hydraulic lifters. One person discussed what you told me but most were doing it on a cold engine in firing sequence and then turning the engine 90 degrees some OCIC, I think it was, acronym. I'll post the thread here just so you can look at it and offer your 2 cents https://www.camaros.net/threads/valve-lash.477993/#post-1783238825 And like I said that's just one of many that have difficulty agreeing.
Was this
answer
helpful?
Yes
No
Saturday, August 1st, 2020 AT 11:06 PM
Tiny
STEVE W.
  • MECHANIC
  • 13,003 POSTS
It makes a big difference if you have solids or hydraulic. With solids you rotate the engine until all travel on a rocker has stopped and the lifter is on the base circle of the cam, then use a feeler gauge to adjust the lash to either the stock number or whatever the cam maker asks for. With hydraulic lifters it depends on what lifter and cam combination you have. With all stock parts the best method is to adjust them with the engine warm in the manner I posted earlier. For the initial cold adjustment you can use the exhaust opening and intake closing method (EO/IC) which is just rotating the engine and adjusting each rocker when you see them stop moving as the engine reaches TDC. Unless you are using something like a Rhoads lifter set up. Those can be a bear to adjust because you need to see the lifters to set proper preload as they are designed to bleed down when the engine is running. The issue of the lifter pumping up and causing valve float is true, however that usually happens with the engine running at very high rpm, like drag racing.
Was this
answer
helpful?
Yes
No
Sunday, August 2nd, 2020 AT 6:41 AM
Tiny
CITYGUYUSA
  • MEMBER
  • 86 POSTS
So, stick with what you told me including "Turn the wrench an additional 1/8 - 1/4 turn to set the lifter preload."? I felt like they couldn't even agree on the amount you had to turn to preload it.
Was this
answer
helpful?
Yes
No
Sunday, August 2nd, 2020 AT 3:47 PM
Tiny
STEVE W.
  • MECHANIC
  • 13,003 POSTS
Reading through it shows that most have a set method that works but they don't specify as to what parts they are using. If you were building an engine with all non-stock parts like a high lift cam, racing lifters, roller rockers and such you use a bit different method. For stock rockers and cam the entire idea of hydraulic lifters it to self adjust for wear using the oil pressure in the engine. To do that you need the preload to be enough to compensate for any heat changes as well as the wear. On most engines 1/4 turn will work, but anything up to 1 full turn will work on stock parts as they have a lot of extra travel in them.
Was this
answer
helpful?
Yes
No
+1
Sunday, August 2nd, 2020 AT 4:22 PM
Tiny
CITYGUYUSA
  • MEMBER
  • 86 POSTS
I've had to replace the front suspension springs and I need to do the hood and the trunk. Now I'm thinking about the valve springs. I don't know how old anything in the engine is or if it was rebuilt a couple thousand miles ago. Is there a way to know if these springs are sprung and have seen better days?
Was this
answer
helpful?
Yes
No
Tuesday, August 4th, 2020 AT 1:12 AM
Tiny
STEVE W.
  • MECHANIC
  • 13,003 POSTS
The only good way is to remove them and use a valve spring tester to see what spring rate they have. If you are doing that then it's usually easier to just buy all new and do the valve stem seals at the same time.
Was this
answer
helpful?
Yes
No
Tuesday, August 4th, 2020 AT 6:35 AM
Tiny
CITYGUYUSA
  • MEMBER
  • 86 POSTS
I was just about ready to bump my engine to check the valve covers to ensure clearance. I already noted I was a screw short and that the rubber grommet that they gave me for the PCV wasn't big enough for my PCV. I tried to use the old grommet but it's not soft like the new one and isn't giving a 1/16th to go in the hole. I guess I could grind it down a bit.

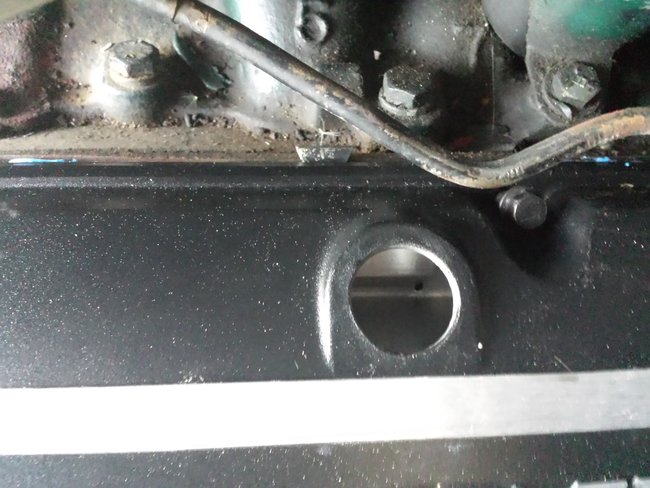
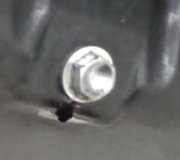
It was then that I realized I had 2 holes on one side and one on the other. What the heck. Never in a million years did I even look at these for extra holes. I either didn't see it or I never handled them together to realize that it was 2 different holes. Anyways it's an actual hole but I have no idea what it's for or what to do about it. Oddly it has a rubber grommet on it where the other one was in the bag with the screws. I would have just moved the PCV to the other side but it doesn't fit there either. Can I plug the odd hole somehow?

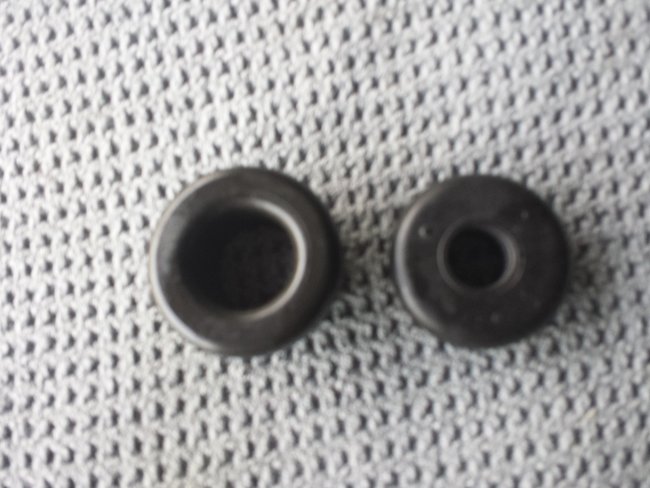
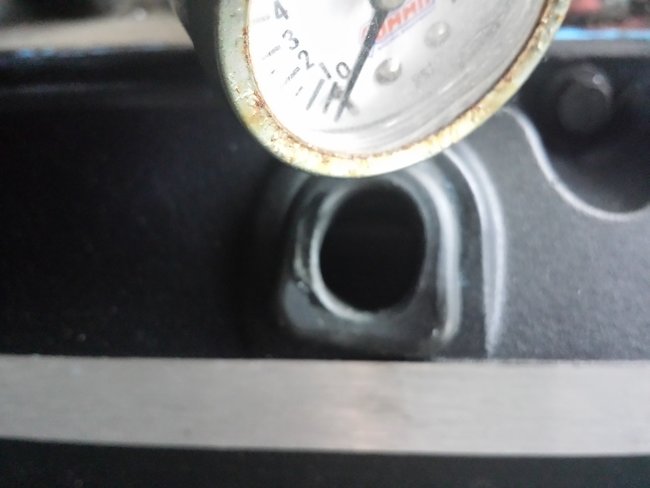
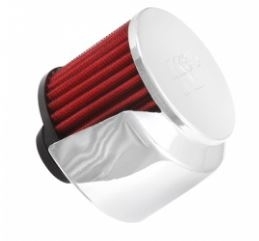
The first 2 pics are just the grommets beside each other. They're not that really much different size wise just one's hard or aged rubber and the other is willing to squeeze into the hole. The 3rd pic was what I was planning to use for the PCV hole. The 4th pic of the hole in the other cover is for what?

PS. Since I was down on the ground thinking maybe one of the valve cover screws jumped I decided I might as well check for a center bolt on the drive pulley and sure enough it wasn't covered over like I had thought. Just can't see it because of the radiator being so close. That's a good thing. No valve cover screw however.

What's your definition of a bolt? A screw? I always thought a bolt had to do with the absence of a slot(s). But from the dictionary a bolt is a connector that holds things together with the help of a nut. Another childhood theory up in smoke. So the crankshaft is a screw?
Was this
answer
helpful?
Yes
No
Tuesday, September 8th, 2020 AT 4:33 PM
Tiny
STEVE W.
  • MECHANIC
  • 13,003 POSTS
You can sometimes get hard rubber to soften using hot water and soaking it, but it's better to replace it. The reason for the extra holes is due to the different ways the older engines were vented. One hole would be for the oil filler, one is for the PCV and the last either goes to a hose that comes out the base of the air cleaner or a push in filter both were used over the years. The PCV allows the crankcase gases to go back into the intake manifold, isually through a vacuum fitting under the carb or on one of the runners, while the other line or filter lets in the fresh air to scavenge those gasses out. Without the air inlet the vacuum on the PCV can cause serious seal damage and oil use from the constant vacuum. On modern engines they have tightened that system up and now if you tried using an open filter on the PCV system it would set a vacuum leak code and cause a high idle. Not a problem on the older engines. I usually think of a screw as a smaller fastener, under about 1/4 inch and using a driver while a bolt is larger and uses a wrench. Either one can go into a tapped hole or use a nut. When you really start looking though there are multiple definitions for each depending on the field of study you are looking in. Mechanics call them one thing, machinists use different words and engineers even others. Then there are differences in other countries as well.
Was this
answer
helpful?
Yes
No
+1
Tuesday, September 8th, 2020 AT 6:04 PM
Tiny
CITYGUYUSA
  • MEMBER
  • 86 POSTS
So what am I looking for to put in that hole? My air cleaner isn't a snorkel type which had a puck on the snorkel with a hose connected and it's not the type with a filter on the side of the base of the air cleaner. I have an open sides air cleaner with a base and a lid.
Was this
answer
helpful?
Yes
No
Tuesday, September 8th, 2020 AT 9:26 PM
Tiny
STEVE W.
  • MECHANIC
  • 13,003 POSTS
There used to be kits that let you install a line into the air cleaner but in your case you could just go with a simple push in breather in one hole. Then a PCV valve with a hose over to the port under the carb. Then a push in oil filler. K&N, Earls and others make kits where you just need to know the size of the hole in the grommet.
Was this
answer
helpful?
Yes
No
+1
Tuesday, September 8th, 2020 AT 9:54 PM
Tiny
CITYGUYUSA
  • MEMBER
  • 86 POSTS
I have the PCV and the filler cap.

Is this push in something I can get from Autozone or is it a specialty that I would have to find from Eklers or 396, etc?
Was this
answer
helpful?
Yes
No
Wednesday, September 9th, 2020 AT 3:03 PM
Tiny
STEVE W.
  • MECHANIC
  • 13,003 POSTS
They should have some on the shelf near the chrome parts for engine dress up. Unless you want something matching what you have or something nicer. They can also order them from what they show online.
Was this
answer
helpful?
Yes
No
Wednesday, September 9th, 2020 AT 3:26 PM

Please login or register to post a reply.

Sponsored links