Hi,
Here are the directions for replacing both the primary and secondary timing chains. All of the attached pics correlate with the directions.
________________________________________________________________________________________
2001 Lincoln LS V8-3.9L VIN A
Primary
Vehicle Engine, Cooling and Exhaust Engine Timing Components Service and Repair Procedures Primary
PRIMARY
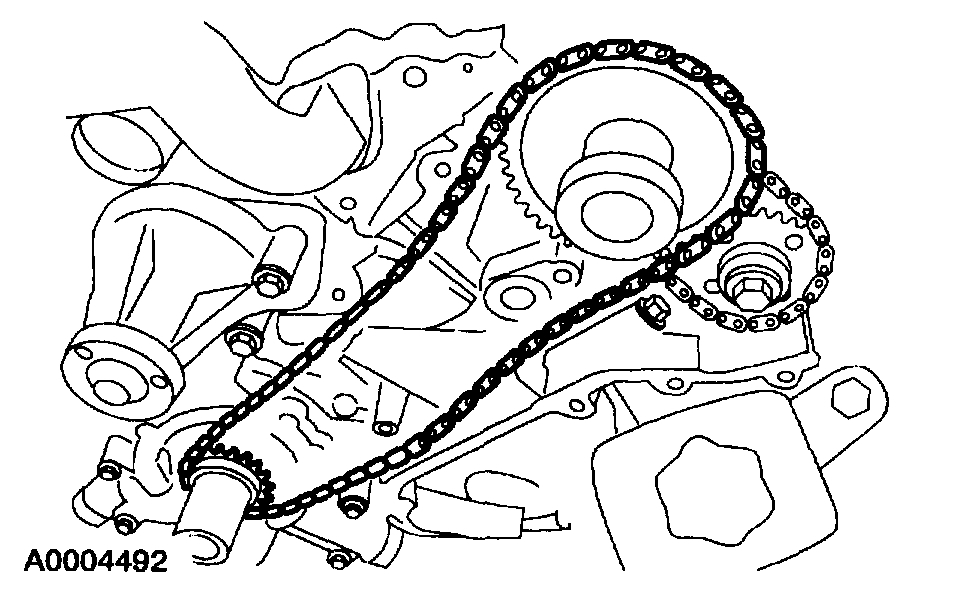
Timing Drive Components-Primary
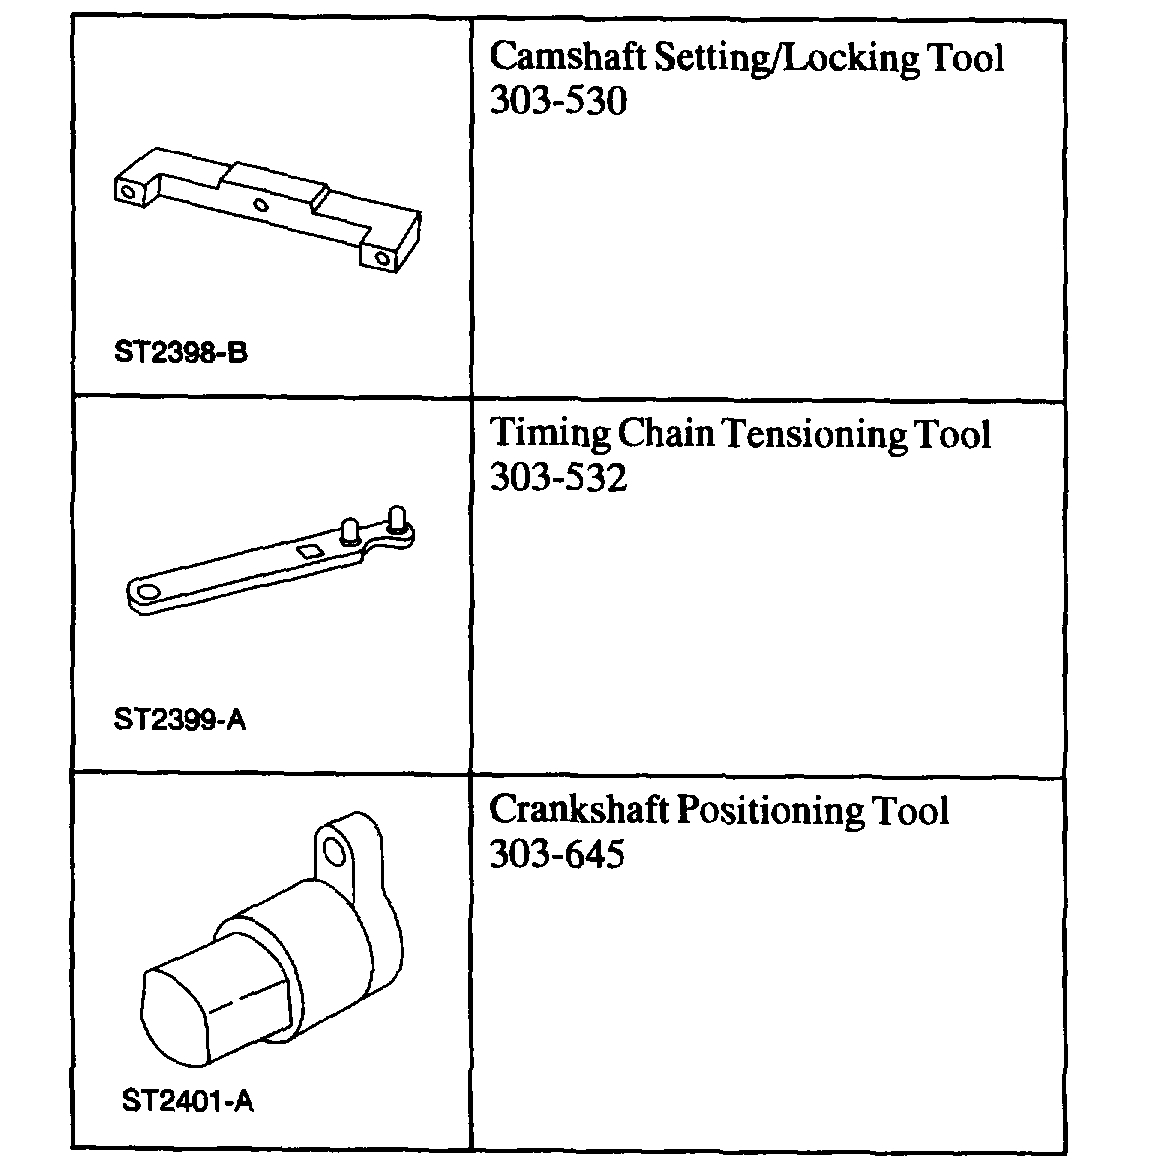
Special Tools
pic 1
Special Tool(s)
Removal
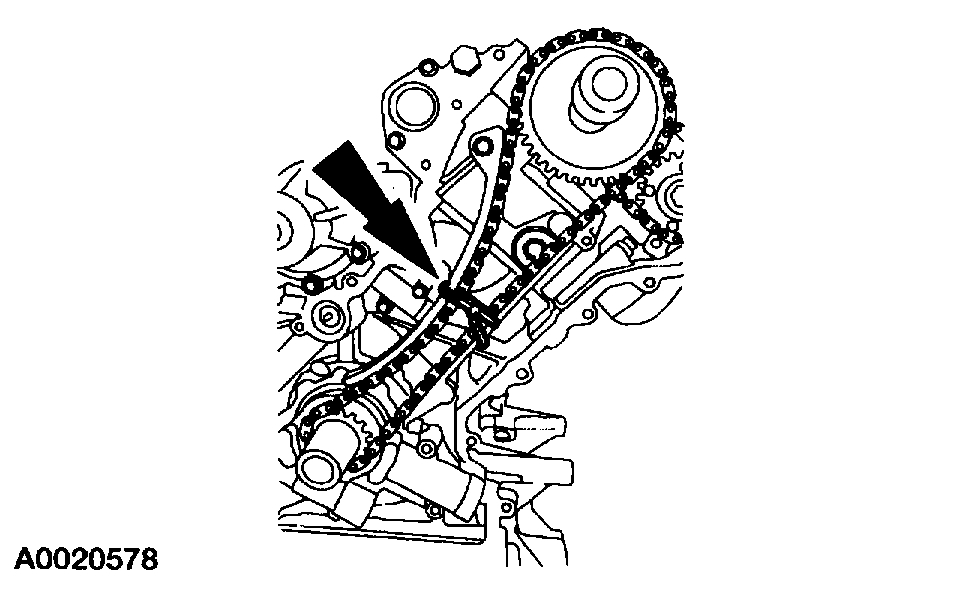
1. Remove the engine front cover.
2. Raise the vehicle.
Pic 2
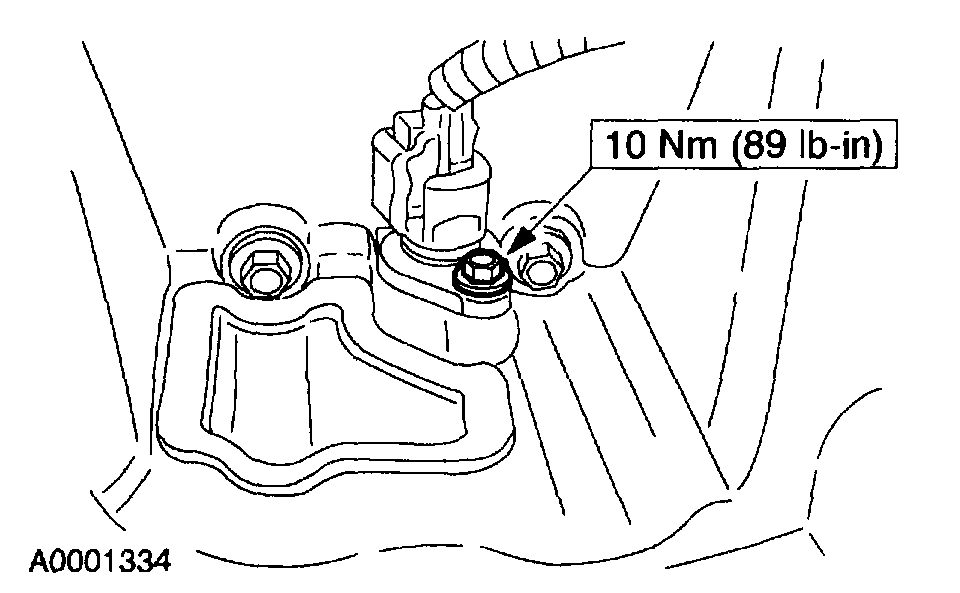
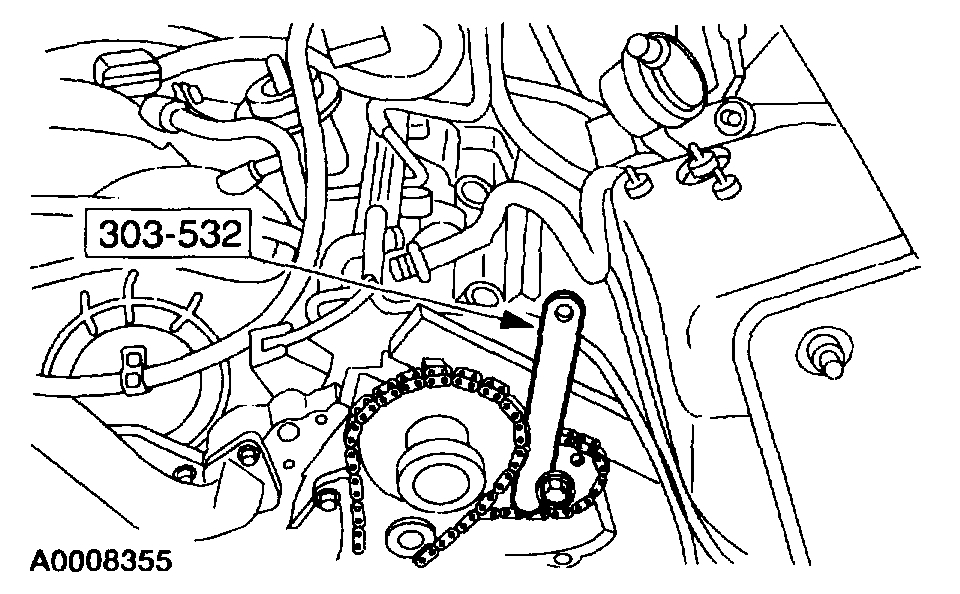
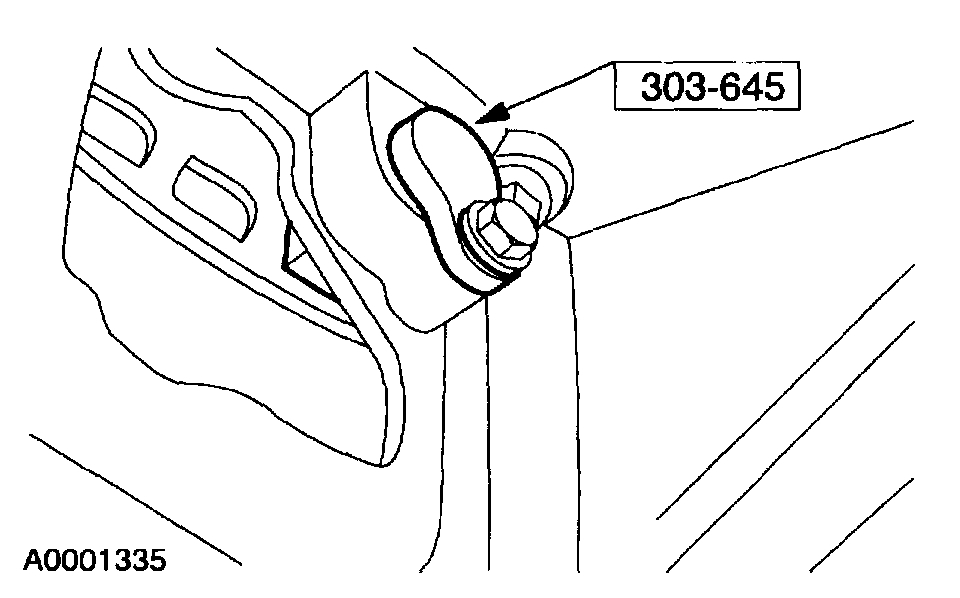
3. Remove the crankshaft position (CKP) sensor and the torque converter cover.
Pic 3
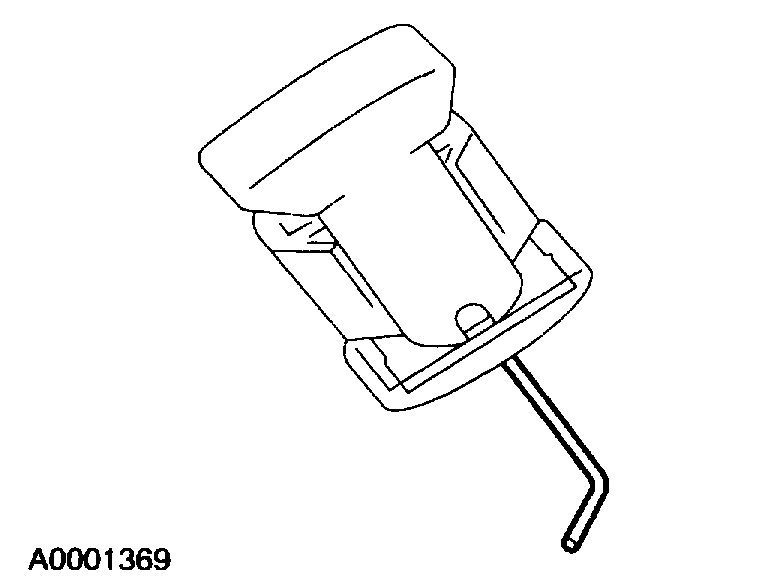
4. NOTE: There is one window on the ignition pulse wheel that is unique to accept the special tool.
Install the special tool.
- Turn the crankshaft to 45 degrees ATDC. The crankshaft keyway will be in the 6 o'clock position.
- Install the special tool.
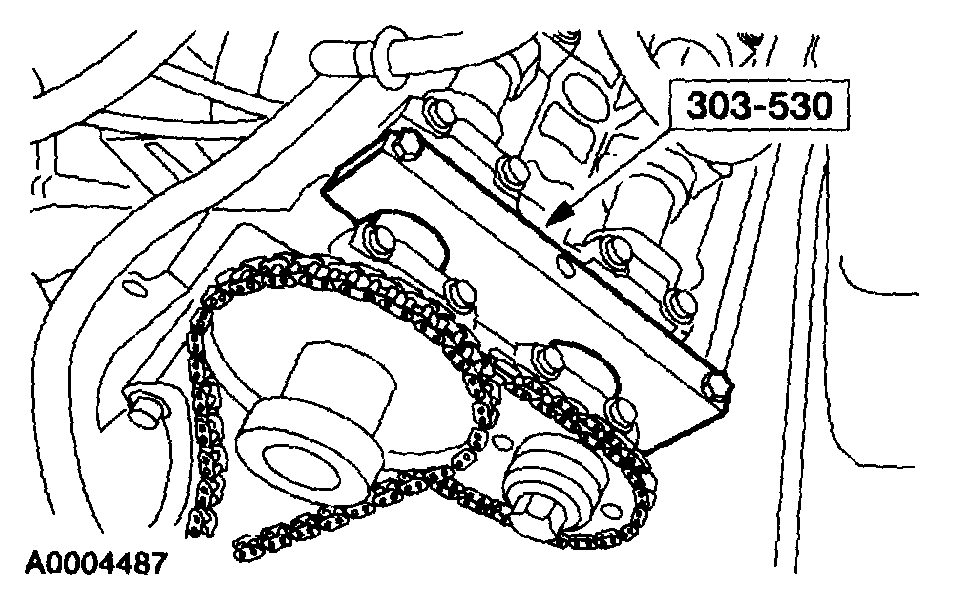
5. Lower the vehicle.
Pic 4
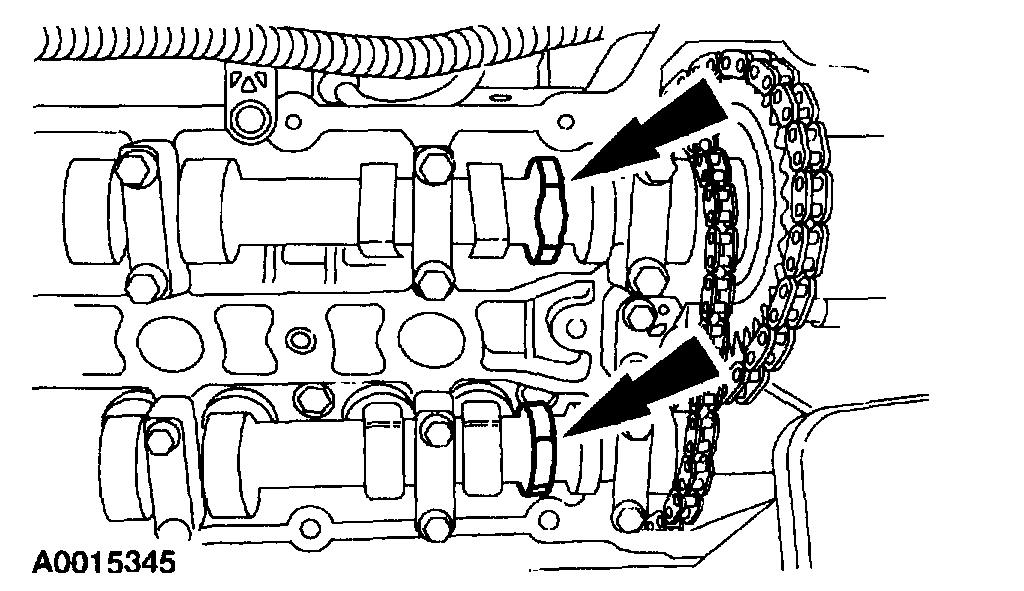
6. Make sure the lobes of the camshaft are facing upwards. If not, repeat Step 4.
Pic 5
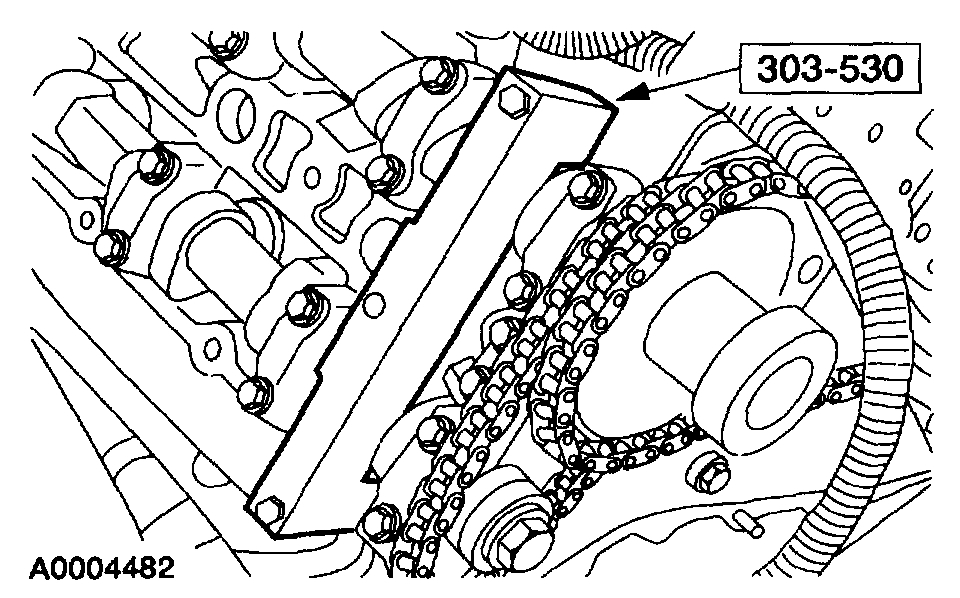
7. Install the special tool on the RH cylinder head.
Pic 6
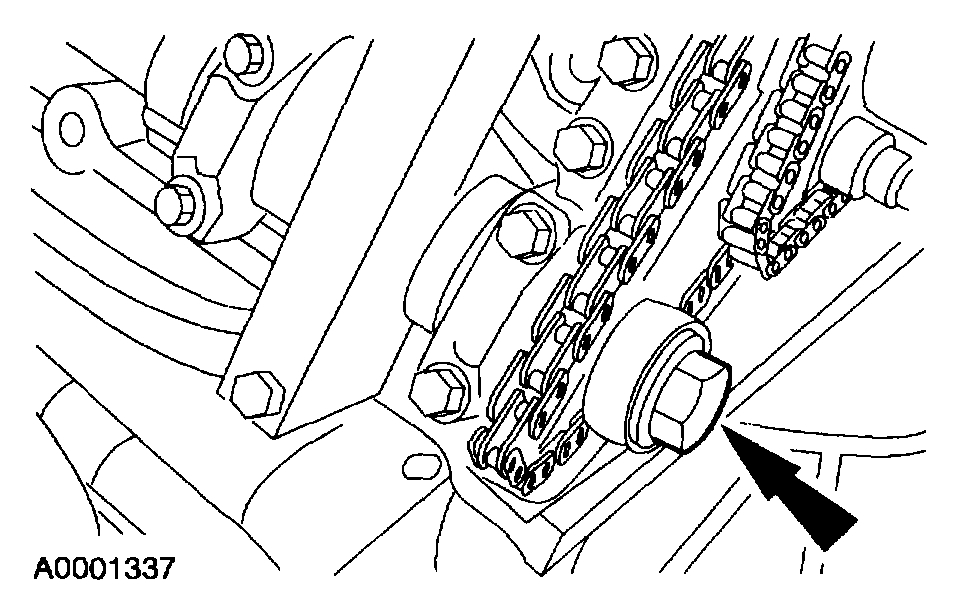
8. Loosen the exhaust camshaft sprocket bolt.
Pic 7
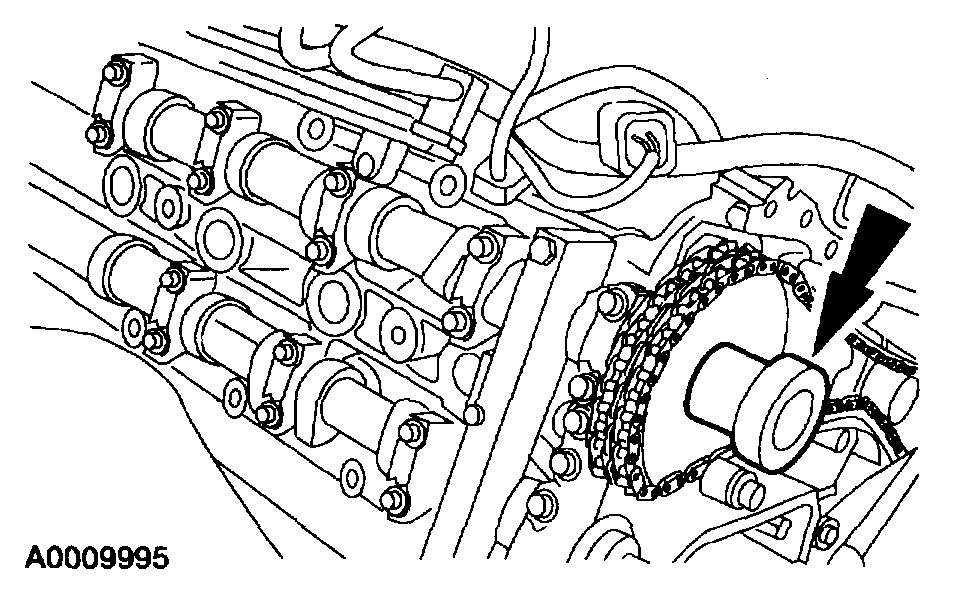
9. Loosen the intake camshaft sprocket bolt and slide the camshaft sprockets forward on the bolts.
Pic 8
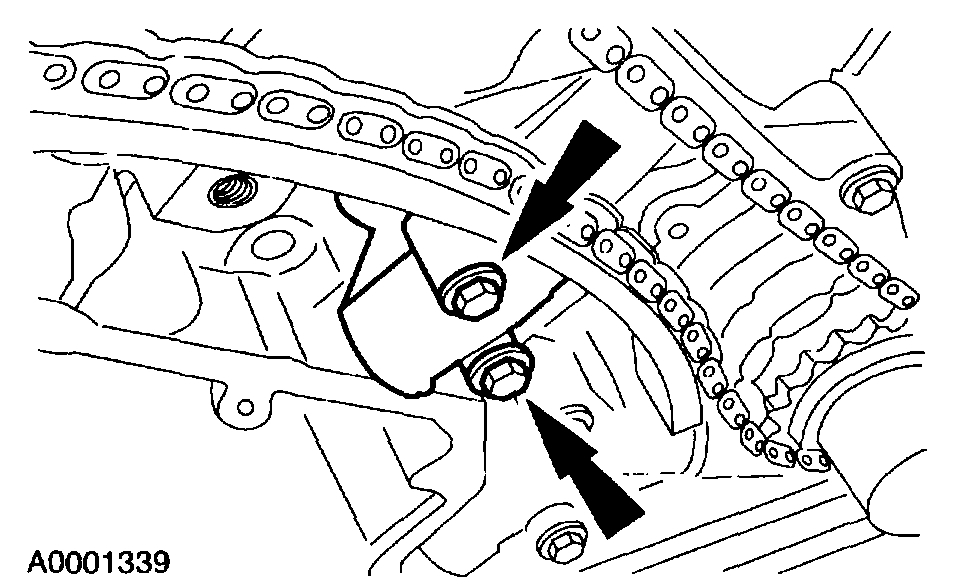
10. Remove the RH timing chain tensioner and blanking plate.
Pic 9
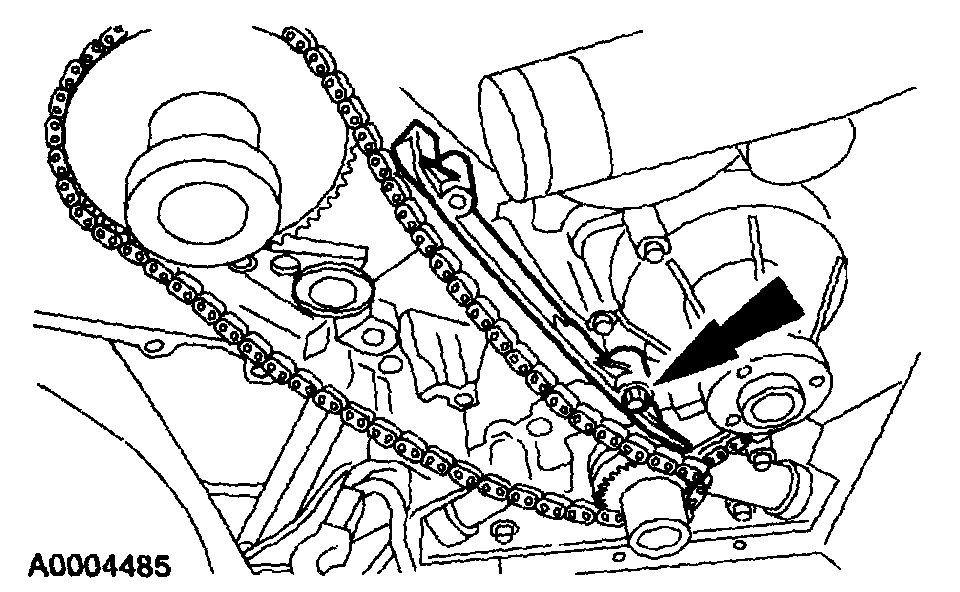
11. Remove the tensioner arm.
Pic 10
12. Remove the timing chain guide.
Pic 11
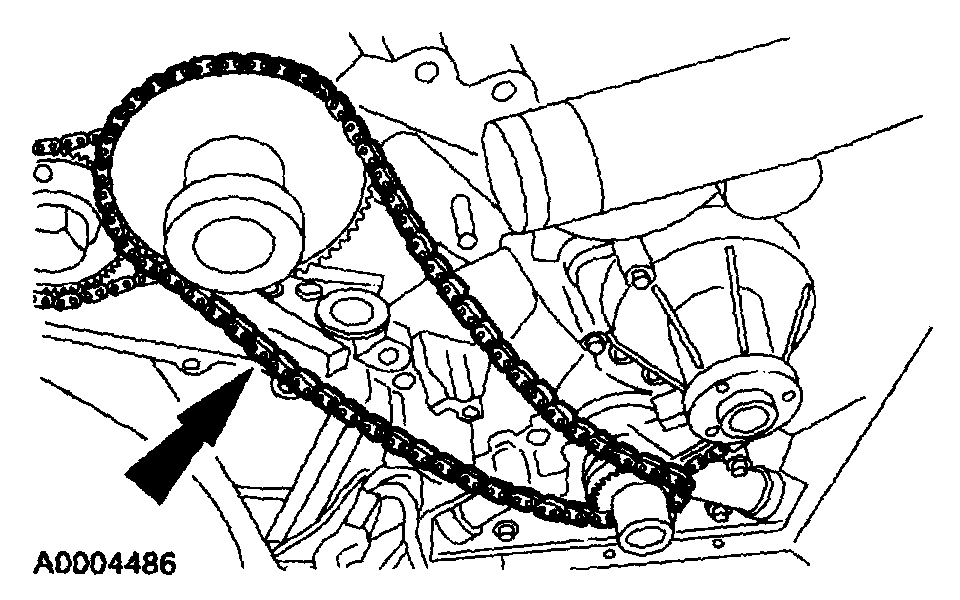
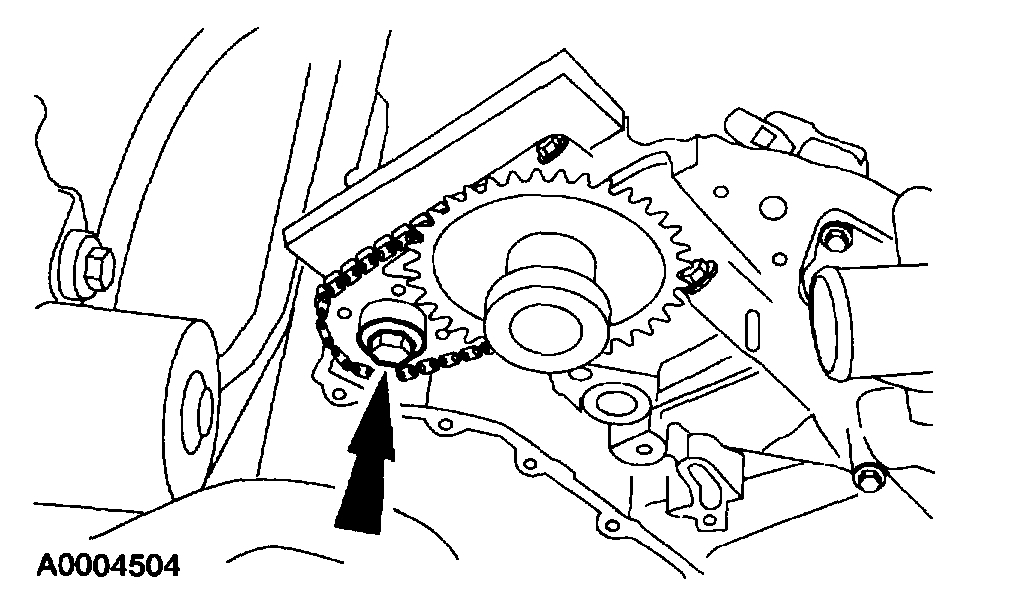
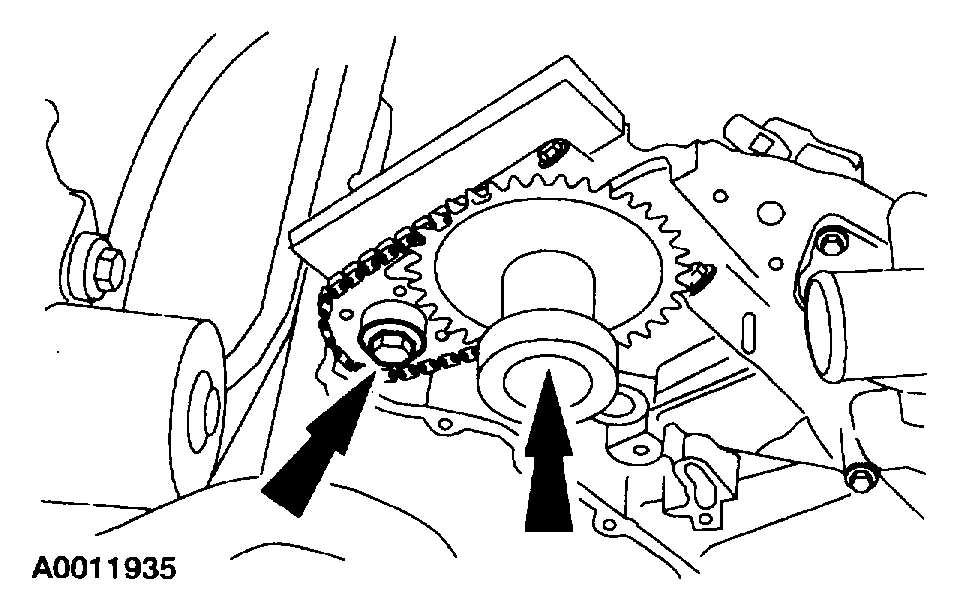
13. Remove the RH primary timing chain and crankshaft sprocket as an assembly.
Pic 12
14. Remove the special tool from the RH head.
Pic 13
15. Install the special tool on the LH head.
Pic 14
16. Loosen the exhaust camshaft sprocket bolt.
Pic 15
17. Loosen the intake sprocket bolt and slide the camshaft sprockets forward on the bolts.
Pic 16
18. Remove the LH timing chain tensioner and blanking plate.
Pic 17
19. Remove the tensioner arm.
Pic 18
20. Remove the timing chain guide.
Pic 19
21. Remove the LH primary timing chain and crankshaft sprocket as an assembly.
Installation
pic 20
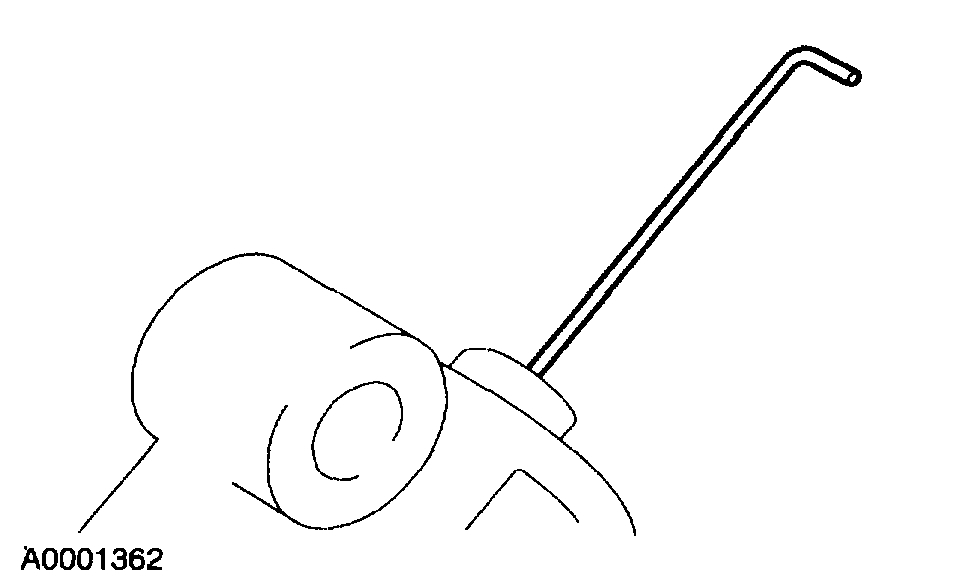
1. Reset the timing chain tensioners.
- Insert a fine wire and dislodge the check ball.
- Using finger pressure, compress the tensioner.
- Remove the wire.
Pic 21
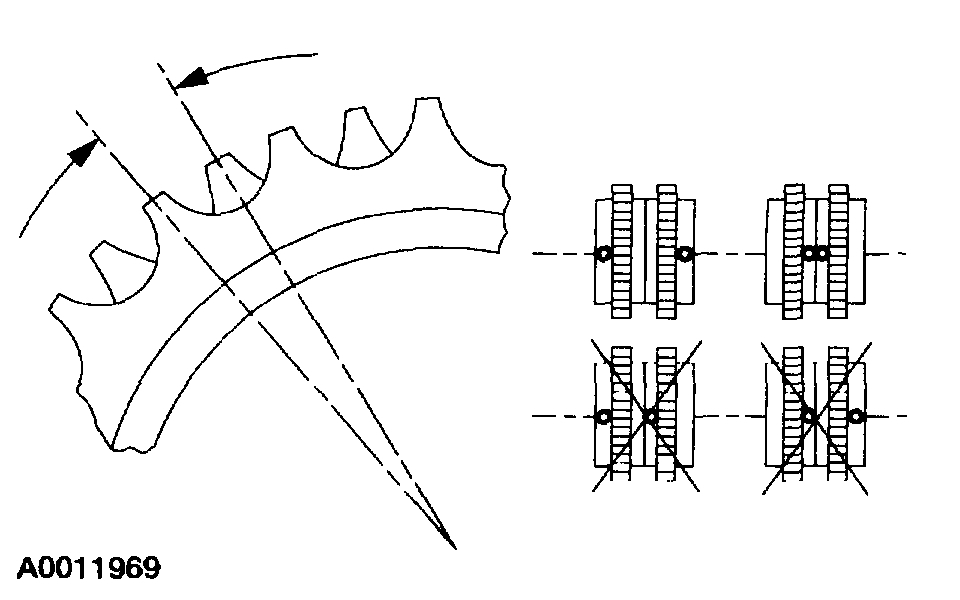
2. NOTE: If the timing mark on the LH timing chain crankshaft gear is facing toward the rear of the engine, install the RH timing chain crankshaft gear with the mark facing forward. If the timing mark on the LH timing chain crankshaft gear is facing toward the front of the engine, install the RH timing chain crankshaft gear with the mark facing toward the rear of the engine.
NOTE: The camshaft holding tool should still be installed on the LH cylinder head.
Position the LH timing chain and crankshaft gear.
- Position the timing chain over the LH intake camshaft sprocket.
- Position the crankshaft gear in the timing chain.
- Position the timing chain and crankshaft gear over the crankshaft as an assembly.
Pic 22
3. Install the LH timing chain guide.
Pic 23
4. Install the LH timing chain tensioner arm.
Pic 24
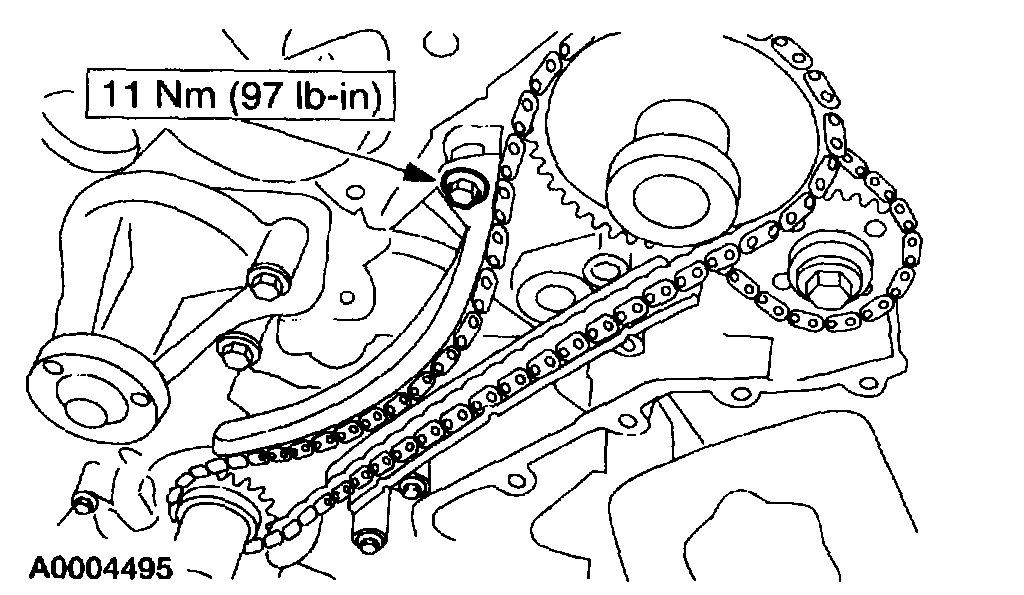
5. CAUTION: The orientation of the blanking plate must be as shown or the oil galley will not seal, resulting in low oil pressure and possible engine damage.
Install the LH timing chain tensioner.
- Position the blanking plate.
- Install the LH timing chain tensioner and blanking plate.
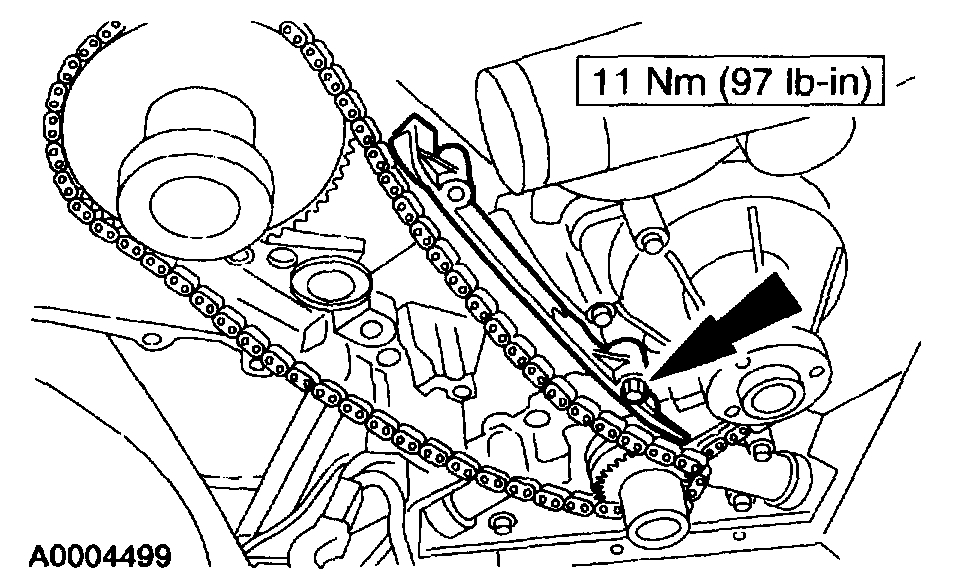
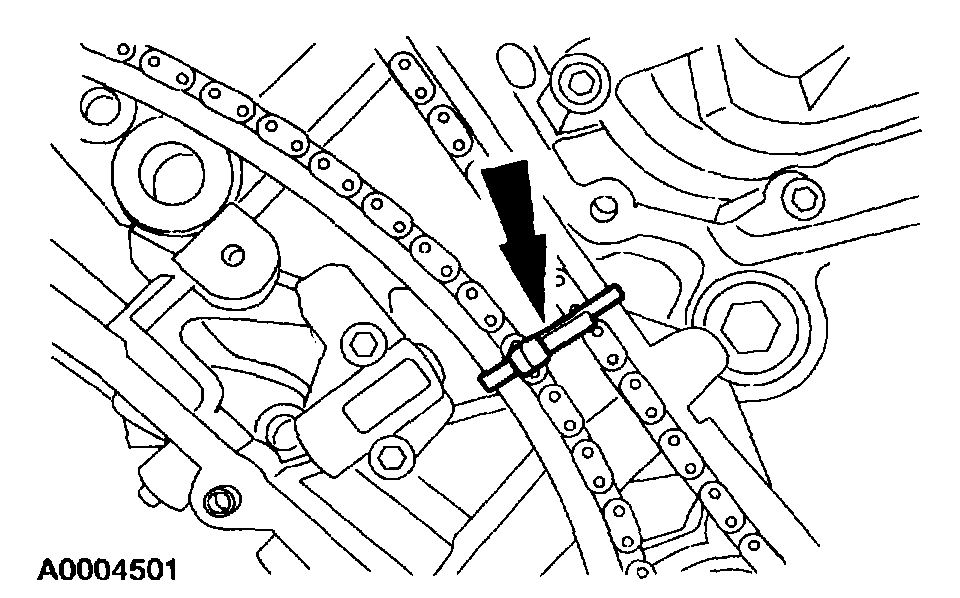
Pic 25
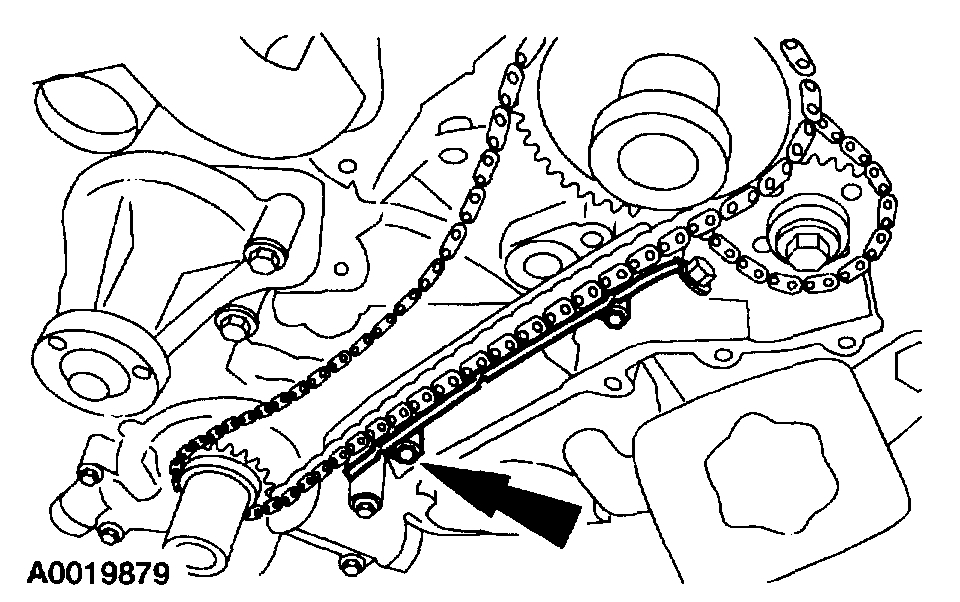
6. Install a tie strap to take up the slack in the timing chain.
Pic 26
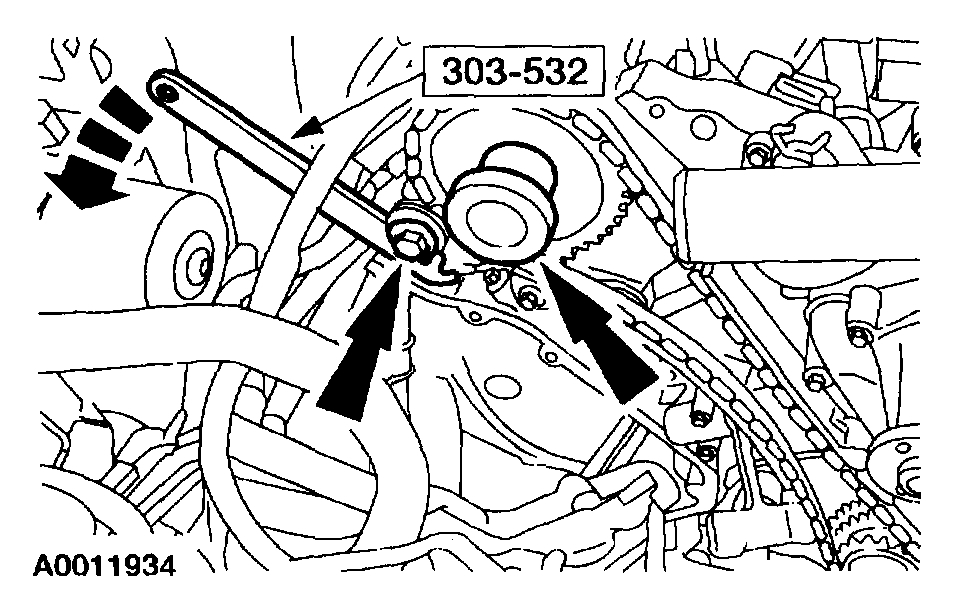
7. Using the special tool, apply tension to the LH exhaust camshaft sprocket and tighten the camshaft sprocket bolts in two stages.
- Stage 1: Tighten to 20 Nm (15 ft. Lbs.).
- Stage 2: Tighten an additional 90 degrees.
Pic 27
8. Remove the special tool.
9. Remove the tie strap.
Pic 28
10. Install the special tool on the right cylinder head.
Pic 29
pic 30
11. NOTE: If the timing mark on the LH timing chain crankshaft gear is facing toward the rear of the engine, install the RH timing chain crankshaft gear with the mark facing forward. If the timing mark on the LH timing chain crankshaft gear is facing toward the front of the engine, install the RH timing chain crankshaft gear with the mark facing toward the rear of the engine.
Position the RH timing chain and crankshaft gear.
- Position the timing chain over the RH intake camshaft sprocket.
- Position the crankshaft gear in the timing chain.
- Position the timing chain and crankshaft gear over the crankshaft as an assembly.
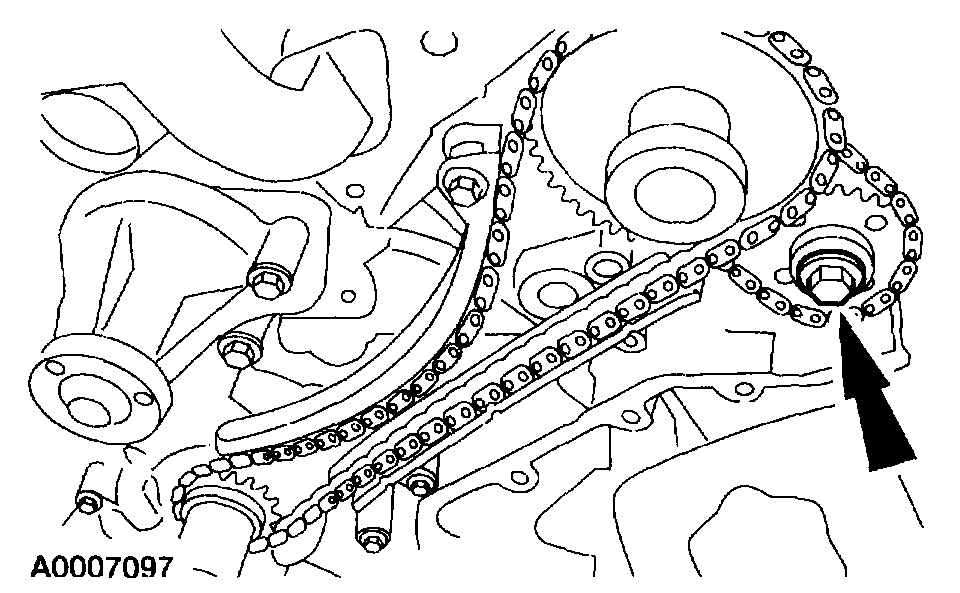
Pic 31
12. Install the RH timing chain guide.
Pic 32
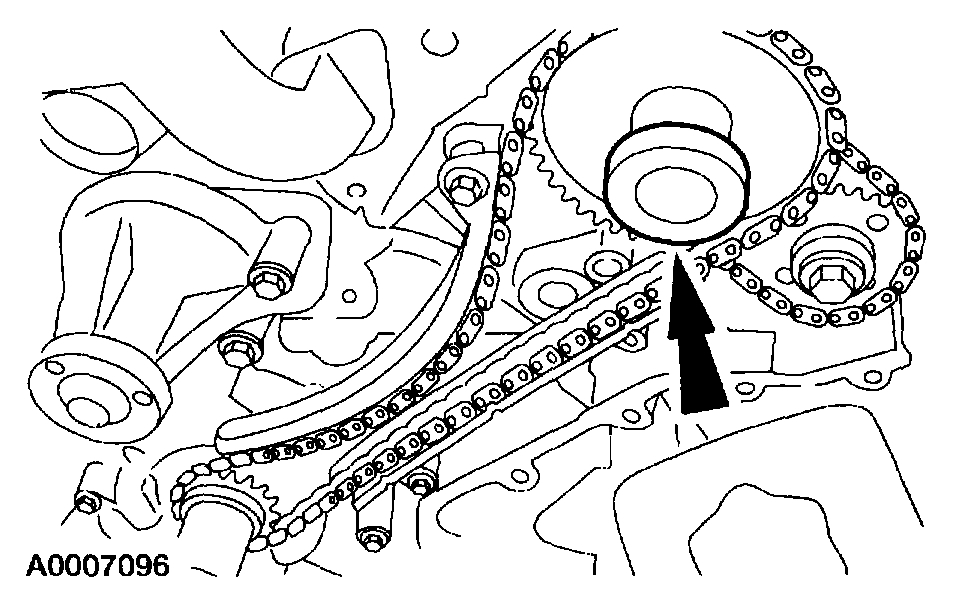
13. Install the RH timing chain tensioner arm.
Pic 33
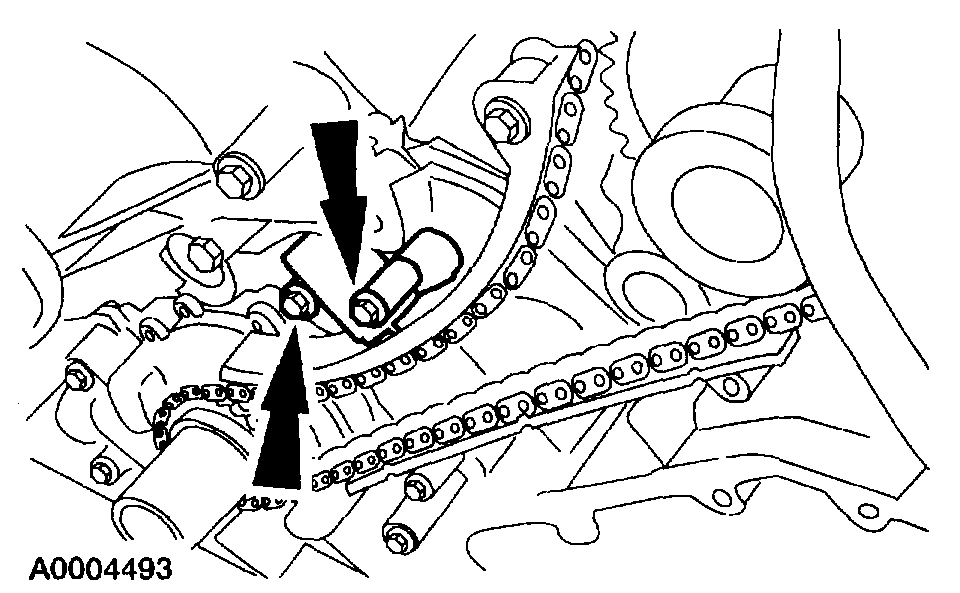
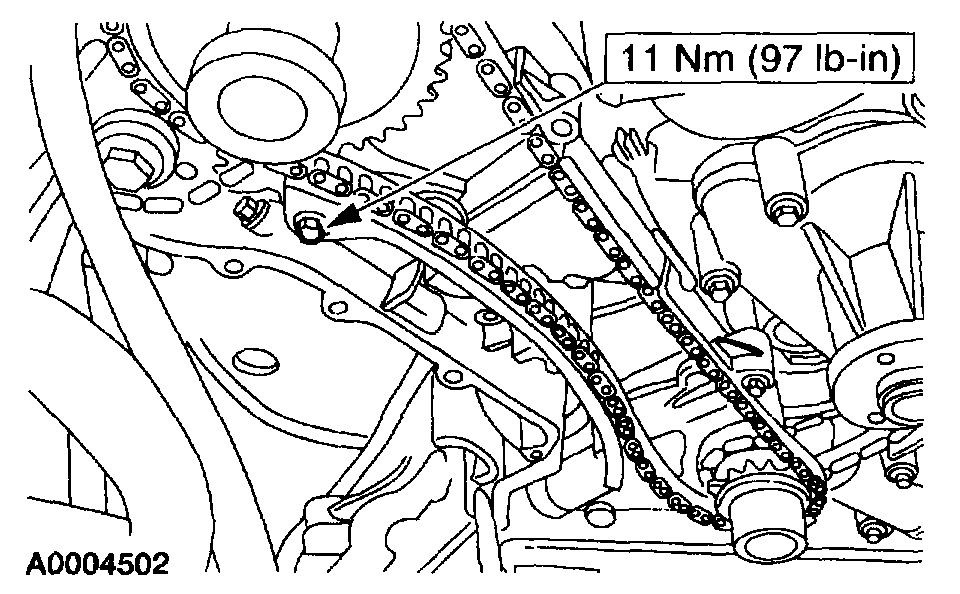
14. CAUTION: The orientation of the blanking plate must be as shown or the oil galley will not seal, resulting in low oil pressure and possible engine damage.
Install the RH timing chain tensioner.
- Position the blanking plate.
- Install the RH timing chain tensioner and blanking plate.
Pic 34
15. Install a tie strap to take up the slack in the timing chain.
Pic 35
16. NOTE: The exhaust camshaft sprocket bolt must be fully tightened before tightening the intake camshaft sprocket bolt.
Using the special tool, apply tension to the RH exhaust camshaft sprocket and tighten the camshaft sprocket bolts in two stages.
- Stage 1: Tighten to 20 Nm (15 ft. Lbs.).
- Stage 2: Tighten an additional 90 degrees.
Pic 36
17. Remove the special tool.
- Remove the tie strap.
18. Raise the vehicle.
Pic 37
19. Remove the special tool.
Pic 38
20. Install the CKP sensor and the torque converter cover.
21. Lower the vehicle.
22. Install the engine front cover.
______________________________________________________________________________________
Here are the directions for replacing the secondary timing chains.
2001 Lincoln LS V8-3.9L VIN A
Secondary
Vehicle Engine, Cooling and Exhaust Engine Timing Components Service and Repair Procedures Secondary
SECONDARY
Timing Drive Components-Secondary
Removal
NOTE: The RH secondary timing chains are shown; the LH secondary timing chains are similar.
1. Remove the primary timing chains.
Pic 39
2. Remove the exhaust sprocket bolt.
Pic 40
3. Remove the intake sprocket bolt and remove the camshaft damper.
Pic 41
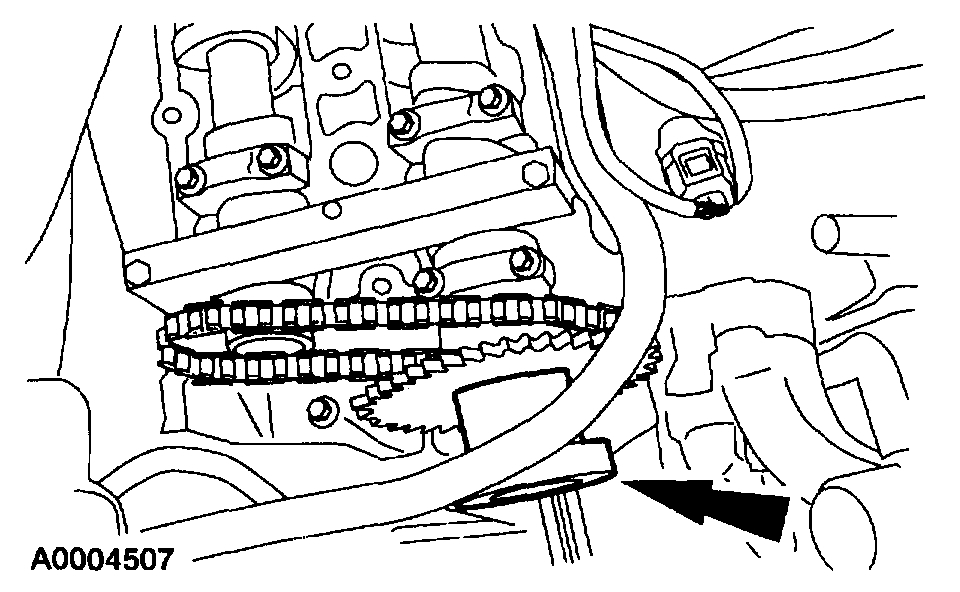
4. Remove the sprockets, damper, and chain as an assembly.
Pic 42
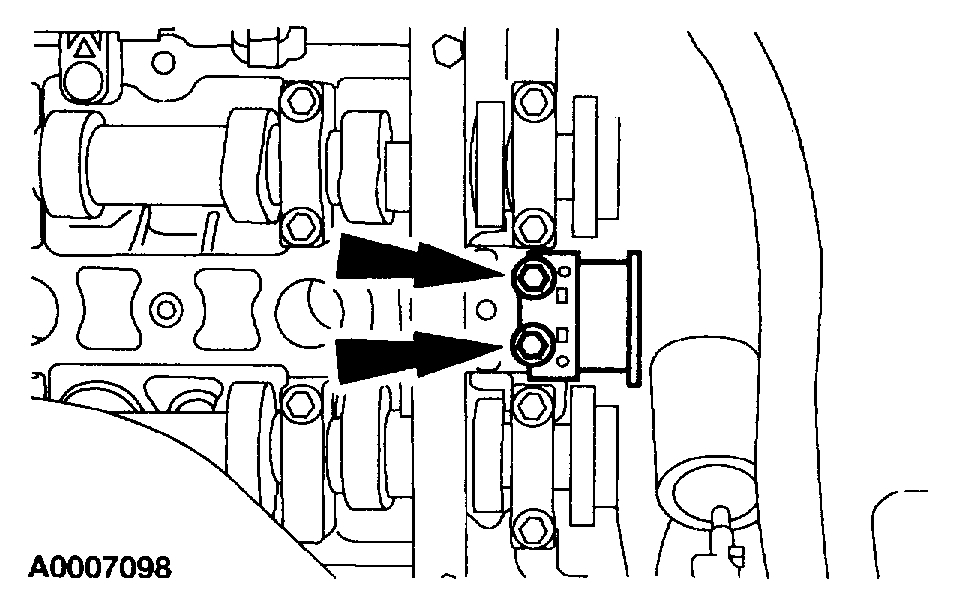
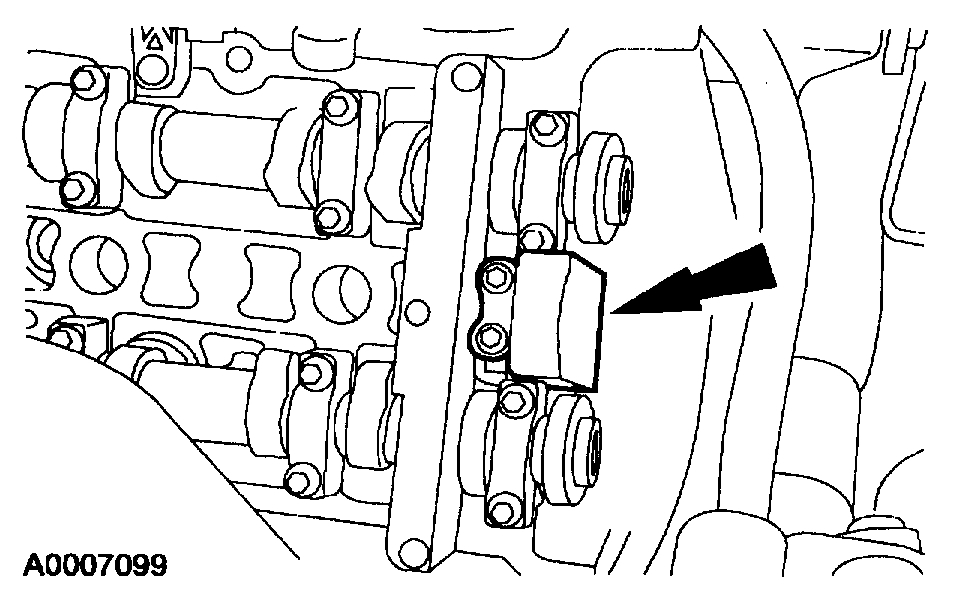
5. Remove the secondary timing chain tensioner bolts.
Pic 43
6. Remove the tensioner.
Installation
pic 44
1. Collapse the tensioners.
- Insert a thin wire into the check valve.
- Apply hand pressure until the tensioner is fully collapsed.
- Remove the wire.
Pic 45
2. Position the tensioner.
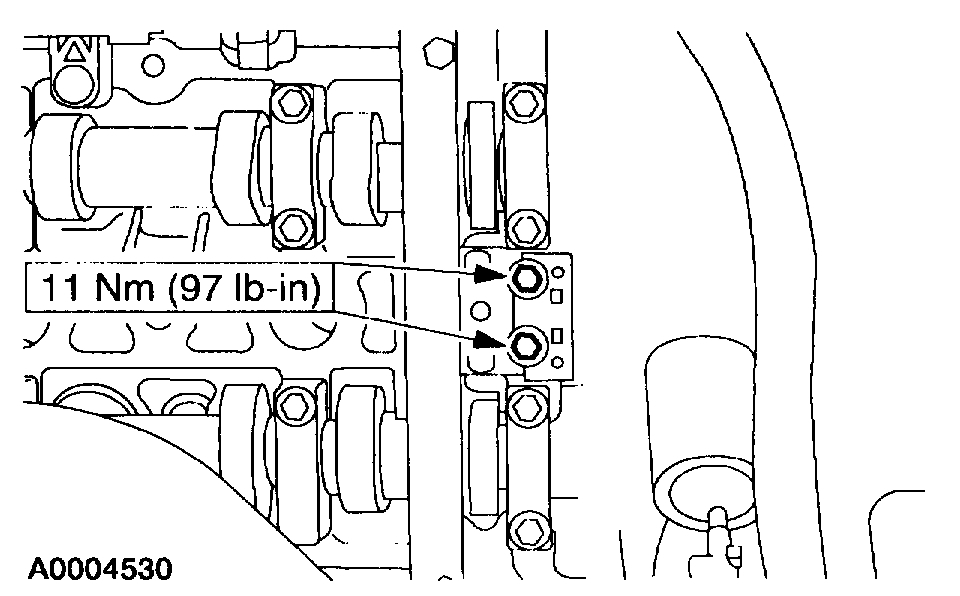
Pic 46
3. Install the timing chain tensioner bolts.
Pic 47
4. Position the intake sprocket, damper, chain and exhaust sprocket on the intake camshaft as an assembly.
Pic 48
5. Loosely install the intake and exhaust sprocket bolts.
6. Install the primary timing chains.
_______________________________
Let me know if this helps or if you have other questions.
Take care,
Joe
Images (Click to make bigger)
Tuesday, April 14th, 2020 AT 8:58 AM