Welcome to 2CarPros.
Timing won't change due to the cam. I am going to provide both the removal and install directions for the chain and the cam sensor. Take a look through everything and confirm you did it as indicated. The attached pictures correlate with the directions.
_____________________________________________
2000 Ford Mustang V6-3.8L VIN 4
Timing Chain
Vehicle Engine, Cooling and Exhaust Engine Timing Components Timing Chain Service and Repair Removal and Replacement Timing Chain
TIMING CHAIN
NOTE: Ford does not provide a TDC (Top Dead Center) mark or determination procedure for this engine in this vehicle.
ALLDATA users have reported success using aftermarket tools to determine TDC on this engine.
Timing Chain
Removal
1. Remove the timing cover.
Pic 1
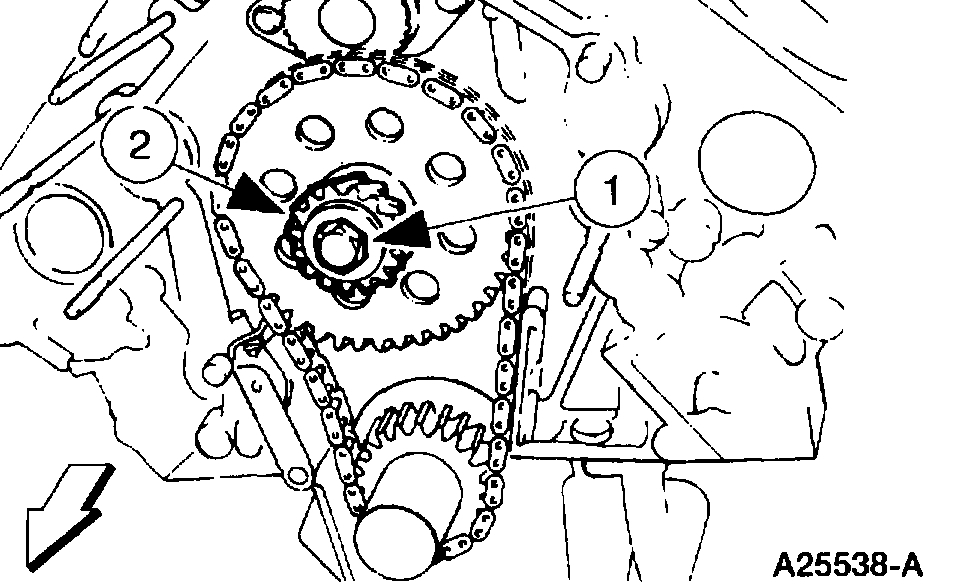
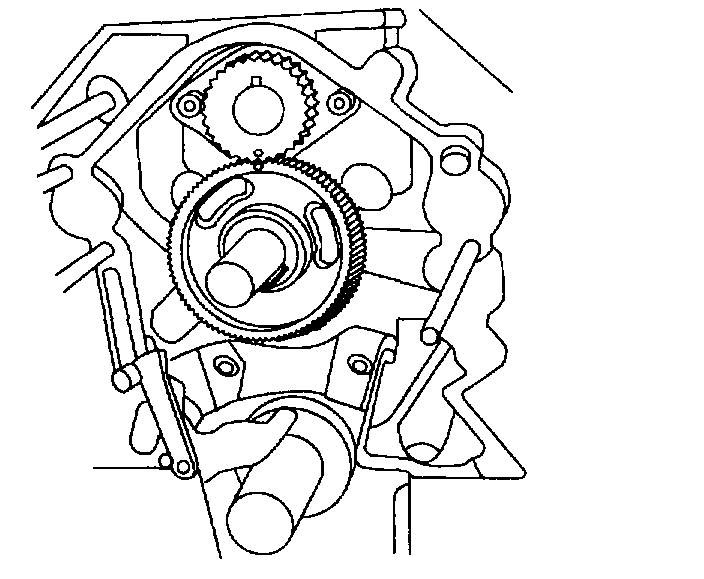
2. Remove the camshaft position sensor drive gear.
1. Remove the bolt.
2. Remove the camshaft position sensor drive gear.
Pic 2
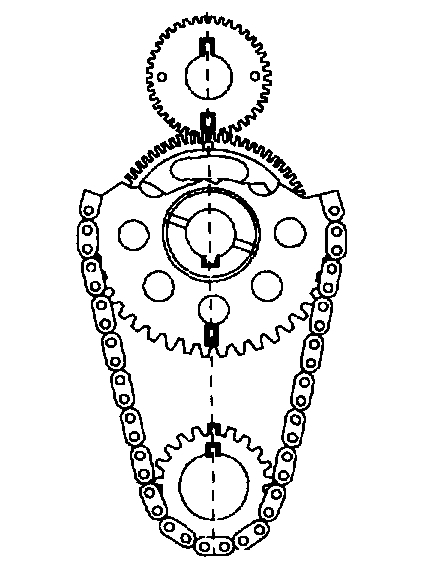
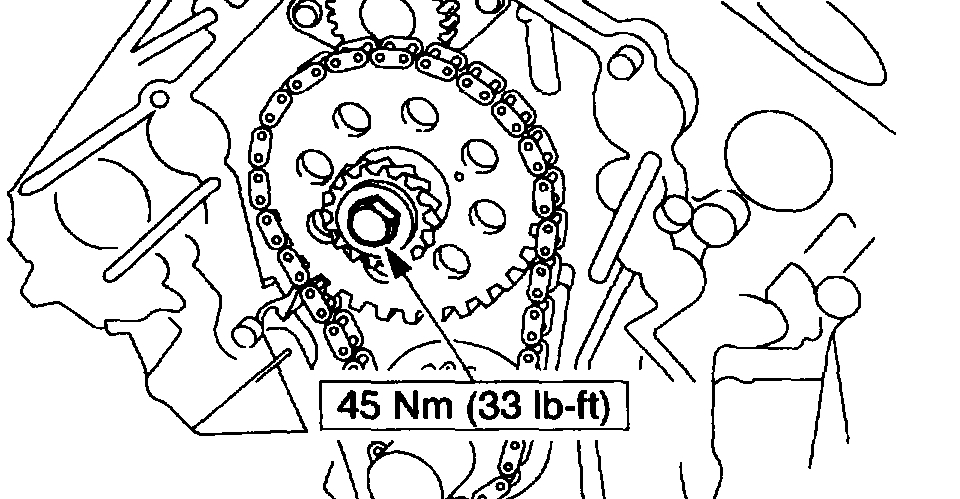
3. Rotate the crankshaft until the timing marks and keyways align.
Pic 3
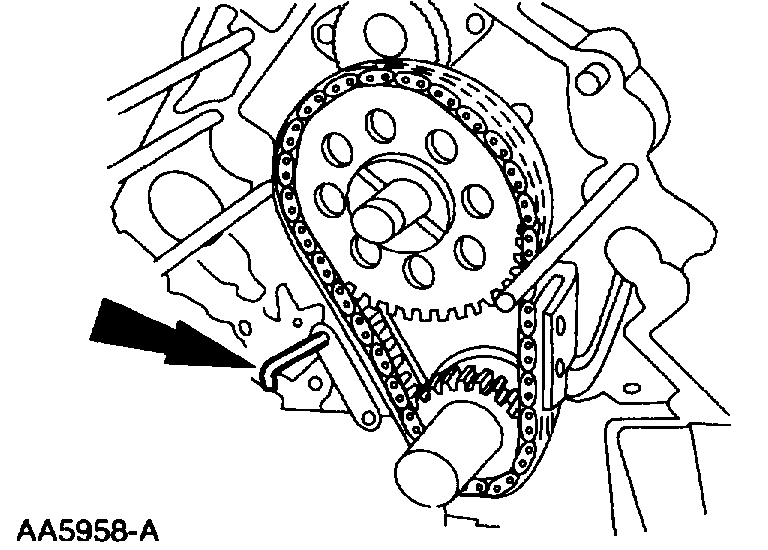
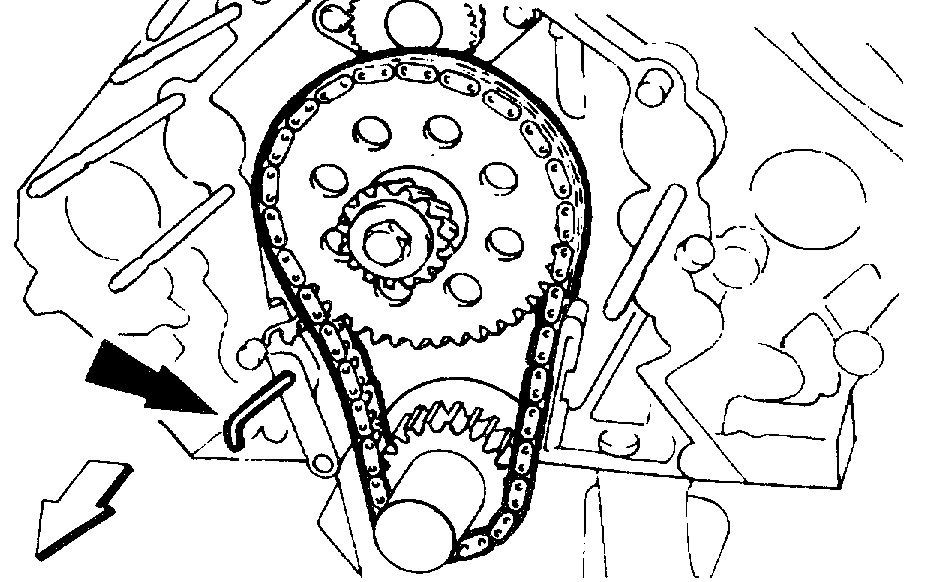
4. Compress and install a retaining pin to hold the timing chain tensioner.
Pic 4
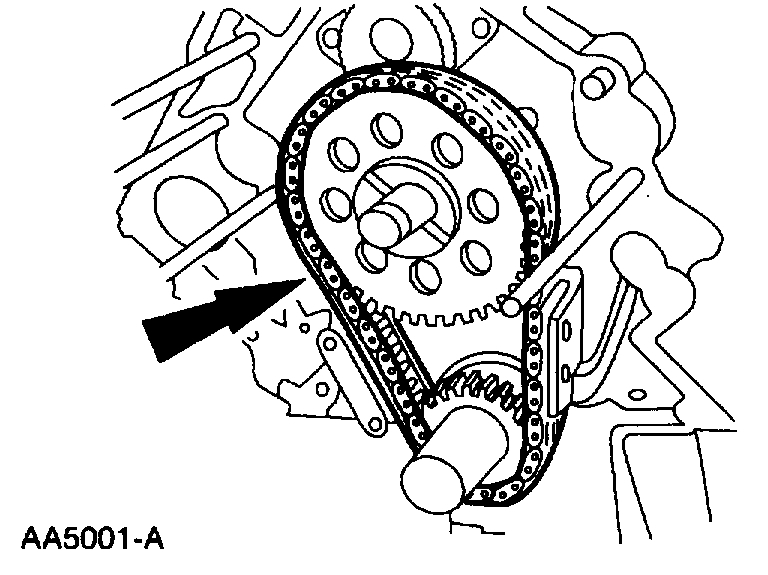
5. Remove the camshaft sprocket, the crankshaft sprocket and the timing chain/belt as an assembly.
Pic 5
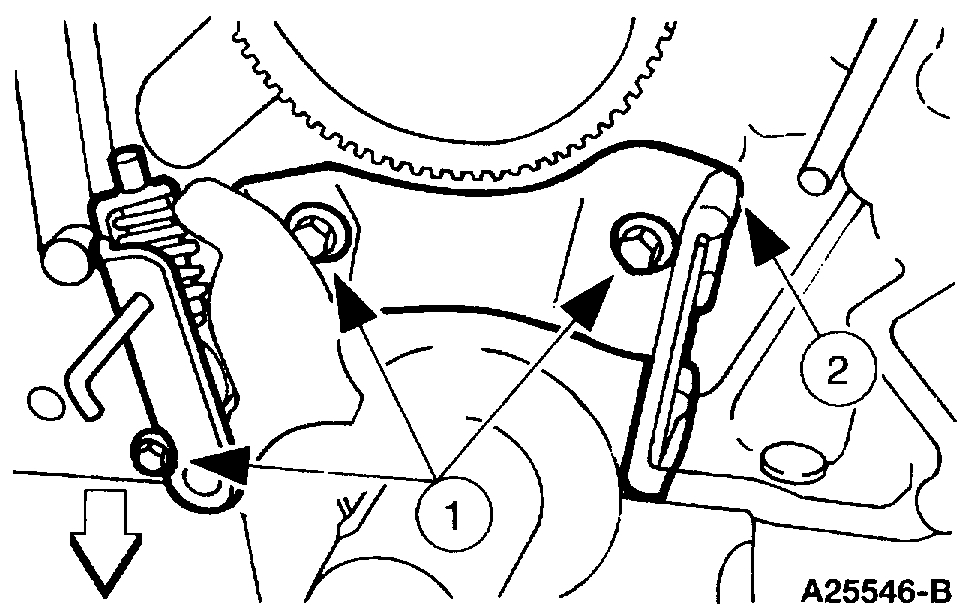
6. Remove the timing chain tensioner.
1. Remove the bolts.
2. Remove the timing chain tensioner.
Installation
pic 6
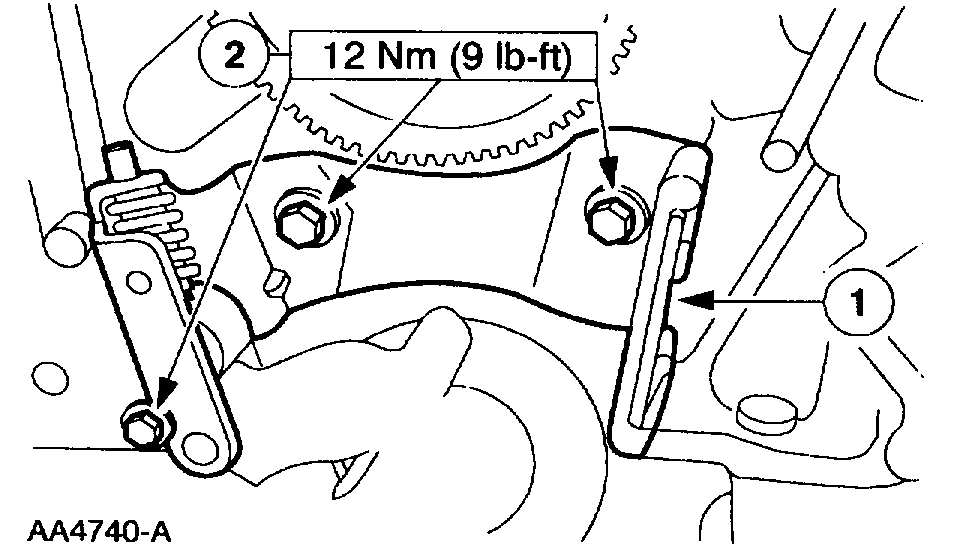
1. Install the timing chain tensioner.
1. Position the timing chain tensioner.
2. Install the bolts.
Pic 7
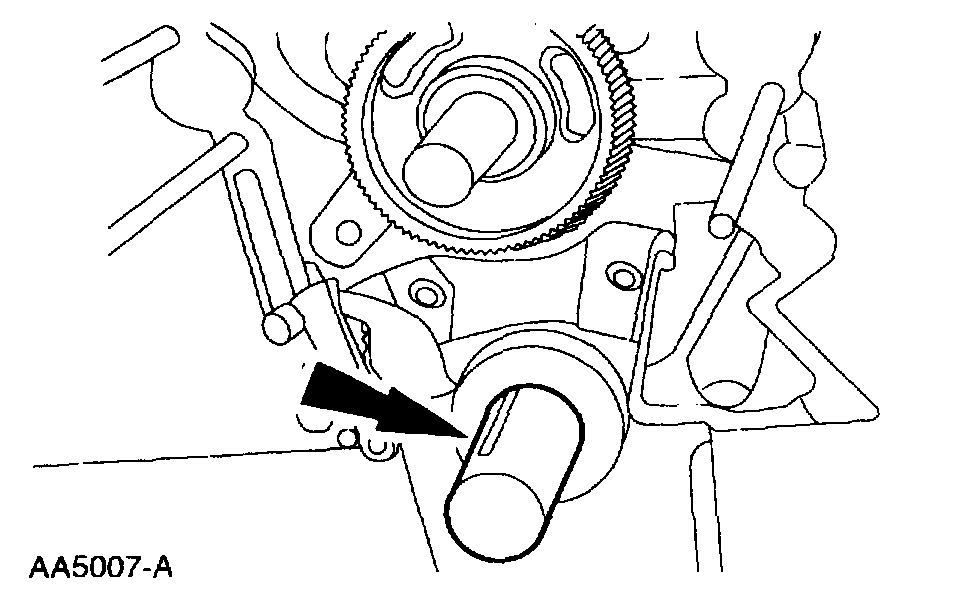
2. Rotate the crankshaft so the number one piston is at Top Dead Center (TDC) and the key is at the 12 o'clock position.
Pic 8
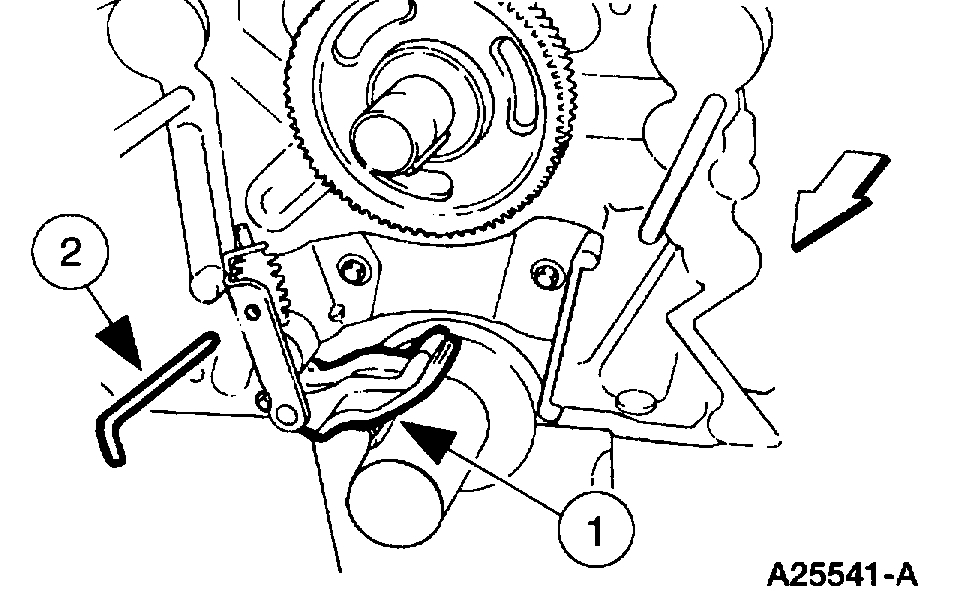
3. If necessary, retract the tensioner pad retracting mechanism.
1. Compress the tensioner pad retracting mechanism.
2. Insert a retaining pin.
Pic 9
4. Turn the camshaft sprocket so that the timing mark is on the bottom of the balance shaft.
Pic 10
5. Install the timing chain, the camshaft sprocket and the crankshaft sprocket.
Pic 11
6. Make sure that the timing marks and the keyways are aligned.
Pic 12
7. Install the camshaft position sensor drive gear.
Pic 13
8. Remove the retaining pin.
9. Install the engine front cover.
____________________________
Camshaft Position (CMP) Sensor
Vehicle Powertrain Management Sensors and Switches - Powertrain Management Sensors and Switches - Computers and Control Systems Camshaft Position Sensor Service and Repair Procedures Camshaft Position (CMP) Sensor
CAMSHAFT POSITION (CMP) SENSOR
REMOVAL
1. Disconnect the battery ground cable. For additional information, refer to Battery.
Pic 14
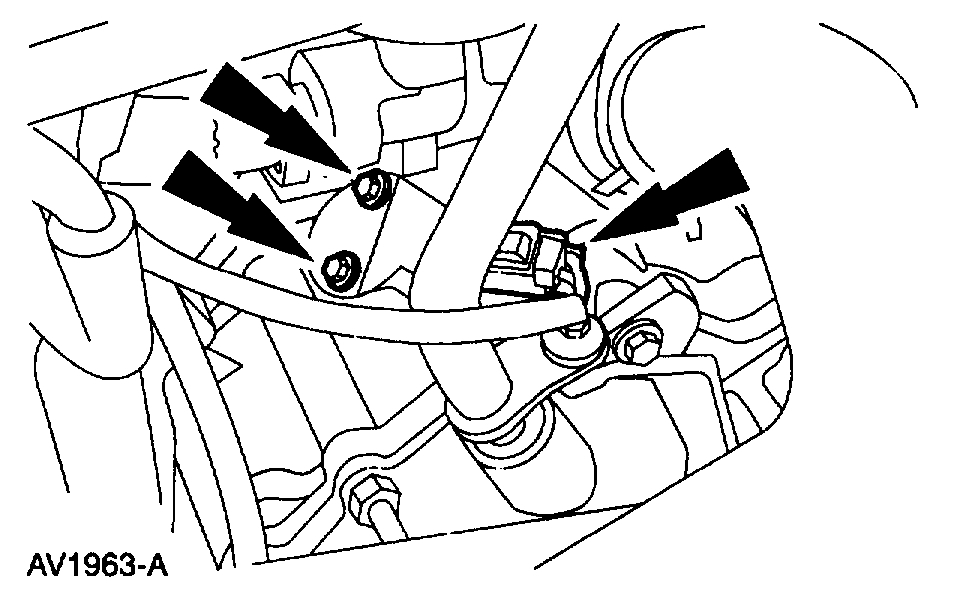
2. Remove the Camshaft Position (CMP) sensor:
- Disconnect the connector.
- Remove the bolts and the sensor.
INSTALLATION
1. To install, reverse the removal procedure.
_____________________________
Let me know if this helps or if you have other questions. Also, let me know what you are referring to with the cam sensor. It should be a plug and play component.
Take care,
Joe
Images (Click to make bigger)
Sunday, August 18th, 2019 AT 7:54 PM