Welcome to 2CarPros.
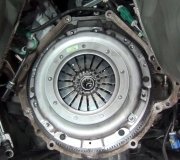
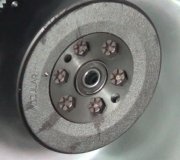
When you have the clutch out, inspect the flywheel. I always have them resurfaced at a minimum. If, however, there are heat marks in it, replace it. You won't get them out and it could cause a chatter when you release the clutch.
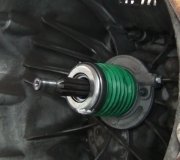
Here are the specifics on flywheel removal and replacement. The directions include torque specs. Additionally, the attached pictures correlate with these directions.
___________________
DUAL-MASS FLYWHEEL
Dual-Mass Flywheel
Special tools, testers and auxiliary items required
Counter-holder tool (3067)
Removing
Engine or transmission removed.
- Remove clutch pressure plate.
CAUTION!
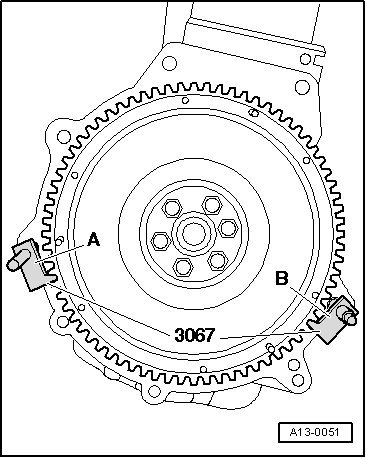
To prevent damage to dual-mass flywheel when removing, bolts - B - must not be removed using an air-powered or impact wrench. Only removing bolts by hand is permitted.
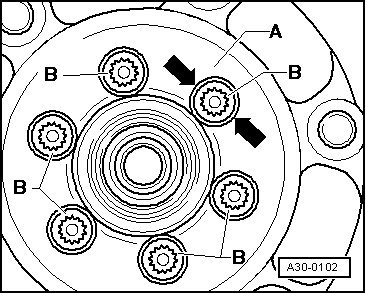
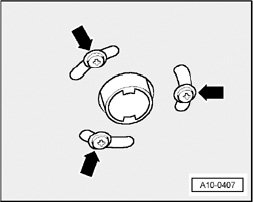
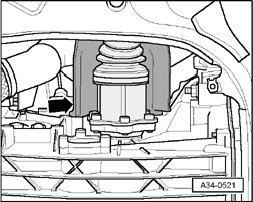
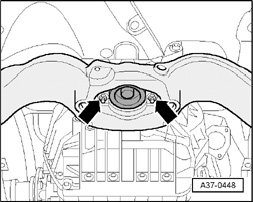
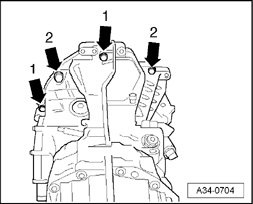
- Rotate dual-mass flywheel - A - so that bolts - B - stand centered to holes - arrows -.
Picture 1
- When removing bolts - B -, make sure that bolt head does not contact dual-mass flywheel
- arrows - and thereby cause damage when turning it further.
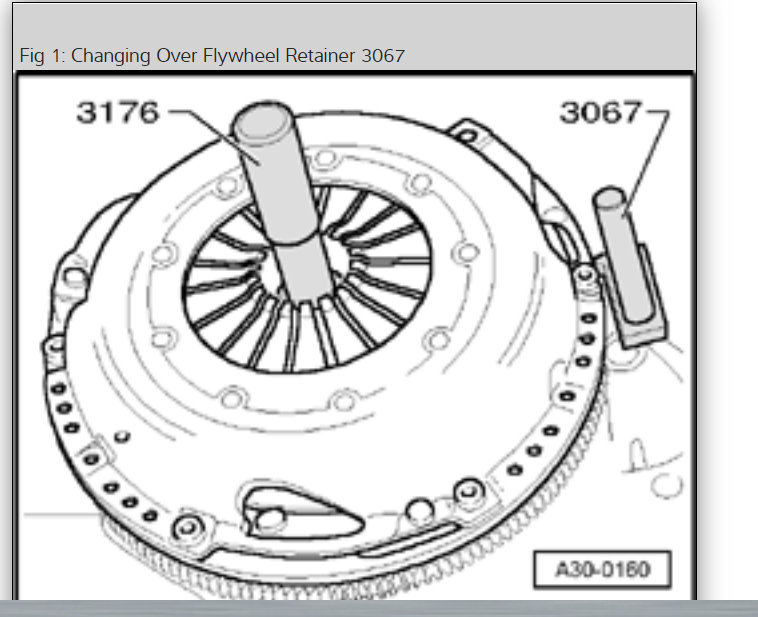
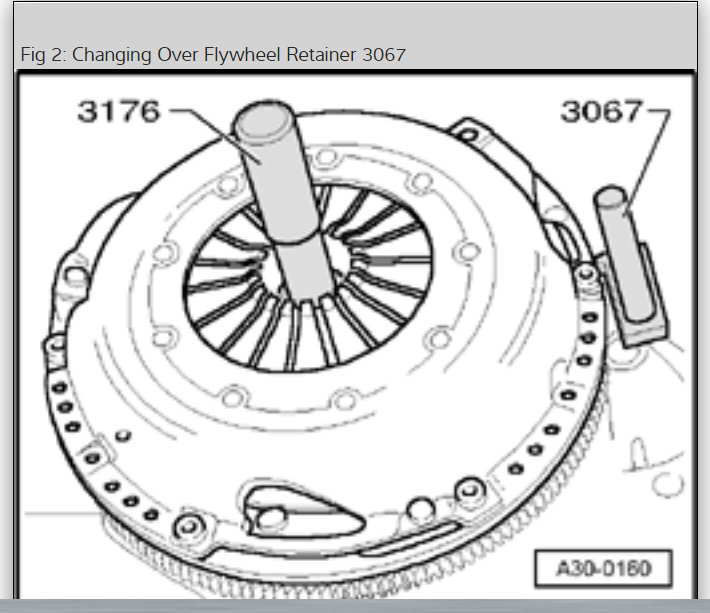
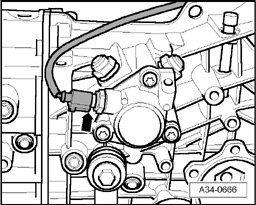
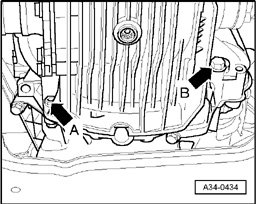
- Insert counter-holder (3067) into hole in cylinder block - B -.
Picture 2
- Mark dual-mass flywheel to engine.
- Remove dual-mass flywheel.
Installing
Installation is in reverse order of removal, note the following:
- Use new bolts when securing.
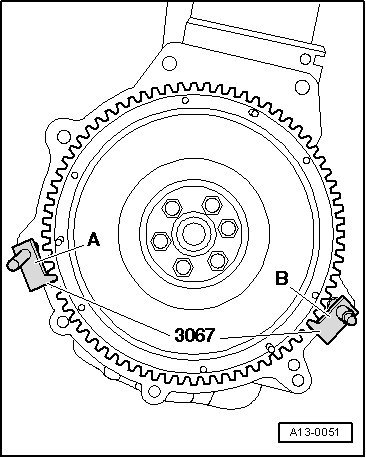
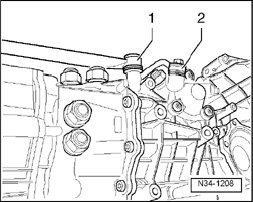
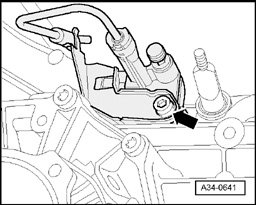
- Insert counter-holder (3067) into hole in cylinder block - A -.
Picture 3
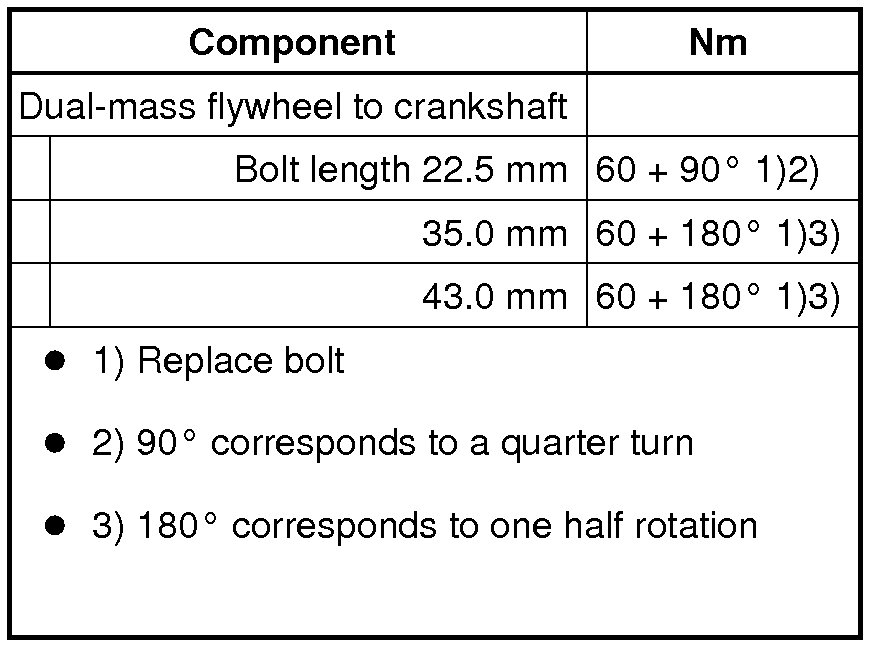
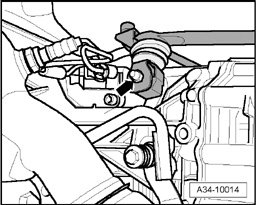
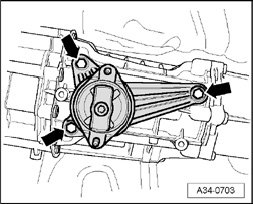
Torque specification
picture 4
__________________________
Here are the directions for clutch replacement:
CONVENTIONAL CLUTCH
Conventional Clutch
Please refer to notes, refer to => [ Clutch General Repair Information ] See: Clutch, M/T > Procedures > Clutch General Repair Information.
The transmission has to be removed before working on the clutch. Refer to => [ Transmission, Removing ] See: Manual Transmission/Transaxle > Removal and Replacement > Transmission, Removing.
Picture 5
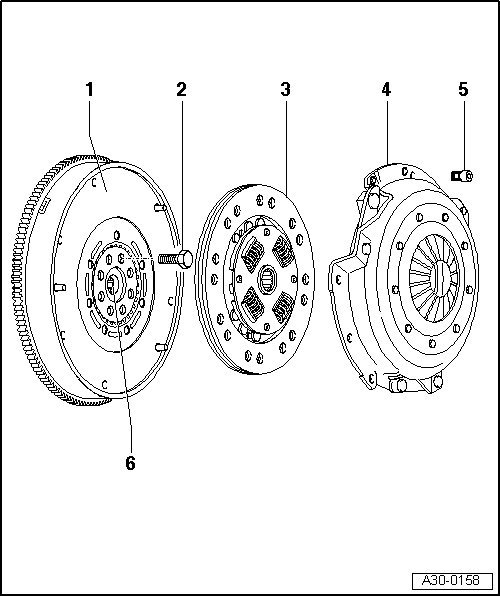
1 Flywheel/dual mass flywheel
Make sure that dowel pins fit tightly.
Contact surface for clutch lining must be free of grooves, oil and grease.
Removing and installing, refer to => Engine Mechanical See: Engine > Mechanical > Cylinder Head, Valvetrain - Fastener Tightening Specifications
2 Bolt for flywheel
Always replace.
Bolt length: 22.5 mm; 60 Nm + an additional 90° 1/ 4 turn.
Bolt length: 43 mm; 60 Nm + an additional 180° 1/ 2 turn.
3 Clutch plate
Installation position: Clutch lining must make full contact with flywheel.
The marking "Getriebeseite" (if provided) faces pressure plate/transmission.
Coil springs (damper assembly) point toward pressure plate and transmission.
Centralize, refer to => [ Centralizing clutch plate and removing and installing pressure plate ]
Clutch plate diameter, refer to => [ Code Letters, Allocation, Transmission Ratios, Capacities ] See: Manual Transmission/Transaxle > Components > Code Letters, Allocation, Transmission Ratios, Capacities.
4 Pressure plate
Removing and installing, refer to => [ Centralizing clutch plate and removing and installing pressure plate ]
Check ends of diaphragm spring, refer to => [ Checking ends of diaphragm spring ]
Check spring connection and rivets, refer to => [ Checking spring connection and rivet ]
Check wire ring, refer to => [ Checking wire ring ]
5 Bolt, 22 Nm
Loosen and tighten gradually in several stages and in diagonal sequence.
6 Needle bearing
Removing and installing, refer to => Engine Mechanical See: Engine > Mechanical > Cylinder Head, Valvetrain - Fastener Tightening Specifications
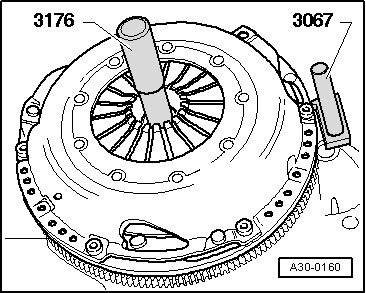
Centralizing clutch plate and removing and installing pressure plate
picture 6
- Loosen and tighten bolts gradually in several stages and in a diagonal sequence.
- To remove, reverse position of counter hold tool (3067) or counter hold tool (10 - 201).
Installation position of clutch plate: coil springs (damper assembly) or marking "Getriebeseite" point toward pressure plate and transmission.
- Before tightening securing bolts, clutch lining and contact surface of pressure plate must make full contact with flywheel.
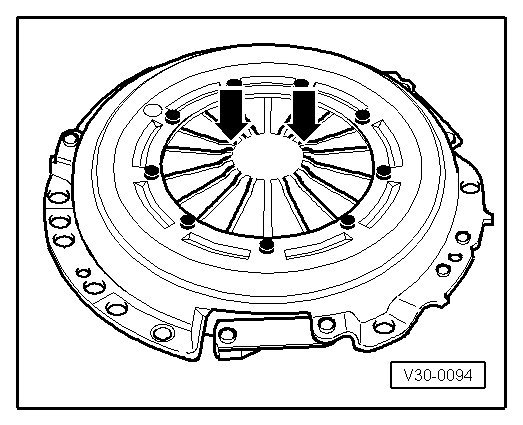
Checking ends of diaphragm spring
picture 7
Wear up to half the thickness of the diaphragm spring is permitted.
When performing repairs, always select the correct clutch pressure plate and clutch plate by checking engine code.
Checking spring connection and rivet
picture 8
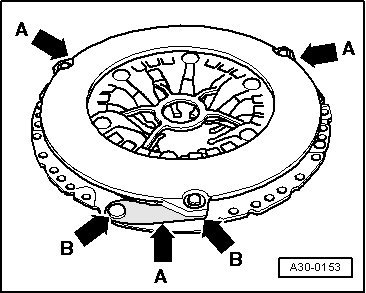
- Check spring connections - arrows A - for damage and make sure riveted fastenings - arrows B - are seated tightly.
Replace pressure plate if spring connections are broken or badly bent, or if riveted fastenings are loose.
Checking wire ring
picture 9
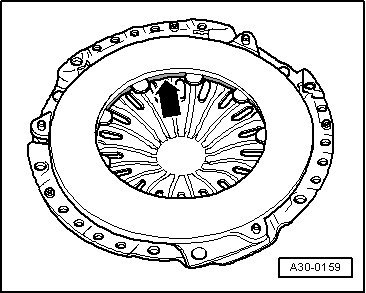
- Check that wire ring in pressure plate - arrow - is not damaged. Replace pressure plate if wire ring is broken.
_________________________________________
Here are the directions for removing and replacing the transmission.
Transmission, removing from vehicles with 4-cylinder engine, 01X, 6-Speed Front-wheel Drive M/T
picture 10
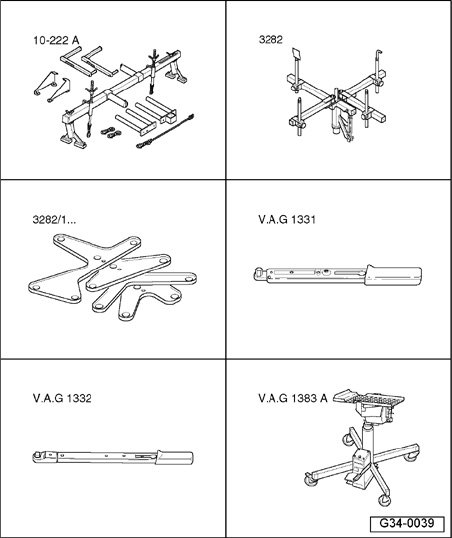
Special tools, testers and auxiliary items required
Engine support bridge 10-222 A
Transmission support 3282
Adjustment plate 3282/43
Torque wrench V.A.G 1331
Torque wrench V.A.G 1332
Engine/transmission jack V.A.G 1383 A
Special tools, testers and auxiliary items required
picture 11
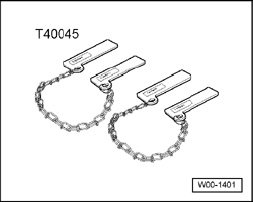
Insert pad for front fender T40045
Grease for clutch plate splines G000100
Copper grease Z381351TE
Procedure
Note:
All cable ties which are released or cut open during removal must be installed in the same position when installing.
Heat insulation sleeves removed during removal of transmission must be installed in the same position when installing.
CAUTION!
Follow steps required when disconnecting battery.
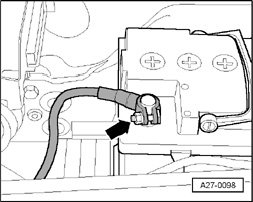
Picture 12
- With ignition switched off, disconnect battery Ground (GND) strap - arrow -.
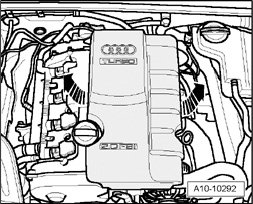
Picture 13
- Remove engine cover - arrows -.
Picture 14
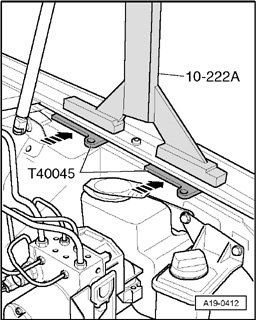
- Detach rubber seal from edges of wing mounting flanges.
- To avoid damaging edges of fenders with engine support bridge 10-222 A, insert wing compensation plates T40045 on both sides between fender mounting flange and body panel underneath.
Picture 15
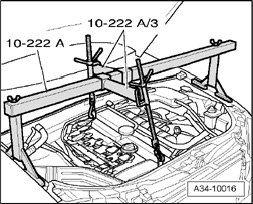
- Set up engine support bridge 10-222 A with adapters 10-222/3 on fender mounting flanges.
- Engage spindles on engine lifting eyes as illustrated.
- Take up weight of engine using spindles.
Picture 16
- On vehicles equipped with auxiliary heater remove screws - arrows - securing exhaust pipe of auxiliary heater to sound insulation.
Picture 17
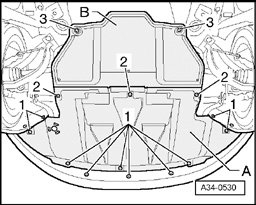
- Loosen bolts/quick release fasteners - 1 - and - 2 - and remove front sound insulation - A -.
Note:
- Item 3 - and - item B - can be disregarded.
Picture 18
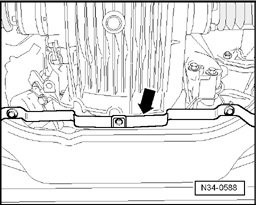
- Remove bracket - arrow - for sound insulation.
Picture 19
- Unbolt heat shield - arrow - for drive axle (right side) from transmission.
- Unbolt drive axles (left and right) from transmission flange shafts.
Picture 20
Note:
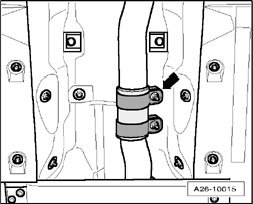
The flexible pipe connection (de-coupling element) on the front exhaust pipe must not be bent more than 10° - otherwise it can be damaged.
- Separate exhaust system at clamp - arrow - and slide clamp to rear.
Picture 21
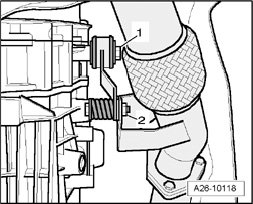
- Remove bolt - 1 - and nut - 2 - and detach retaining bracket for front exhaust pipe.
Picture 22
Cabriolet:
Note:
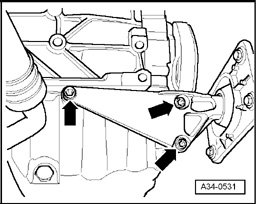
On Audi Cabriolet vehicles the following steps are required in order to remove the three bottom engine/transmission bolts:
- Unbolt torque reaction support - arrows -.
Picture 23
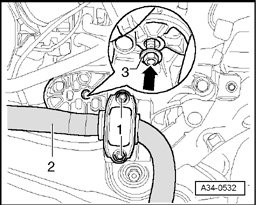
- Remove nuts - 1 - on left and right sides, and swivel stabilizer bar - 2 - downward.
- Remove nut - 3 - on left and right engine mountings until bottom of nut is flush with end of stud - arrow -.
- Use engine support bridge 10-222 A to lift engine just enough for nuts - 3 - to make contact with bottom surface of left and right consoles.
Picture 24
Continued for all vehicles:
- Remove three lower engine/transmission securing bolts - arrow -.
Cabriolet:
- Lower engine back down.
Picture 25
Continued for all vehicles:
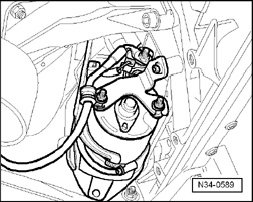
- Detach starter from engine/transmission and secure if necessary.
Note:
Starter cables do not have to be disconnected.
Picture 26
- Drill a hole of 10.2 mm diameter - arrow - in supporting elements of transmission support 3282.
Picture 27
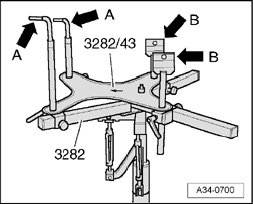
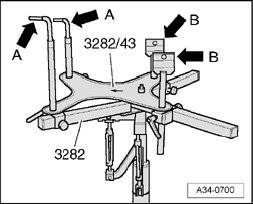
- To remove manual transmission 01X, set up transmission support 3282 with adjustment plate 3282/43 and place on engine/transmission jack V.A.G 1383 A.
Note:
The support elements 3282149 - arrows A - and 3282152 - arrows B - are shown in schematic form on the adjustment plate. The arrow on the adjustment plate points toward the direction of travel.
Adjustment plate can only be installed in one position.
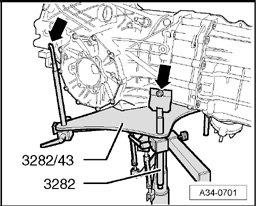
Picture 28
- Align adjustment plate parallel to transmission.
- Secure supporting elements to left side of transmission, as shown in illustration. Tighten bolt arrow - on right side to 20 Nm.
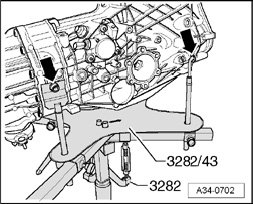
Picture 29
- Secure supporting elements to right side of transmission, as shown in illustration. Tighten bolt - arrow - on left side to 20 Nm.
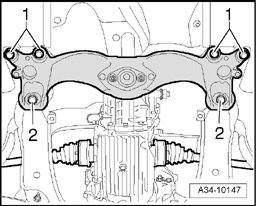
Picture 30
- Remove bolts - 1 - and bolts - 2 -.
Picture 31
- Remove nuts - arrows - and detach tunnel cross member.
- Lower transmission slightly using engine/transmission jack VAG 1383 A.
Picture 32
- Disconnect electrical connector - arrow - for back-up light switch F4 and move electrical wire clear.
Picture 33
- Remove connecting rod - 2 - for selector rod.
- Remove push rod - 1 - by using an 8 mm hex key when removing bolt.
Picture 34
- Remove nut - arrow - and detach selector shaft lever from selector shaft.
Picture 35
- Remove upper engine/transmission securing bolts - arrows 1 - and - arrows 2 -. Please note that retaining brackets for wires/lines and coolant pipe may be secured on bolts - arrows2 -(important for installation).
- If installed, remove retaining clips/cable ties together with Lambda probe wiring from transmission.
Picture 36
- Remove remaining engine/transmission securing bolts - arrow A - and - arrow B -.
- Press transmission off dowel sleeves and lower carefully with engine/transmission jack VAG 1383 A just far enough to gain access to slave cylinder.
Note:
When lowering transmission, make sure hydraulic line to slave cylinder is not damaged.
Picture 37
- Remove slave cylinder from transmission - arrow - and secure with wire; do not open line/hose system.
CAUTION!
Do not depress clutch pedal after removing slave cylinder. The slave cylinder would then be destroyed once pedal force exceeds approx. 300 N.
- Lower transmission completely with engine/transmission jack V.A.G 1383 A.
Note:
When lowering transmission, make sure there is sufficient clearance to drive axles.
- Before carrying out assembly work, secure transmission to assembly stand, using holding fixture VW 540.
Picture 38
- If you will be installing a new transmission instead of the one removed, the transmission mounting has to be transferred to the new transmission -
_____________________________
Let me know if this helps or if you have other questions. Also, if yours isn't a 6 speed, let me know.
Take care,
Joe
Images (Click to make bigger)
Tuesday, April 9th, 2019 AT 8:03 PM

