Rear drum brake shoes replacment

Tiny
OUTANDMITSCOTT
  • MEMBER
  • 2003 MITSUBISHI OUTLANDER
  • 2.4L
  • 4 CYL
  • 2WD
  • AUTOMATIC
  • 123,400 MILES
Scott here with one of your Mitsubishi Outlander I bought here in Orlando Florida. Question: does the locking nut to the hub assembly need to be removed to inspect and replace the rear shoes of the drum brakes assembly? I do have experience in the mechanics. I just never have replaced them on a Mitsubishi. I was told at Pep Boys that the locking nut had to be removed.

Could you assist me when you have time with the factual procedures?
Monday, January 21st, 2019 AT 2:45 AM

3 Replies

Tiny
JACOBANDNICKOLAS
  • MECHANIC
  • 108,192 POSTS
Hi and thanks for using 2CarPros.

The hub nut doesn't need removed to check the rear brake shoes. The nut holds the hub assembly on the spindle and not the drum on. Take a look at the attached picture (1). It shows the components related to the rear drum, hub. The second picture shows the drum removed.

As far as shoe replacement, they are straight forward. Here is a link that shows in general how brake shoes are replace. Also, picture 3 below shows an exploded view of the rear brake system.

https://www.2carpros.com/articles/how-to-replace-rear-brake-shoes-and-drums

Let me know if this helps or if you have other questions.

Take care,
Joe
Was this
answer
helpful?
Yes
No
Monday, January 21st, 2019 AT 5:18 PM
Tiny
OUTANDMITSCOTT
  • MEMBER
  • 4 POSTS
Jacob, thanks for for the reconfirmation, I thought they didn't need to be removed. Before I take my time in preparations. Whats the metric size of the front brake caliper stems/bolts. Are they 14. Or 15 mm. Could you tell me. Autozone online access is acting ignorant at the moment. Im about to pick up socket set to do these brake replacements because they need to be changed. Reason for asking is can't get access to the maintenance records with the online Mitsubishi owners. Vin registration. Could you be specific. I also have fotos. And several videos of my experience of vehicular intrusions and sabotaging after maintenance repairs I personally have completed after ownership since buying it in Nov. Last yr. May I request for transmission of evidence to you all. Orlando FL.
Was this
answer
helpful?
Yes
No
Wednesday, January 23rd, 2019 AT 10:57 AM
Tiny
JACOBANDNICKOLAS
  • MECHANIC
  • 108,192 POSTS
Welcome back:

Honestly, the manual doesn't indicate the bolt size. However, most likely it will either be a 13mm or 14mm. As far as replacement, here is a link that shows how it is done in general:

https://www.2carpros.com/articles/how-to-replace-front-brake-pads-and-rotors-fwd

Here are the directions specific to your vehicle for inspection and replacement. The attached pictures correlate with these directions.

_________________________

FRONT DISC BRAKE PAD CHECK AND REPLACEMENT
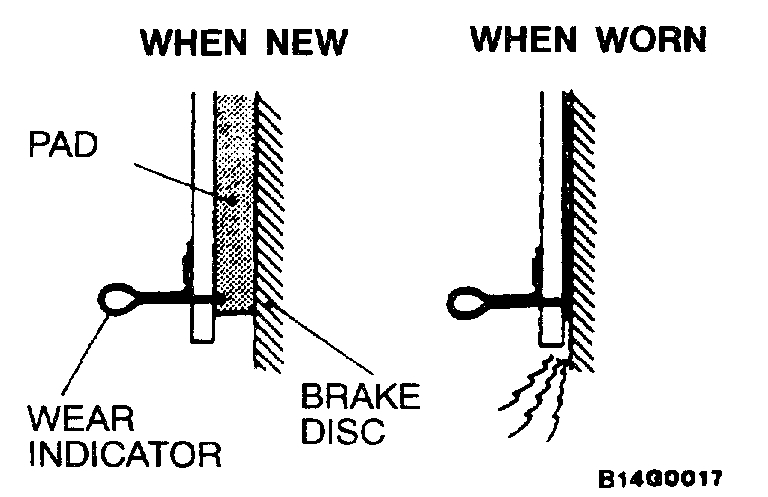
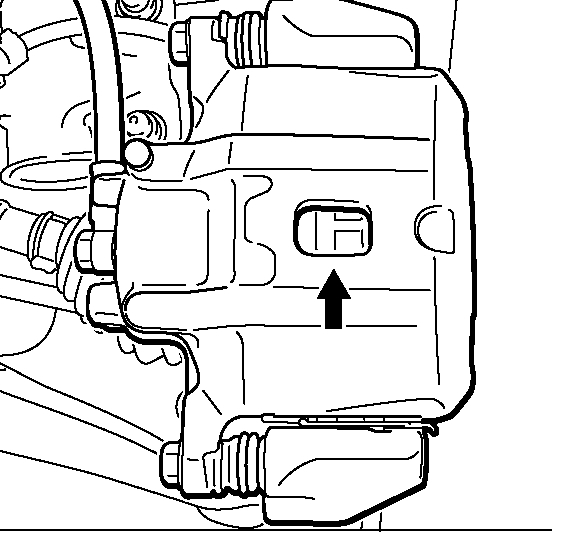
see pic 1

NOTE: The brake pads have indicators that contact the brake disc when the brake pad thickness becomes 2 mm (0.08 inch), and emit a squealing sound to warn the driver.

CAUTION:
Whenever a pad must be replaced, replace both LH and RH wheel pads as a set to prevent the vehicle from pulling to one side when braking.
If there is a significant difference in the thicknesses of the pads on the left and right sides, check the sliding condition of the piston and slide pins.
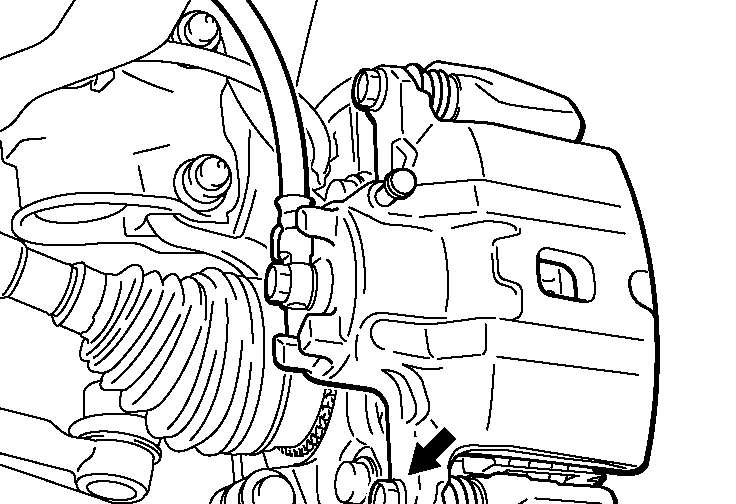
see pic 2

1. Check the brake pad thickness through the caliper body check port.
Standard value: 10.0 mm (0.39 inch)
Minimum limit: 2.0 mm (0.08 inch)

CAUTION: Do not wipe off the special grease that is on the lock pin or allow it to contaminate the lock pin.

see pic 3

2. Remove the lock pin bolt. Pivot the caliper assembly and hold it with wires.
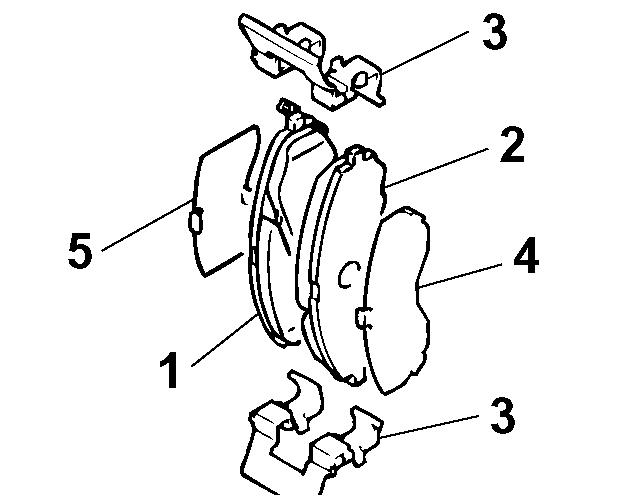
see pic 4

3. Remove the following parts from caliper support.
1. Pad assembly or Pad and wear indicator assembly
2. Pad assembly
3. Clip
4. Outer shim
5. Inner shim
4. In order to measure the brake drag force after pad installation, measure the rotary-sliding resistance of the hub with the pads removed.
5. Install the pads and caliper assembly, and then check the brake drag force.

Once you remove the old brake pads, I strongly recommend removing the hardware clips and taking a file to remove any dirt or rust where the clips sit. If rust develops there, it will cause the pads to become locked in the mount and cause sticking and premature wear. Once you do that, then reinstall the clips. They should be clean and lubricated. Make sure the pads move freely in the mount.

Let me know if this helps or if you have other questions.

Joe
Was this
answer
helpful?
Yes
No
+1
Wednesday, January 23rd, 2019 AT 5:32 PM

Please login or register to post a reply.

Sponsored links