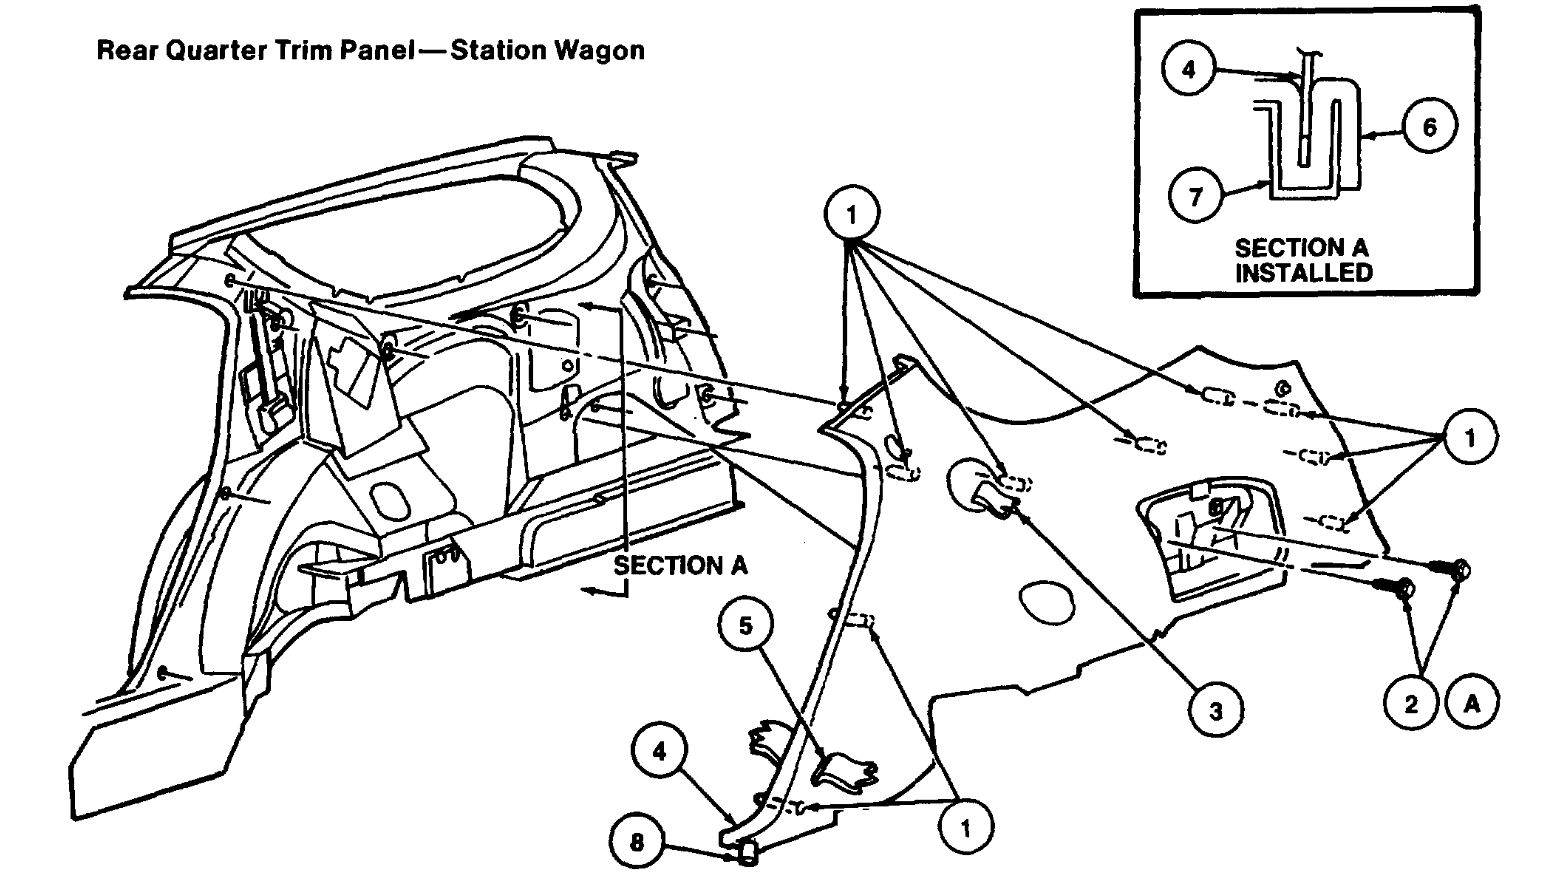
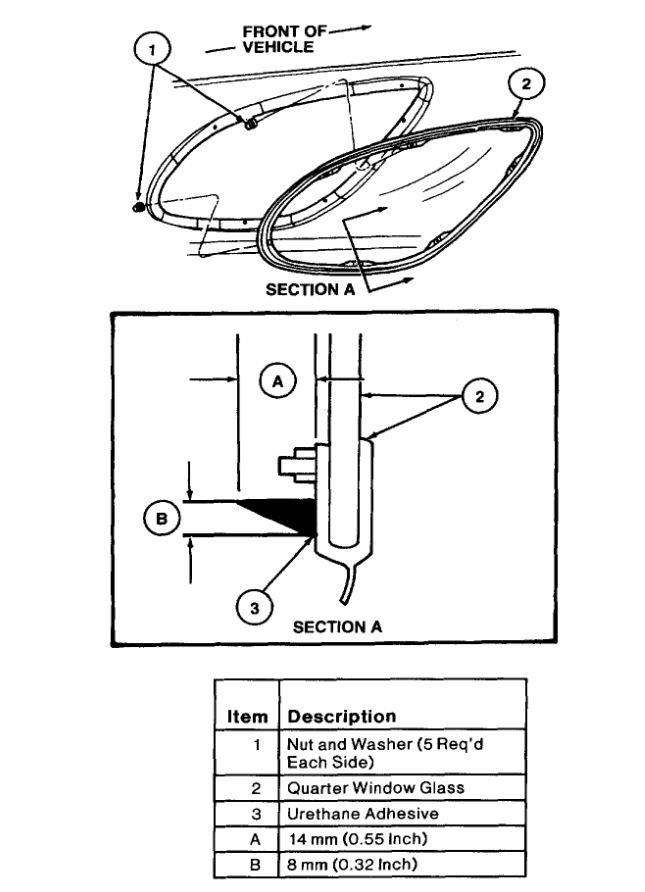
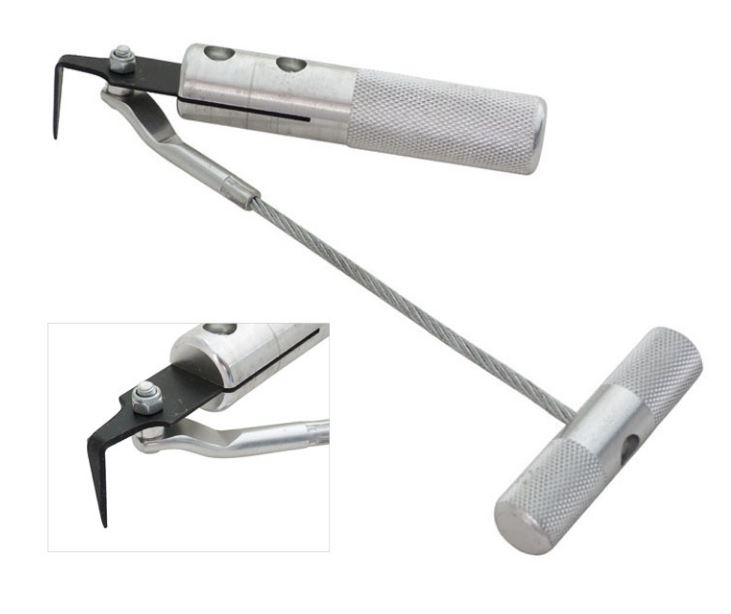
That window isn't too hard to replace. The hardest part is getting the interior trim panels out without breaking the vintage plastic. The first thing will be to secure the glass before it collapses, the fast way to do that is using packing tape. You use gentle pressure to support the glass from the inside and use the tape on the outside to capture the broken glass. Just use strips across the glass in two directions, then repeat that on the inside. Next will be removing the rear quarter trim, for that you remove the rear seat. That allows you to remove the clips that retain the trim panel. Don't forget the screws in the storage nook. Now you need to remove the other surrounding trim panels, most are secured with push clips. Now with the trim out of the way you can remove the window. There are 5 nuts around the glass that secure the frame to the body, as well as the adhesive. Remove the nuts then you need to remove the broken glass, Put a junk sheet inside the car, tuck it into any places you can so that if any of the glass does fall in the sheet catches it, you will be throwing out the sheet and glass so don't use the expensive silk. Now place a cardboard box below the window and just run a strip of tape across the flap to hold it to the body. This is going to catch the glass and then the rest of the bits as you remove the rest of the frame and glue. Next, wear gloves and push the glass out of the frame, try to remove it as much intact as possible. Now with the opening cleared out you can use a sharp knife to cut the remaining glue from around the glass. If you have a glass knife as in the picture it's easier but a sharp putty knife will work. You need to remove the trim ring and most of the urethane, you can leave a thin layer as long as it's bonded well, but nothing over about a sixteenth of an inch. Now with the old glass and trim out, use some glass seam primer to coat and areas of the body that you scraped the paint off while removing the glue. If you are worried about damaging the outer paint you can use painters tape to surround the area as a barrier.
Once you have the scratched areas primed you can clean the frame of the replacement glass, any grease or oil or old glue needs to be removed, and make sure the studs and nut's are in good shape. After the primer has dried you then open the new urethane tube, apply a nice even triangular bead around the opening about five sixteenths wide and a half inch tall in a continuous stripe. Now install the replacement glass and be sure the studs line up as you seat the glass. Once you have the glass set in place install the nuts to the studs, only finger tight for now, you only want to hold the glass in place so the urethane is evenly squeezed and it can seal and cure, Then after about 2 hours you can tighten the nuts to about 25 inch pounds. They are there for alignment and just in case the glue were to fail so they don't need to be super tight and in fact if they are too tight they can cause the glass to fail. Now you just clean up the mess and reinstall the trim panels, now is a great time to vacuum out everything back there as you have real good access. Re-install the trim panels and the rear seat and you are finished.
Images (Click to enlarge)
May 31, 2021 at 7:59 AM