Hi,
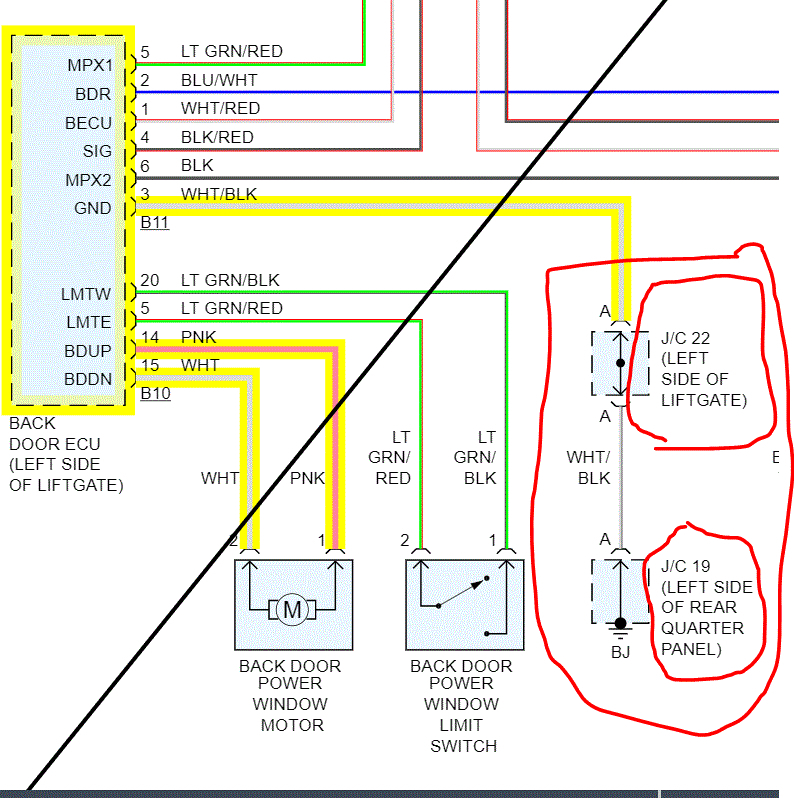
The window motor sounds good. So, the first thing I need you to check is to make sure the ground is good. I attached a pic from the wiring schematic which indicates two locations to check. Do this first and let me know what you find. (See Picture 1)
Here are a couple links you may find helpful:
https://www.2carpros.com/articles/how-to-use-a-test-light-circuit-tester
https://www.2carpros.com/articles/how-to-use-a-voltmeter
https://www.2carpros.com/articles/how-to-check-wiring
_____________________
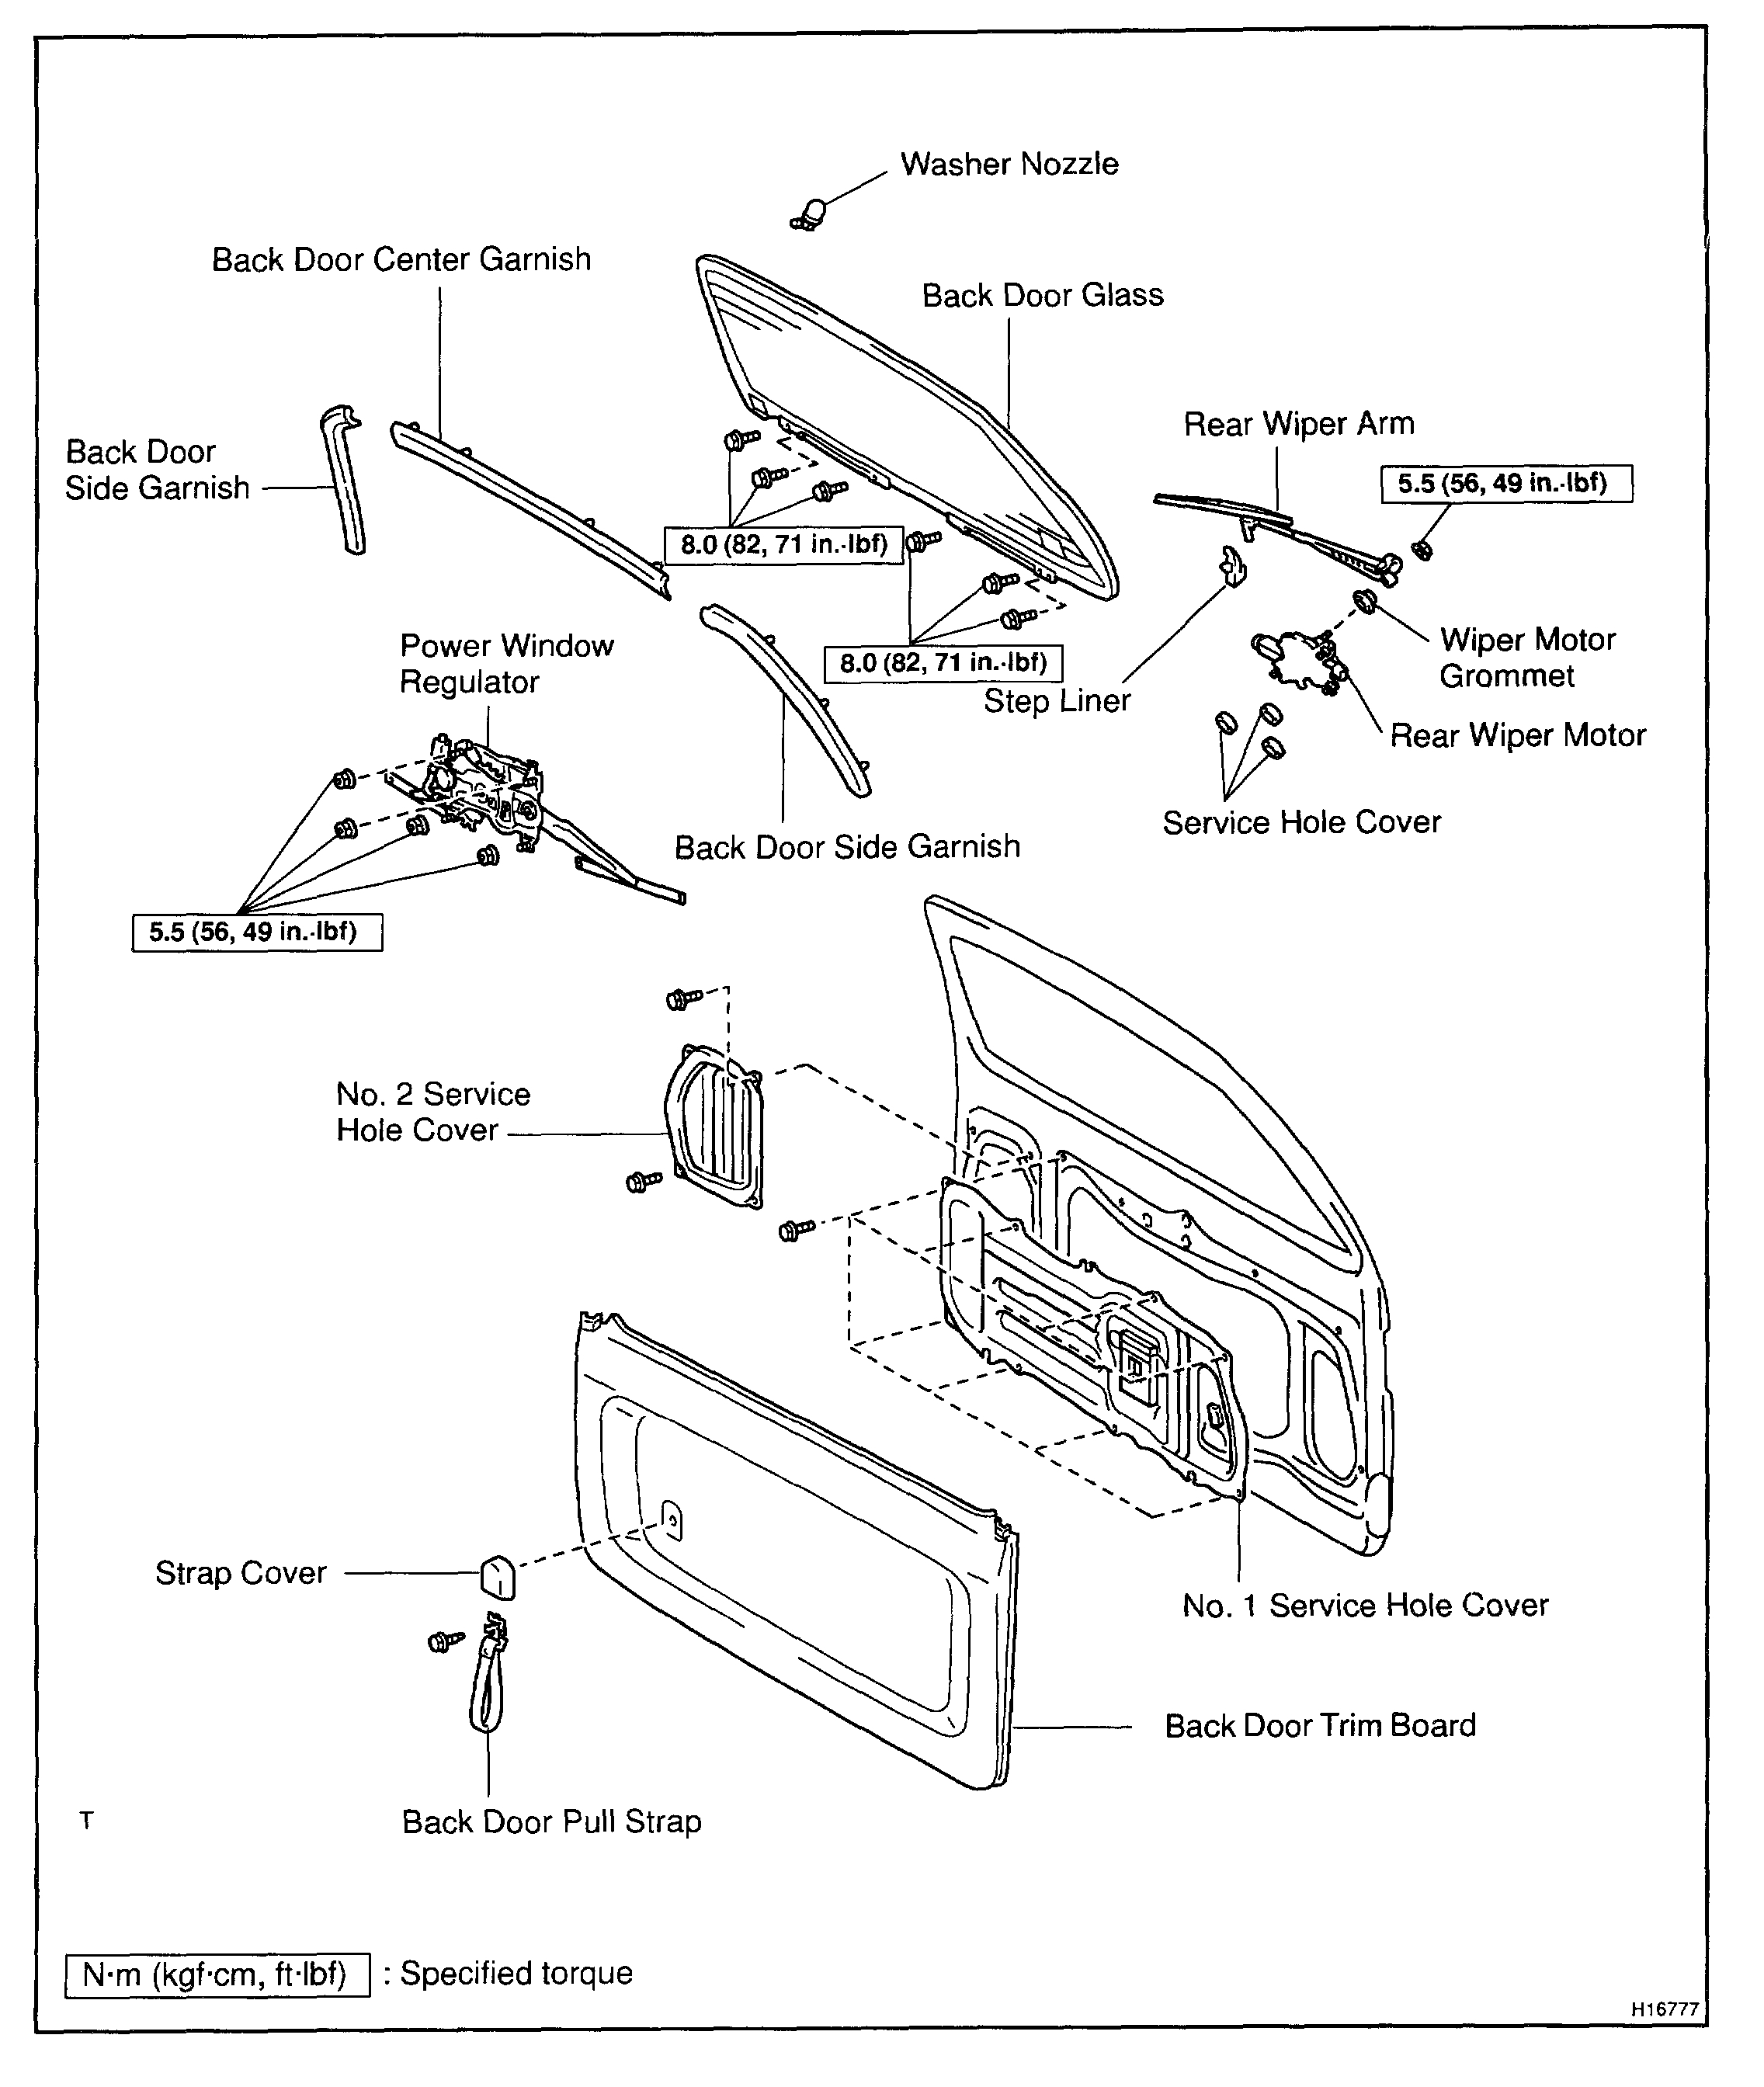
I don't know if you need them, but here are the directions for replacing the rear wiper motor. The remaining pictures correlate with the directions.
____________________
2002 Toyota Truck Sequoia SR5 4WD V8-4.7L (2UZ-FE)
Rear Wiper and Washer
Vehicle Wiper and Washer Systems Service and Repair Procedures Removal and Installation Rear Wiper and Washer
REAR WIPER AND WASHER
Rear Wiper And Washer
Pic
REMOVAL
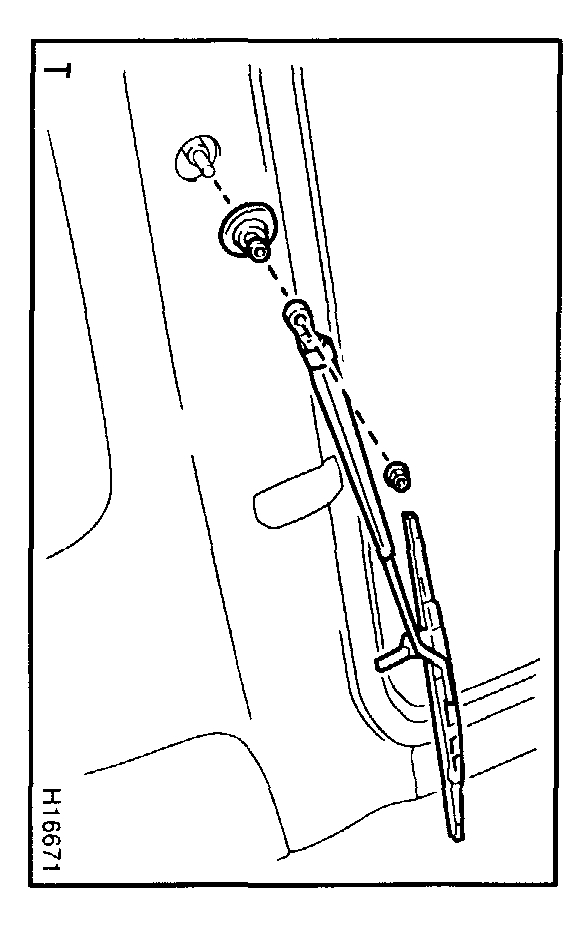
1. REMOVE REAR WIPER ARM
pic 3
a. Open the cover.
b. Remove the nut and rear wiper arm.
Torque: 5.5 N.m (56 kgf.cm, 49 in.lbf)
c. Remove the rear wiper motor grommet.
pic 4
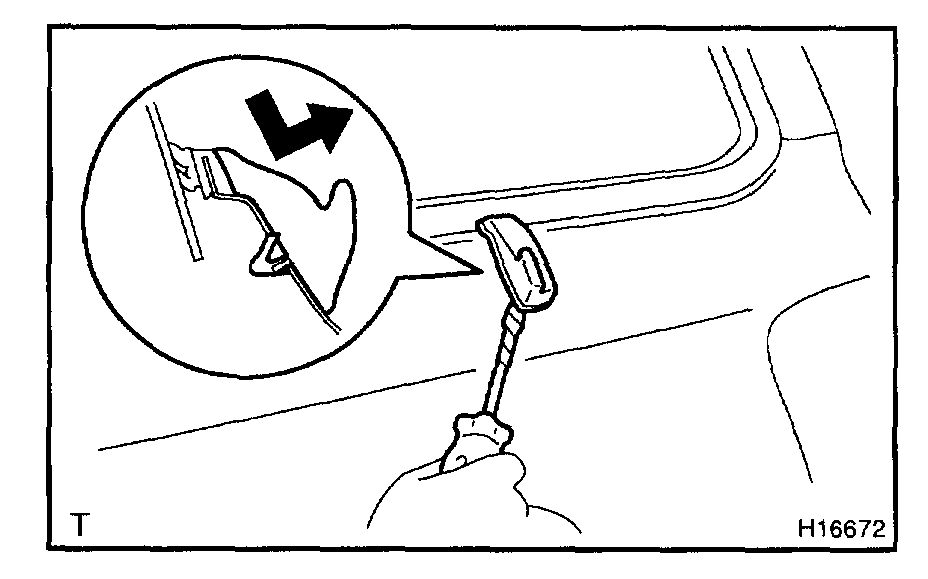
2. REMOVE STEP LINER
Using a screwdriver, remove the step liner.
HINT: Tape the screwdriver tip before use.
3. REMOVE BACK DOOR PULL STRAP
a. Using a screwdriver, remove the strap cover.
HINT: Tape the screwdriver tip before use.
b. Remove the screw and back door pull strap.
pic 5
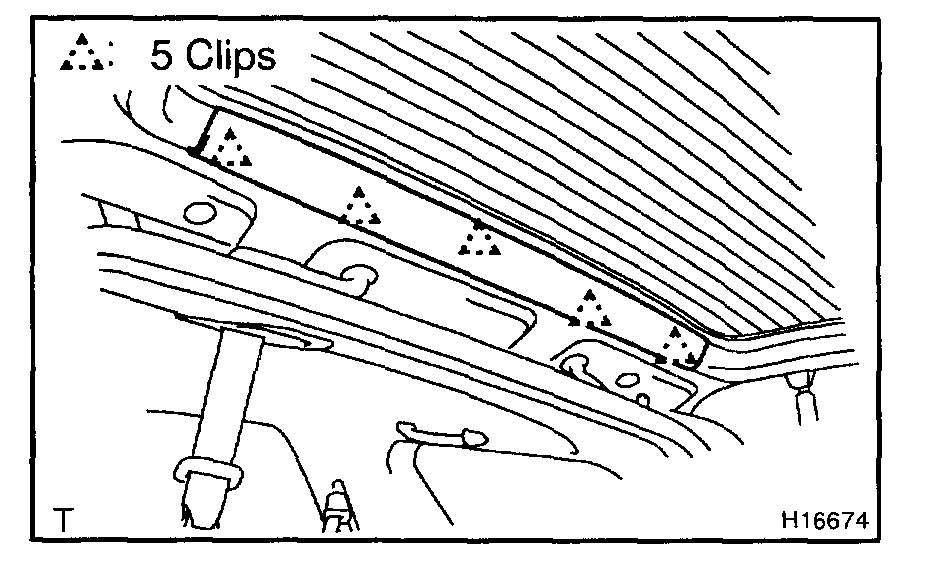
4. REMOVE BACK DOOR CENTER GARNISH
Using a screwdriver, remove the back door center garnish.
HINT: Tape the screwdriver tip before use.
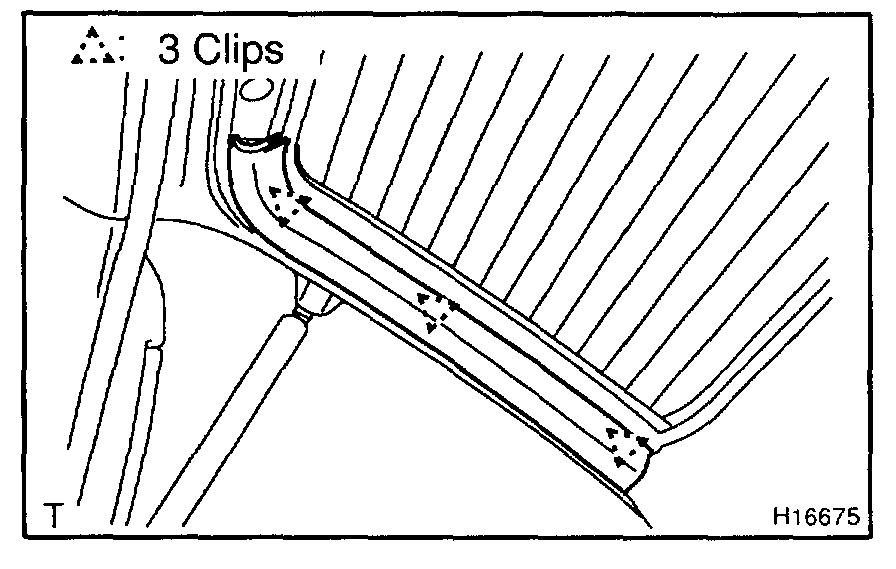
5. REMOVE BACK DOOR SIDE GARNISH
pic 6
a. Using a screwdriver, remove the back door side garnish.
HINT: Tape the screwdriver tip before use.
b. Employ the same manner described above to the other side.
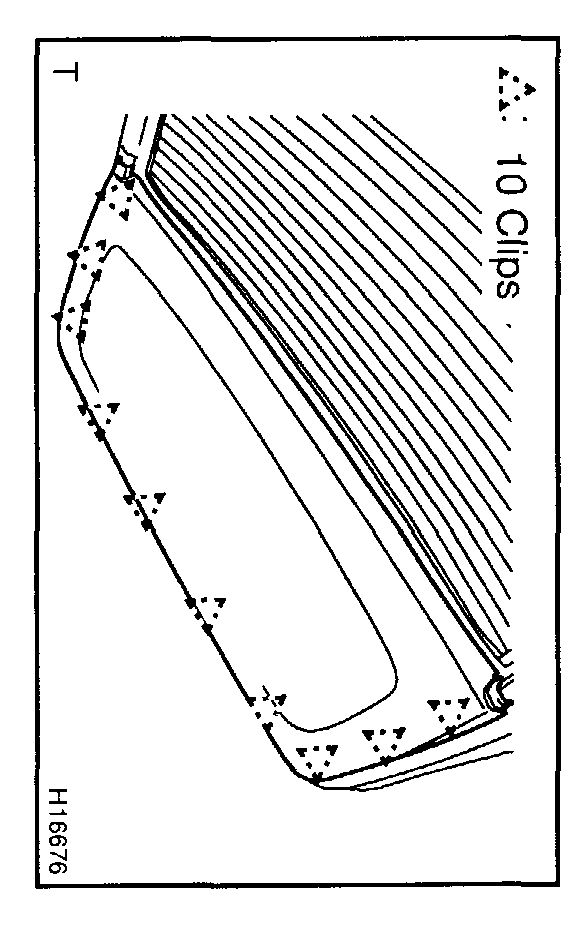
6. REMOVE BACK DOOR TRIM BOARD
pic 7
a. Insert a screwdriver between the back door and back door time board to pry the back door trim board out.
NOTE: Be careful not to damage the back door and back door trim board.
HINT: Tape the screwdriver tip before use.
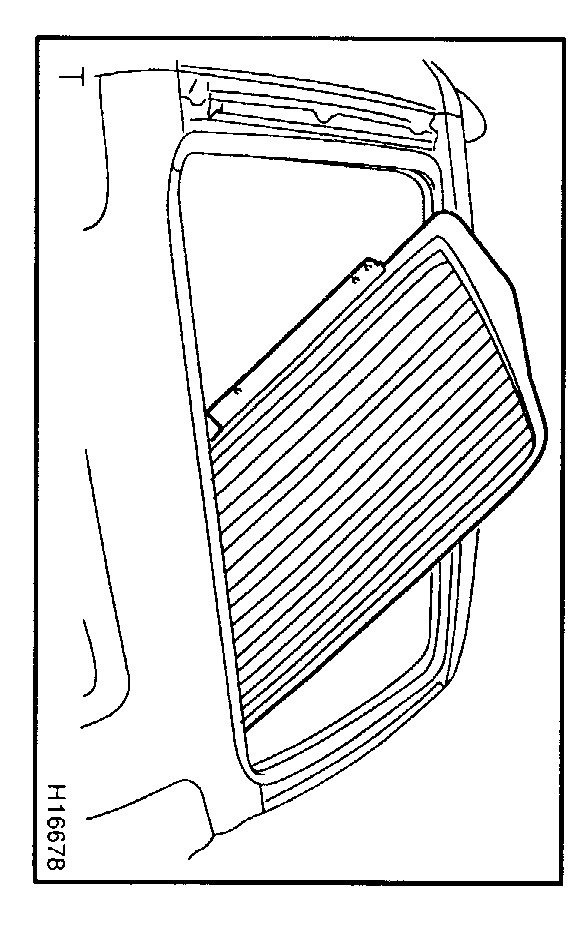
b. Pull the back door trim board to remove it as shown in the illustration.
7. REMOVE NO.1 SERVICE HOLE COVER
8. REMOVE NO.2 SERVICE HOLE COVER
9. REMOVE BACK DOOR GLASS
pic 8
a. Open the back door glass until the bolts appear in the service hole.
b. Disconnect the connector.
c. Remove the 2 bolts and guide bracket.
pic 9
d. Remove the 4 bolts and back door glass as shown in the illustration.
NOTE: Be careful not to drop the back door glass.
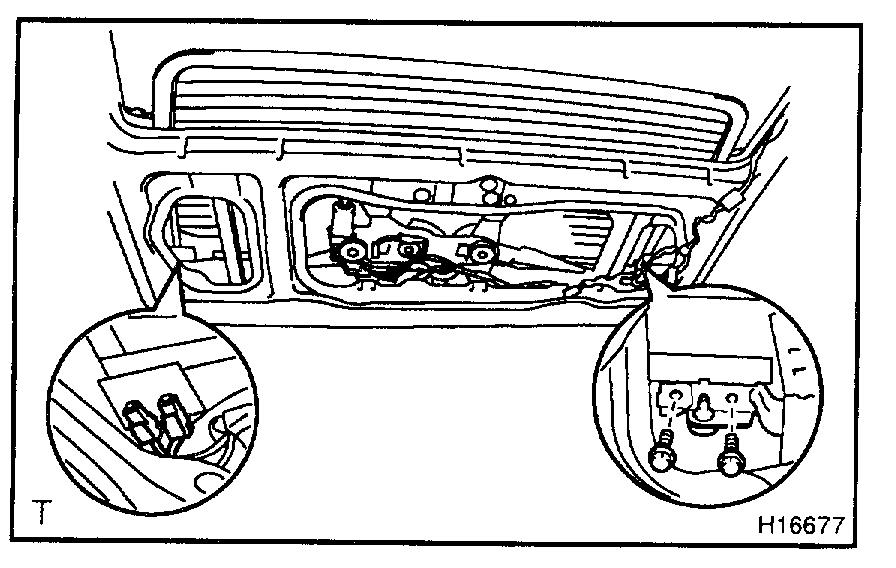
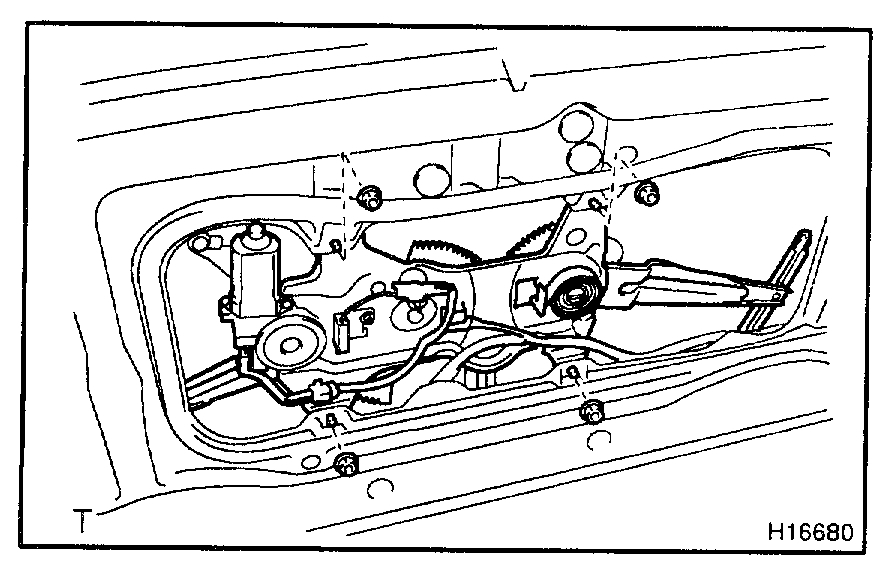
10. REMOVE POWER WINDOW REGULATOR
pic 10
a. Disconnect the connector.
b. Disengage the connector and clamp.
c. Remove the 4 nuts and power window regulator.
HINT: Remove the power window regulator through the service hole.
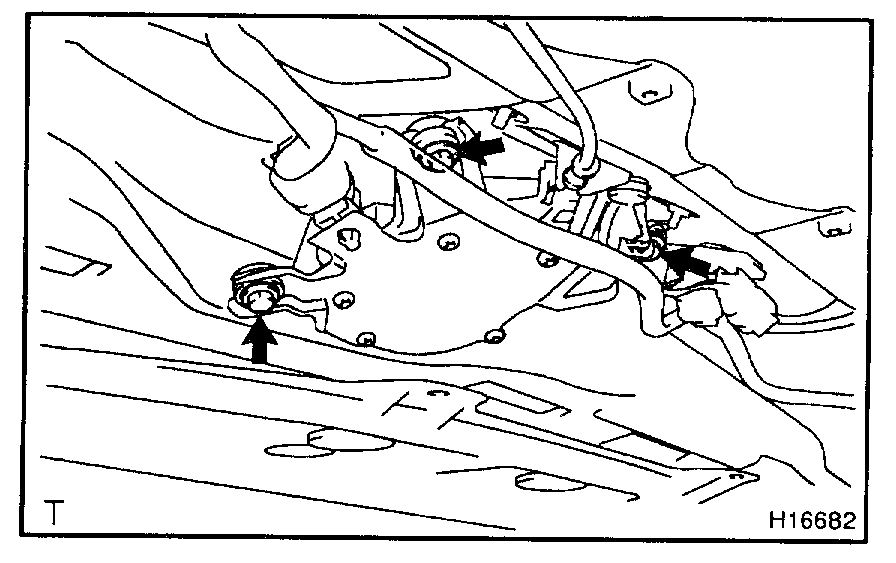
11. REMOVE REAR WIPER MOTOR
pic 11
a. Disconnect the connector.
b. Disengage the connector and clamp.
c. Remove the service hole plug.
d. Unfasten the 3 bolts, then remove the rear wiper motor.
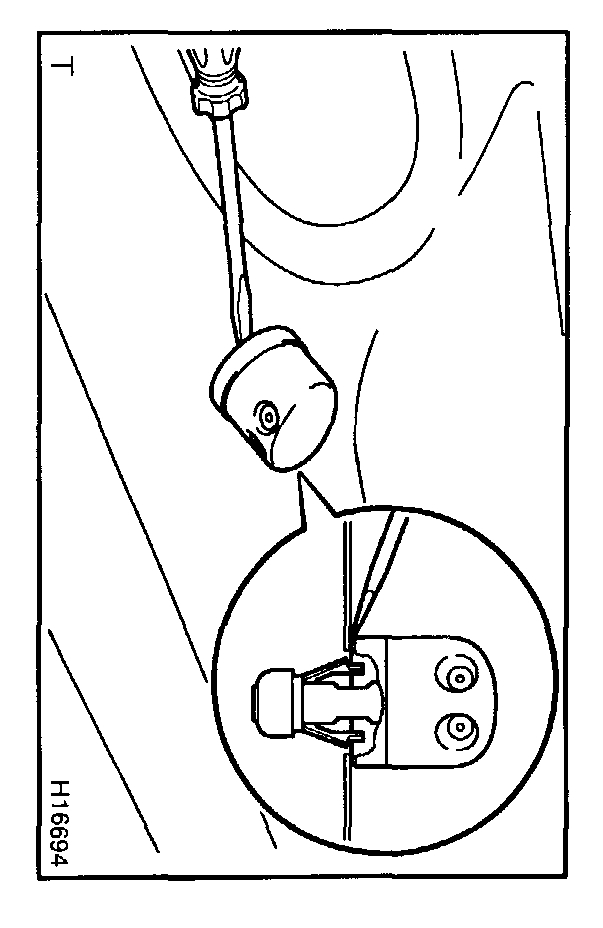
12. REMOVE WASHER NOZZLE
pic 12
a. Using a screwdriver, remove the washer nozzle.
HINT: Tape the screwdriver tip before use.
b. Disconnect the washer hose.
INSTALLATION
1. INSTALL WASHER NOZZLE
2. INSTALL REAR WIPER MOTOR
a. Install the rear wiper motor, then torque the 3 bolts.
Torque: 5.5 N.m (56 kgf.cm, 49 in.lbf)
b. Engage the connector and clamp.
c. Connect the connector.
3. INSTALL POWER WINDOW REGULATOR
Torque: 5.5 N.m (56 kgf.cm, 49 in.lbf)
4. INSTALL BACK DOOR GLASS
Torque: 8.0 N.m (82 kgf.cm, 71 in.lbf)
5. INSTALL NO.2 SERVICE HOLE COVER
6. INSTALL NO.1 SERVICE HOLE COVER
7. INSTALL BACK DOOR TRIM BOARD
8. INSTALL BACK DOOR SIDE GARNISH
9. INSTALL BACK DOOR CENTER GARNISH
10. INSTALL BACK DOOR PULL STRAP
11. INSTALL STEP LINER
pic 13
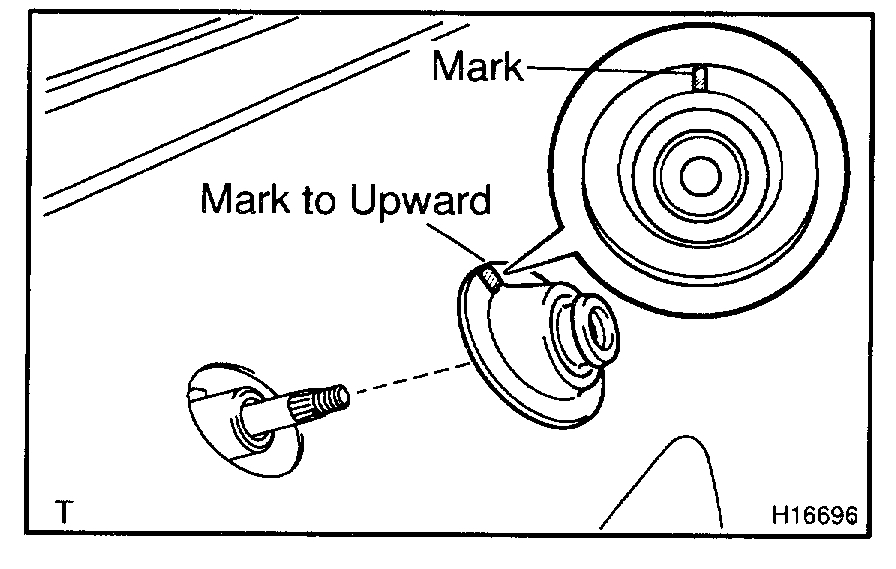
12. INSTALL REAR WIPER ARM
a. Install the rear wiper motor grommet as shown in the Illustration.
b. Operate the wiper once and turn the wiper switch OFF.
pic 14
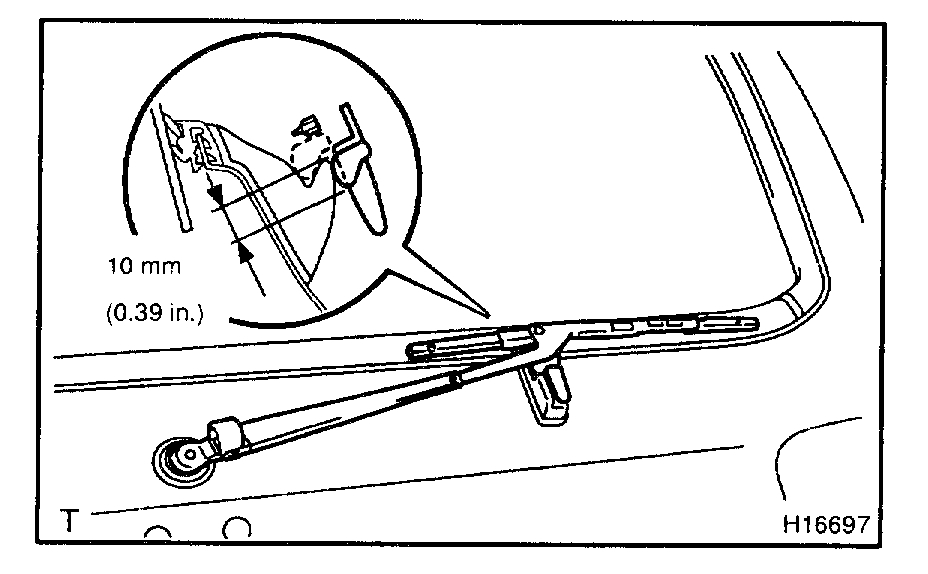
c. Install the wiper arm as shown in the illustration, then torque the nut.
Torque: 5.5 N.m (56 kgf.cm, 49 in.lbf)
pic 15
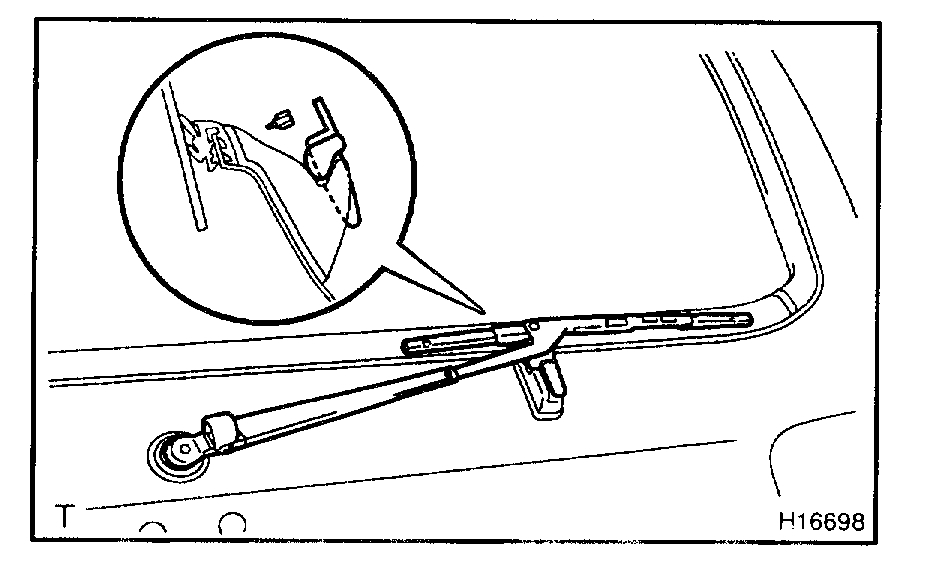
d. Set the wiper arm to rise-up position as shown in the illustration.
e. Close the cover.
__________________________
Let me know if this helps.
Take care,
Joe
Images (Click to enlarge)
Jan 29, 2020 at 7:23 PM