My truck started having trouble starting about a week ago, which sounded like a cold start without a fully charged battery, but this would not happen every time it was started - only some days. It has continued to start every time, but sometimes it sounded like it might not. If I would sit in the truck with the radio on for 15 minutes or leave the lights on by mistake for 5 minutes with the truck off, that would seem to be enough to drain the battery just enough to make the truck strain to start the next time. Also, some mornings it would strain to start a little, even if I could not find anything that had been left on.
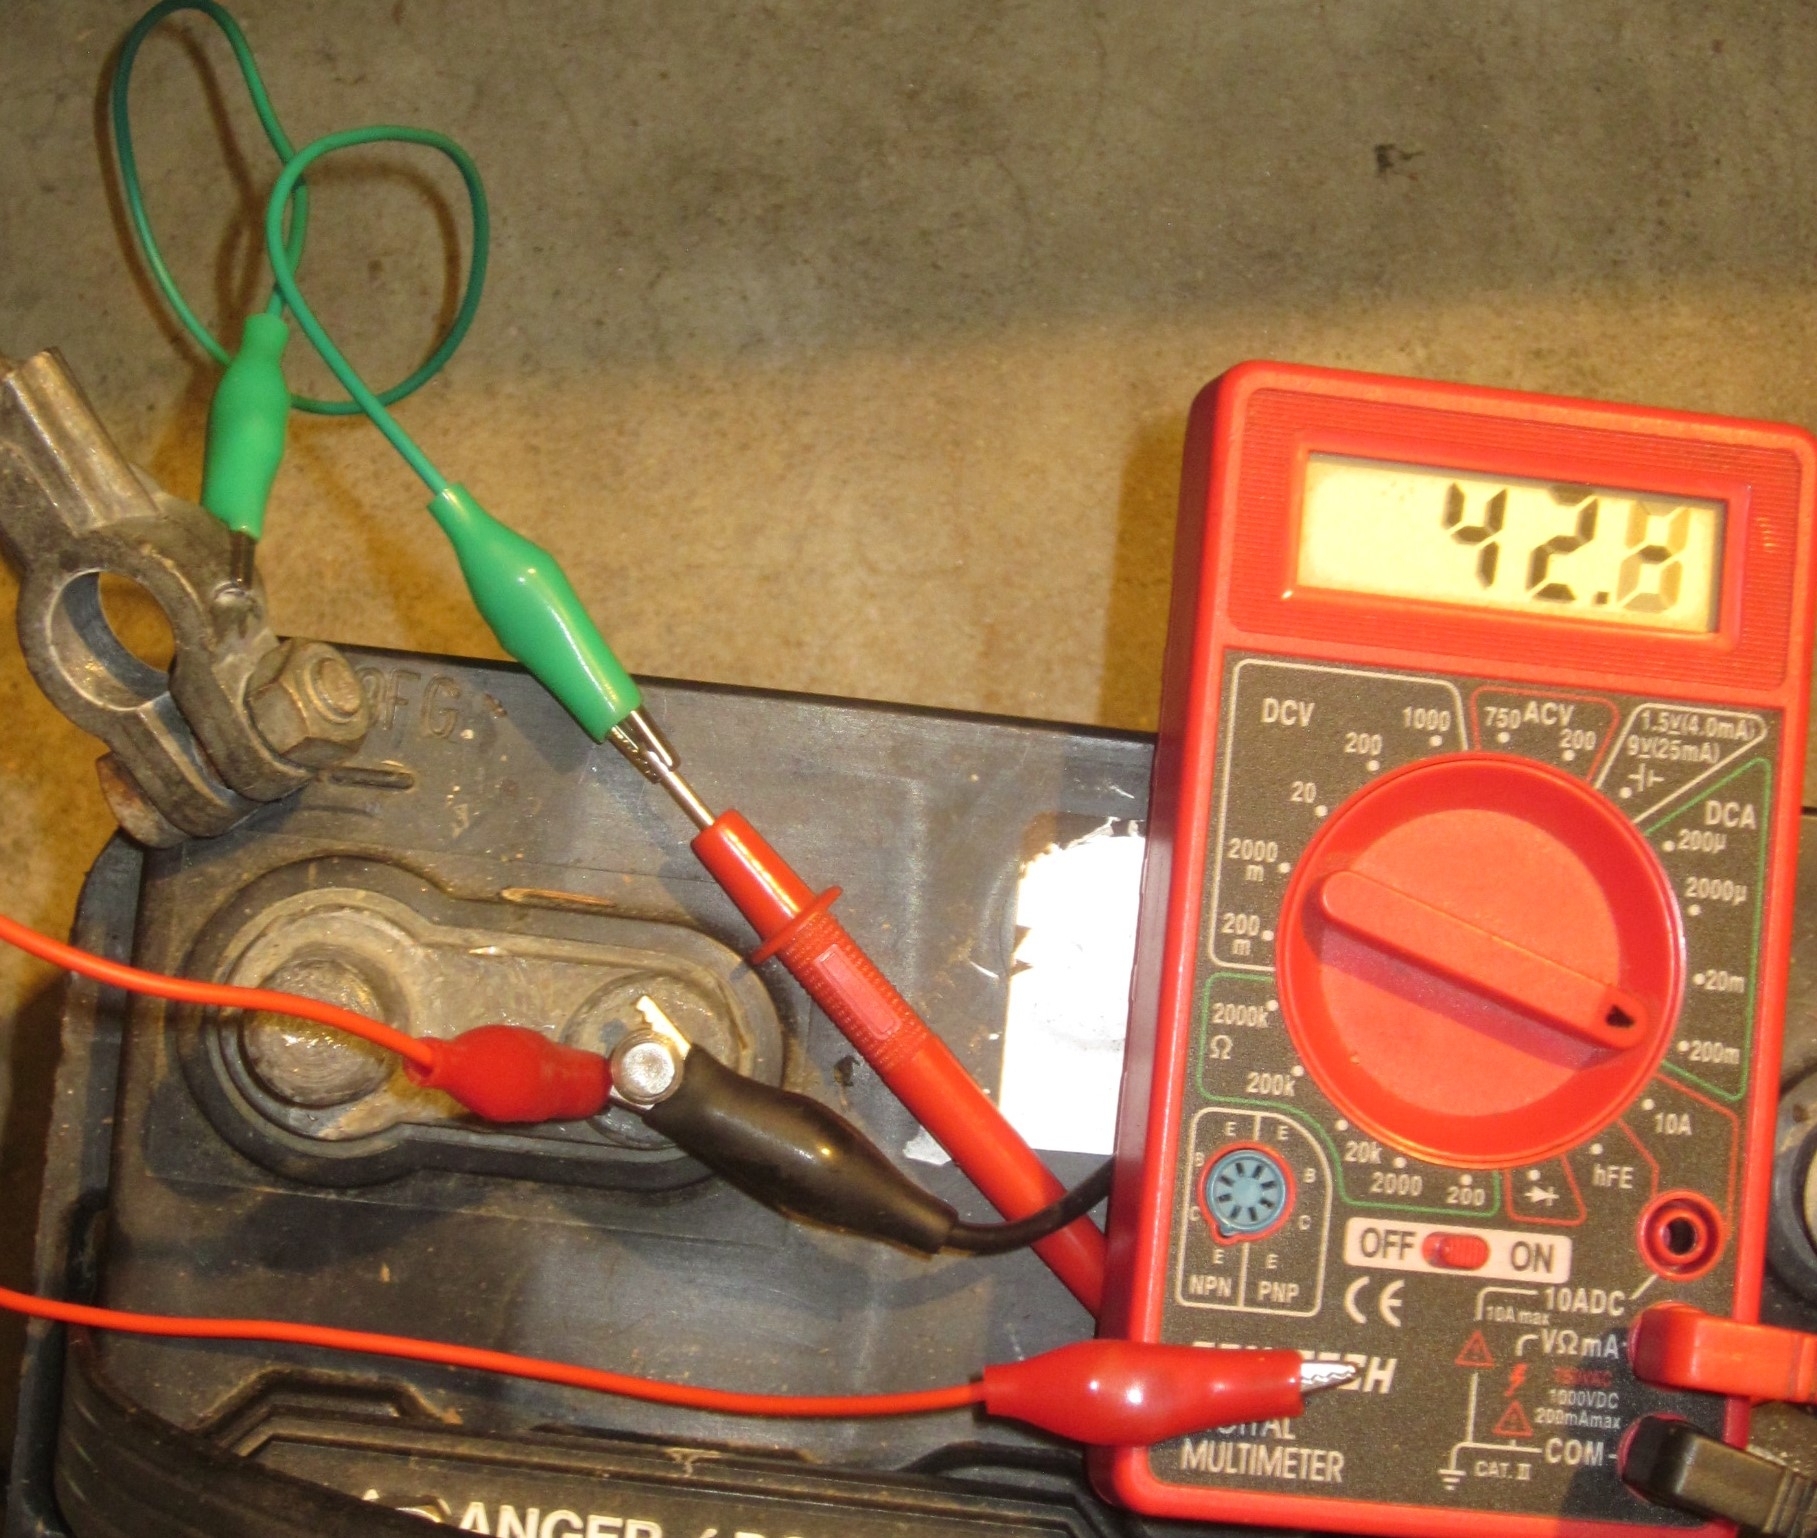
I assumed it was just the battery going bad, so I did a multimeter load test and set the meter to min/max while I started the engine. Battery voltage started at about 12.7V, then when starting the engine, it reached a low of 9.2V and maxed at 14.99 with the engine/alternator running. Based on it being lower than 9.5V at its low point during starting (I've heard that is the threshold to go by), I am guessing that the battery is bad. But at the same time I tested for parasitic drain and that seems to be an issue right now as well.
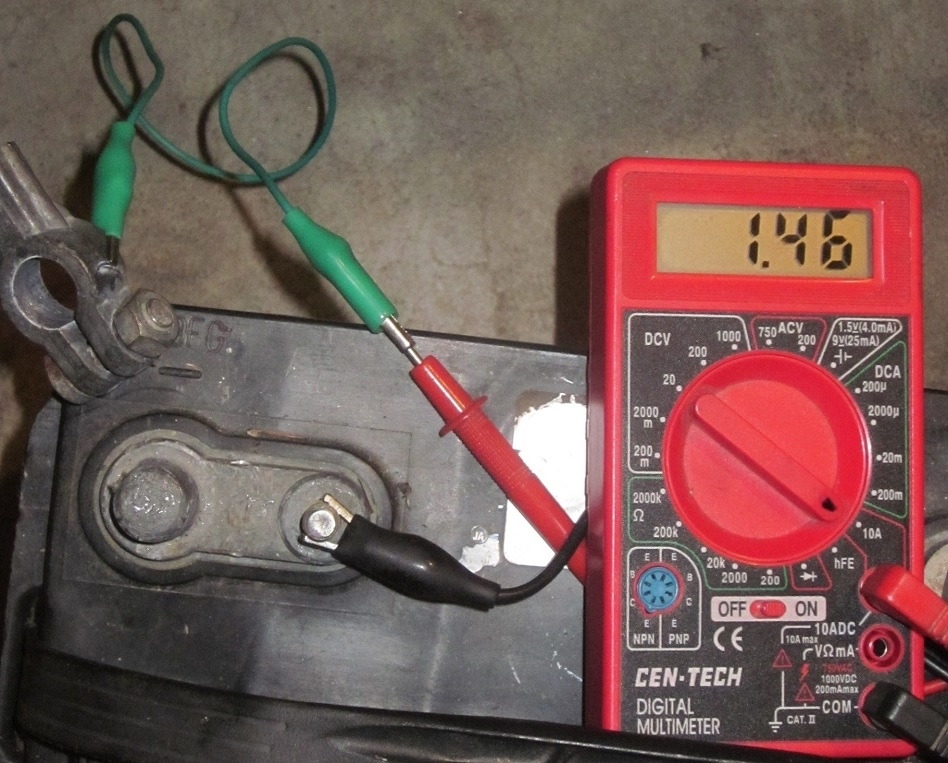
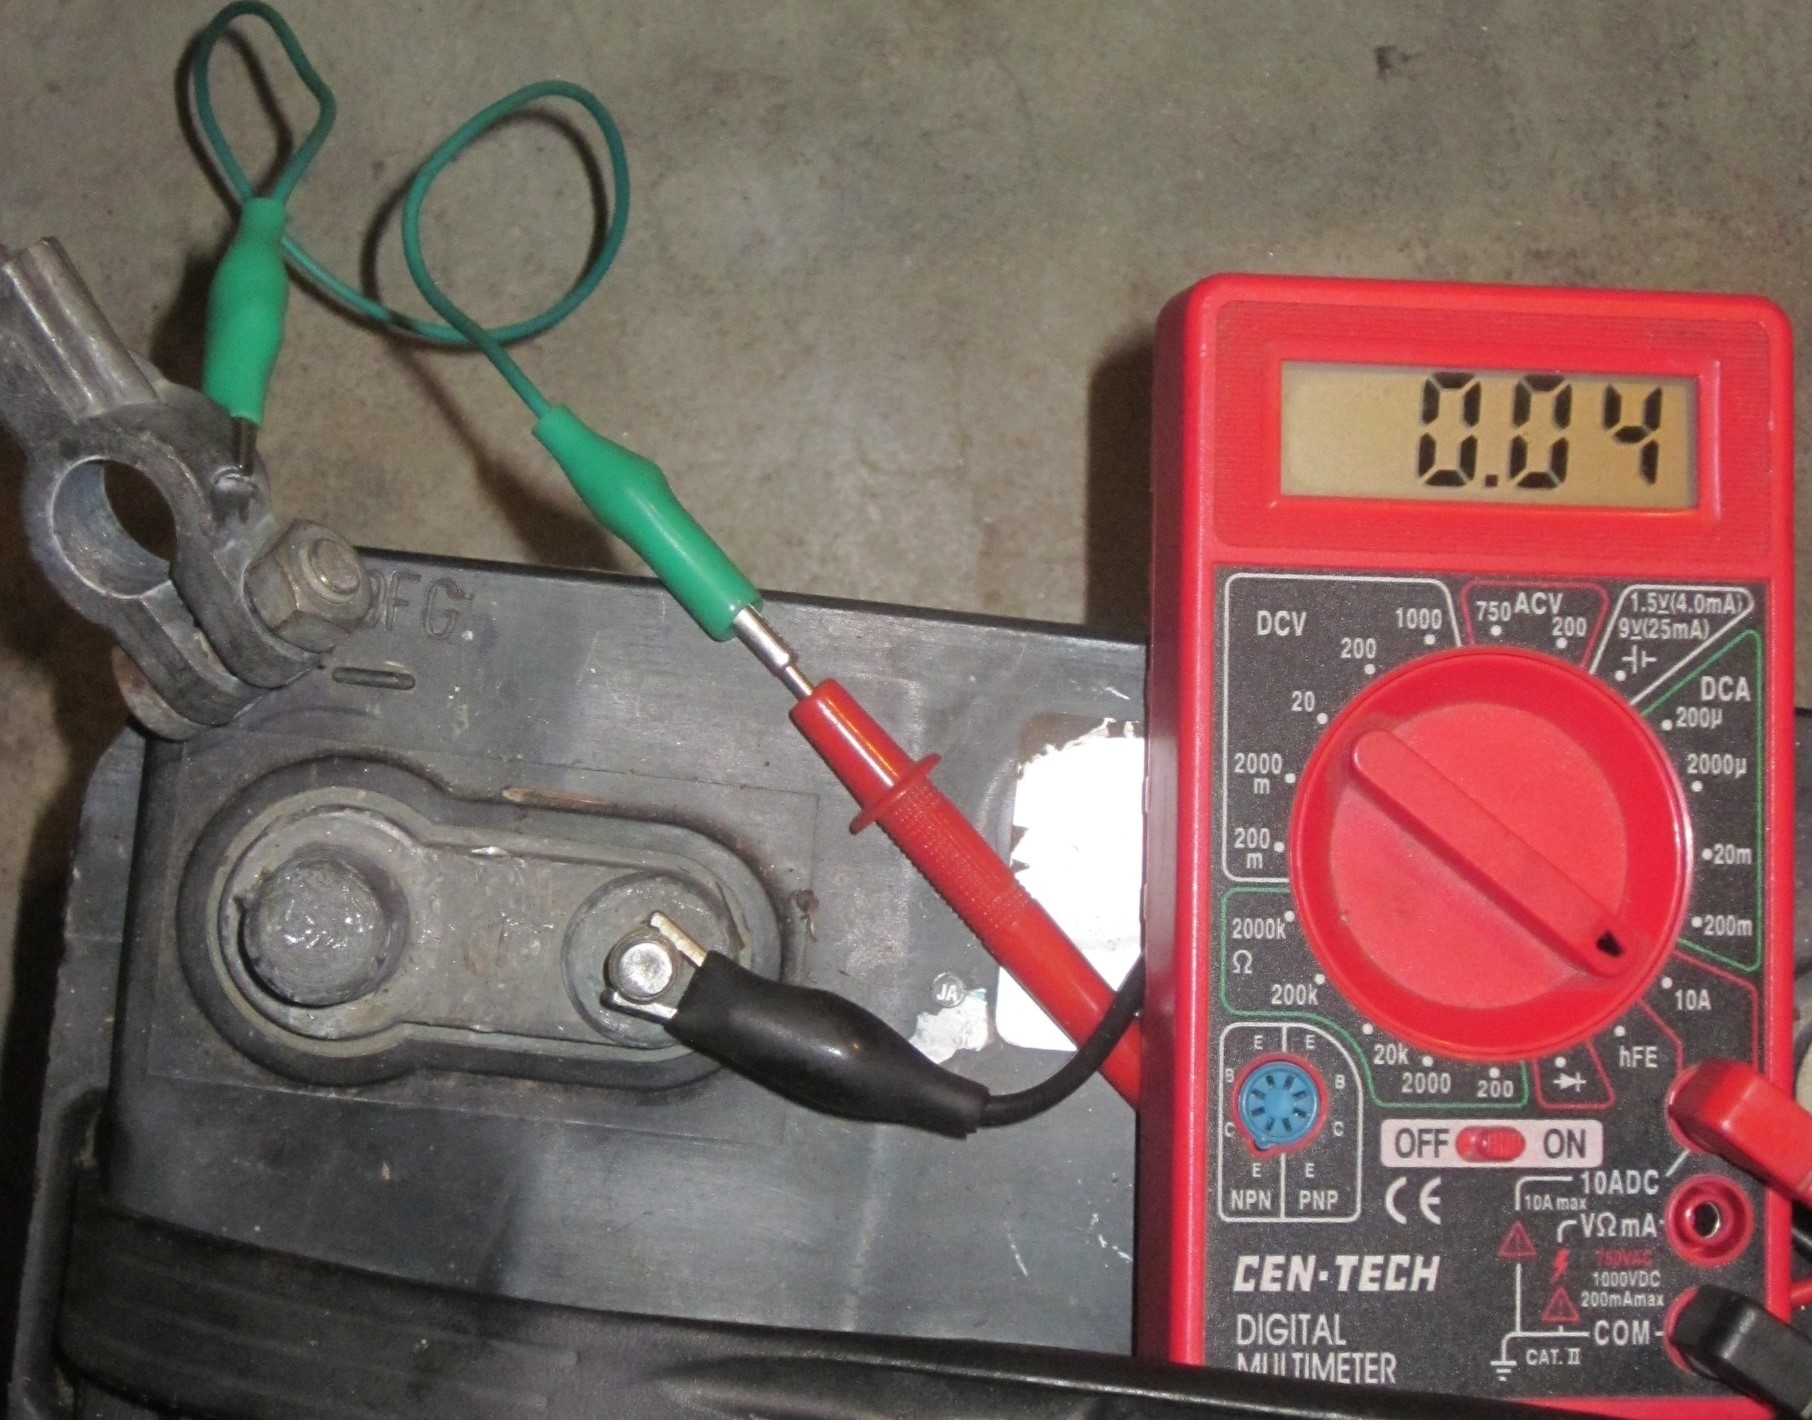
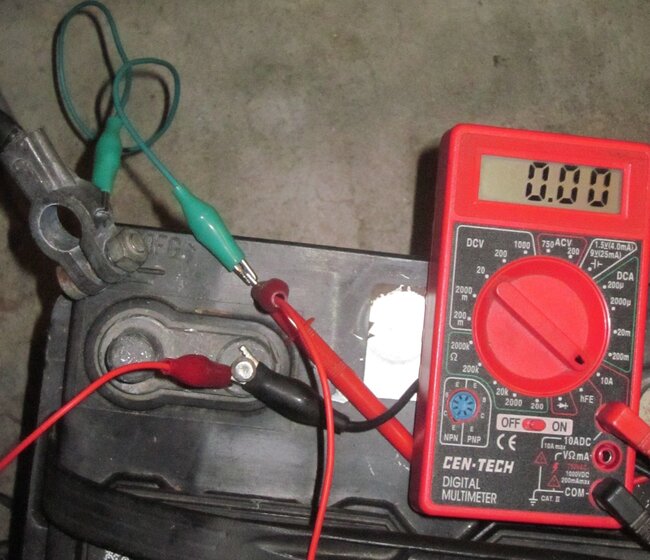
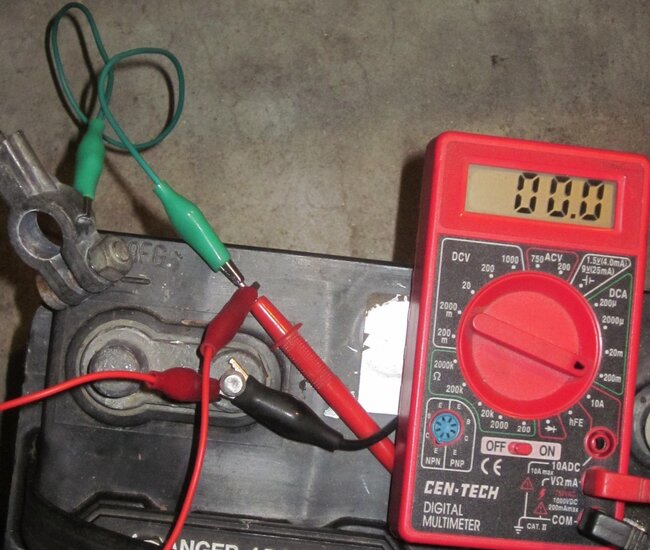
When the engine and all accessories off, and with either the neg or pos battery terminal disconnected (I did both ways separately), and a test light connected between the terminal connector and the post, the test light is lighting up bright, and with a very slight pulsing to the light. You actually have to stare at the light very closely in a dark garage to notice the pulsing, so the pulsing is very subtle. I started pulling fuses to see what would shut off the test light, but the test light never turned off after pulling every single fuse. I did this at least 3 times through to make sure I wasn't missing any (once with the pos batt side and once with the neg batt side). This truck only has one fuse box to check, so I am at a loss as to where to go from here.
I also used a clamp amp meter on the battery positive cable and am getting about 2.5 Amps of draw with the engine and all accessories off. I got under the truck just to visually check any wiring that I could, and added some cable protector in two places that the existing protector was falling apart, and then I checked with the clamp meter again just to see if I would get the same readings, but now it was only reading 1 amp when clamped on the cable. I should mention that my meter seems to be acting funny and I am not trusting the amp readings 100%, because sometimes when I would take the clamp back off the battery cable, it would still read 1 amp without being clamped on anything and not even being near the cables. When I would open the clamp but keep the clamp over/around the cable, the meter would immediately go up to 2.5 amps, and then when I would close the clamp around the cable again it was going back to only 1 amp.
Either way, I definitely have a parasitic draw, since the test light method is clearly confirming that. But I just can't find the source of the draw, since pulling every fuse never turns off the test light.
Thanks so much for your input!
-Ben
I assumed it was just the battery going bad, so I did a multimeter load test and set the meter to min/max while I started the engine. Battery voltage started at about 12.7V, then when starting the engine, it reached a low of 9.2V and maxed at 14.99 with the engine/alternator running. Based on it being lower than 9.5V at its low point during starting (I've heard that is the threshold to go by), I am guessing that the battery is bad. But at the same time I tested for parasitic drain and that seems to be an issue right now as well.
When the engine and all accessories off, and with either the neg or pos battery terminal disconnected (I did both ways separately), and a test light connected between the terminal connector and the post, the test light is lighting up bright, and with a very slight pulsing to the light. You actually have to stare at the light very closely in a dark garage to notice the pulsing, so the pulsing is very subtle. I started pulling fuses to see what would shut off the test light, but the test light never turned off after pulling every single fuse. I did this at least 3 times through to make sure I wasn't missing any (once with the pos batt side and once with the neg batt side). This truck only has one fuse box to check, so I am at a loss as to where to go from here.
I also used a clamp amp meter on the battery positive cable and am getting about 2.5 Amps of draw with the engine and all accessories off. I got under the truck just to visually check any wiring that I could, and added some cable protector in two places that the existing protector was falling apart, and then I checked with the clamp meter again just to see if I would get the same readings, but now it was only reading 1 amp when clamped on the cable. I should mention that my meter seems to be acting funny and I am not trusting the amp readings 100%, because sometimes when I would take the clamp back off the battery cable, it would still read 1 amp without being clamped on anything and not even being near the cables. When I would open the clamp but keep the clamp over/around the cable, the meter would immediately go up to 2.5 amps, and then when I would close the clamp around the cable again it was going back to only 1 amp.
Either way, I definitely have a parasitic draw, since the test light method is clearly confirming that. But I just can't find the source of the draw, since pulling every fuse never turns off the test light.
Thanks so much for your input!
-Ben
Nov 1, 2023 at 6:25 AM