Welcome to 2CarPros.
If the wrong part is installed, they could have cross threaded the tie rod when installing it. If that is the case, you will need to remove the inner tie rod and replace it, too.
________________________________________
Here are the directions for replacing the outer tie rod. See if there is anything different shown. Also, the first set of directions are for a front wheel drive and AWD models outer tie rod. The attached pics correlate with the directions.
_______________________________________
PROCEDURES
Rack and Pinion Outer Tie Rod End Replacement
^ Tools Required
- J 24319-B Steering Linkage and Tie Rod Puller
Removal Procedure
1. Raise and support the vehicle.
2. Remove the front tire assembly.
pic 1
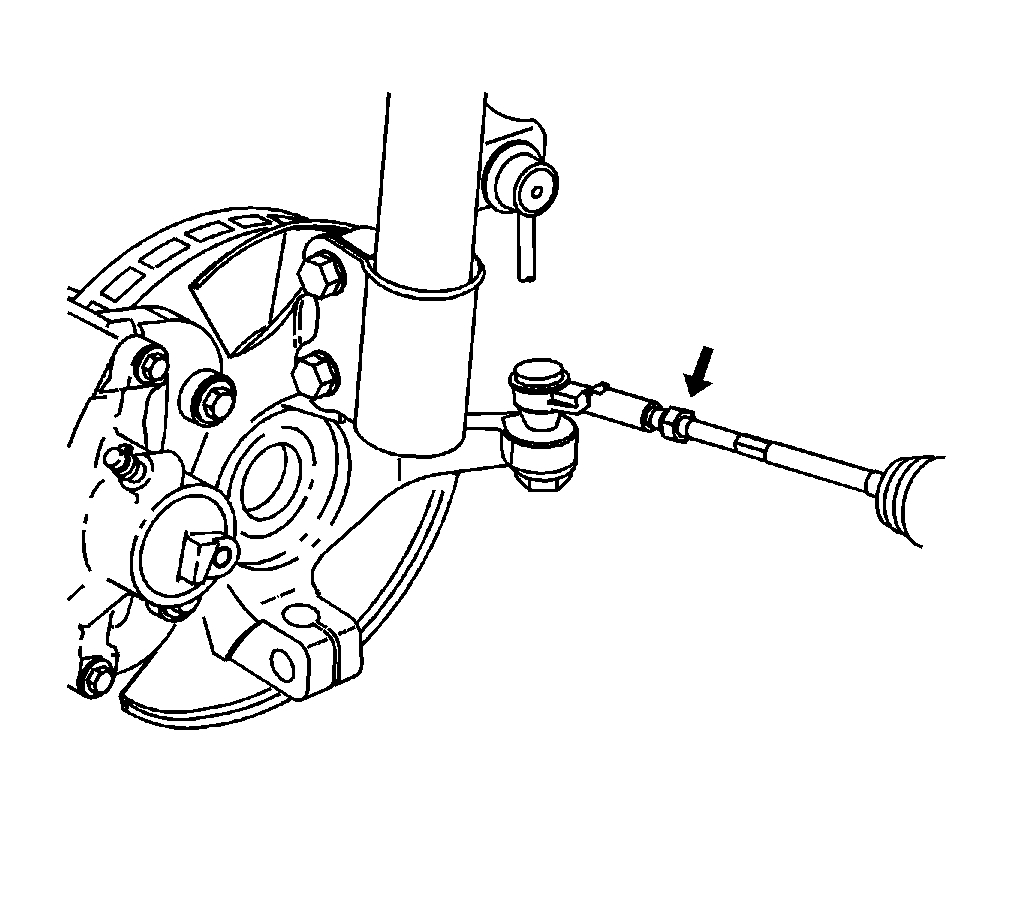
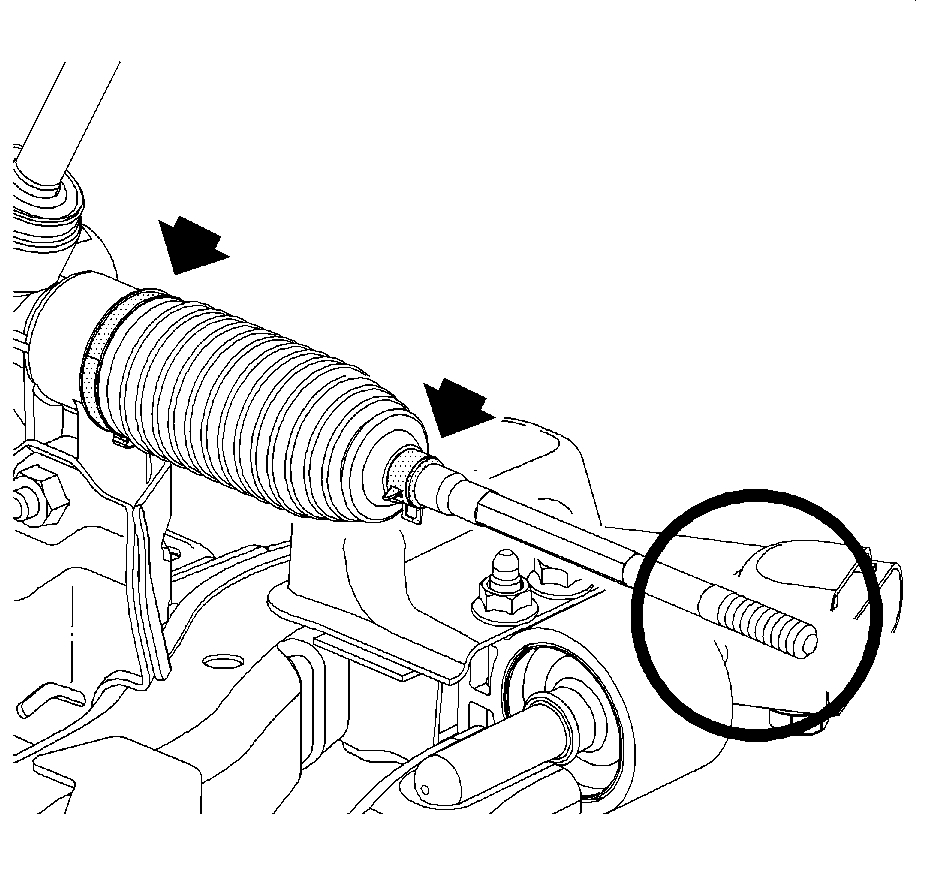
3. Important: Mark the location of the jam nut for installation.
Loosen the tie rod inner jam nut.
pic 2
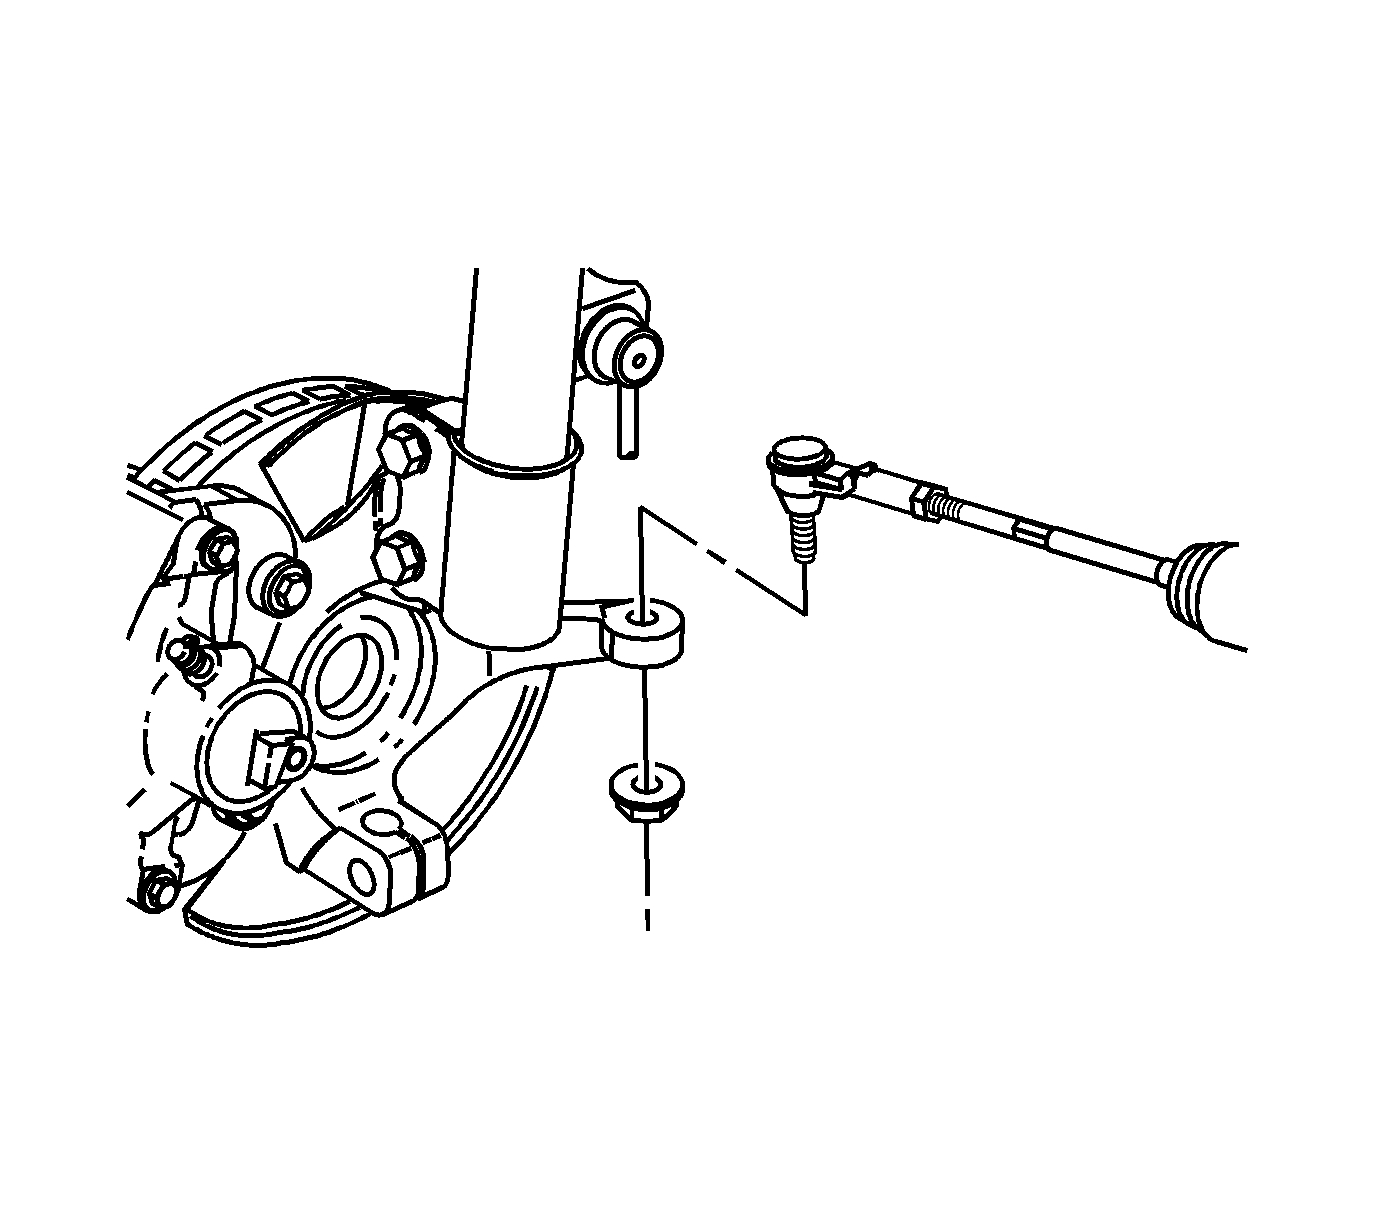
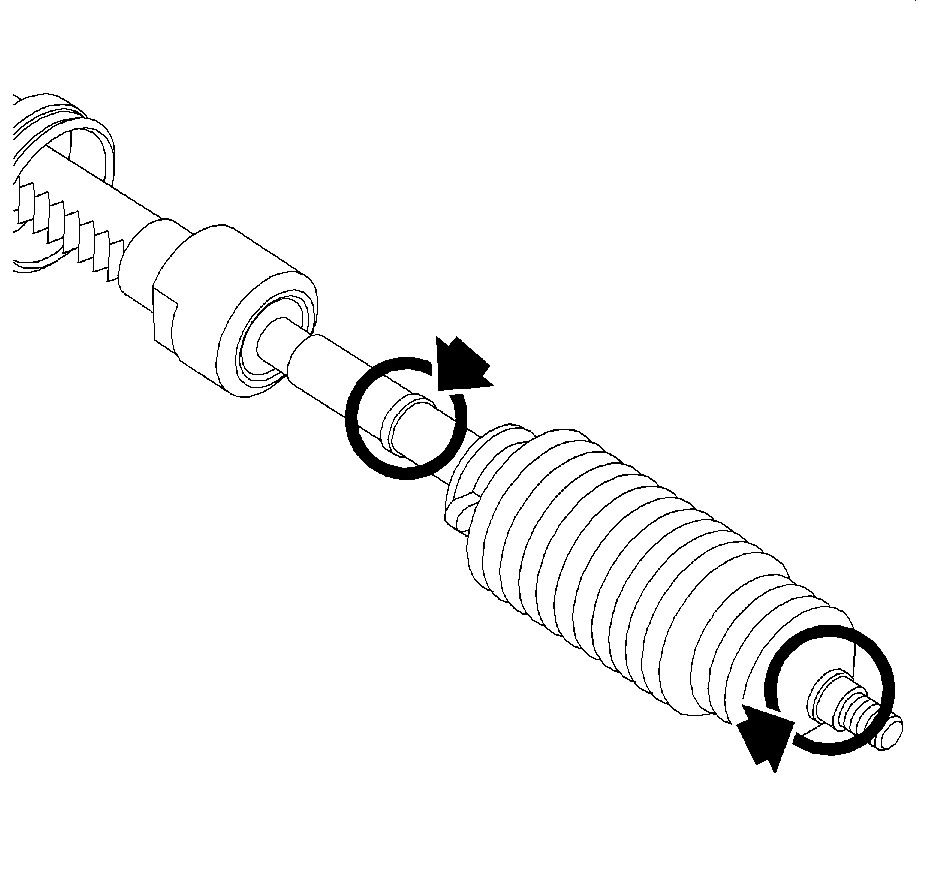
4. Important: Hold the ball stud to prevent turning during removal of the nut.
Remove the tie rod to knuckle nut. Discard the nut.
pic 3
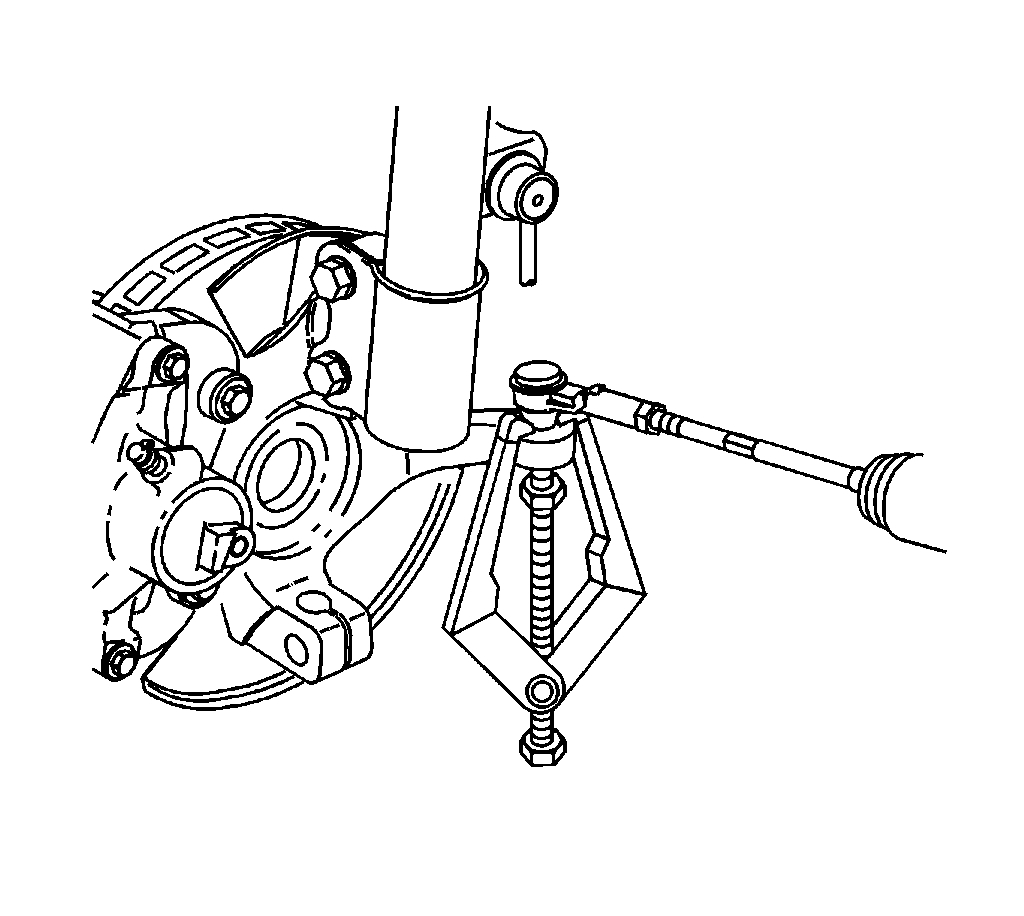
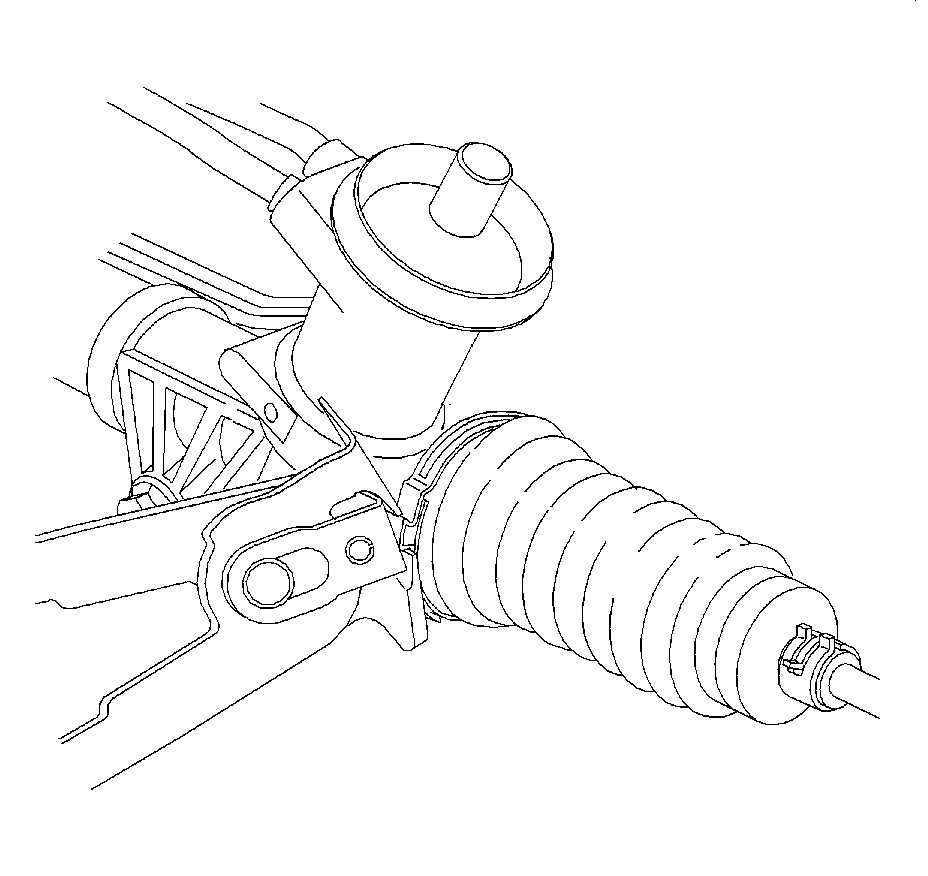
5. Notice: Do not free the ball stud by using a pickle fork or a wedge-type tool. Damage to the seal or bushing may result.
Use the J 24319-B to separate the tie rod from the steering knuckle.
pic 4
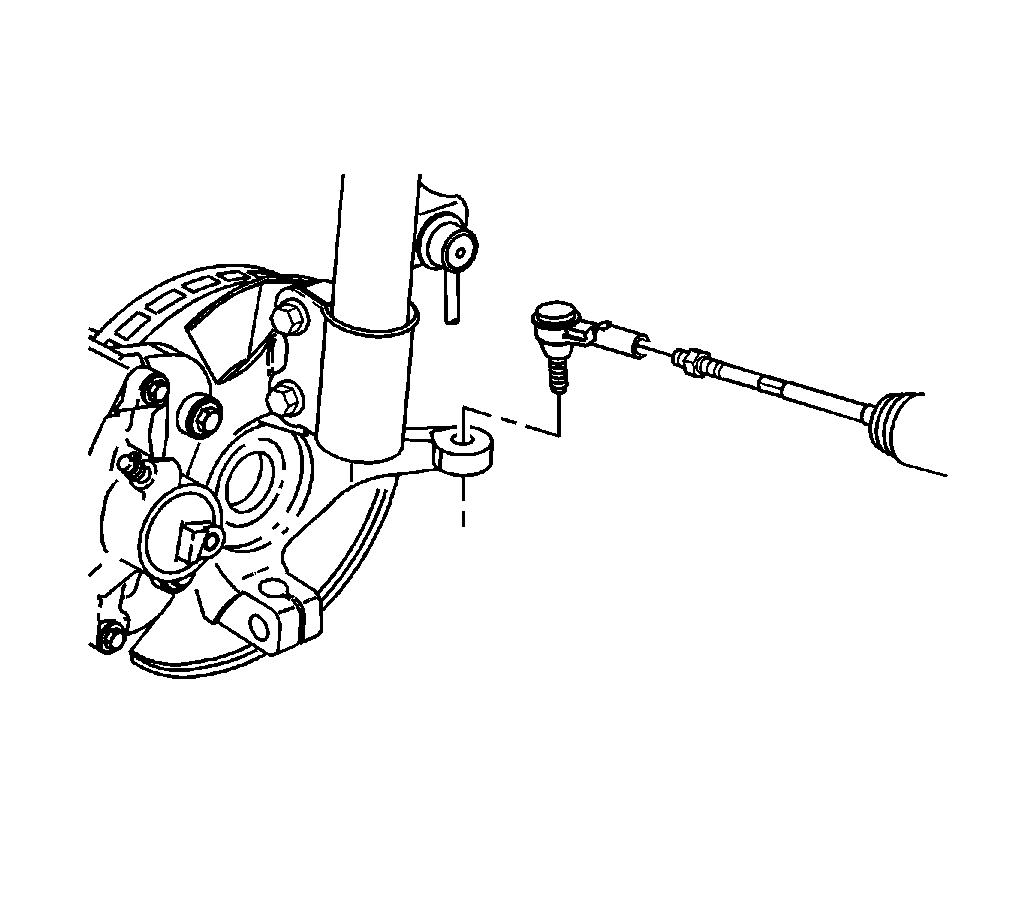
6. Remove the outer tie rod from the inner tie rod.
Installation Procedure
pic 5
1. Install the outer tie rod to the inner tie rod.
2. Connect the tie rod to the knuckle.
pic 6
3. Notice: Refer to Fastener Notice in Service Precautions.
Install a new tie rod retention nut.
^ Tighten the nut to 60 Nm (44 ft. lbs.).
4. Install the front tire assembly.
5. Check the wheel alignment.
_____________________________
If you are unable to remove the outer tie rod, then both inner and outer will need removed and replaced. Here are the directions for replacing the inner boot for the inner tie rod. This will get you to where it connects. Remember, you want the overall length of the unit to be the same when you reinstall it. Also, I do recommend an alignment when this is done.
____________________________
RACK AND PINION BOOT REPLACEMENT - ON VEHICLE
Rack and Pinion Boot Replacement - On Vehicle
^ Tools Required
- J 22610 Keystone Clamp Pliers
Removal Procedure
1. Raise and support the vehicle.
2. Remove the tire assembly.
pic 7
3. Remove the outer tie rod.
4. Remove the jam nut.
pic 8
5. Remove the spring from the boot, outer end.
6. Cut and remove the crimp clamp, inner end. Discard the clamp.
7. Unseat the boot from the steering gear and remove.
pic 9
8. Clean the inner tie rod and boot contact area of grease and debris.
Installation Procedure
1. Important: The inner tie rod must be free of debris and moisture. The boot sealing areas must be clean and dry.
Apply approximately 3/4 of the supplied grease packet into the small end of the boot cavity. Apply the remainder of the grease on the shaft where the small end of the boot meats the shaft.
pic 10
2. Important: Ensure the large end of the boot is firmly seated in the gear housing groove.
Install the boot with the large clamp loosely attached, not crimped.
pic 11
3. Using the J 22610, crimp the large clamp.
4. Important: Ensure the small end of the boot is firmly seated in the inner tie rod end groove.
Install the spring clamp to the small end of the boot.
pic 12
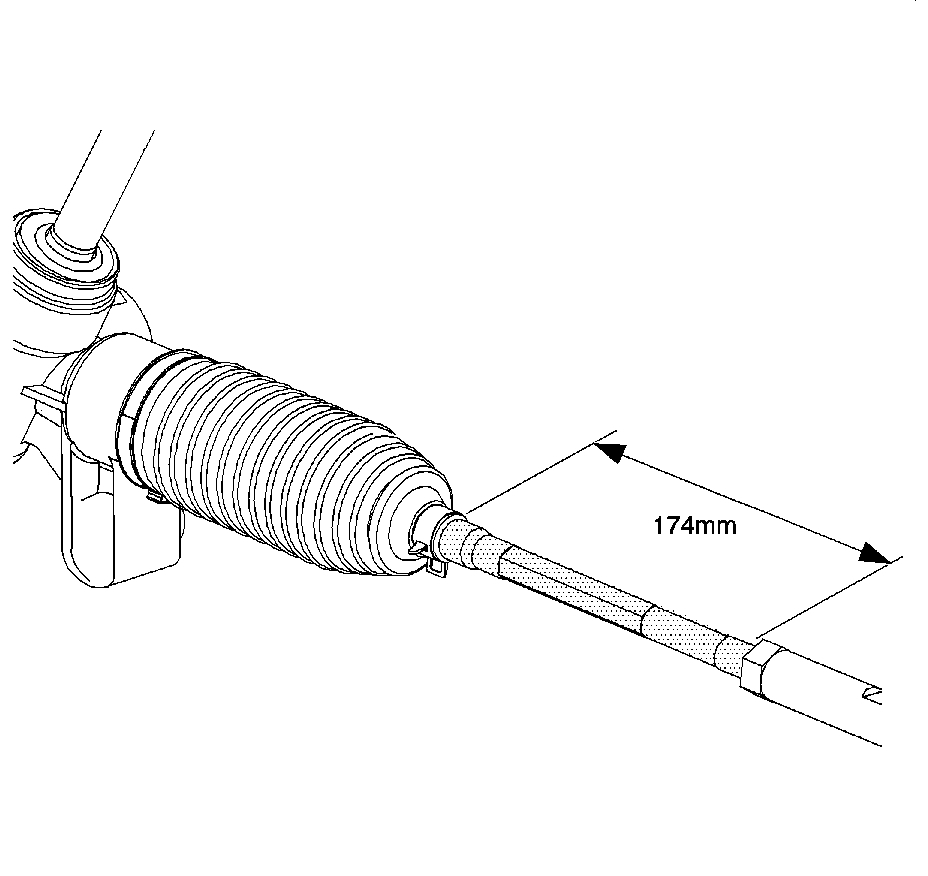
5. Install the jam nut approximately 174 mm (6.85 inch) from the boot clamp.
pic 13
6. Install the outer tie rod.
7. Install the tire assembly.
8. Check the front wheel alignment and align as necessary.
___________________________
Let me know if this helps.
Take care,
Joe
Images (Click to enlarge)
May 24, 2019 at 9:44 PM