Hard start, possible O2 sensors issue

Tiny
RALPH850
  • MEMBER
  • 1991 FORD F-150
  • 4.2L
  • 6 CYL
  • 4WD
  • MANUAL
  • 180,000 MILES
Whole problem started with lean codes on both banks.
Replaced fuel filter.
Looked for vacuum leaks.
Cleaned MAF.

Then I noticed, all four O2 sensors read.020 volts Flat, no change.

Changed two upstream O2 sensors.

Still no response.

Checked O2 sensor heater power, good.

Ran truck for 5 minutes O2 sensors began working? I assume they got warm from exhaust gases

This morning, O2 sensors working, got out on highway, after 20 minutes they flat lined, constant.025 volts.
Engine goes into Closed Loop Fault.

When I got off highway, one O2 sensor begins working and engine reports Closed Loop.

I am lost. Any help?


Truck has sat for 2 hours, started it up, O2 sensor bank2 comes on line, truck reports fuel system in CL. About 2 minutes later O2 sensor bank 1 comes alive. Very hard to start.
Monday, March 15th, 2021 AT 6:59 AM

13 Replies

Tiny
ASEMASTER6371
  • MECHANIC
  • 52,797 POSTS
Good afternoon,

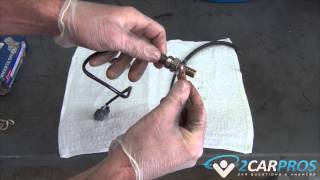
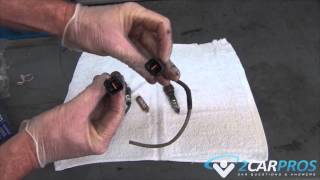
Did you check the fuel pressure? If you do not have sufficient pressure, the O2 sensors readings will be off and you will have starting and driving issues.

https://www.2carpros.com/articles/repair-lean-mixture-codes-p0171-or-p0174-on-some-manufacturers

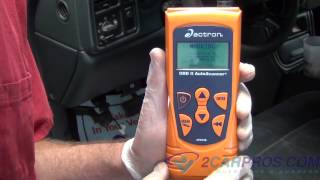
Key On Engine Off 50 - 60 psi
Key On Engine Running 45 - 60 psi

You can rent a tester at a parts store to check.

https://www.2carpros.com/articles/how-to-check-fuel-system-pressure-and-regulator

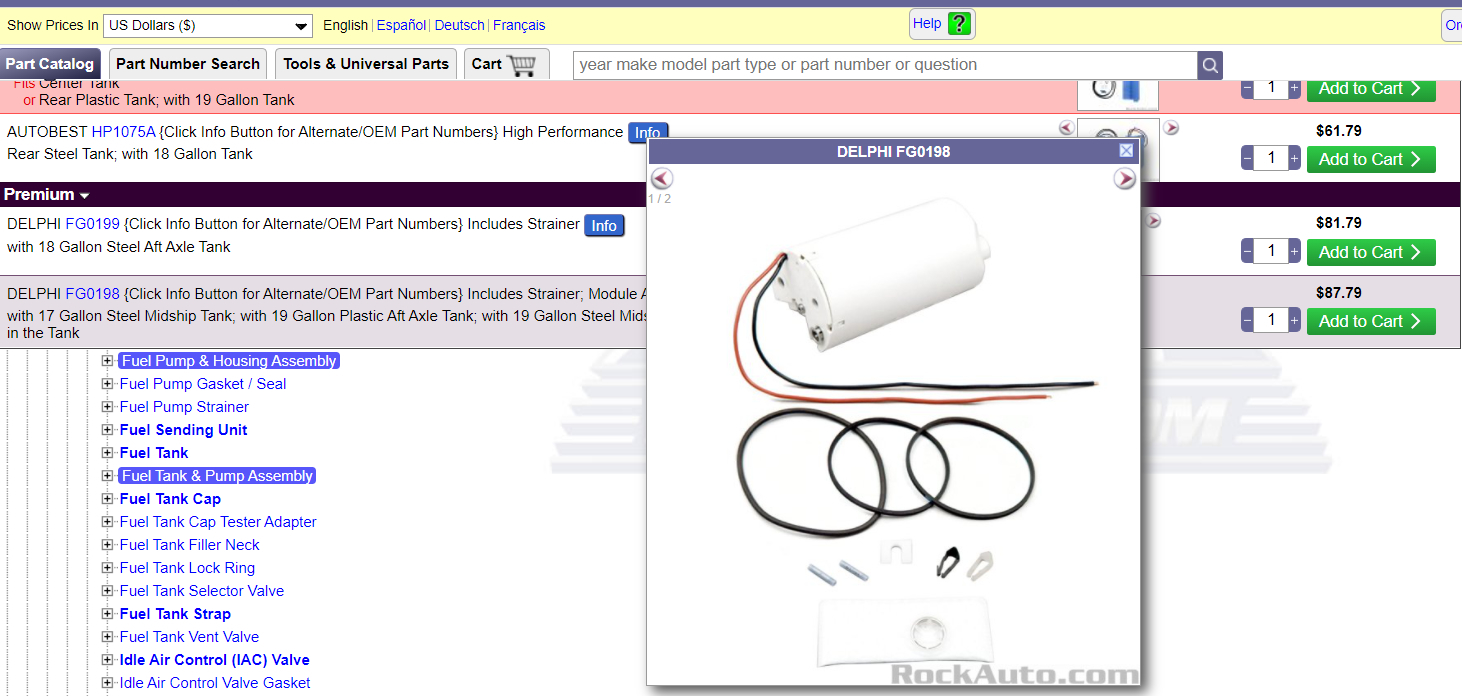
https://www.2carpros.com/articles/how-to-replace-an-electric-fuel-pump

Roy

REMOVAL
1. Raise the rear of the vehicle.
2. To avoid electrical sparking at the tank, disconnect battery ground cable. Then disconnect the fuel gauge sending unit wire at the fuel tank.
3. On vehicles with dual tanks, disconnect the ground wire after both tanks have been drained. Siphon the fuel from the tank into a suitable container at the hose between the fuel pump and the fuel tube.
4. Disconnect the fuel line push-connect fittings at the fuel gauge sending unit.
5. If the fuel gauge sending unit is to be removed, turn the unit retaining ring counterclockwise and remove the sending unit, retaining ring and gasket.
6. Loosen the clamp on the fuel filler pipe. Disconnect the filler pipe hose by pulling along the rubber inner tube from the tank filler neck.
7. If removing the metal-type tank, support the tank and remove the bolts attaching the tank supports to the frame. Carefully lower the tank and disconnect the vent tube(s) from the vapor emission control valve in the top of the tank. Finish removing the filler pipe and filler pipe vent hose if not possible in step 6. Remove the tank from under the vehicle.
8. If removing the plastic-type tank, support the tank and remove the bolts attaching the combination skid plate and tank support to the frame. Carefully lower the tank and disconnect the vent tube(s) from the vapor emission control valve in the top of the tank. Complete removing the filler pipe if not possible in step 6. Remove the skid plate and tank from under the vehicle. Disassemble the skid plate from the tank.
INSTALLATION
1. Install new support strap insulation as required.
2. If installing the plastic-type tank, assemble the skid plate and support straps to the tank.
3. Raise the tank skid plate and support assembly and attach the vent hose(s) to the vapor emission control valve.
4. Start the tank neck into the hose.
5. Position the tank assembly filler against the top straps of the frame. Install the attaching bolts and nuts using thread adhesive. Tighten the attaching bolts and nuts.

NOTE: The plastic tank attaching bolts and nuts do not utilize thread adhesive. Tighten these bolts and nuts.
6. Insert the rubber inner hose inside the tank filler neck and connect the filler pipe hose. Tighten the clamps.
7. If the fuel gauge sending unit was removed, ensure all the old gasket material has been removed from the unit mounting surface on the tank. Using a new gasket, position the fuel gauge sending unit to the fuel tank and secure with the retaining ring.
8. Connect the fuel gauge sending unit electrical connector to the sending unit.
9. Connect the fuel lines at the fuel gauge sending unit. Install the drain plug, if so equipped.
10. Connect the vehicle battery ground cable removed in Removal step 2.
11. Fill the tank and check all connections for leaks.
12. Lower the vehicle.
Was this
answer
helpful?
Yes
No
+1
Monday, March 15th, 2021 AT 4:05 PM
Tiny
RALPH850
  • MEMBER
  • 7 POSTS
Thanks, yes I am testing fuel pressure tomorrow after work.
I am pretty sure there is a fuel problem. Coming home today I watched fuel trims. Trims were maxed out but I was able to accelerate. When trims dropped to 6 - 8 % I lost all power. Thanks for the help, I will let you know what happens.
Was this
answer
helpful?
Yes
No
Monday, March 15th, 2021 AT 4:50 PM
Tiny
ASEMASTER6371
  • MECHANIC
  • 52,797 POSTS
You are welcome.

Always glad to help.

Roy
Was this
answer
helpful?
Yes
No
Monday, March 15th, 2021 AT 5:23 PM
Tiny
RALPH850
  • MEMBER
  • 7 POSTS
I think we can put a fork in this one.
Key on Engine off 13 PSI.
Key on Engine at Idle 17 Lbs.
Only good thing is the P was stable.

Guess I am replacing fuel pump.
Thanks for the help.
Was this
answer
helpful?
Yes
No
Tuesday, March 16th, 2021 AT 4:02 PM
Tiny
ASEMASTER6371
  • MECHANIC
  • 52,797 POSTS
Yes, that is correct.

You are welcome.

Always glad to help.

Roy
Was this
answer
helpful?
Yes
No
Tuesday, March 16th, 2021 AT 4:05 PM
Tiny
RALPH850
  • MEMBER
  • 7 POSTS
Would you recommend replacing the entire Sending unit/fuel pump assy? Or just the pump? No issues with fuel gauge. Is it difficult to replace just the pump?
Was this
answer
helpful?
Yes
No
Wednesday, March 17th, 2021 AT 5:40 AM
Tiny
ASEMASTER6371
  • MECHANIC
  • 52,797 POSTS
I would replace the fuel pump alone. I do not see the entire units available.

I attached my choice from rock auto below.

Roy
Was this
answer
helpful?
Yes
No
Wednesday, March 17th, 2021 AT 5:46 AM
Tiny
RALPH850
  • MEMBER
  • 7 POSTS
Thanks.
Was this
answer
helpful?
Yes
No
Wednesday, March 17th, 2021 AT 5:56 AM
Tiny
ASEMASTER6371
  • MECHANIC
  • 52,797 POSTS
You are welcome.

Always glad to help.

Roy
Was this
answer
helpful?
Yes
No
Wednesday, March 17th, 2021 AT 5:58 AM
Tiny
RALPH850
  • MEMBER
  • 7 POSTS
Sorry to keep bothering ya, I have a question.
Why when I put my ignition in on position, my fuel pump comes on for a few seconds then shuts off? It has only reached 13 PSI. I would expect the pump to come on until it reaches a desired pressure. In my case somewhere above 40 PSI. So in my case, believing the pump is bad, it should keep running trying to get to 40 PSI. Isn't there a pressure sensor telling the pump when to shut off/turn on? Also if that sensor does not see the desired pressure, shouldn't it trigger a message? A PID? Thanks
Was this
answer
helpful?
Yes
No
Wednesday, March 17th, 2021 AT 9:29 AM
Tiny
ASEMASTER6371
  • MECHANIC
  • 52,797 POSTS
The pump will only run for 2 seconds. That is controlled by the engine ECM. It does that to prime the system. When you have a good fuel pump, the pressure will rise to spec when you turn on the key.

Roy
Was this
answer
helpful?
Yes
No
+1
Wednesday, March 17th, 2021 AT 12:22 PM
Tiny
RALPH850
  • MEMBER
  • 7 POSTS
Replaced the fuel pump this past weekend. Truck runs like new. Only problem was I discovered anti siphon contraptions prevented me from siphoning gas from tank. I ended up pumping the gas out of the Schrader valve on the fuel rail. Hot wired the pump relay to keep it on.
Thanks for your help, I learned a lot.
Was this
answer
helpful?
Yes
No
Monday, March 22nd, 2021 AT 8:50 AM

Please login or register to post a reply.

Sponsored links