No start/spark condition

Tiny
30YR_MCPO
  • MEMBER
  • 1978 JEEP CJ5
  • 5.0L
  • V8
  • 4WD
  • MANUAL
  • 200 MILES
Have a the vehicle listed above with a 304, 3 Speed-T-150, Dana 20 transfer case. Engine, transmission, transfer case professionally rebuilt. Electrical replaced with kit from Centech. This has been a labor of love project since 2009. First symptom was while driving in the open at highway speeds (forty five to fifty mph), everything was operating as normal. Come to a light or stop sign the motor would spit/sputter or shut off. Would start right up, but had to ride the clutch to get out of traffic as there was just zero power under load. This has happened several times now. I have it in the garage and hen peck at trouble shooting but have just run out motivation at this point.
I know I am getting air and gas, I can see the gas going in the carburetor, and smell it as well. I have followed the power from firewall to ignition module to distributor and to coil (input and outputs) and ballast resistor.
I have replaced the cap and rotor (with the Team Rush upgrade using the F-350 cap and rotor) replaced ignition module, coil, spark plugs and wires. Only thing left in the life cycle is the ignition switch and ballast resistor.
The engine is a standard 304, Holley 650CFM 4 barrel carburetor, headman headers.
Sunday, July 22nd, 2018 AT 5:36 AM

24 Replies

Tiny
CJ MEDEVAC
  • MECHANIC
  • 11,004 POSTS
I have a couple of questions.

Does this have Prestolite Ignition or Motorcraft?

Can you remove the breather and send some good full screen pics from the sides and above?

Since this has been a project, how many hours/minutes/miles has it been driven with no issues?

Any other modifications that may have been made?

Why did you modify your distributor cap?

Do you have a timing light and portable dwell tach meter?

The Medic
Was this
answer
helpful?
Yes
No
Sunday, July 22nd, 2018 AT 3:43 PM
Tiny
30YR_MCPO
  • MEMBER
  • 14 POSTS
Has a Motorcraft ignition. I have driven this vehicle very little, the odometer says 200 miles. So I would say about 180 miles of trouble free driving. A dice roll!
I have recently installed a new cap and rotor, new plug wires, new ignition module, new coil, ignition switch. I am reaching for bad equipment as all this same parts where installed when the engine was rebuilt.
Do not know why my pictures are posting upside down. Kind of sums up my day.
Was this
answer
helpful?
Yes
No
Sunday, July 22nd, 2018 AT 4:18 PM
Tiny
30YR_MCPO
  • MEMBER
  • 14 POSTS
No timing light, long story. And no portable tachometer.
Was this
answer
helpful?
Yes
No
Sunday, July 22nd, 2018 AT 4:19 PM
Tiny
CJ MEDEVAC
  • MECHANIC
  • 11,004 POSTS
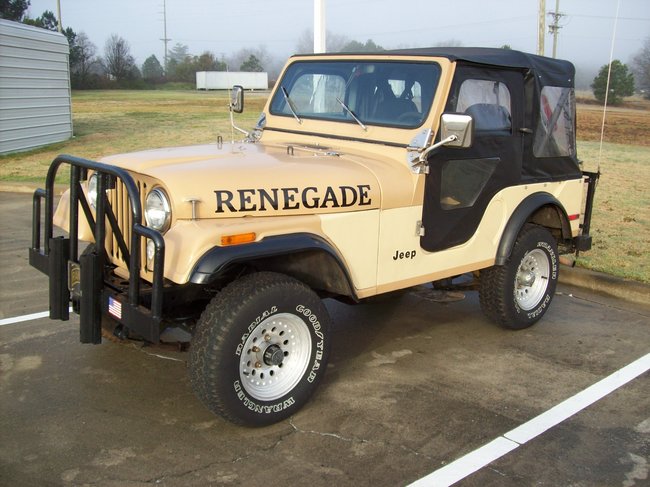
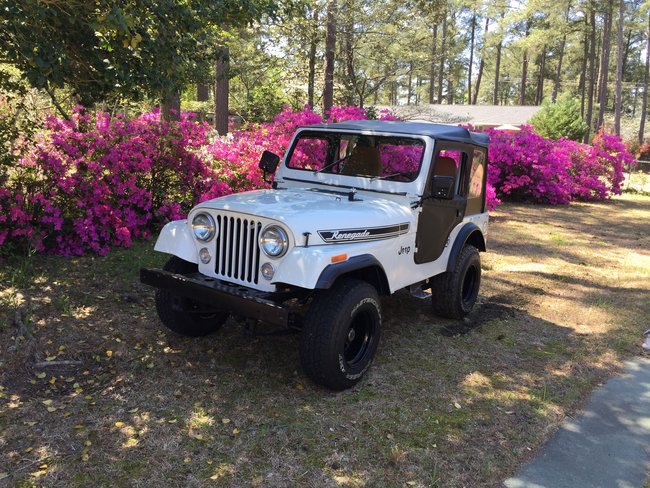
Really nice Jeep! I really like it!

No worry with the pictures, I have got a lot of time looking at CJ stuff on my sides/back/ belly, I can process the images.

We need to get it on the road minus those embarrassing moments.

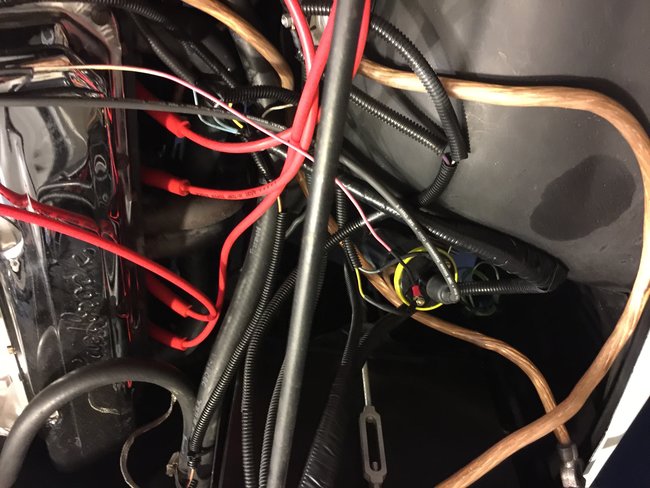
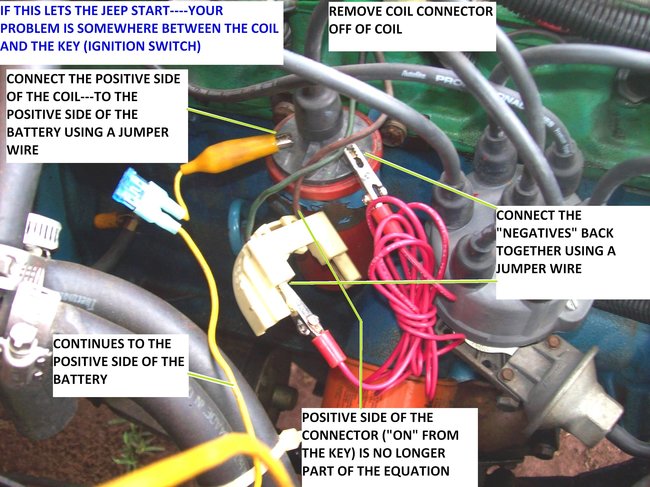
Do you know the make and part number for the coil?

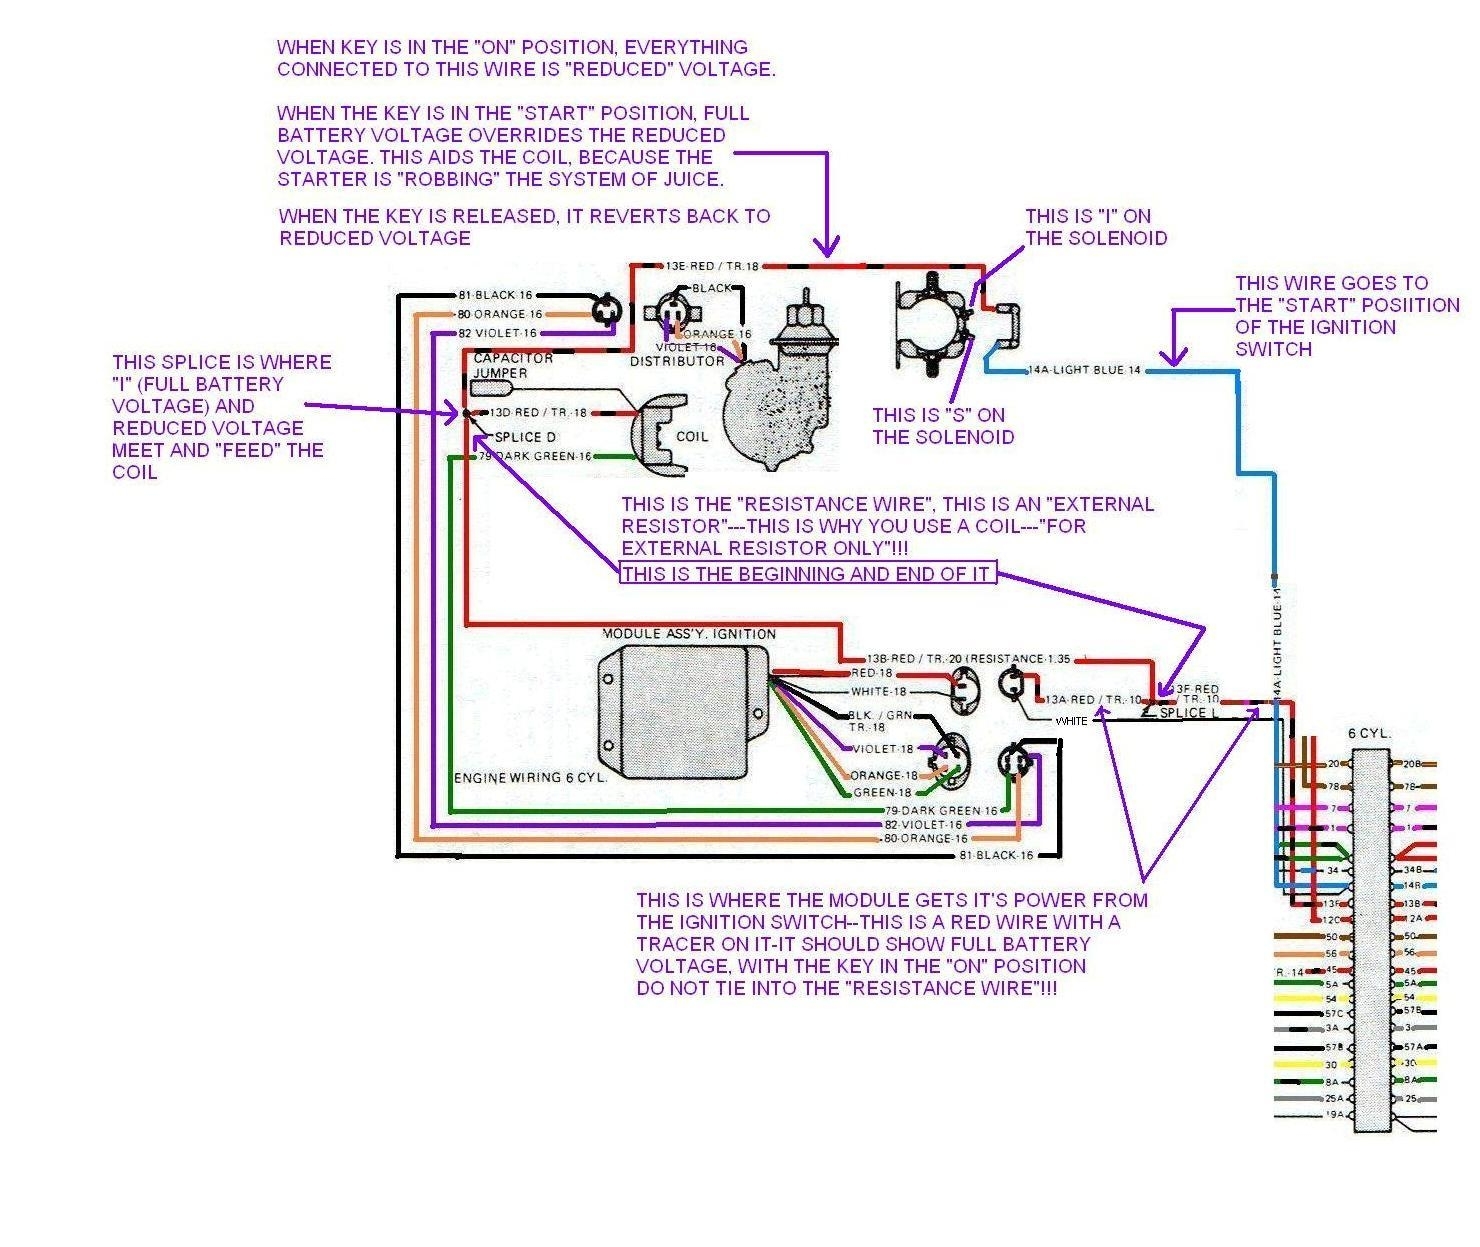
Is there or is there not a resistance wire leading to the coil?

I try to keep things simple as I can!

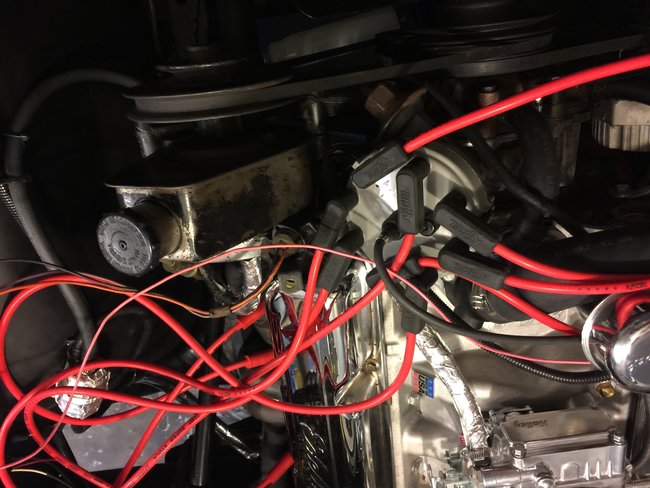
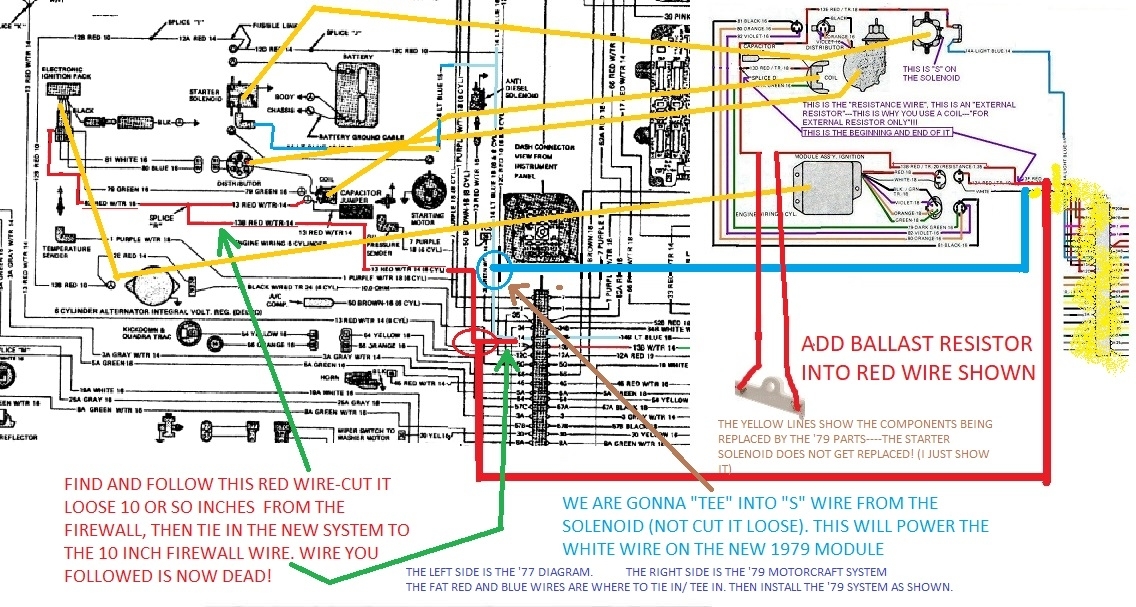
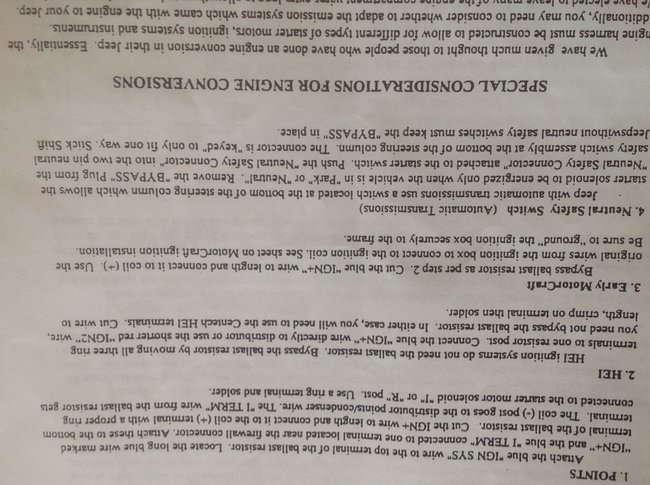
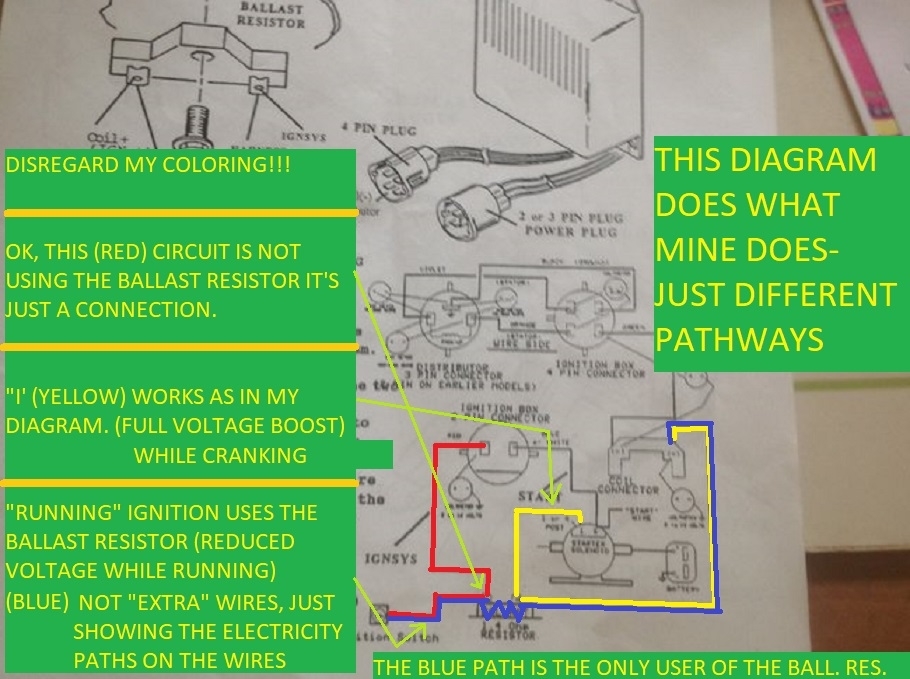
Basically, My upgrade is all (spark plugs/ distributor/ distributor cap/ coil/ plug wires/ rotor button/ ignition module/ wiring) that a 1979 is OEM.

My only exception to the above is: there was not a resistance wire on a 1977, I use a ballast resistor to make up for it.

When getting ignition parts in an auto parts store I simply tell them it is for a 1979, this makes things so simple.

Is your carburetor "out of the box" or has it been monkeyed with since it was installed?

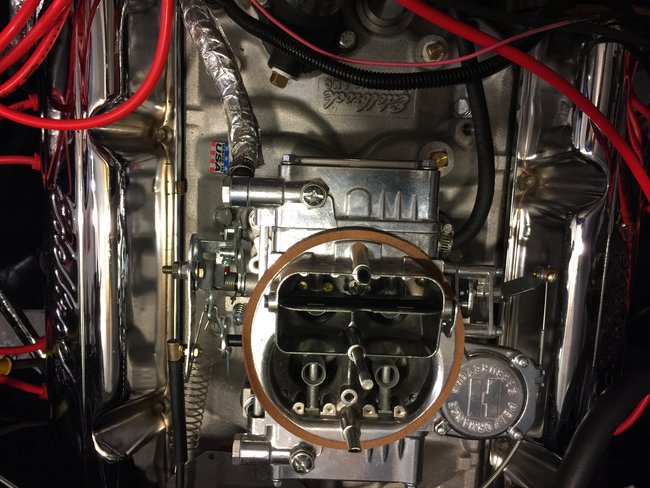
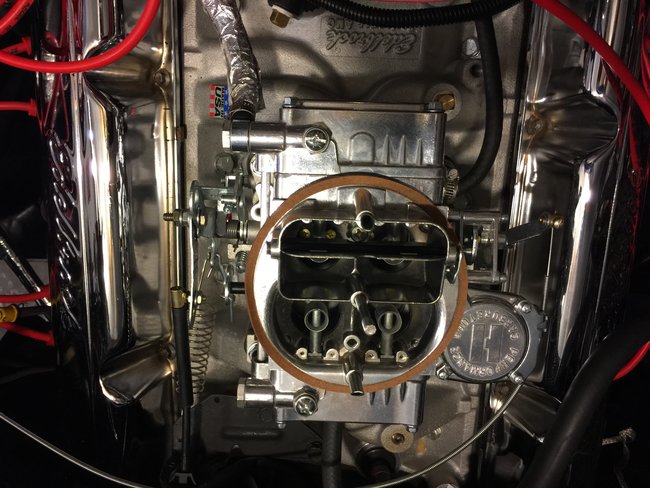
I have an Offenhauser intake and a Holley 390 4 barrel on my 258 six cylinder. Using a few tricks that I picked up, I was able to select my jets without it being a big headache like in the past.

I am into MPG's not speed and racket. My jets are just one size larger than what came in the carburetor. Finally, after peaking at 15-16 MPGs in my previous CJ-5's, I now get 18 MPG's pretty consistently!

I vowed that no matter what the cost might be (I have tried all of the "promise inventions" with no improvements) I would get past the 16 MPG mark. I am satisfied now.

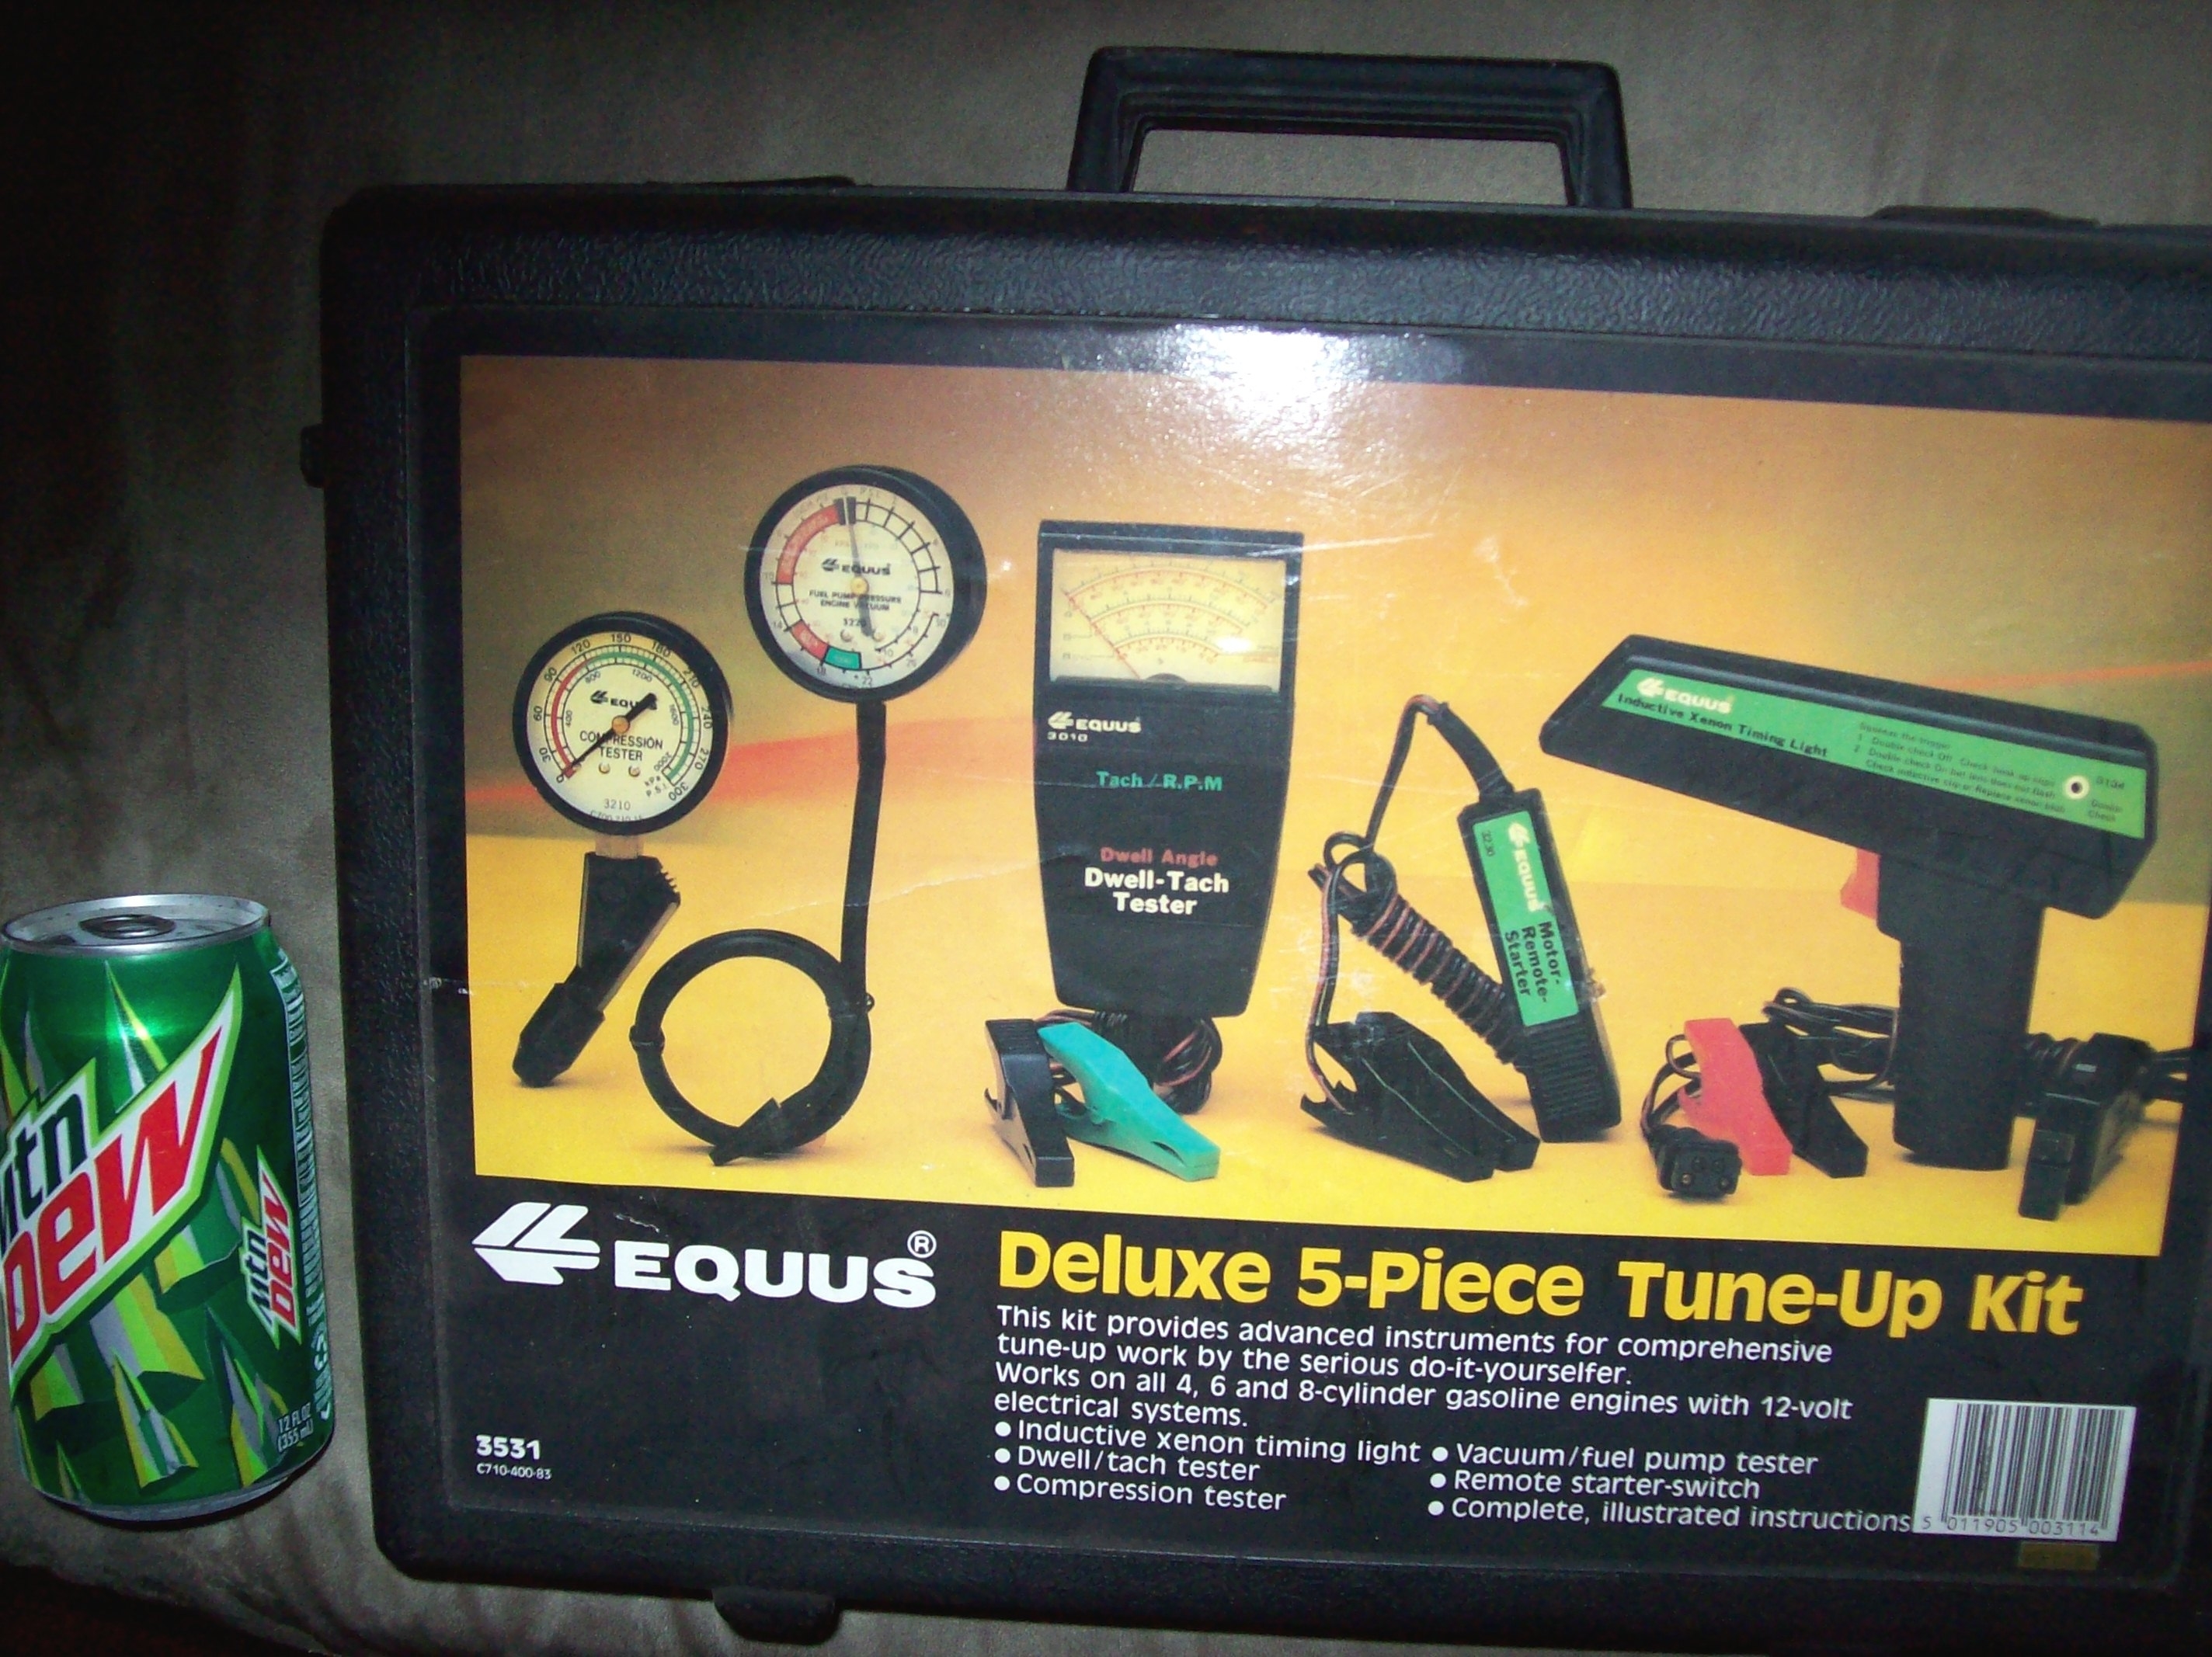
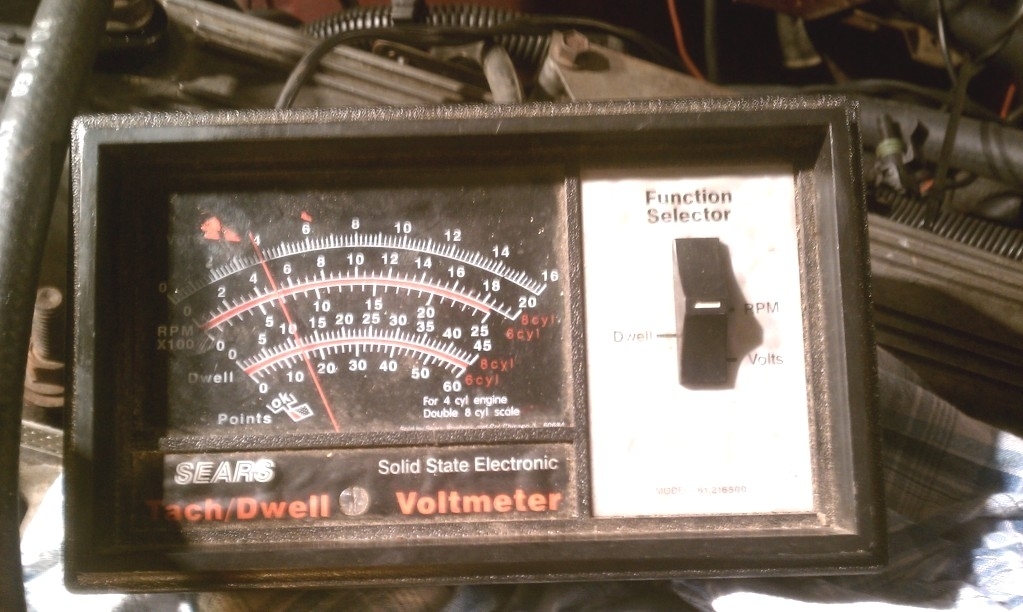
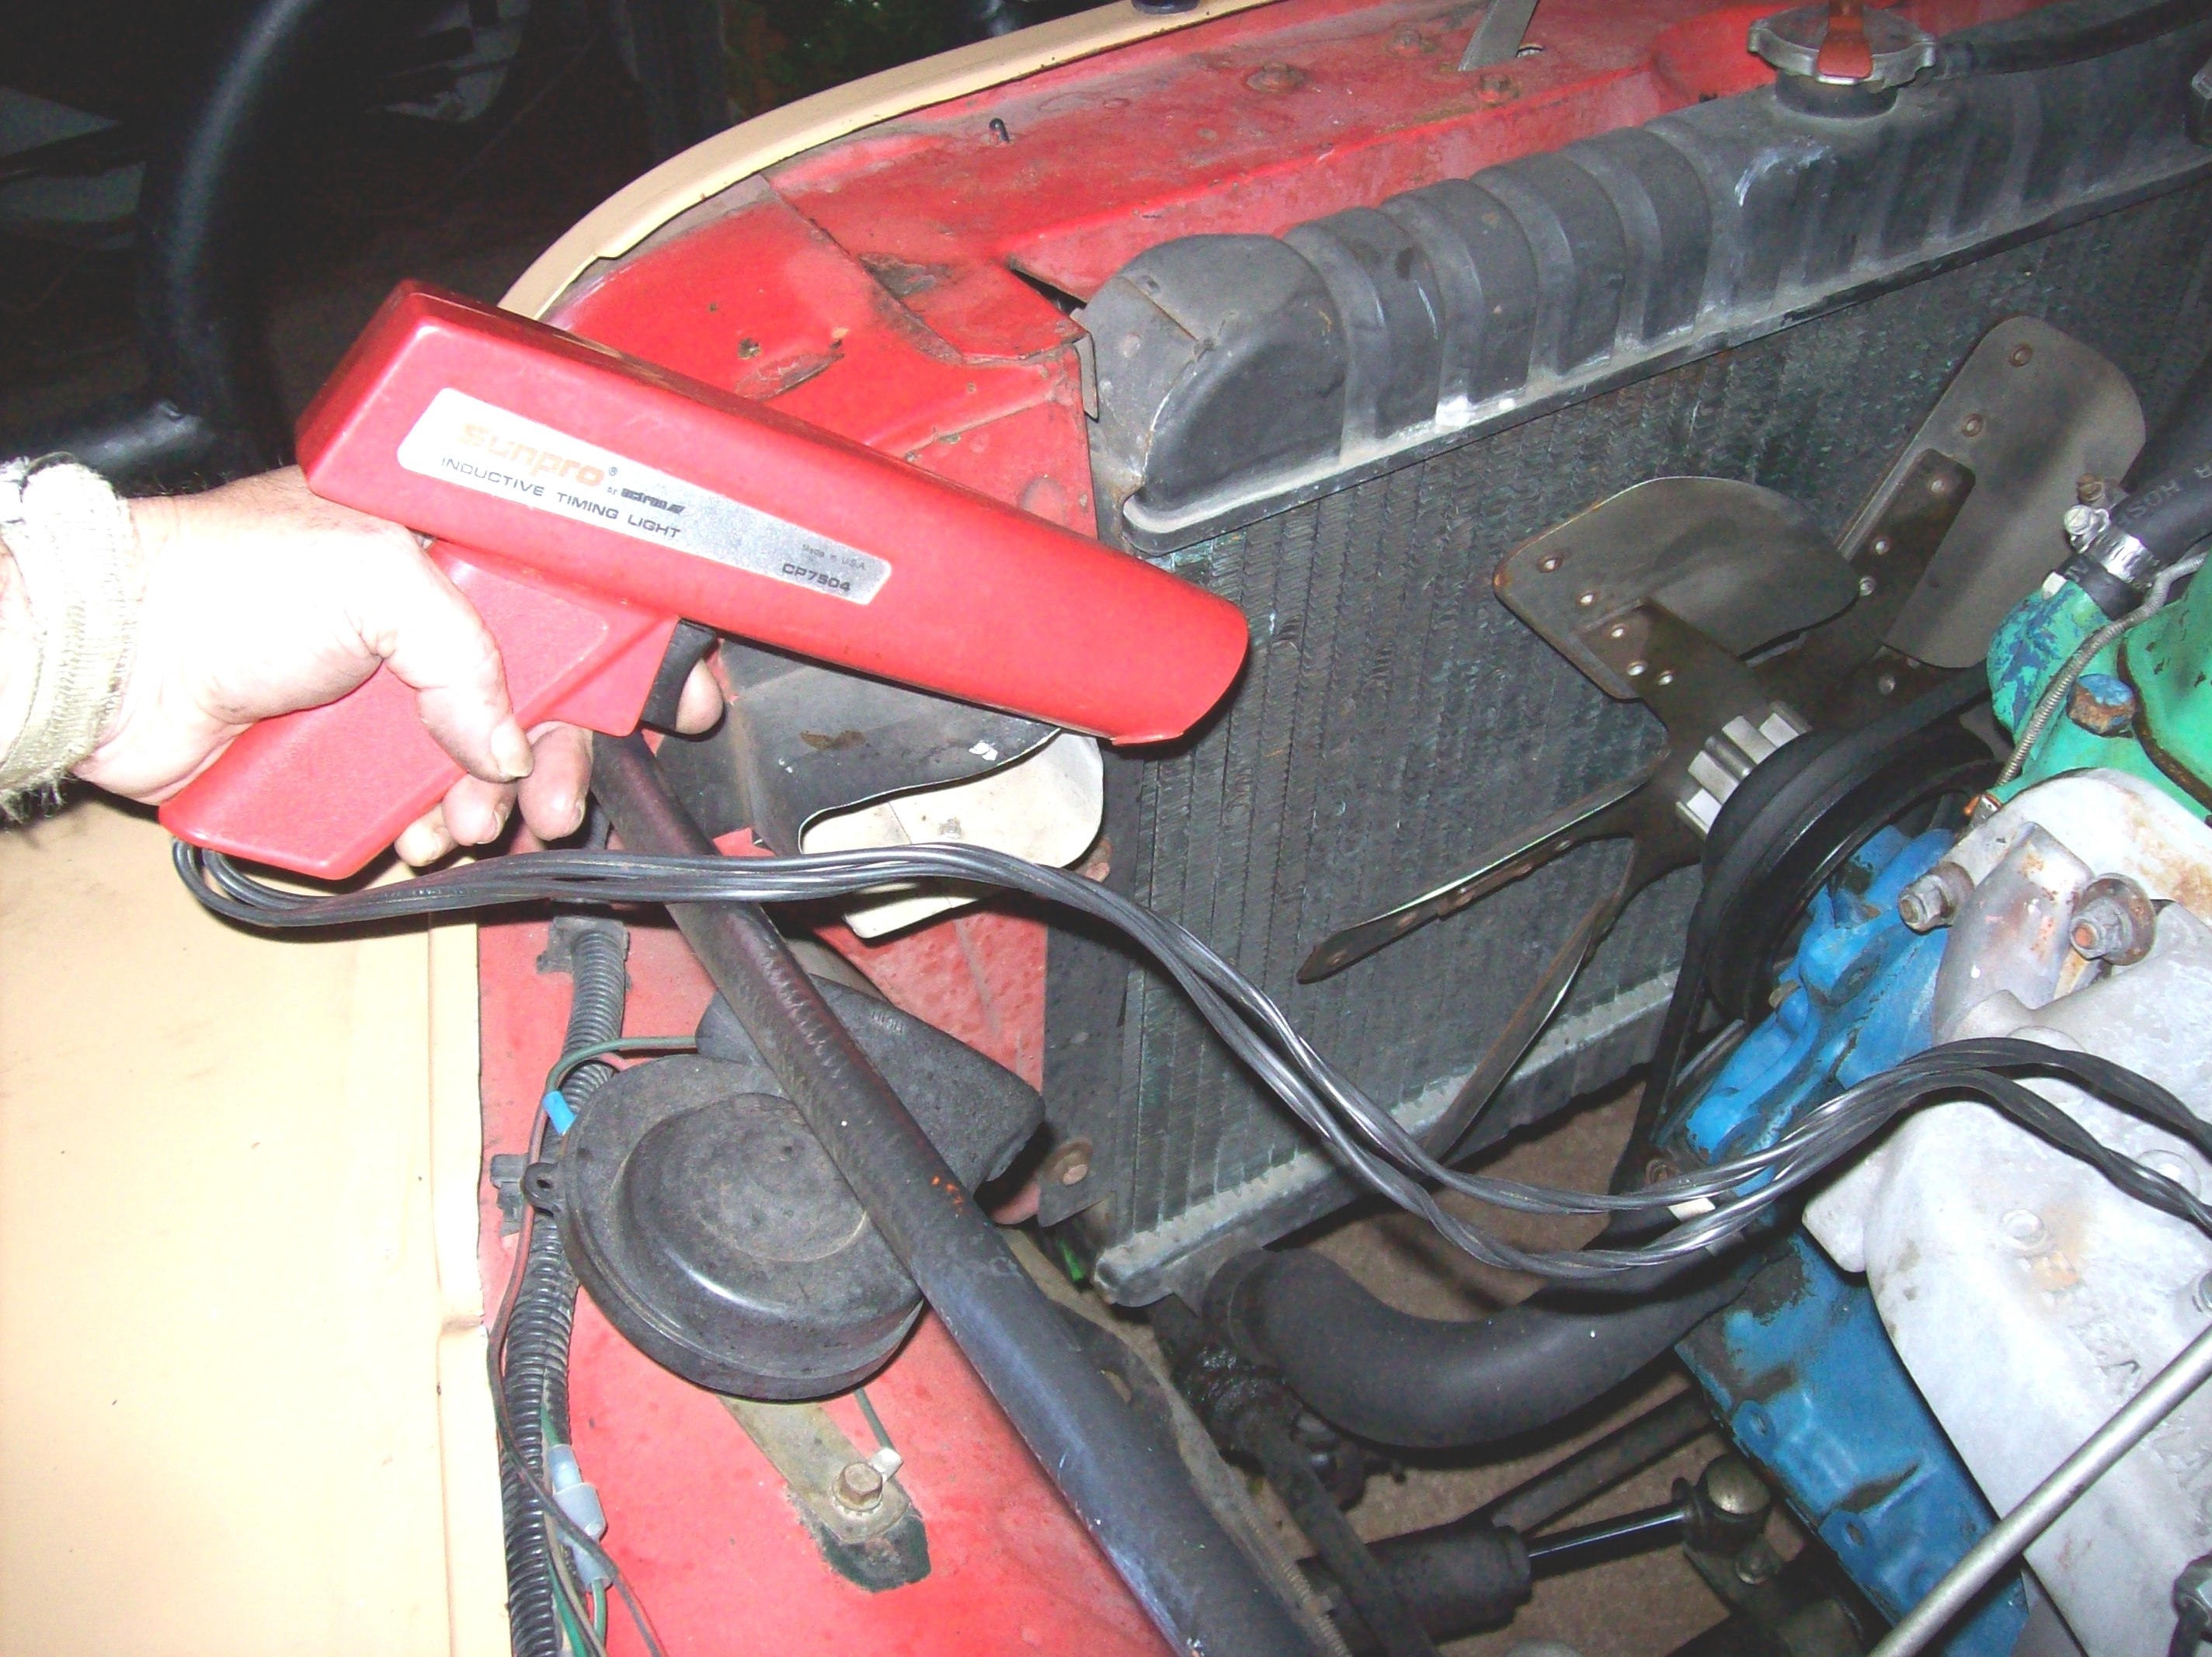
You know, you can sometimes get a timing light (plain Jane is fine!) And a dwell tach meter from pawn shops (yard sales too) really cheap. They are so crucial to getting your Jeep running right. Not only for the timing but to tune your carburetor too.

It might be that a good real tuning is what you might need. Playing it by ear just does not cut it.

I can guide you though that too.

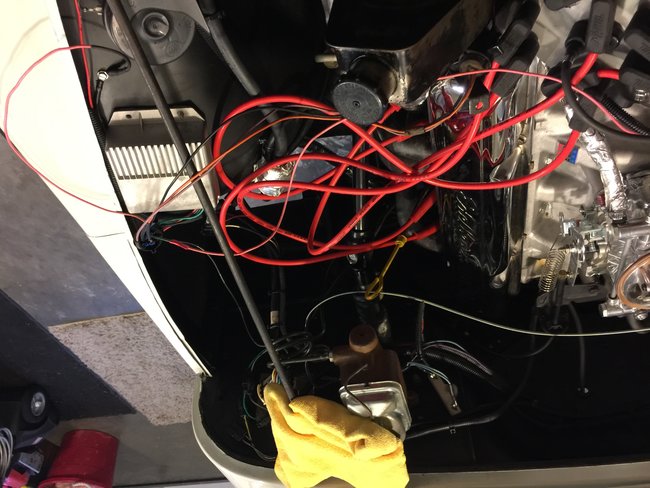
We have other possible things that could affect engine performance, we are going to have to go through things in an order as not to miss something. Forty years of "monkeying" might do something stupid like plugging off the fuel tank vent, that could ruin your day (leaving the gas cap off would make it all better until you get it corrected). Lots of previous improvements could have been done by incompetent people, now you have to undo them!

Right now-absolutely no spark?

Your turn!

The Medic

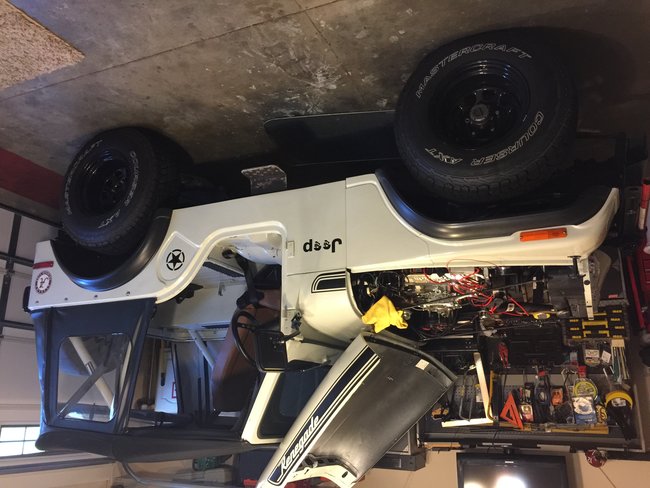
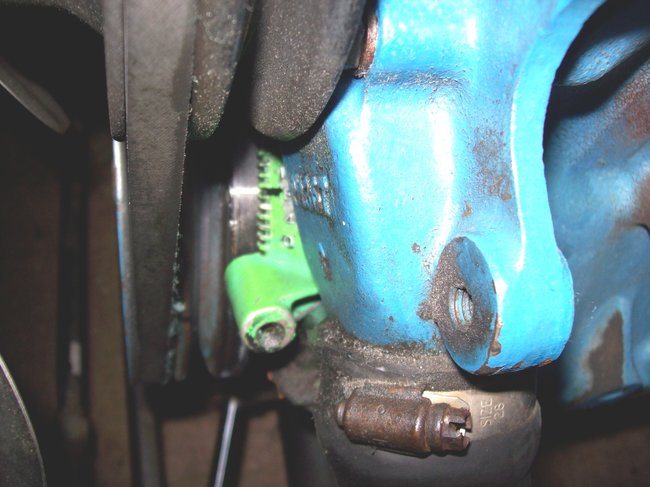
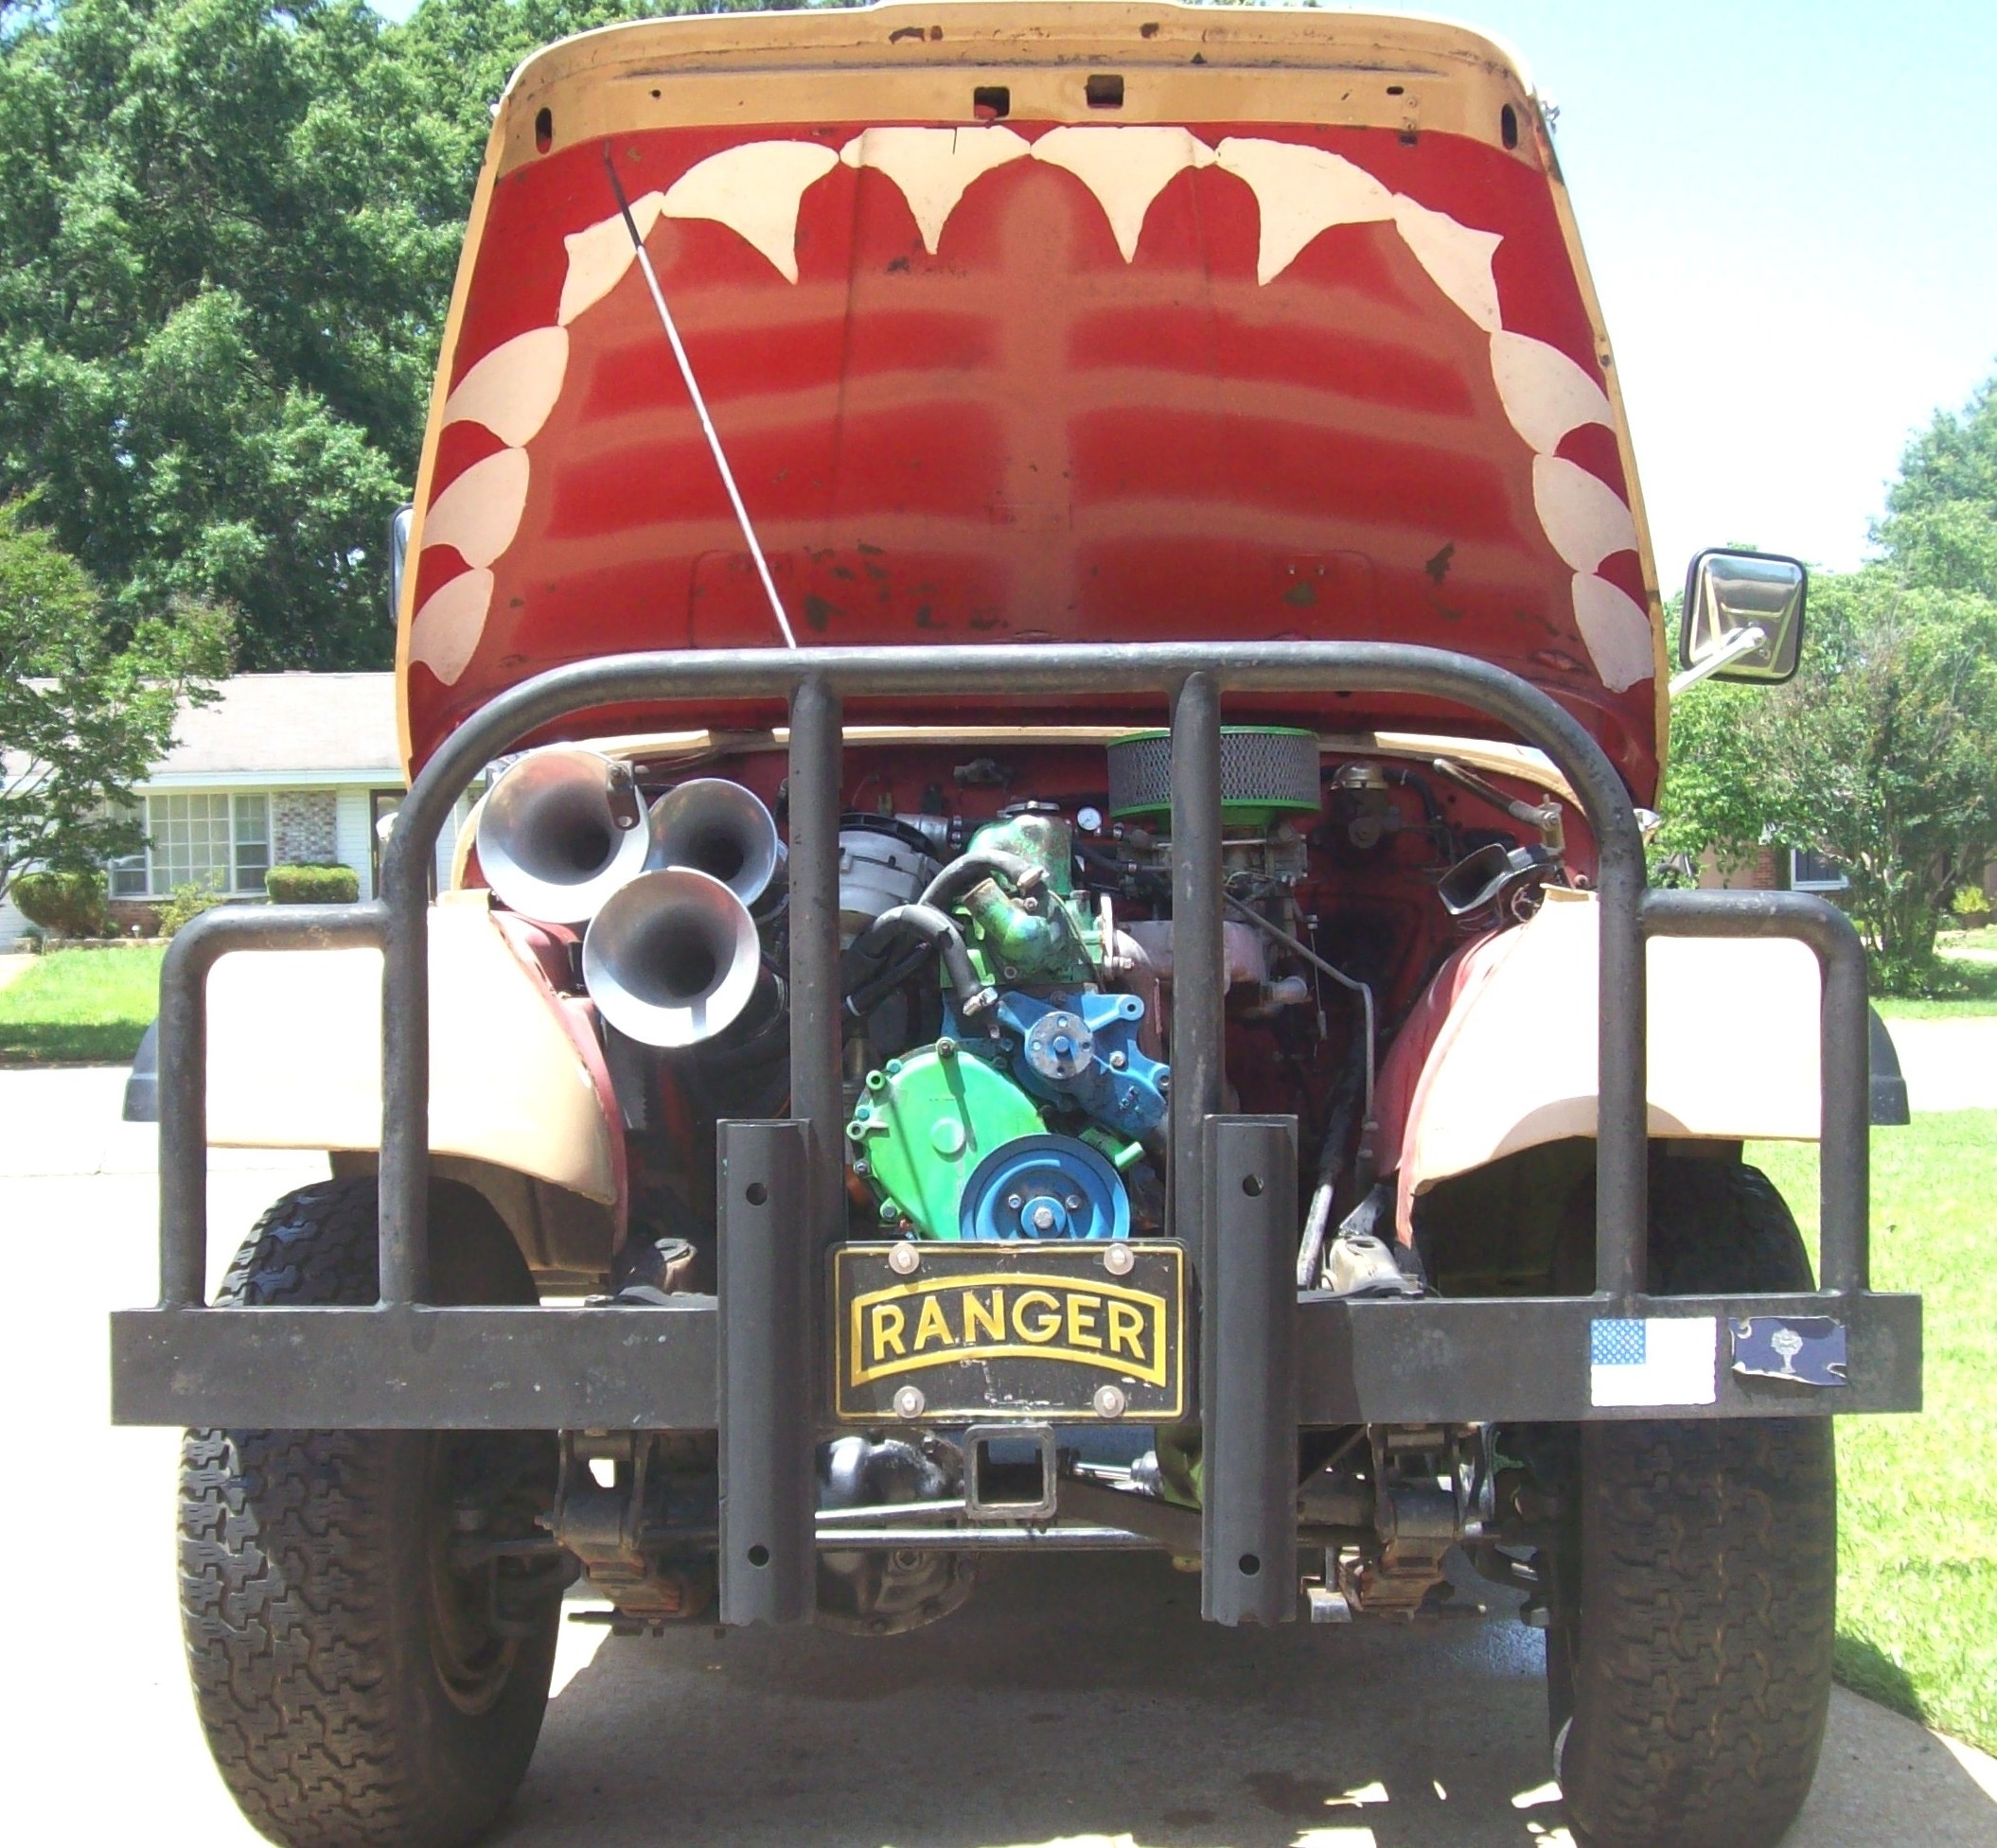
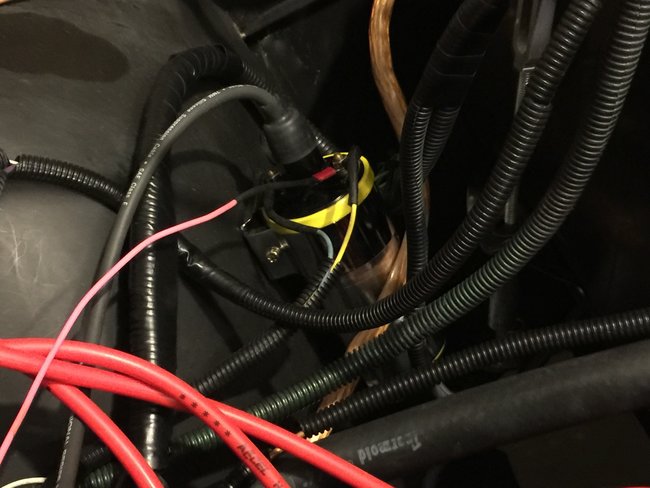
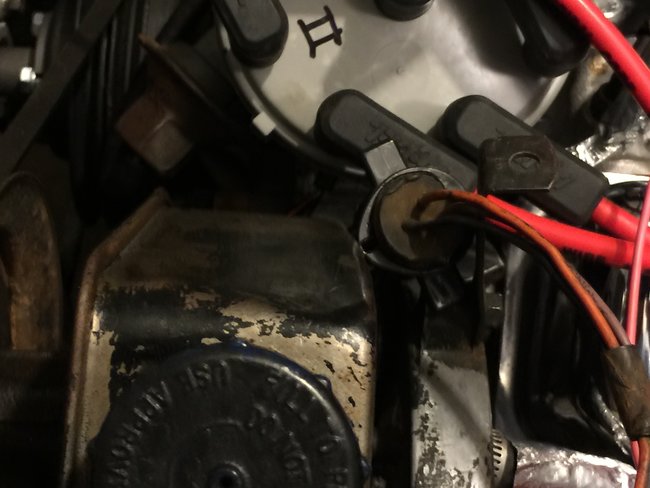
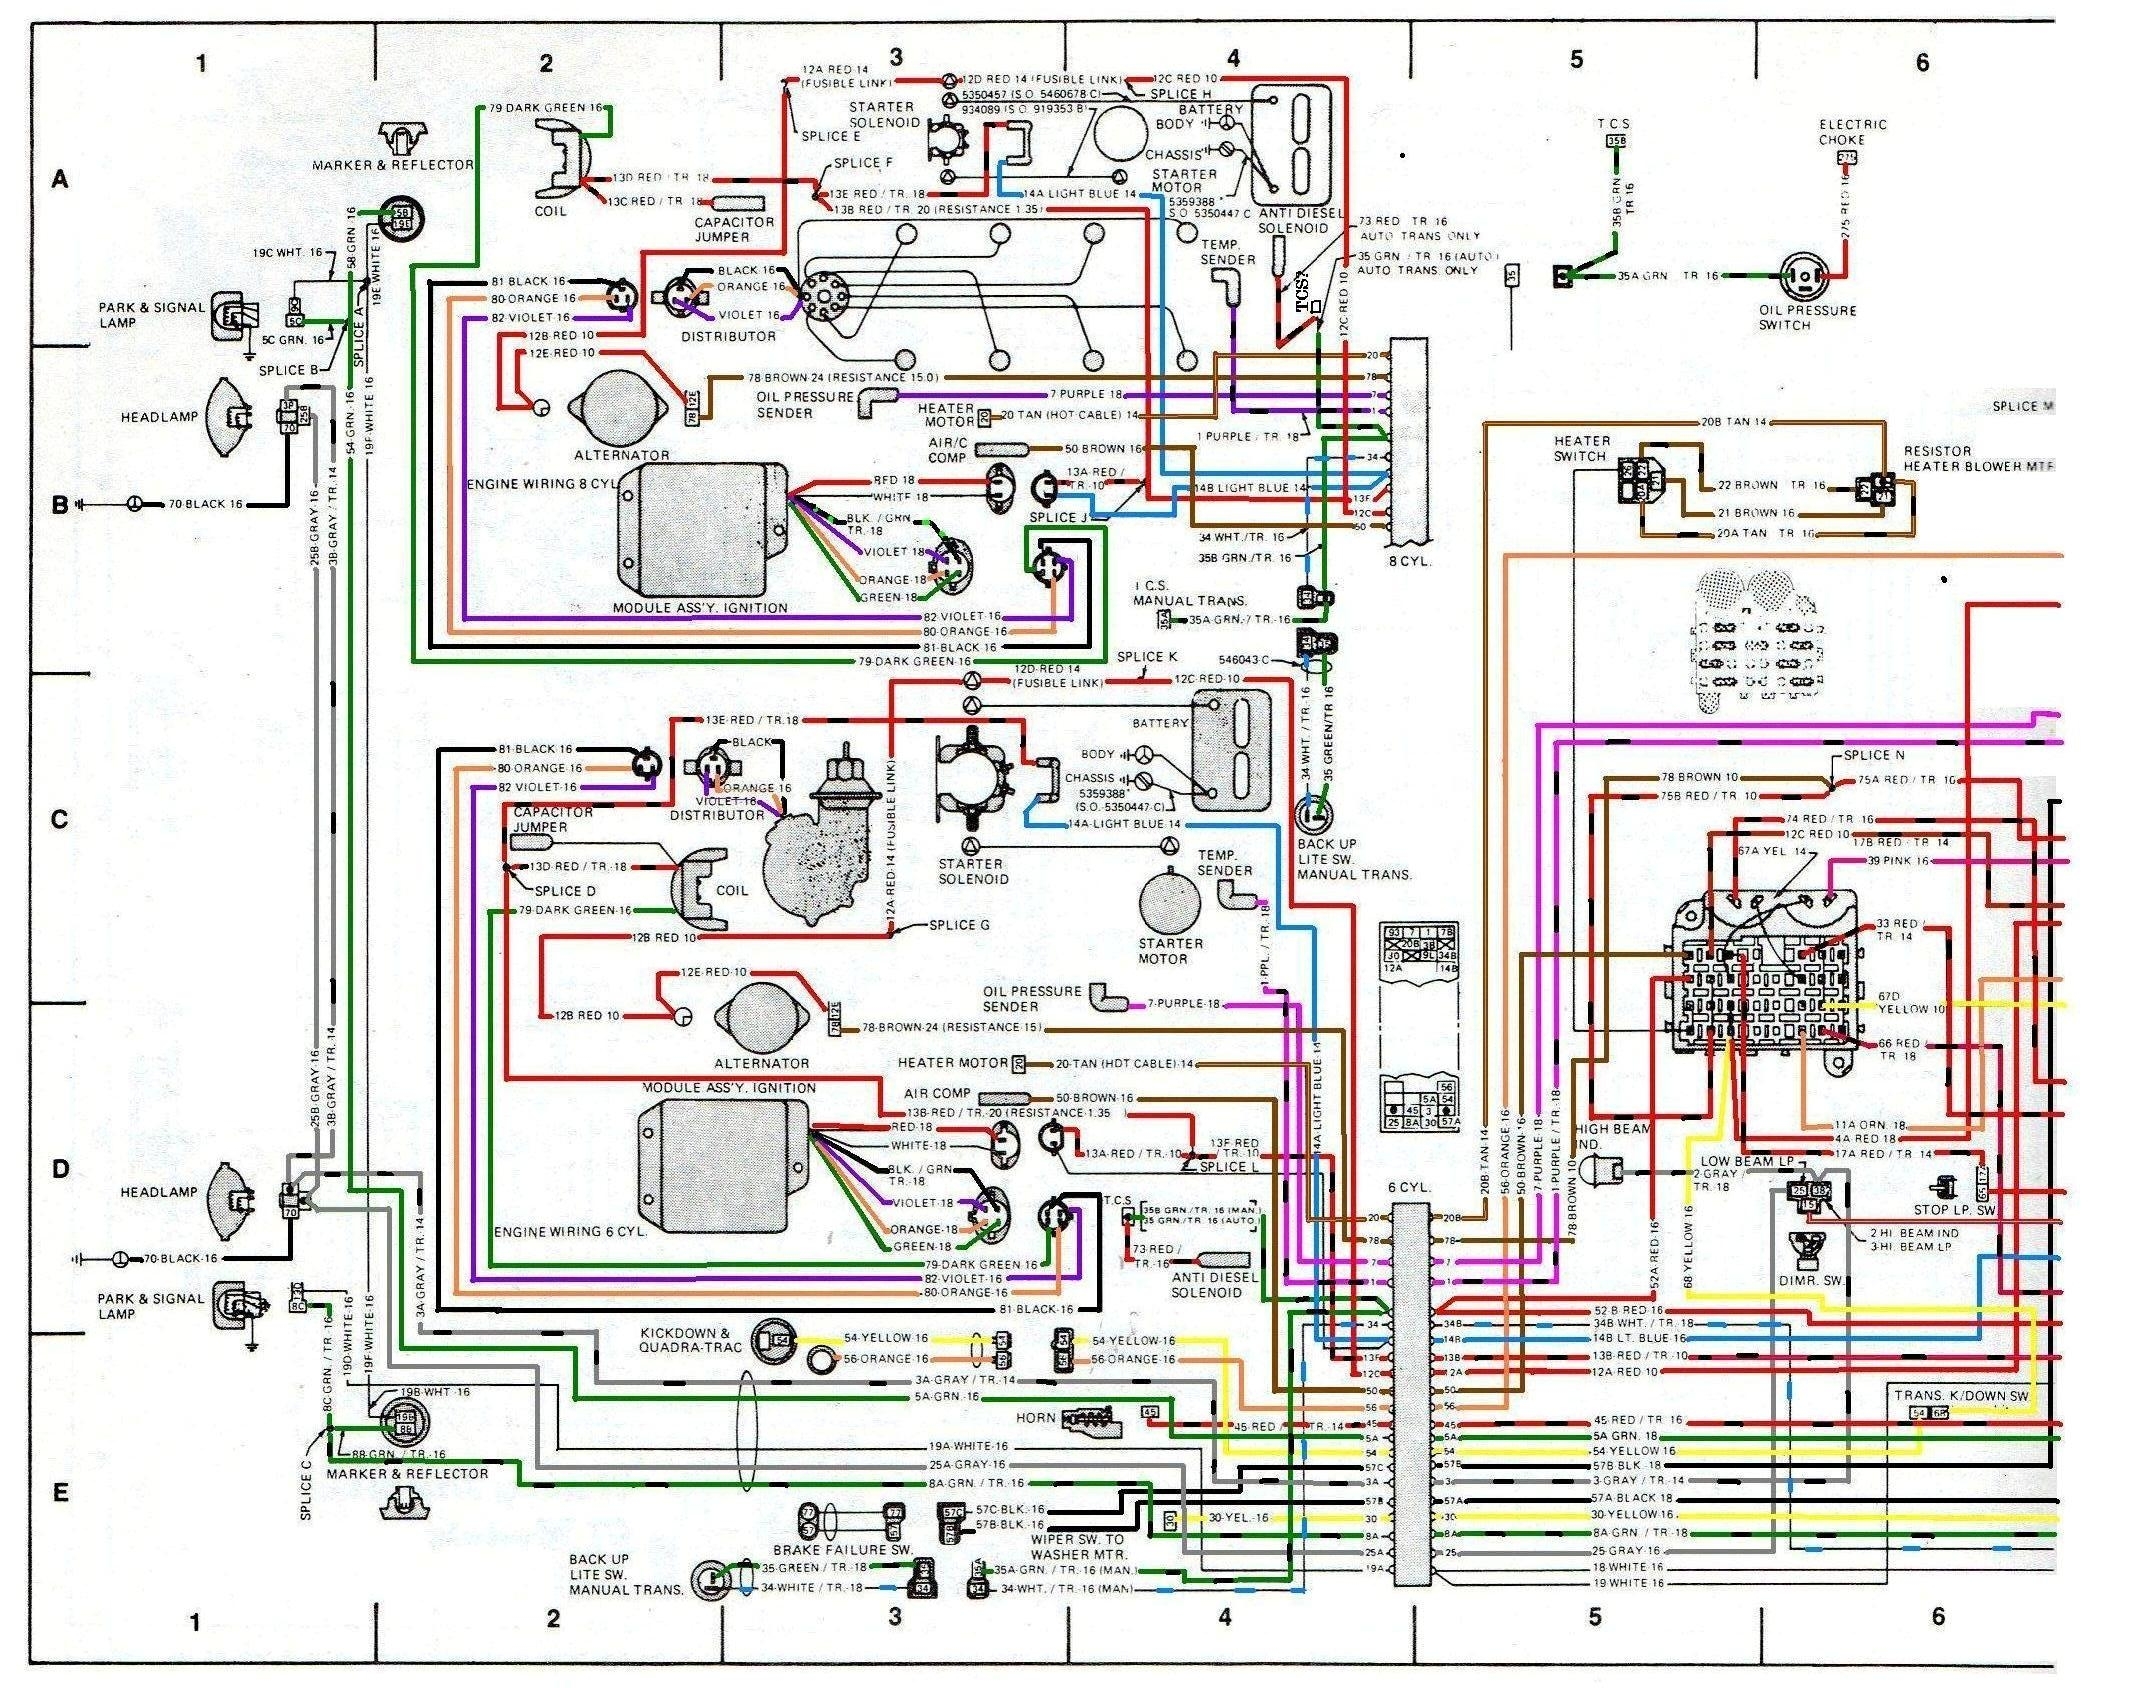
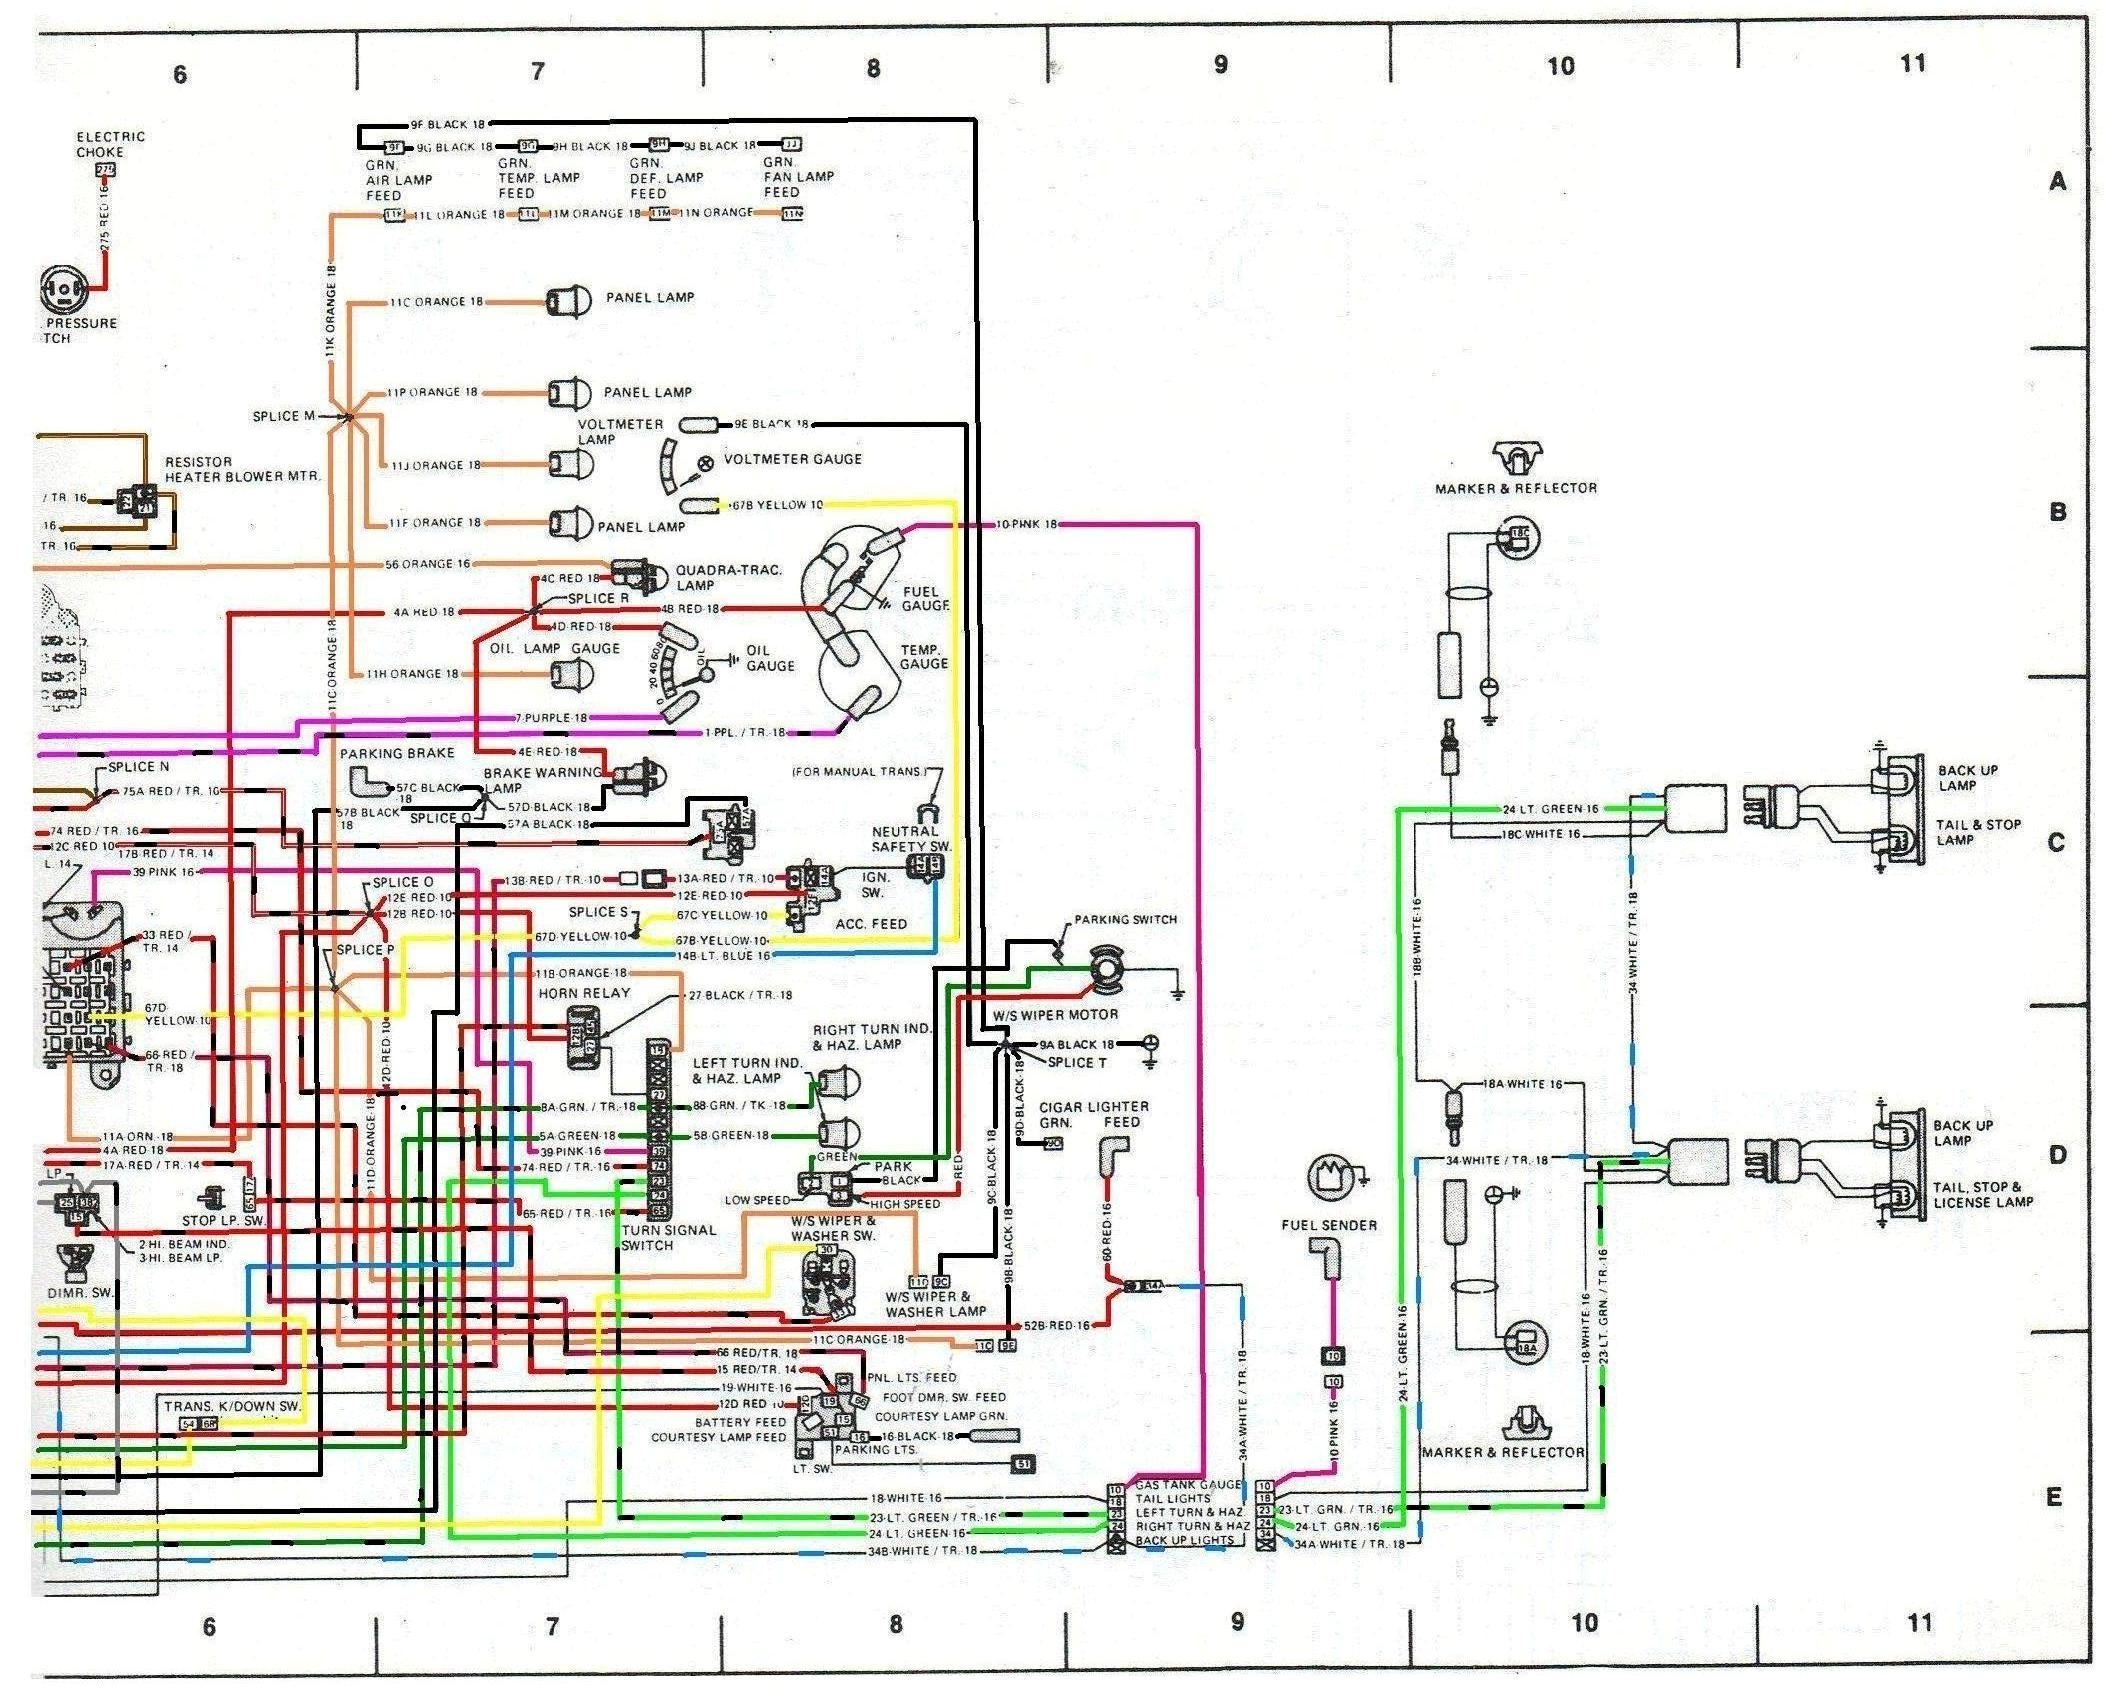
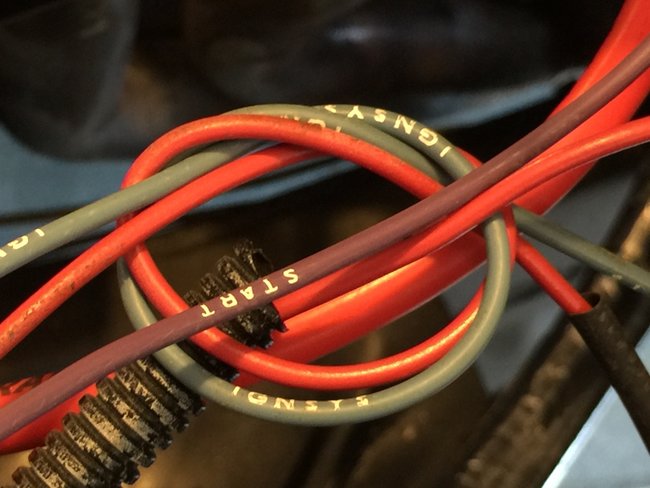
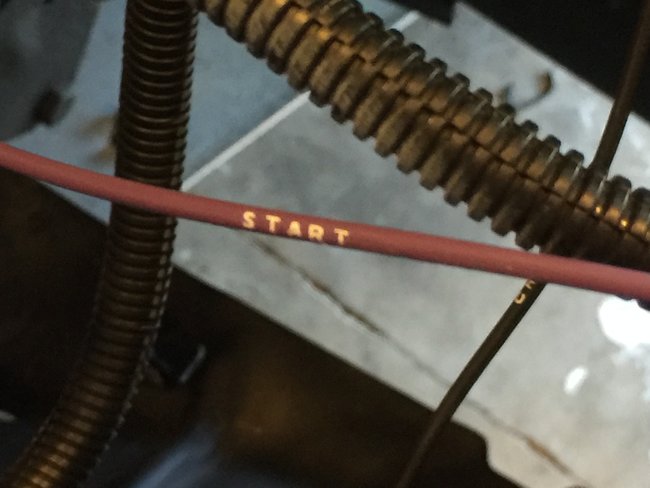
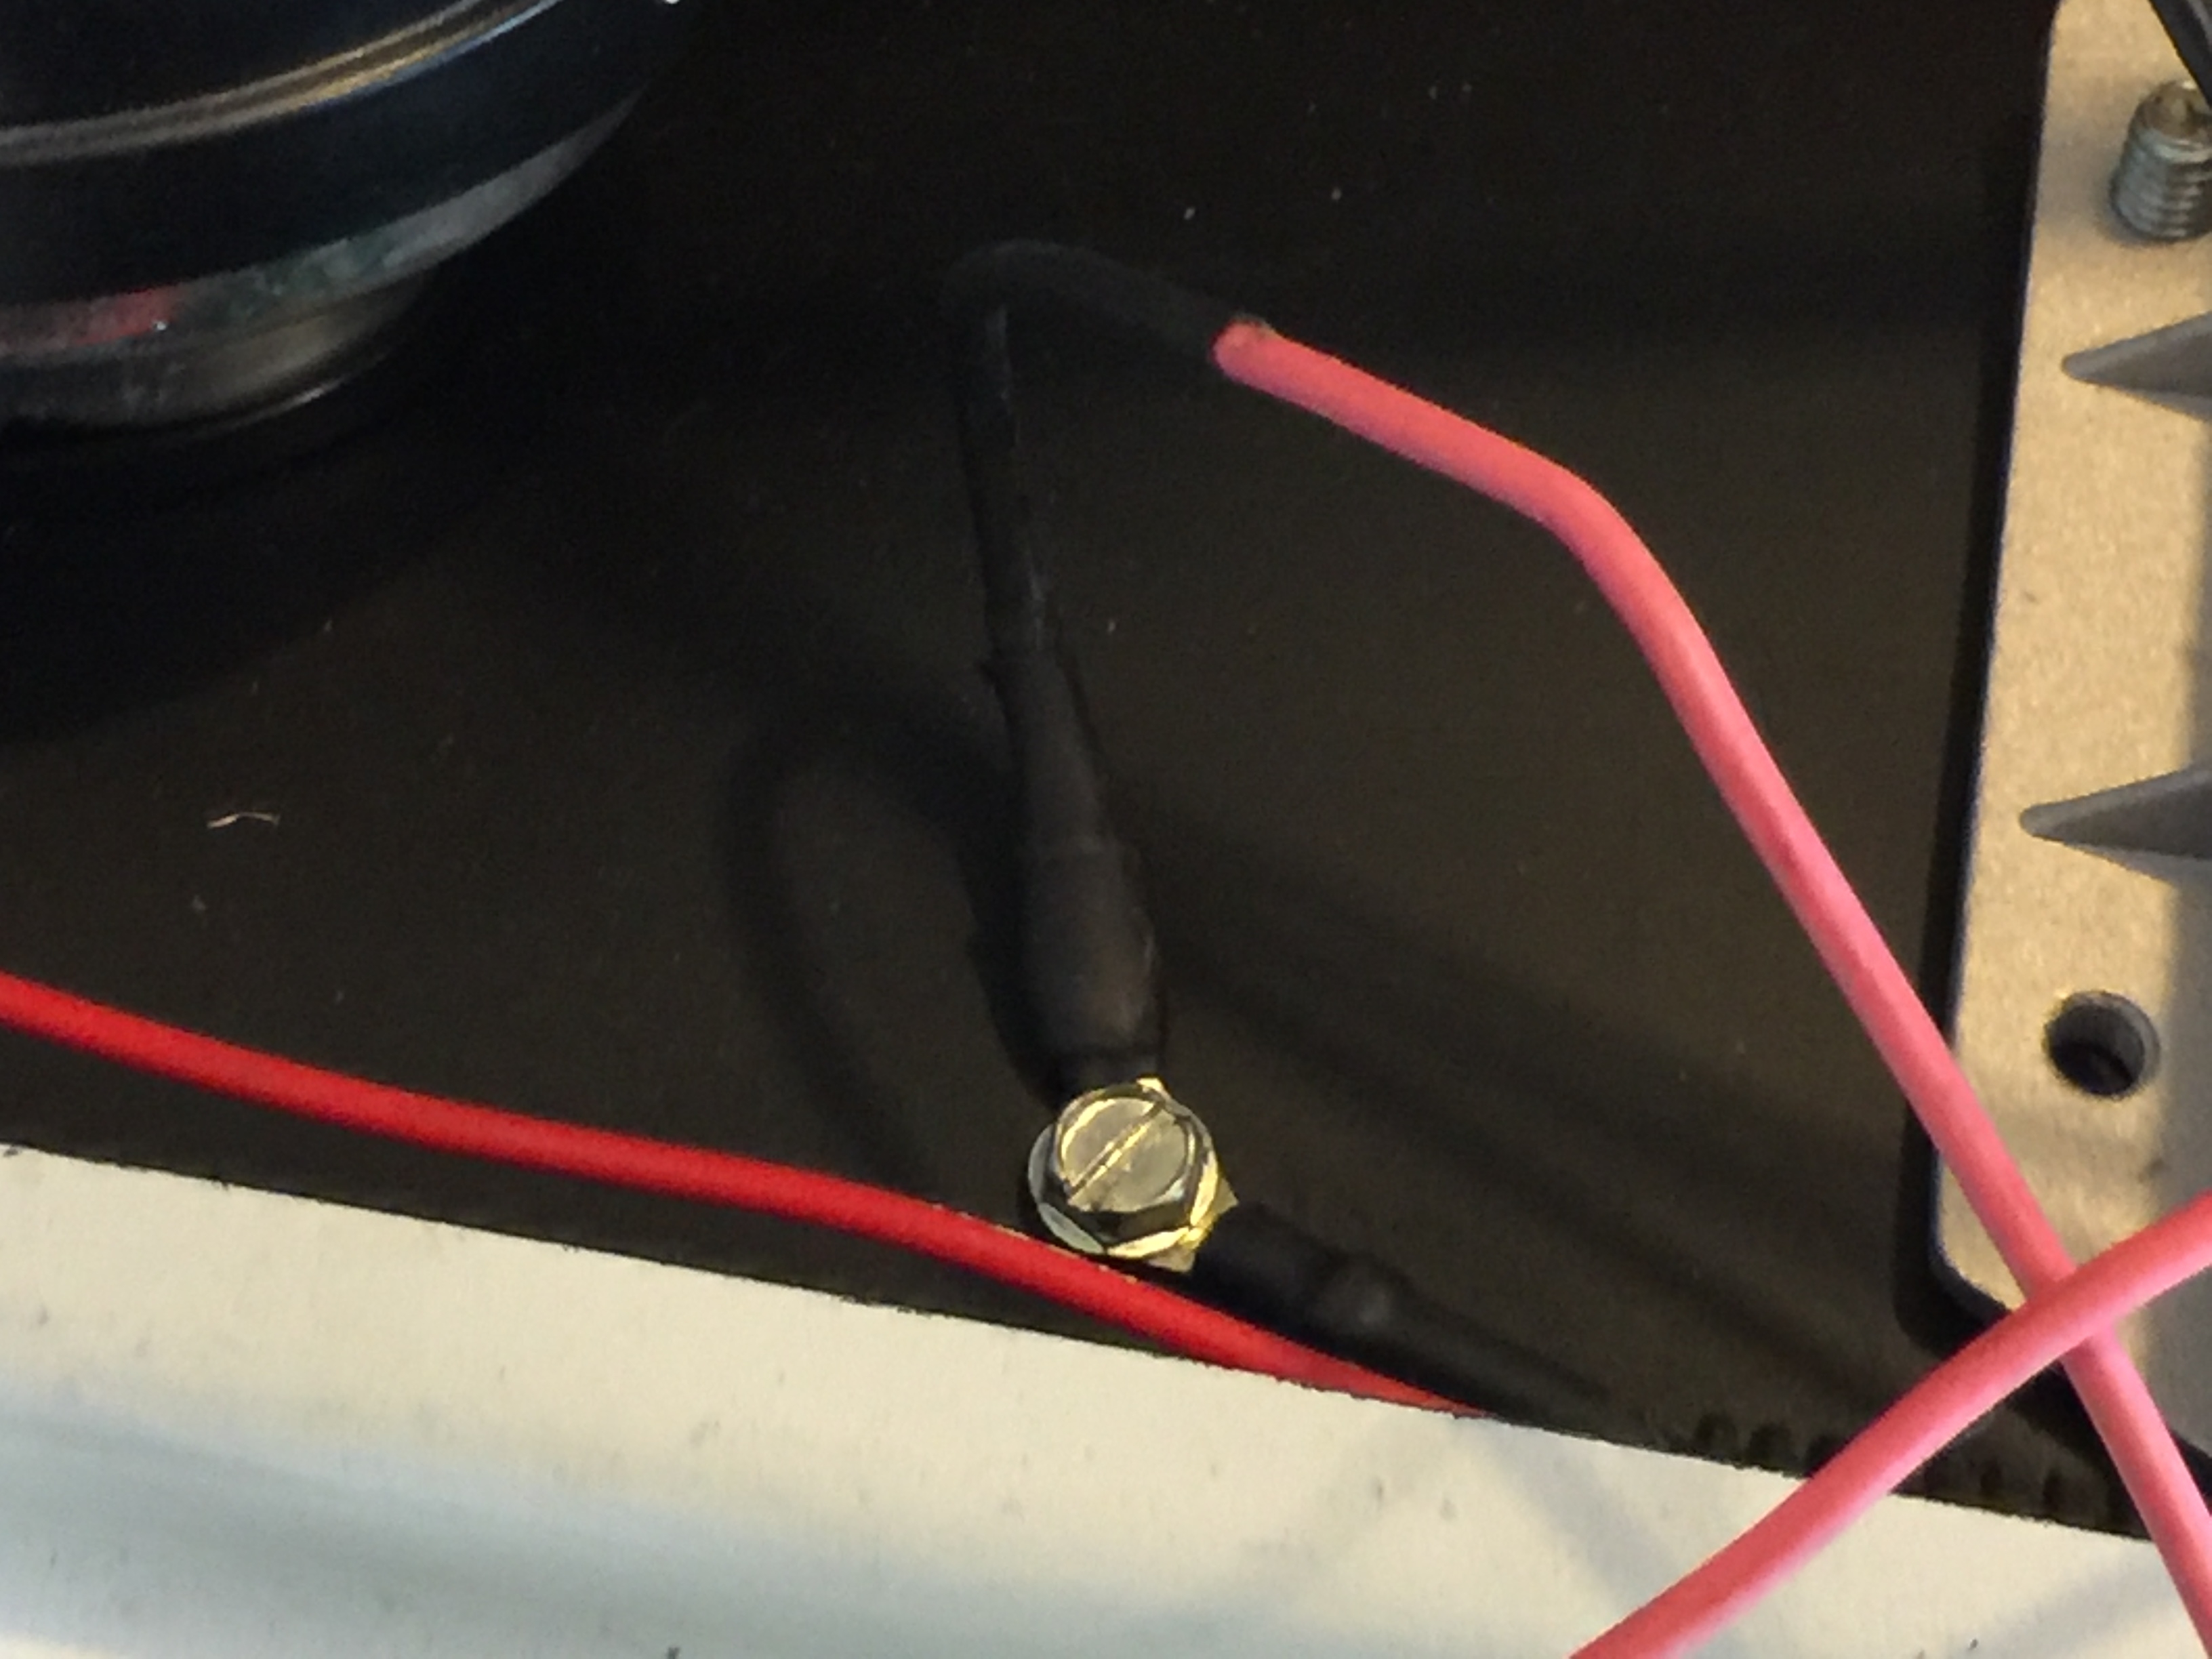
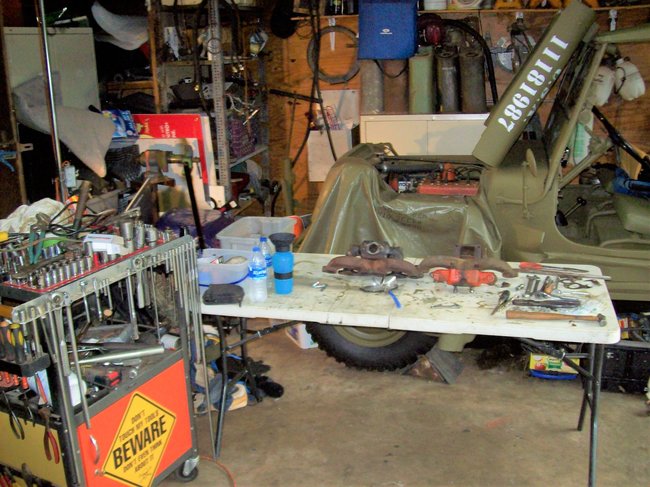
(Pictures of my 258)
Was this
answer
helpful?
Yes
No
Sunday, July 22nd, 2018 AT 5:29 PM
Tiny
30YR_MCPO
  • MEMBER
  • 14 POSTS
The part number/make for the coil is:
Accel 8140 super stack can type coil.
Yes, I have a resistance wire going to the coil.
Carburetor is plug and play out of the box, only idle - fuel and air adjustments - manual choke - no jets etc monkeyed with.
I have moved a ton of times over the years lost more tools than ill ever own again, LOL.
I will get a timing light this week.
Here are some more pictures.
I have taken the wires out of their protective sleeves and using jumper wires as I originally had the ignition module hard wired to the distributor plug wires for ease of trouble shooting, so my under hood is messy, which is not my norm SOP. I am an old salt, so I like my stuff squared away.

Correct no spark, I am on my iPhone, iPad not working. So I am having to type along like a praying mantis.
Let’s keep the dialogue moving. I will check for further homework tomorrow.
Thanks for serving and your help is much appreciated.
Was this
answer
helpful?
Yes
No
Sunday, July 22nd, 2018 AT 6:25 PM
Tiny
CJ MEDEVAC
  • MECHANIC
  • 11,004 POSTS
I am seeing the ballast resistor.

Is this your coil's resistor or do you have a resistance wire too?

I am not understanding the multiple wires going into and out of the ballast resistor?

Just for giggles, alligator clip a jumper wire across the ballast resistor terminals (basically, bypassing the resistor) then crank it, do you have spark?

I am going to send you a few diagrams.

1) My set up, 1977 with no resistance wire (OEM Prestolite had an internal coil resistor just a plain wire) I added the ballast resistor to make up for the R-wire and to install the upgraded 1979 coil, to keep it all 1979ish.

This is a cropped portion of the second diagram.

Even though I show the resistance wire in this diagram (snagged from a 1979 diagram), it is really a plain wire in my 1977.

2) Showing another 2CarPros member how to tie his "new system" into a 1976 or 1978 wire harness (I have "some timers").

3) 1979 ignition diagram that I cropped out and cleaned up. I also colored every wire (in the entire diagram). There were a few obstacles in that wires with tracer stripes were not labeled with the color of the stripe, I winged it with "dashed" or "dotted" black lines to denote those wires.

4 and 5 the 1979 diagram I colored.

The Medic
Was this
answer
helpful?
Yes
No
Sunday, July 22nd, 2018 AT 7:17 PM
Tiny
30YR_MCPO
  • MEMBER
  • 14 POSTS
Yes, you are correct, my resistance comes from the ballast. As for the wiring at the input/output of the ballast, I have no idea. I would have to go back and pull the install instructions. The CJ was rewired with Centech kit. I will get on with the rest of the homework assignment this afternoon.
Was this
answer
helpful?
Yes
No
Monday, July 23rd, 2018 AT 1:13 AM
Tiny
CJ MEDEVAC
  • MECHANIC
  • 11,004 POSTS
I saw that some of your ignition module/ etc, were female spade connectors shoved onto the pins of the connector half.

It might be better if you obtained the other half and make it as it was meant to be. Should your set up now get jerked apart you might spend some headache time trying to figure out what is what and where it goes.

Ask around/call around, you are wanting a "older" auto salvage yard (maybe even better, a smaller yard) that has late 1970's and early 1980's Fords, Lincolns, and Mercury's.

All we are wanting is some specific wires and their connectors. Many times the establishment will give you little "baloney ideas" like this: You can clean them up with Purple Power or brake cleaner in a spray can.

You may have to shorten and butt splice "donor" wiring to meet your needs.

These can also be purchased on the net too, I like the cheap way out!

If I have not told you already, to take those "walnut-like" connectors apart (as the book says), Grasp the wires on either side of the connector and pull! Digging them apart with a screwdriver results in the locking tabs being broke off.

I would really like to know what else is going through the ballast resistor.

The Medic
Was this
answer
helpful?
Yes
No
Monday, July 23rd, 2018 AT 3:49 PM
Tiny
30YR_MCPO
  • MEMBER
  • 14 POSTS
Okay, I have opened a can of worms and starting to question myself. I went back to look at your question about my ballast wiring. There were four ways to wire/use wire the ballast in the ignition flow. I am pretty sure after looking again at the instructions and looking at your schematics I wired this incorrect and what has got me scratching my head is I did this like two to three years ago.
I will attach a picture of the written instruction and up front I used (1) points and should of (3) used early Motorcraft.
Are we agreeing here? Should be wired using rule 3?
Also, I only changed the distributor for an upgrade (team rush).
I have been chasing wires and pulling by cable runs etc, tracing things. So, I have not done the jump test as I think we are now on the right path.
Found a dwell/tachometer on eBay for $20.00, barter more on that tonight, still need another timing gun. Wally World $35.00.
This is about as far as I am going to get tonight, spousal unit needs attention. Just let me know if you agree on my assumption on rule wiring 1 or 3.
Was this
answer
helpful?
Yes
No
Monday, July 23rd, 2018 AT 4:02 PM
Tiny
30YR_MCPO
  • MEMBER
  • 14 POSTS
To answer your question about that ignition module jerry rig (lol). No man that is all temporary brother, I had the module hard wired in (no plugs) and at it was easier for me to just put some temporary spades on for testing. Thanks for busting on me, but trust me, no way would I leave that as a permanent fix.
Was this
answer
helpful?
Yes
No
Monday, July 23rd, 2018 AT 4:09 PM
Tiny
CJ MEDEVAC
  • MECHANIC
  • 11,004 POSTS
Your diagram looks to do the same as the 1979 AMC Jeep diagram I posted earlier. Just different routing.

See my "hopefully" explanation of your diagram.

Are you on board or overboard?

Diagram below- pictures from the net too.

The Medic
Was this
answer
helpful?
Yes
No
Monday, July 23rd, 2018 AT 5:09 PM
Tiny
30YR_MCPO
  • MEMBER
  • 14 POSTS
I am just really trying to get pumped up to get this wiring correct. I will be going to hit it hard tomorrow. I am done today.
Was this
answer
helpful?
Yes
No
Monday, July 23rd, 2018 AT 5:22 PM
Tiny
30YR_MCPO
  • MEMBER
  • 14 POSTS
Just an update still plugging along couple sixteen hour days in the cube limit my trouble shooting.
First picture I am to splice this blue ignition system wire with the red wire that is two wire plug into the ignition module
Second picture purple start wire to splice Into the white wire that is two wire plug into the ignition module
Now/at the point nothing is connected to the ballast resister, so do I?
Picture 3 the top double wires lead to the i-side terminal of the solenoid and to the coil. Right now there is nothing on the ballast to send power to those places. So I am thinking I slice the red wire going into the ignition module as stated above in picture one and also run through the ballast?
Pic 4 - sliced extra ground into black wire at module.
Pic 5 happier days
Just whenever you get s chance. I am probably not going to get under the hood until Friday. Thanks, bro btw I am in Evans.
Was this
answer
helpful?
Yes
No
Wednesday, July 25th, 2018 AT 4:52 PM
Tiny
CJ MEDEVAC
  • MECHANIC
  • 11,004 POSTS
In my diagram above (as I hope you understood). The color of the wires I drew in was merely to show the pathways that the electricity takes through and around the ballast resistor. I could have picked any color to put on the wires (I chose those because you could see them better)!

After I colored the (your) diagram I was able to compare it to the AMC diagrams I posted earlier. I found that both diagrams do the same functions, the only difference was the way the wires are routed to perform the same tasks. (See third diagram on SUNDAY, JULY 22ND, 2018 AT 7:17 PM)

So here is the deal:

Continue to wire it by your diagram, maybe go back and re-check your previous work from long ago.

Or

Wire it by the AMC diagram.

But!

Do not mix the diagrams together as it will become confusing and wires will not conflict with one another!

This is so hard to put "wiring" in writing/in person you would understand the deal in a few minutes.

We will get there, I may have to revamp my approach. If you did the wiring you pictured, it looks to be a neat job.

Okay, Evans, GA? Right down there at Augusta?

The Medic
Was this
answer
helpful?
Yes
No
Friday, July 27th, 2018 AT 10:28 PM
Tiny
30YR_MCPO
  • MEMBER
  • 14 POSTS
Hey - yes, home of the Masters - Augusta. Was basically using you as a second set of eyes and keep me from burning down the house. Going to hook everything up and see what I get. Thanks
Was this
answer
helpful?
Yes
No
Saturday, July 28th, 2018 AT 6:07 AM
Tiny
CJ MEDEVAC
  • MECHANIC
  • 11,004 POSTS
Busy all day with the wife, sorry I have not responded sooner.

I am working on "Willy" every chance she permits me to, I am about to reinstall my replacement intake (ear broke off the original) and original exhaust manifolds.

I have taken a few pictures along the way.

I am going to squeeze in at least hanging them on the studs and starting the washers and nuts, It is now 10:15 PM and I should be in sleepy land, I got to get him back on the road!

Keep me posted with your progress, we will race to see whether AMC beats WILLYS back on the road!

The Medic
Was this
answer
helpful?
Yes
No
Sunday, July 29th, 2018 AT 7:22 PM
Tiny
30YR_MCPO
  • MEMBER
  • 14 POSTS
I rewired the engine portion, found some issues non related, but nevertheless clean it up some. Put original cap, rotor back on. I am still in no sparky land. Like everybody else, work on it when I can. For now back to that place that funds my habits!
Was this
answer
helpful?
Yes
No
Monday, July 30th, 2018 AT 1:15 AM
Tiny
CJ MEDEVAC
  • MECHANIC
  • 11,004 POSTS
Lets give this a shot.

This will bypass the "on" part of the ignition and anything along that line too. Any open circuit any short that could be on that pathway will not be part of this equation.

You can still use the key to start it.

Yellow wire goes to the positive side of the battery.

This temporary, looking for some sparkage, or it firing up.

Results?

The Medic
Was this
answer
helpful?
Yes
No
Monday, July 30th, 2018 AT 3:58 PM
Tiny
30YR_MCPO
  • MEMBER
  • 14 POSTS
Okay, I am back from last vacation of the summer. Mowing grass and getting the honey do list down to under 59 pages. So I have gone back over our conversation blog - and pretty much exactly as I left off.
I did run a jumper from pos batter to positive side coil, no spark, but that jumper wire was hot to the touch.
In the mean - I’ve gained a timing light to the tool box.
Just for kicks I put on a new ballast - same result
Put in new distributor - same result - no spark - so back to square one.
Was this
answer
helpful?
Yes
No
Sunday, August 19th, 2018 AT 5:50 PM
Tiny
CJ MEDEVAC
  • MECHANIC
  • 11,004 POSTS
Let's try the jumper exactly this way in my pic above, this will eliminate possible wiring problems back towards the switch as that wire is not hooked to the coil now.

Give the carburetor 2 teaspoons of gas down the throat.

This is a test to see if it fires (or even some spitting and sputtering!).

Let me know if this does anything.

Next we will check your distributor installation.

The Medic
Was this
answer
helpful?
Yes
No
Monday, August 20th, 2018 AT 5:55 PM

Please login or register to post a reply.

Sponsored links