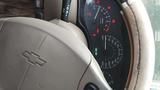
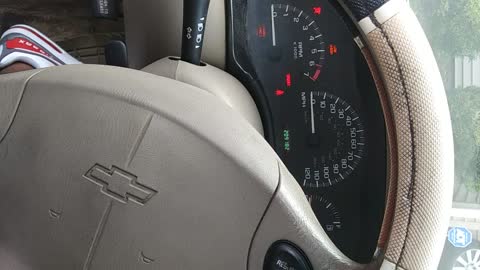
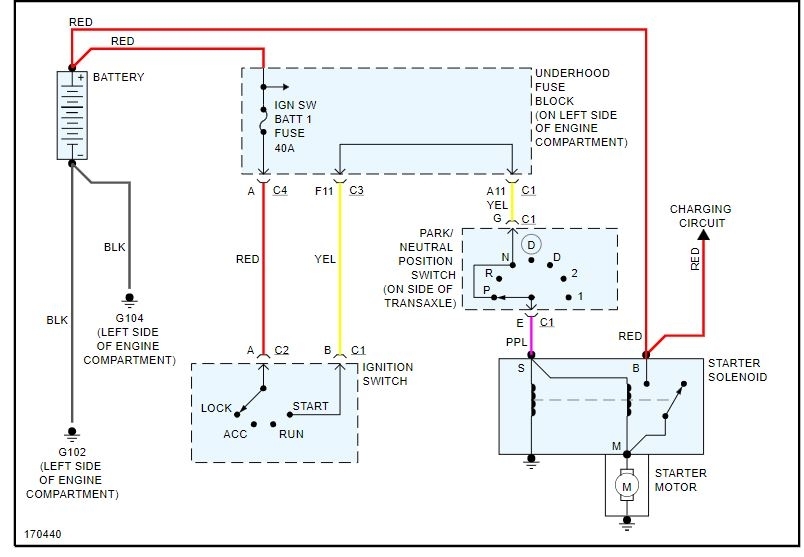
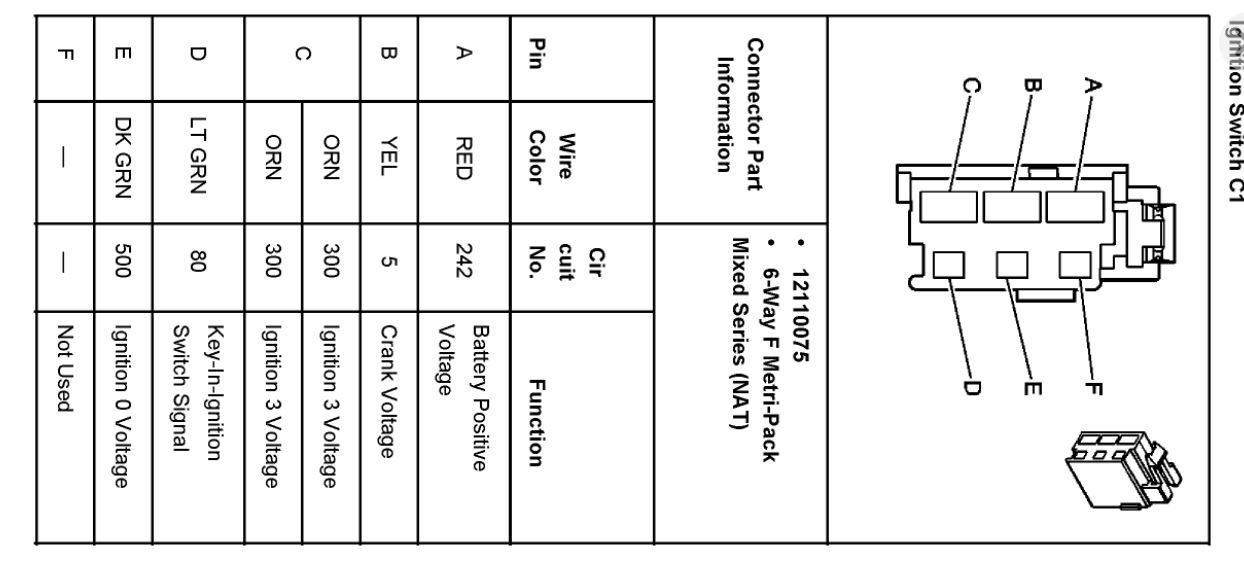
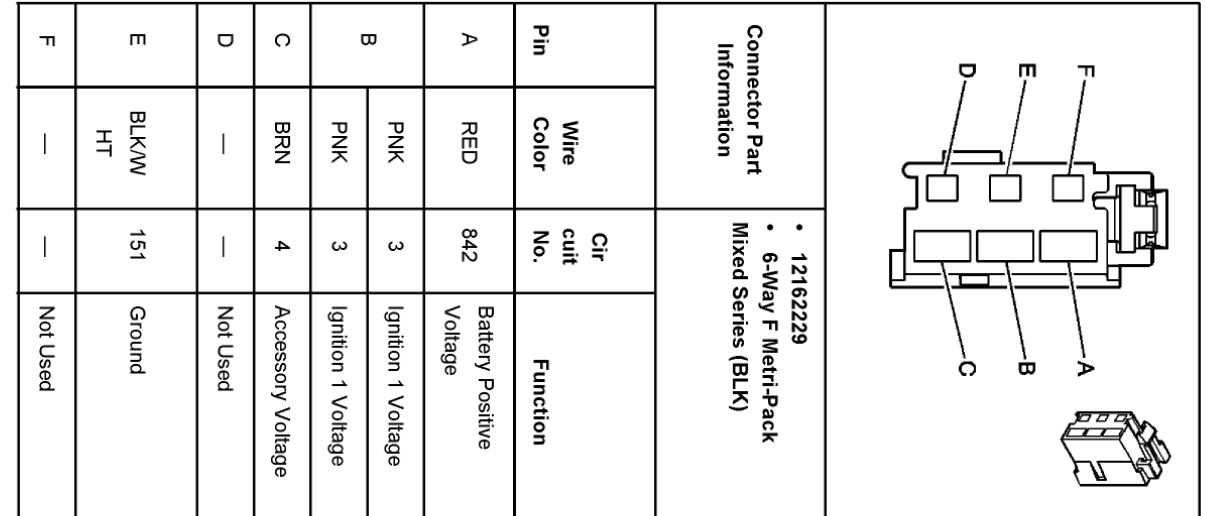
Okay, I attached a diagram of the system for you. The ignition switch is a common failure for this.
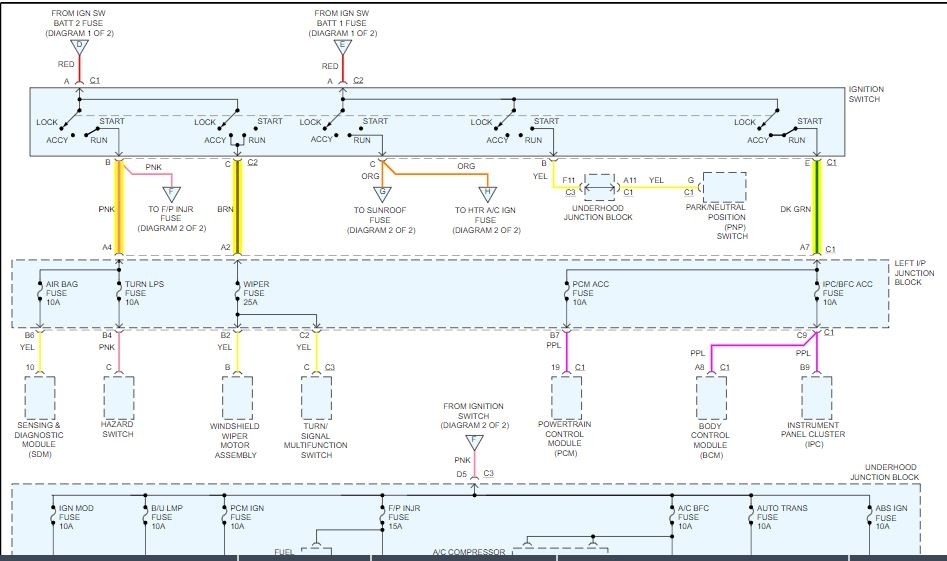
I posted the connector diagram for you as well. You will need to check the voltage on the wires.
https://www.2carpros.com/articles/how-to-check-wiring
Roy
Ignition and Start Switch Replacement
Removal Procedure
Caution: Unless directed otherwise, the ignition and start switch must be in the OFF or LOCK position, and all electrical loads must be OFF before servicing any electrical component. Disconnect the negative battery cable to prevent an electrical spark should a tool or equipment come in contact with an exposed electrical terminal. Failure to follow these precautions may result in personal injury and/or damage to the vehicle or its components.
For Vehicles equipped with OnStar (UE1) with Back Up Battery:
The Back Up Battery is a redundant power supply to allow limited OnStar functionality in the event of a main vehicle battery power disruption to the VCIM (OnStar module). Do not disconnect the main vehicle battery or remove the OnStar fuse with the ignition key in any position other than OFF. Retained accessory power (RAP) should be allowed to time out or be disabled (simply opening the driver door should disable RAP) before disconnecting power. Disconnecting power to the OnStar module in any way while the ignition is On or with RAP activated may cause activation of the OnStar Back-Up Battery (BUB) system and will discharge and permanently damage the back-up battery. Once the Back-Up Battery is activated it will stay on until it has completely discharged. The BUB is not rechargeable and once activated the BUB must be replaced.
1. Disconnect the negative battery cable.
2. Disable the SIR system. Refer to SIR Disabling and Enabling and SIR Disabling and Enabling See: Air Bag(s) Arming and Disarming > Procedures.
3. Remove the accessory trim plate from the I/P carrier. Refer to Instrument Panel Accessory Trim Plate Replacement See: Dashboard / Instrument Panel > Removal and Replacement.
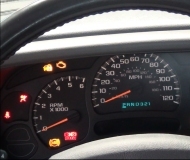
4. Remove the instrument panel cluster from the I/P carrier. Refer to Instrument Cluster Replacement See: Dashboard / Instrument Panel > Removal and Replacement.
imageOpen In New TabZoom/Print
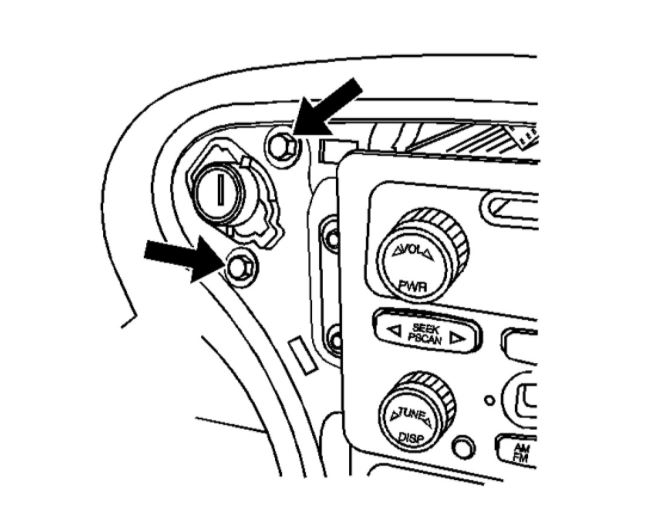
5. Remove the ignition switch bolts from the ignition switch.
6. Insert the key into the ignition switch lock cylinder. Rotate the key to the ON position.
imageOpen In New TabZoom/Print
7. If the ignition switch lock cylinder is seized or won't rotate, perform the following procedure:
7.1.Protect the immediate work area with suitable material such as clean shop towels or a clean fender cover.
7.2.Locate the surface for the ignition switch lock cylinder release button (2) on the plastic ignition switch housing.
On the key entry side of the switch housing center punch a location on the rib (1) approximately 3/8 of an inch from the cylinder release button (2).
7.3.Carefully drill a pilot hole through the plastic housing with a 1/8 inch drill bit.
7.4.Using a 9/32 inch drill bit carefully drill a hole at the pilot location, and slightly into the ignition switch lock cylinder surface to break the release button retaining spring.
7.5.Remove portions of the broken spring from the hole using a small suitable tool.
7.6.Grasp the ignition switch lock cylinder and remove the cylinder from the switch housing.
7.7.Remove any plastic flashing from the drilling operation, and using compressed air blow out the ignition switch assembly.
imageOpen In New TabZoom/Print
8. Disconnect the electrical connectors from the ignition switch.
9. Release the transaxle park/lock cable retainer, then pull outward to remove the cable from the ignition switch.
imageOpen In New TabZoom/Print
10. Press the ignition switch lock cylinder release plunger. The release plunger is located at the four o'clock position on the ignition switch housing.
11. Use the key in order to pull the ignition switch lock cylinder from the ignition switch housing.
imageOpen In New TabZoom/Print
12. Disconnect the pass key electrical connector from the ignition switch housing.
13. Remove the ignition switch housing through the opening in the I/P cluster.
Images (Click to make bigger)
Wednesday, January 13th, 2021 AT 5:25 PM