Hi,
If there are no leaks, chances are the master cylinder is bad. Read through this link:
https://www.2carpros.com/articles/brake-pedal-goes-to-the-floor
What I would suggest is to confirm there are no leaks anywhere. If the master cylinder is staying full, then suspect it is bad and fluid is bypassing the piston o-rings.
Here are the directions for replacement specific to your vehicle. The attached pics correlate with the directions. After the replacement directions, I will include the directions for bleeding the system. One last thing. Here is a link that shows in general how one is replaced. Look through it because it explains how to bench bleed the new master cylinder. You will need to do that.
https://www.2carpros.com/articles/how-to-replace-a-brake-master-cylinder
__________________________________________
1999 Saturn SL1 L4-1.9L SOHC VIN 8
Base Brake Master Cylinder
Vehicle Brakes and Traction Control Hydraulic System Brake Master Cylinder Service and Repair Procedures Service Procedures Base Brake Master Cylinder
BASE BRAKE MASTER CYLINDER
REMOVAL
1. Disconnect negative battery cable.
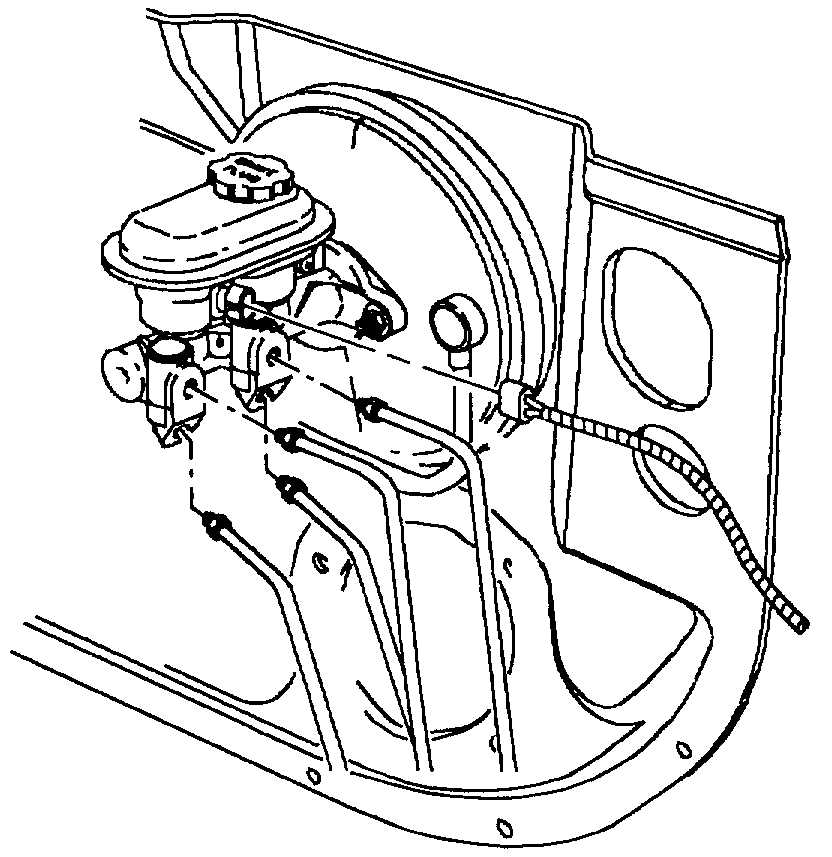
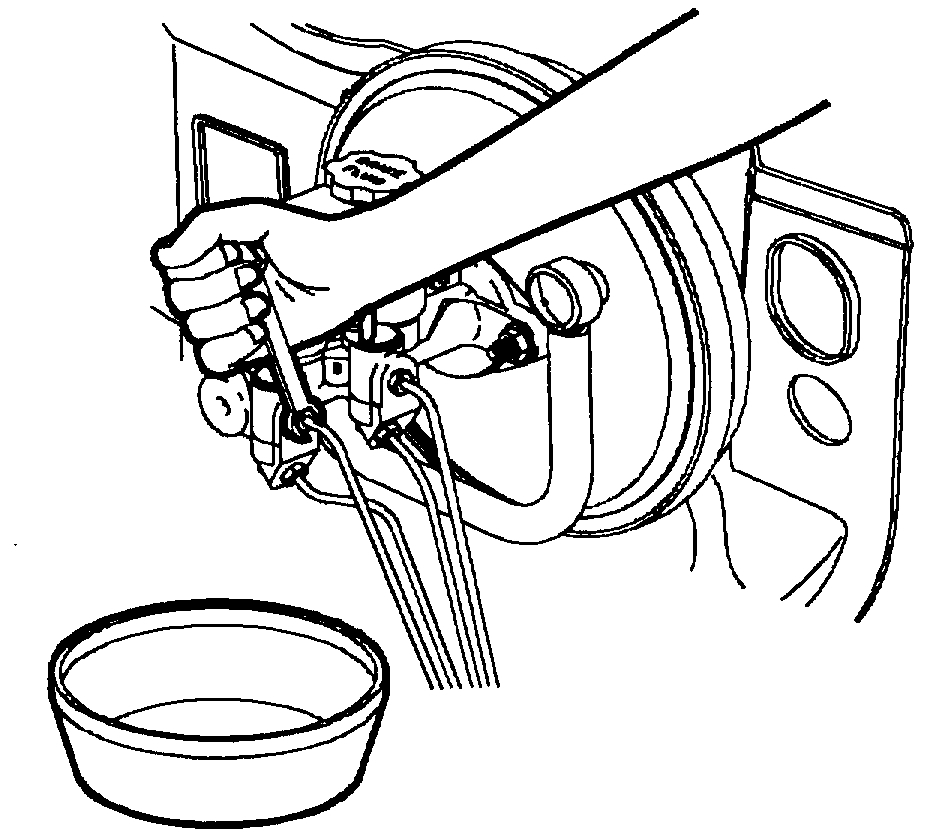
2. Remove brake fluid level switch electrical connector from master cylinder reservoir.
pic 1
3. Remove brake pipe nuts from master cylinder.
NOTICE:
^ After removing brake pipe nuts, do not excessively pull or bend brake pipes away from master cylinder.
^ Plug open brake pipes to prevent brake fluid loss and contamination.
pic 2
4. Remove two master cylinder-to-brake booster attachment nuts.
NOTICE: Be careful not to bend brake pipes.
5. Remove master cylinder.
INSTALLATION
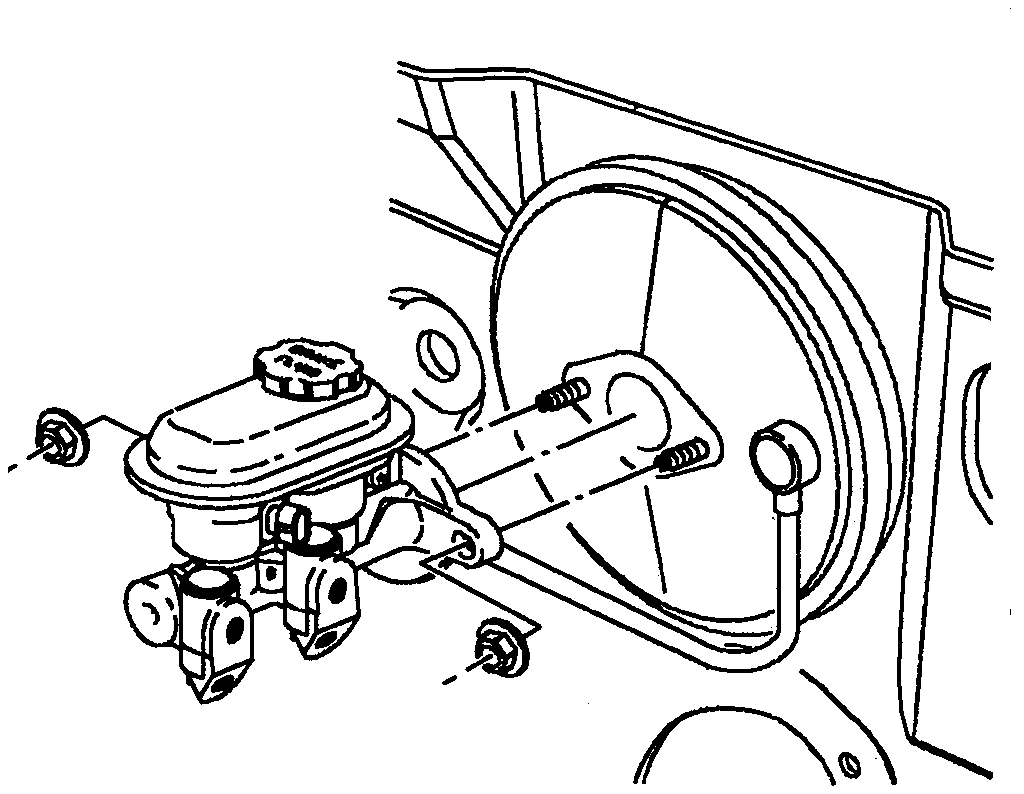
1. Position master cylinder onto brake booster studs and install fastening nuts.
^ Torque: 27 Nm (20 ft. lbs.)
NOTICE: Be careful not to bend brake pipes.
pic 3
2. Position brake pipes into the master cylinder and secure brake pipe nuts.
^ Torque: 32 Nm (24 ft. lbs.)
3. Connect electrical connector for brake fluid level switch.
4. Connect negative battery cable.
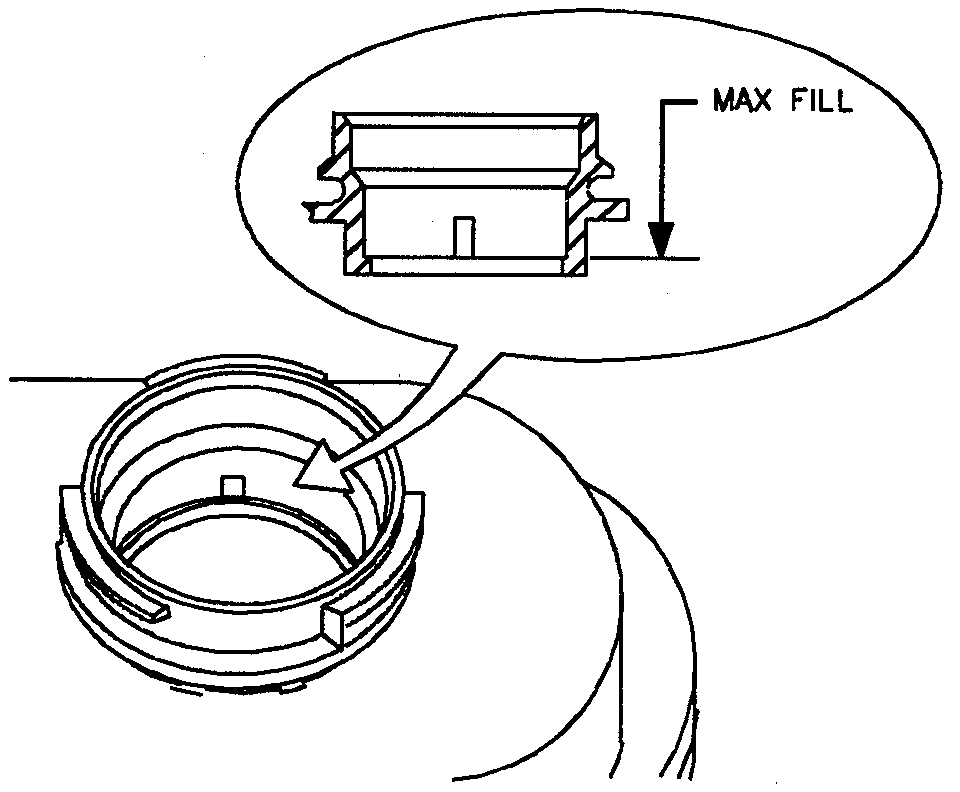
5. Fill brake fluid reservoir with clean brake fluid up to the base of the reservoir fill neck.
6. Bleed brake system. Refer to Base Brake Bleeding.
7. Check brake fluid level.
8. Check for leaks with engine running and brakes applied.
____________________________________
1999 Saturn SL1 L4-1.9L SOHC VIN 8
Manual Bleeding Procedure
Vehicle Brakes and Traction Control Hydraulic System Brake Bleeding Service and Repair Procedures Manual Bleeding Procedure
MANUAL BLEEDING PROCEDURE
Conventional (Base) Brake Bleeding
pic 4
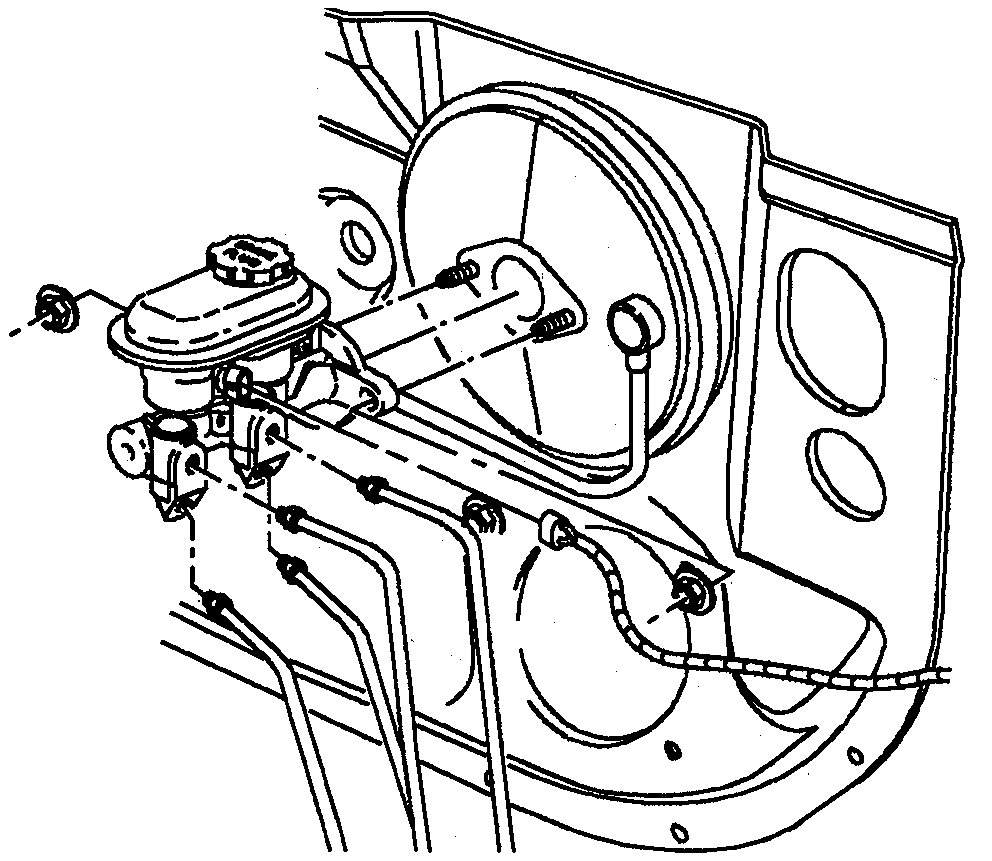
1. Fill the master cylinder reservoir with brake fluid. Keep reservoir at least half full during bleeding procedure.
NOTICE:
^ Brake fluid is corrosive to painted surfaces. Take care not to allow brake fluid to contact painted surfaces on vehicle.
^ Use only DOT 3 brake fluid from a clean, sealed container. Do not use any fluid from a container which is wet with water. Do not use DOT 5 silicone fluid.
pic 5
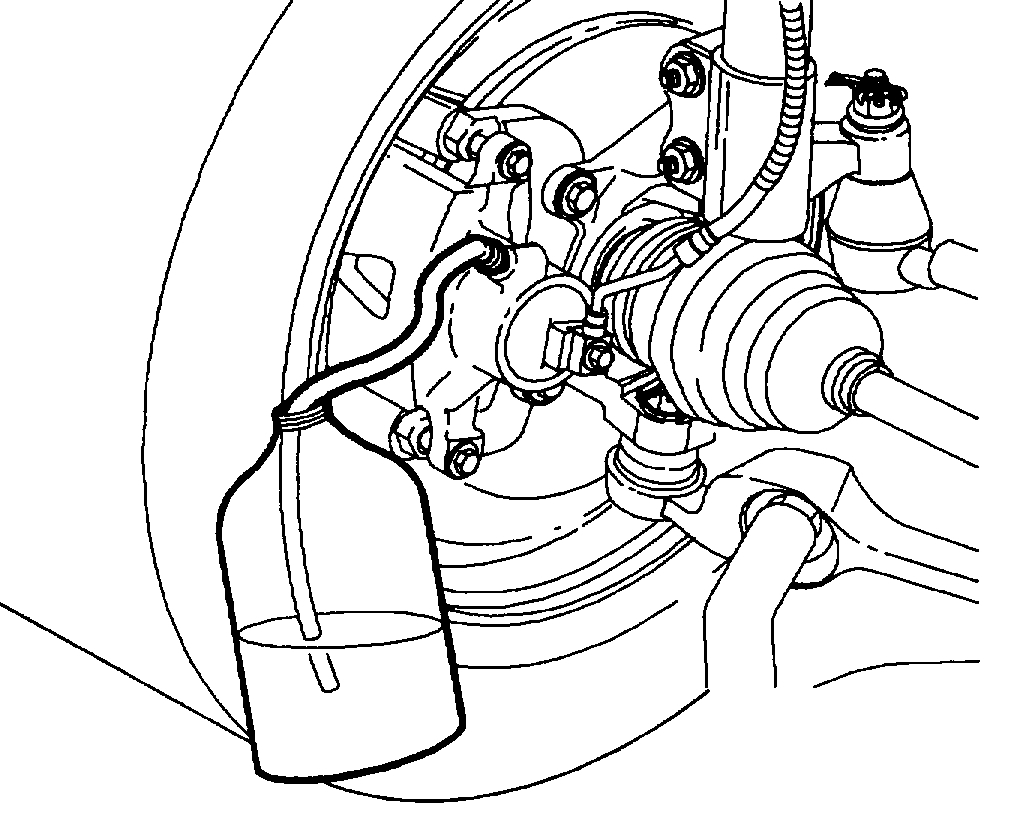
2. If the master cylinder is suspected of having air in its bore, it must be bled before proceeding to brake line bleeding.
a. Loosen left front brake pipe (front upper port) at master cylinder.
b. Allow brake fluid to flow from front master cylinder port.
c. Tighten left front brake pipe into master cylinder.
^ Torque: 32 Nm (24 ft. lbs.)
d. Loosen left front brake pipe at master cylinder 1/4 turn.
e. Depress brake pedal slowly until fluid is seen coming from the pipe nut.
f. Once again, tighten left front brake pipe into master cylinder, while pedal is being depressed.
g. Slowly release pedal.
^ Torque: 32 Nm (24 ft. lbs.)
h. Repeat sequence until all air is removed from front (secondary) master cylinder bore.
i. Loosen right front brake pipe (rear upper port) at master cylinder.
j. Allow brake fluid to flow from rear master cylinder port.
k. Tighten right front brake pipe into master cylinder.
^ Torque: 32 Nm (24 ft. lbs.)
l. Loosen right front brake pipe at master cylinder 1/4 turn.
m. Depress brake pedal slowly until fluid is seen coming from the pipe nut.
n. Once again, tighten right front brake pipe into master cylinder while pedal is being depressed.
o. Slowly release pedal.
^ Torque: 32 Nm (24 ft. lbs.)
p. Repeat sequence until all air is removed from rear (primary) master cylinder bore.
pic 6
3. Bleed individual calipers and wheel cylinders.
a. Place wrench over bleeder valve.
b. Attach transparent hose over bleeder valve nipple. Submerge other end of hose in a transparent container of brake fluid.
c. Loosen bleeder screw.
d. Apply brake pedal slowly and hold.
e. Tighten bleeder valve.
^ Torque: 11 Nm (97 inch lbs.) front
^ Torque: 7.5 Nm (66 inch lbs.) rear
IMPORTANT: To assist in freeing entrapped air, tap lightly on caliper casting with a rubber mallet.
f. Release brake pedal.
g. Repeat sequence until all air is removed from brake pipes.
pic 7
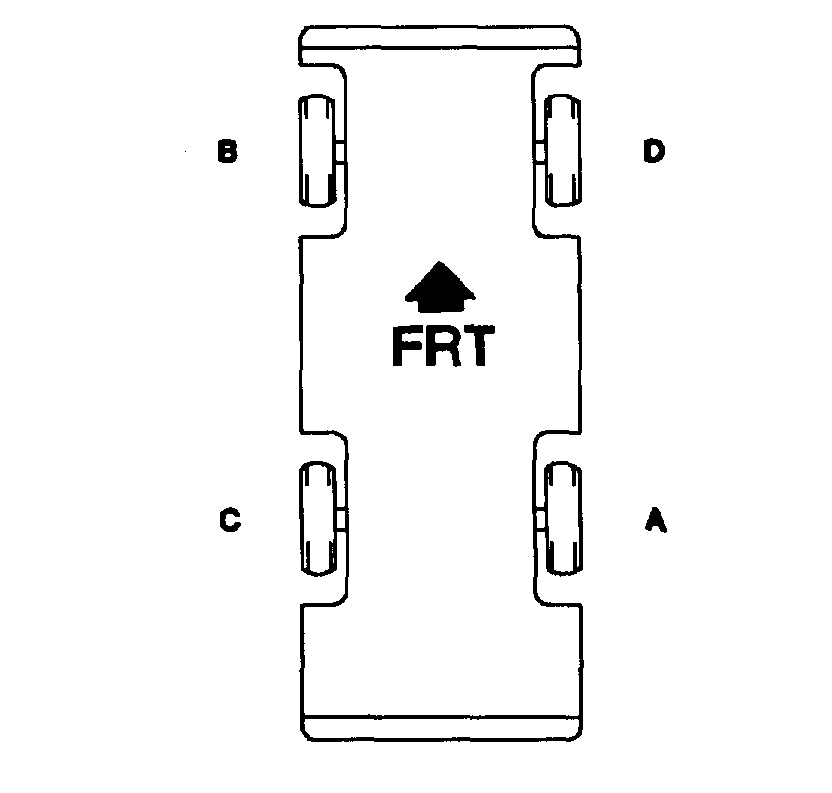
4. If more than one brake pipe is being bled, bleed in the following sequence:
a. Right rear
b. Left front
c. Left rear
d. Right front
5. Check brake pedal feel for sponginess. If brake pedal exhibits this feel, repeat bleeding procedure until condition disappears.
6. When bleeding procedure is completed on each wheel, check the reservoir fluid level. Fill as necessary.
_____________________________________
I hope this helps. Let me know if you have other questions or need help.
Take care and God Bless.
Joe
Images (Click to enlarge)
Feb 2, 2021 at 6:02 PM