Hi,
When the hoses get older, they can dry rot and crack creating a leak. This can cause brake failure if the hose totally breaks.
Here are the directions specific to your vehicle for replacement. The attached pics correlate with the directions.
___________________________________
2008 Honda Civic L4-1.8L
Brake Hose Replacement
Vehicle Brakes and Traction Control Hydraulic System Brake Hose/Line Service and Repair Removal and Replacement Brake Hose Replacement
BRAKE HOSE REPLACEMENT
Brake Hose Replacement
NOTE:
Before reassembling, check that all parts are free of dirt and other foreign particles.
Replace parts with new ones whenever specified to do so.
Do not spill brake fluid on the vehicle; it may damage the paint; if brake fluid gets on the paint, wash it off immediately with water.
To prevent the brake fluid from flowing, plug and cover the hose ends and joints with a shop towel or equivalent material.
The illustrations show only the front of the vehicle except where the procedure is different for the rear.
1. Remove the wheel.
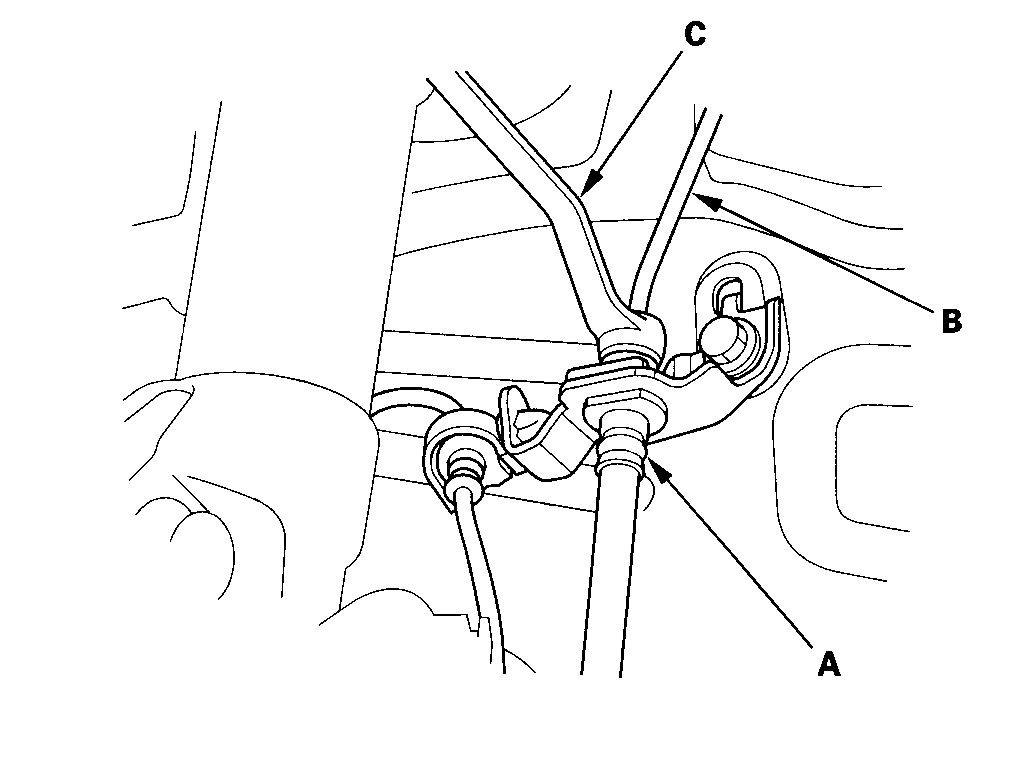
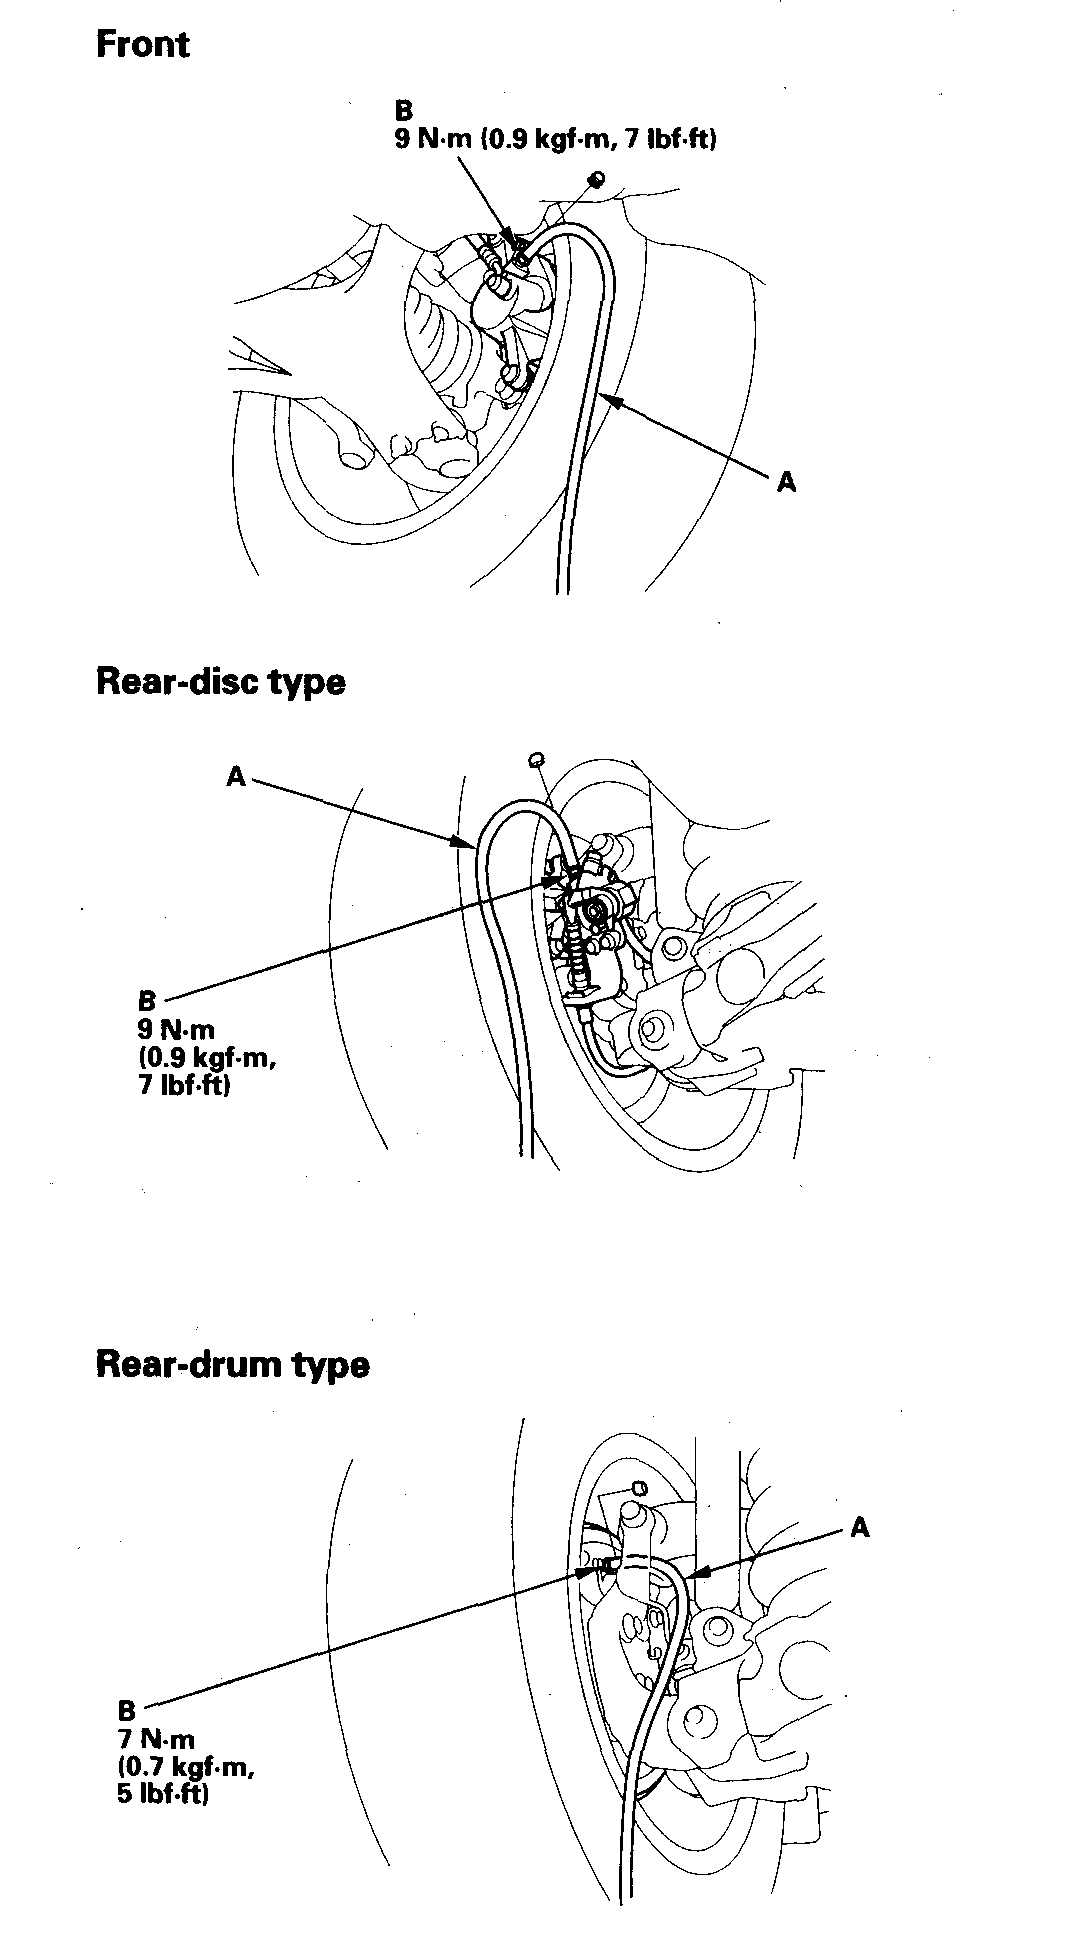
2. Disconnect the brake hose (A) from the brake line (B) using a 10 mm flare-nut wrench (C).
Pic 1
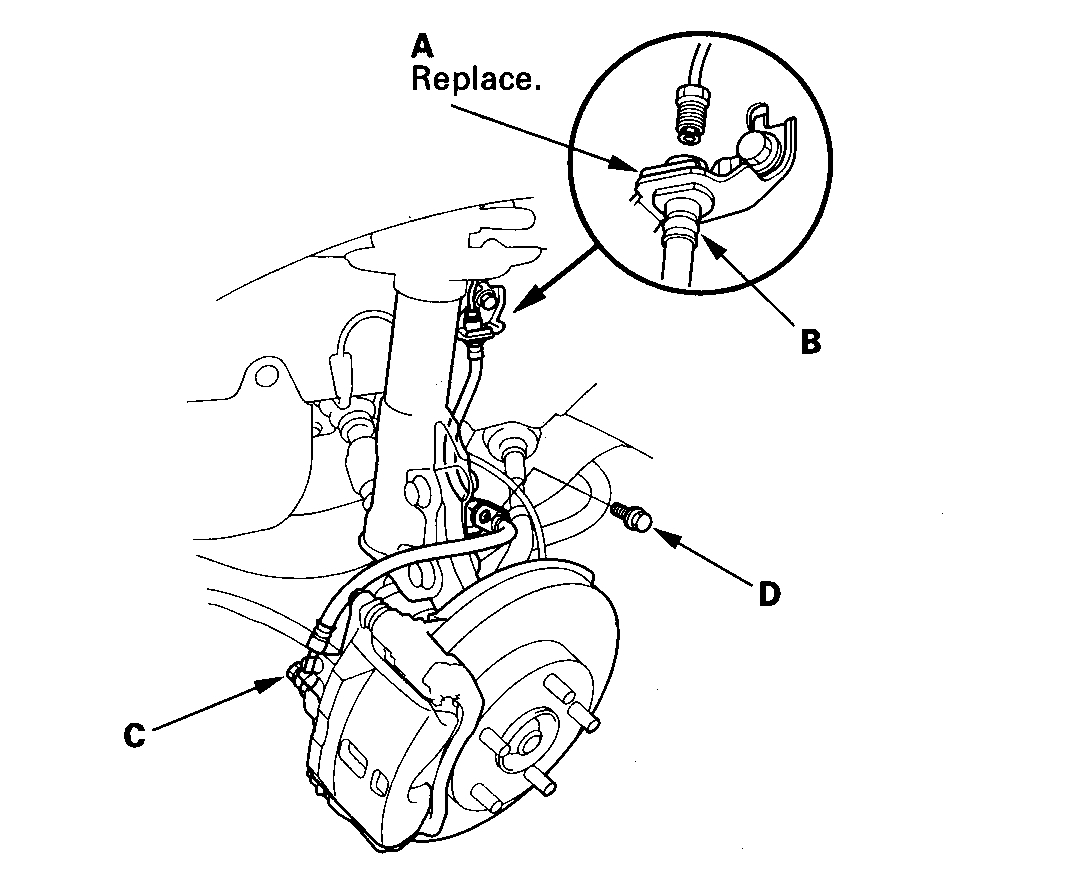
3. With clip type: Remove the brake hose clip (A) from the brake hose (B).
Pic 2
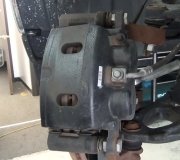
4. Disc brake type: Remove the banjo bolt (C), and disconnect the brake hose from the caliper.
5. Remove the brake hose mounting bolt(s) (D), then remove the brake hose.
NOTE: Without clip type: Remove the brake hose with the bracket.
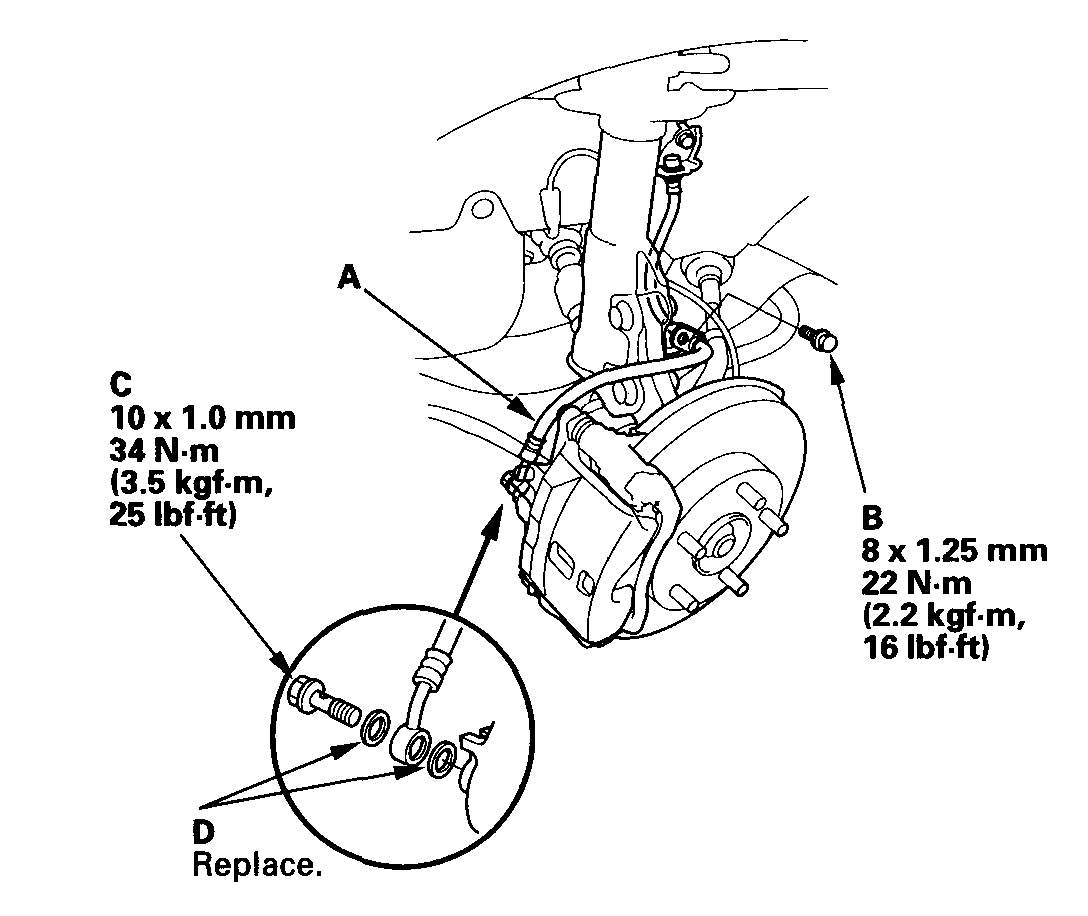
6. Install the brake hose (A) with the brake hose mounting bolt (B).
Pic 3
7. Disc brake type: Connect the brake hose to the caliper with the banjo bolt (C) and new sealing washers (D).
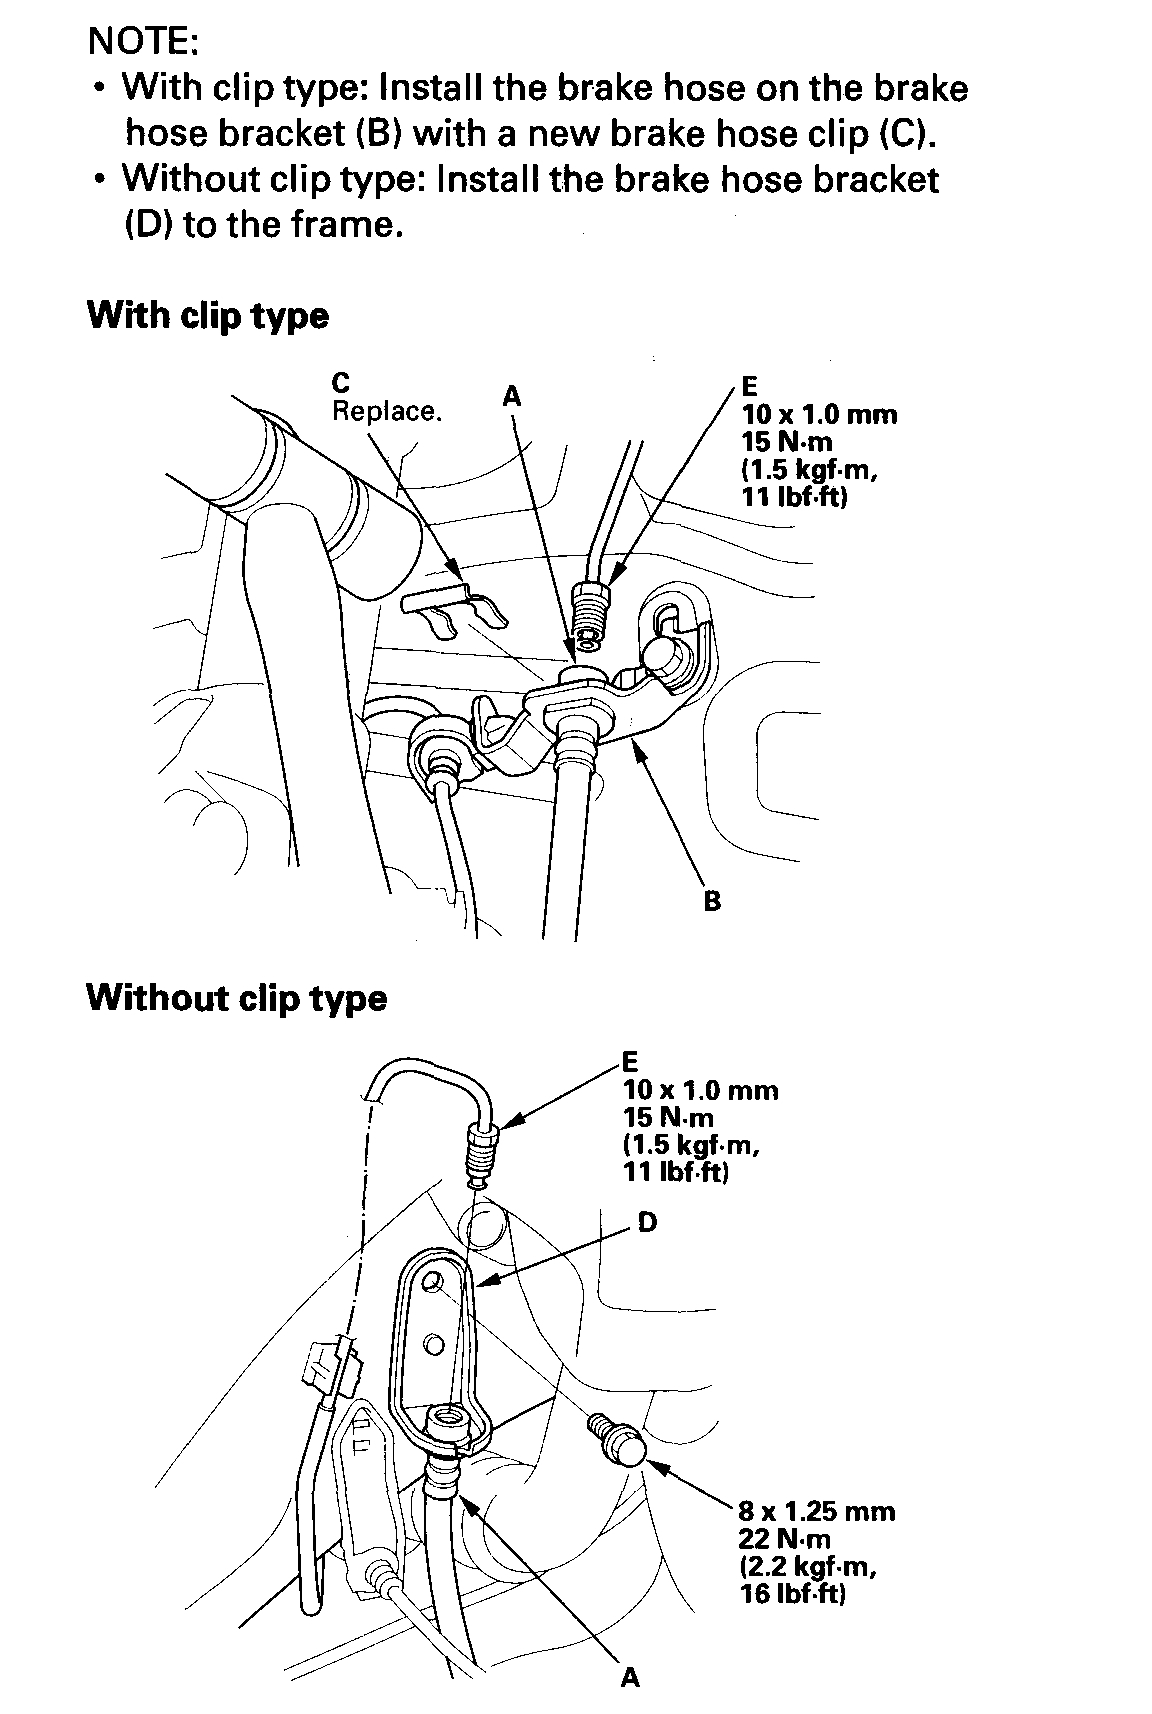
8. Position the brake hose ends (A).
NOTE:
With clip type: Install the brake hose on the brake hose bracket (B) with a new brake hose clip (C).
Without clip type: Install the brake hose bracket (D) to the frame.
Pic 4
9. Connect the brake line (E) to the brake hose.
10. After installing the brake hose, bleed the brake system.
11. Do the following check:
Check the brake hose and line joint for leaks, and tighten if necessary.
Check the brake hoses for interference and twisting.
12. Clean the mating surfaces of the brake disc or the brake drum and the inside of the wheel, then install the wheel.
___________________________________________
Here are the directions for bleeding. If you prevent the master cylinder from getting empty, you should be able to just bleed the brake with the new hose. If the master cylinder empties, bleed all brakes.
___________________________________________
2008 Honda Civic L4-1.8L
Brake System Bleeding
Vehicle Brakes and Traction Control Hydraulic System Brake Bleeding Service and Repair Procedures Brake System Bleeding
BRAKE SYSTEM BLEEDING
Brake System Bleeding
NOTE:
Do not reuse the drained fluid. Use only clean Honda DOT 3 Brake Fluid from an unopened container. Using a non-Honda brake fluid can cause corrosion and shorten the life of the system.
Do not mix different brands of brake fluid; they may not be compatible.
Make sure no dirt or other foreign matter is allowed to contaminate the brake fluid.
Do not spill brake fluid on the vehicle, it may damage the paint; if brake fluid does contact the paint, wash it off immediately with water.
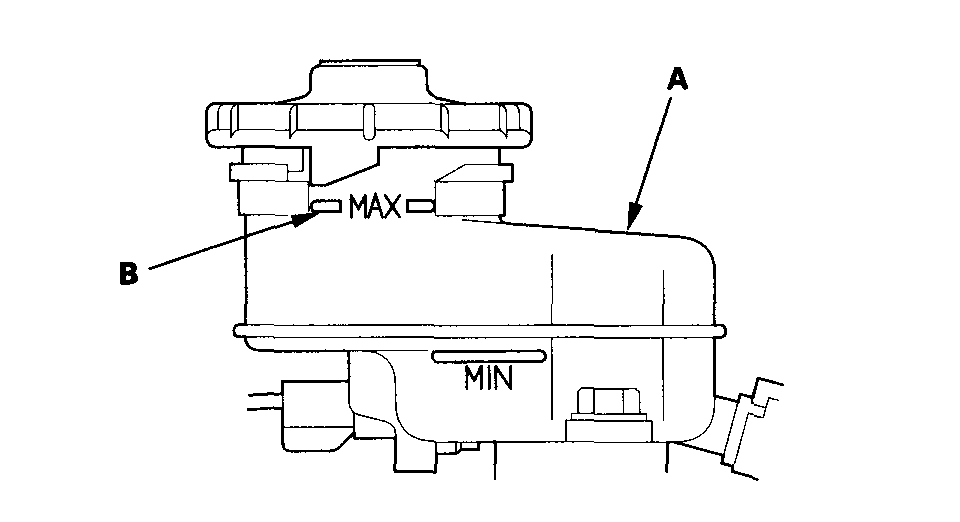
The reservoir connected to the master cylinder must be at the MAX (upper) level mark at the start of the bleeding procedure and checked after bleeding each brake system. Add fluid as required.
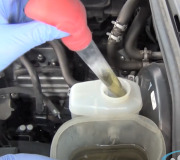
1. Make sure the brake fluid level in the reservoir (A) is at the MAX (upper) level line (B).
Pic 5
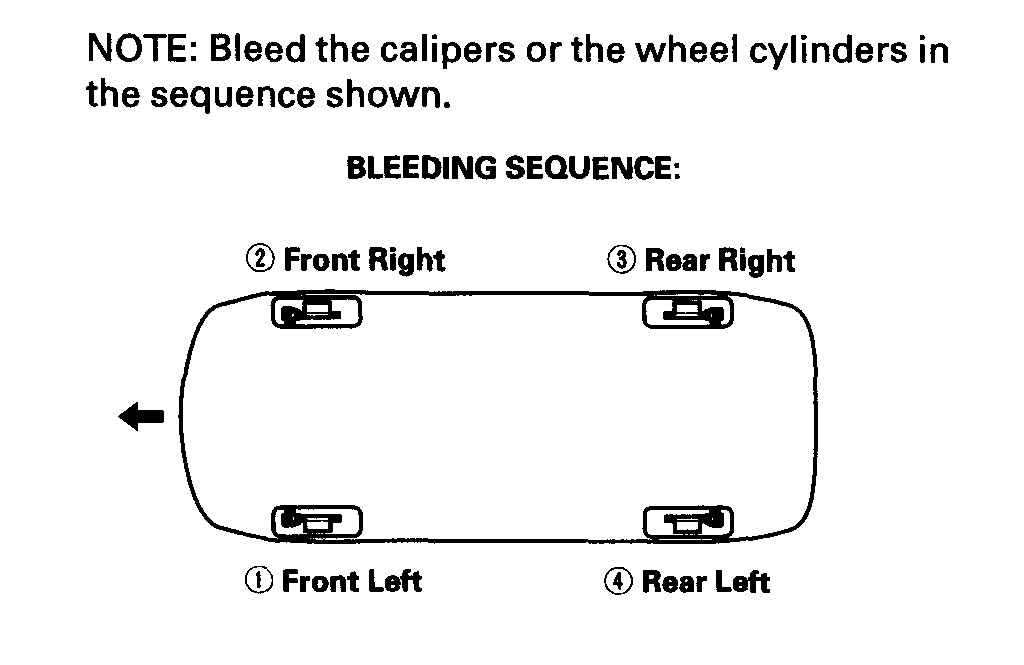
2. Have someone slowly pump the brake pedal several times, then apply steady pressure.
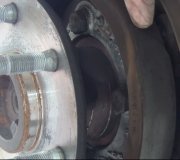
3. Start the bleeding at the driver's side of the front brake system.
Pic 6
4. Attach a length of clear drain tube (A) to the bleed screw (B), then, loosen the bleed screw to allow air to escape from the system. Then tighten the bleed screw securely.
Pic 7
5. Refill the master cylinder reservoir to the MAX (upper) level line.
6. Repeat the procedure for each brake circuit until no air bubbles are in the fluid.
_______________________________________
I hope this helps. Let me know if you have other questions.
Take care and God Bless,
Joe
Images (Click to make bigger)
Wednesday, March 10th, 2021 AT 8:28 PM