Welcome to 2CarPros.
My first suspect is the switch itself. However, it could be related to the TIPM (totally integrated power module). What I need you to do is remove the light first and check to see if power is there when you turn the light switch on. If there is no power, my first suspect is the switch itself. If the power is low (less than battery power) then I have a feeling the TIPM has failed. Actually the module usually isn't the problem, but rather one of the pins is corroded or has partially broken and not allowing enough power to make it to the light.
______________________________
If you find the switch is the problem, here are the directions for replacement. The attached pictures correlate with these directions.
Warning: to avoid personal injury or death, on vehicles equipped with airbags, disable the supplemental restraint system before attempting any steering wheel, steering column, airbag, seat belt tensioner, impact sensor, or instrument panel component diagnosis or service. Disconnect and isolate the battery negative (ground) cable, then wait two minutes for the system capacitor to discharge before performing further diagnosis or service. This is the only sure way to disable the supplemental restraint system. Failure to take the proper precautions could result in accidental airbag deployment.
REMOVAL
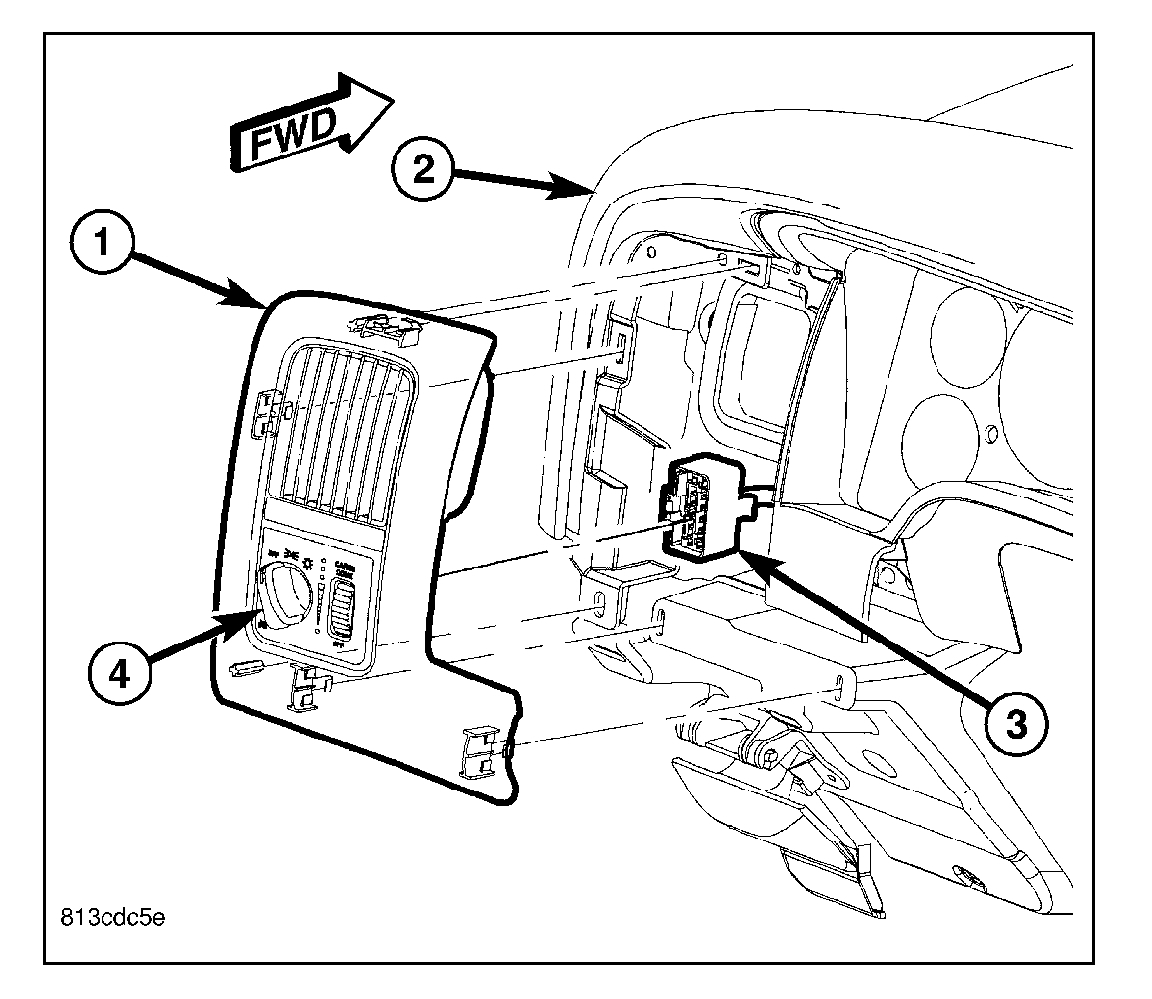
picture 1
1. Disconnect and isolate the battery negative cable.
2. Remove the headlamp switch (4) and the left bezel (1) from the instrument panel (2) as a unit.
3. Disconnect the instrument panel wire harness connector (3) from the back of the headlamp switch.
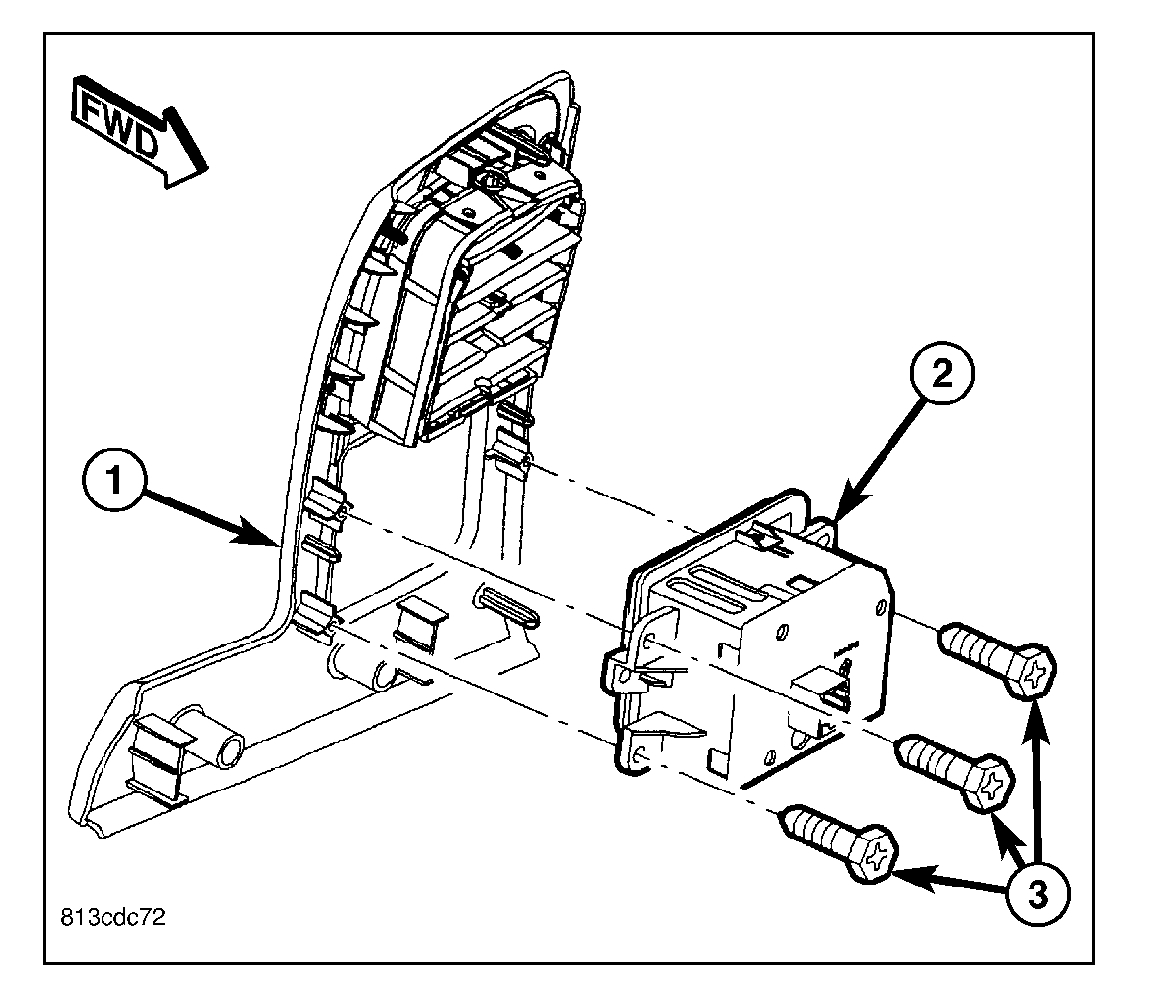
picture 2
4. Remove the three screws (3) that secure the headlamp switch (2) to the back of the instrument panel bezel (1).
5. Remove the headlamp switch from the instrument panel bezel.
INSTALLATION
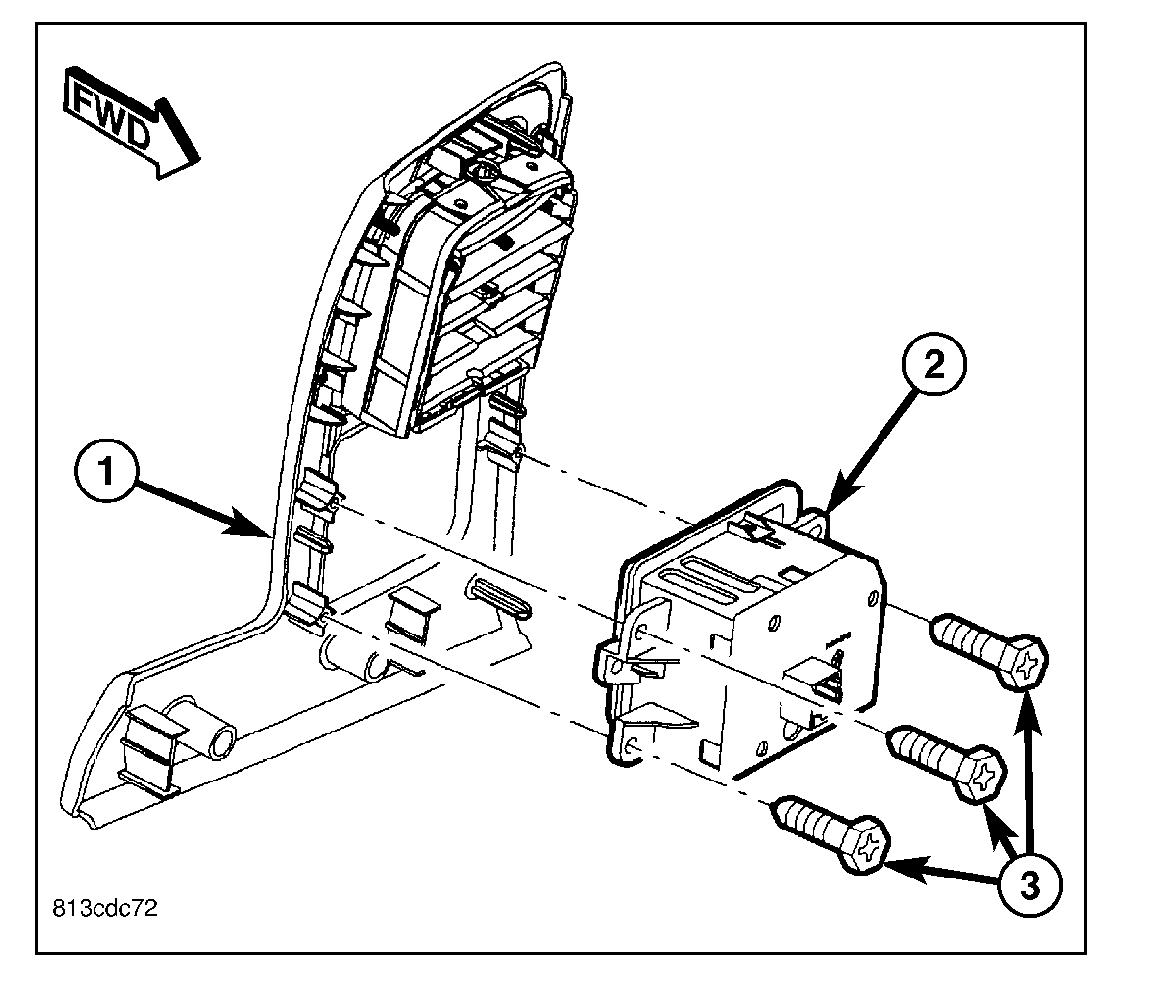
picture 3
1. Position the headlamp switch (2) to the back of the left instrument panel bezel (1).
2. Install and tighten the three screws (3) that secure the headlamp switch to the instrument panel bezel. Tighten the screws to 2 N.m (20 in.lbs.).
picture 4
3. Position the left bezel (1) close enough to the instrument panel (2) to reconnect the instrument panel wire harness connector (3) to the back of the headlamp switch (4).
4. Reinstall the left bezel and the headlamp switch onto the instrument panel as a unit.
5. Reconnect the battery negative cable.
________________________________________________
Now, if you want to check the TIPM, it is located under the power distribution box. Please disconnect the battery prior to working on it.
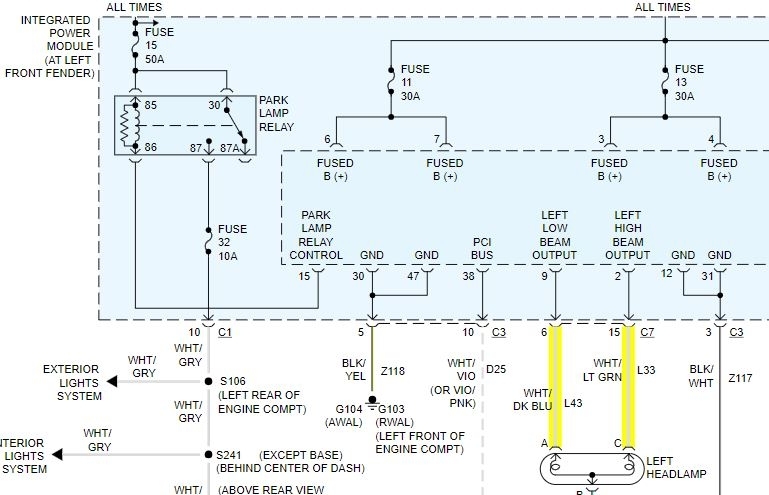
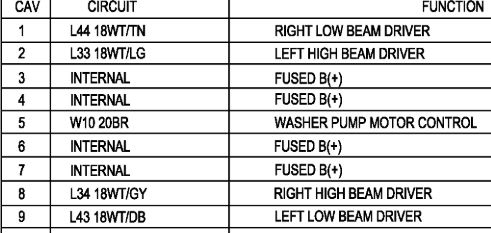
I have attached a picture which shows which pins on the C plug are responsible for the left head lights. See picture 5. Disconnect the connector and check the pins for deterioration. Picture 6 correlates with the wiring schematic to show which pins are for the left high and low drivers from the TIPM.
If there is damage to the pins in the TIPM, it will need replaced.
Here are a few links you may find helpful for testing wiring:
https://www.2carpros.com/articles/how-to-use-a-test-light-circuit-tester
https://www.2carpros.com/articles/how-to-use-a-voltmeter
https://www.2carpros.com/articles/how-to-check-wiring
Let me know if this helps or if you have other questions.
Take care,
Joe
Images (Click to enlarge)
Apr 5, 2019 at 7:03 PM