Welcome to 2CarPros.
If the vehicle is hard to start, it can be the result of a few things. Most commonly, it is related to low fuel pressure or what is called fuel pressure drop off. Take a look through this link and see if it is helpful.
https://www.2carpros.com/articles/engine-cranks-excessively-before-starting
What I suggest is to check fuel pressure and fuel pressure drop off. Drop off is nothing more than how quickly the pressure drops in the system after the engine is turned off. It should take some time. Here is a link that shows how to test pressure:
https://www.2carpros.com/articles/how-to-check-fuel-system-pressure-and-regulator
Here are specific directions. Note that you put V6, so that is what this is based on. Pic 1 correlates with these directions.
_____________________________________
FUEL PRESSURE CHECK
NOTE:
- Use Fuel Pressure Gauge Kit (J-44321) to check fuel pressure.
- Do not perform fuel pressure check with system operating. Fuel pressure gauge may indicate false readings.
1. Release fuel pressure to zero. Refer to "FUEL PRESSURE RELEASE".
pic 1
2. Install the inline fuel quick disconnect fitting between the connection of the fuel feed hose (from tank) and the fuel hose (to engine).
3. Connect the fuel pressure test gauge (quick connect adapter hose) to the quick disconnect fitting.
4. Turn ignition switch ON and check for fuel leakage.
5. Start engine and check for fuel leakage.
6. Read the indication of fuel pressure gauge.
At idling: Approximately 350 kPa (3.7 kg/sq.cm, 51 psi)
7. If result is unsatisfactory, go to next step.
8. Check the following.
- Fuel hoses and fuel tubes for clogging
- Fuel filter for clogging
- Fuel pump
- Fuel pressure regulator for clogging
If OK, replace fuel pressure regulator.
If NG, repair or replace.
____________________________________
If you find the pump is bad, here is a link that shows in general how one is replaced.
https://www.2carpros.com/articles/how-to-replace-an-electric-fuel-pump
+++++++++++++++++++++++++++
Here are the specific directions for replacement.
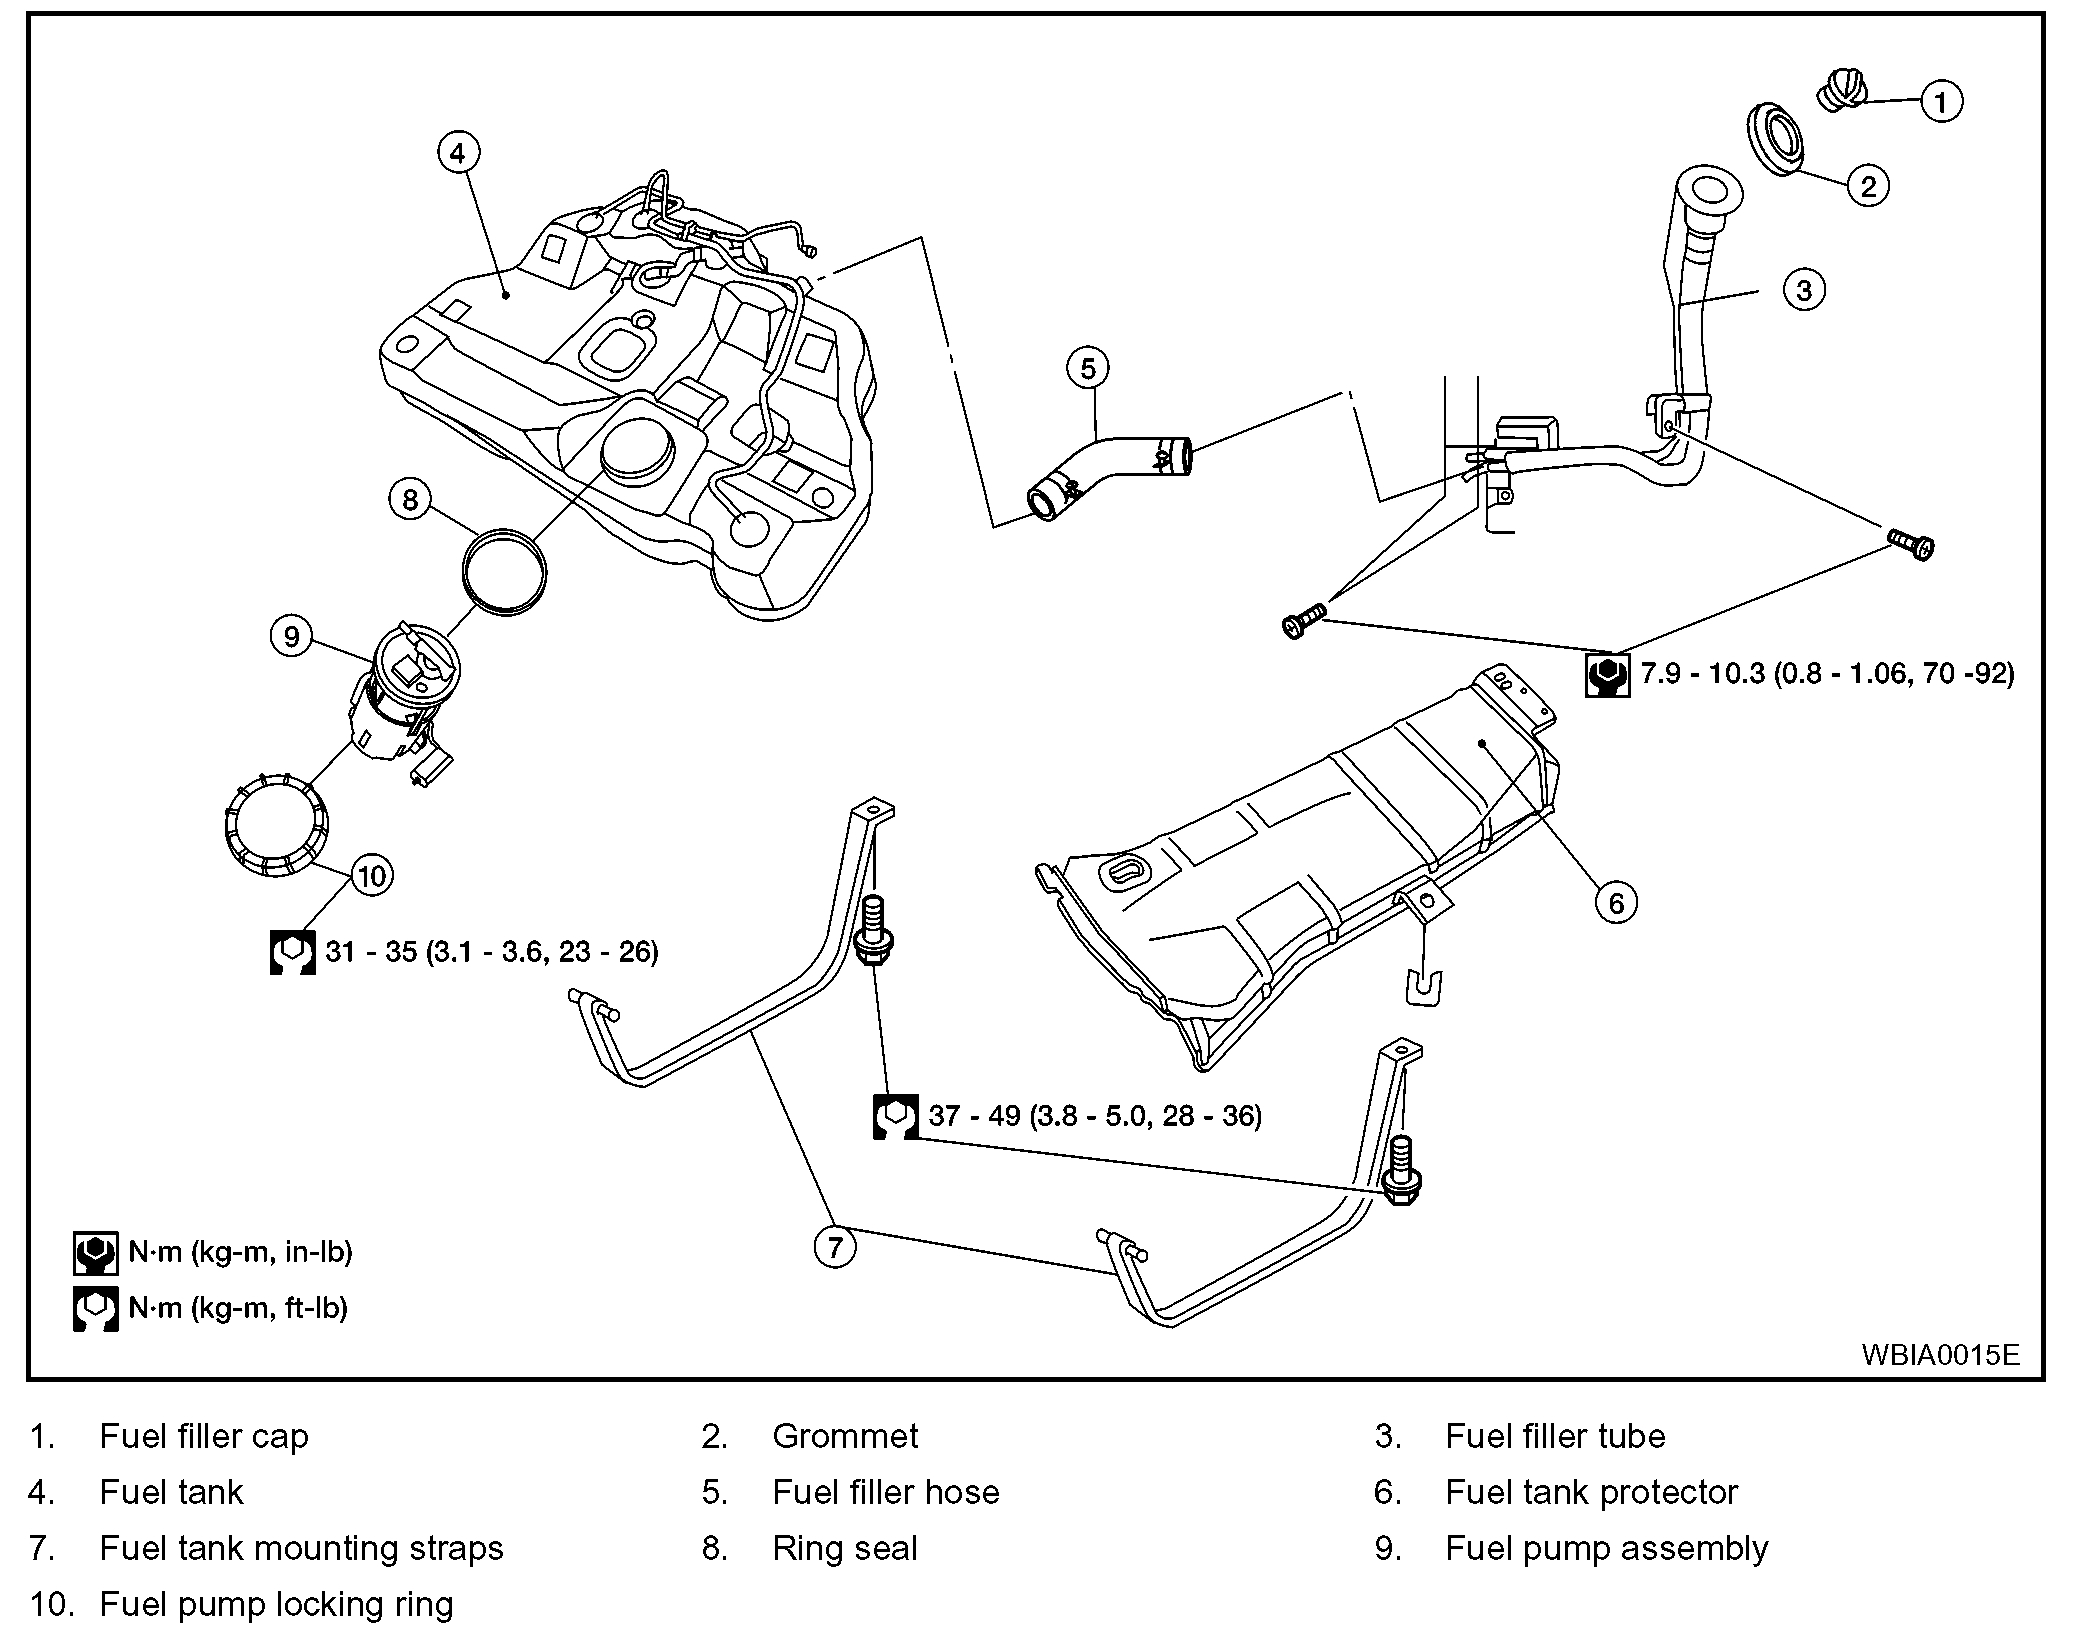
FUEL LEVEL SENSOR UNIT, FUEL FILTER AND FUEL PUMP ASSEMBLY
pic 2
REMOVAL
WARNING: Read "General Precautions" before working on the fuel system.
Refer to "General Precautions".
1. Unscrew the fuel filler cap to release the pressure inside the fuel tank.
2. Release the fuel pressure from the fuel lines. Refer to "FUEL PRESSURE RELEASE".
3. Remove the rear seat bottom.
4. Remove the fuel pump inspection hole cover.
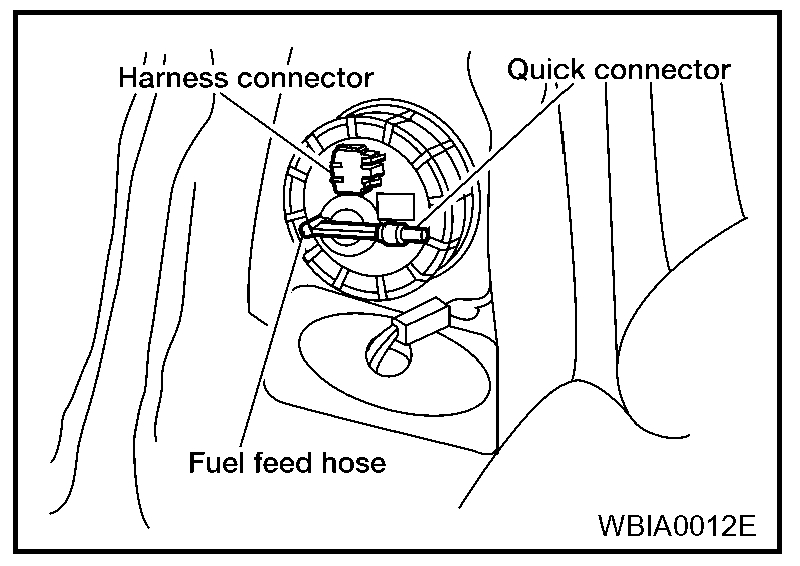
pic 3
5. Disconnect the harness connector, and fuel feed hose from the fuel pump assembly.
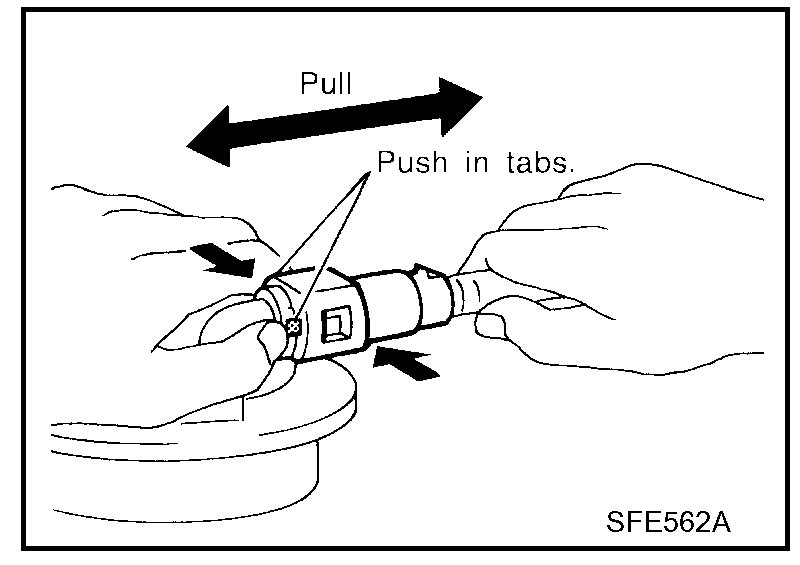
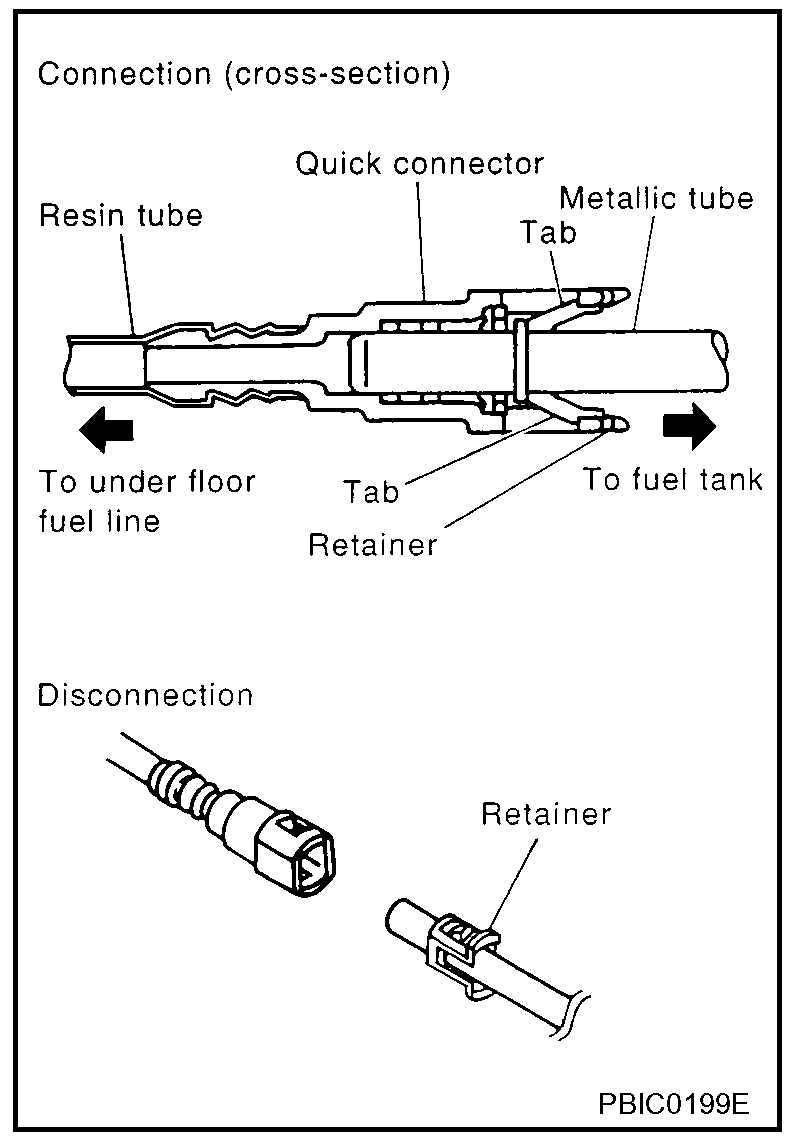
pic 4
Remove the quick connector as follows:
- Hold the sides of the connector, push in tubs and pull out the tube.
- If the connector and the tube are stuck together, push and pull several times until they start to move. Then disconnect them by pulling.
CAUTION:
- The tube can be removed when the tabs are completely depressed. Do not twist it more than necessary.
- Do not use any tools to remove the quick connector.
- Keep the resin tube away from heat. Be especially careful when welding near the tube.
- Prevent acid liquid such as battery electrolyte, etc. from getting on the resin tube.
- Do not bend or twist the tube during installation and removal.
- Only when the tube is replaced, remove the remaining retainer on the tube or fuel pump assembly.
- When the tube or fuel pump assembly is replaced, also replace the retainer with a new one (green colored retainer).
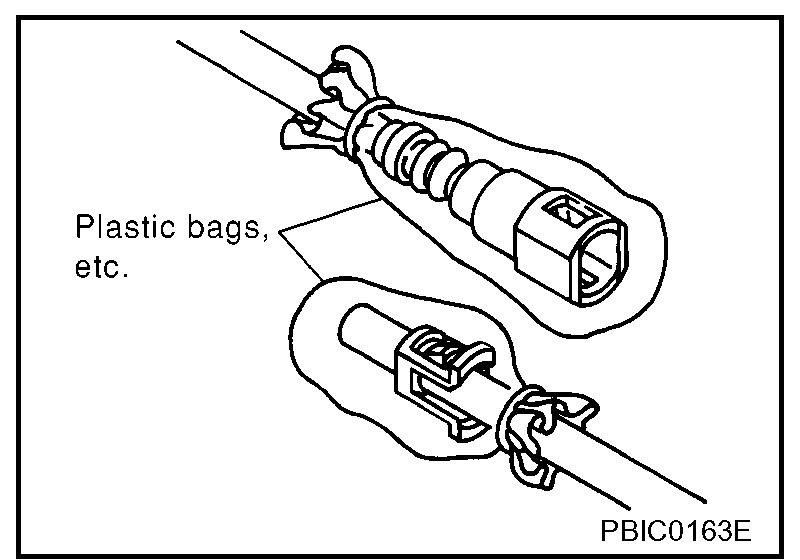
pic 5
- To keep the connecting portion clean and to avoid damage and foreign materials, cover them completely with plastic bags or something similar.
pic 6
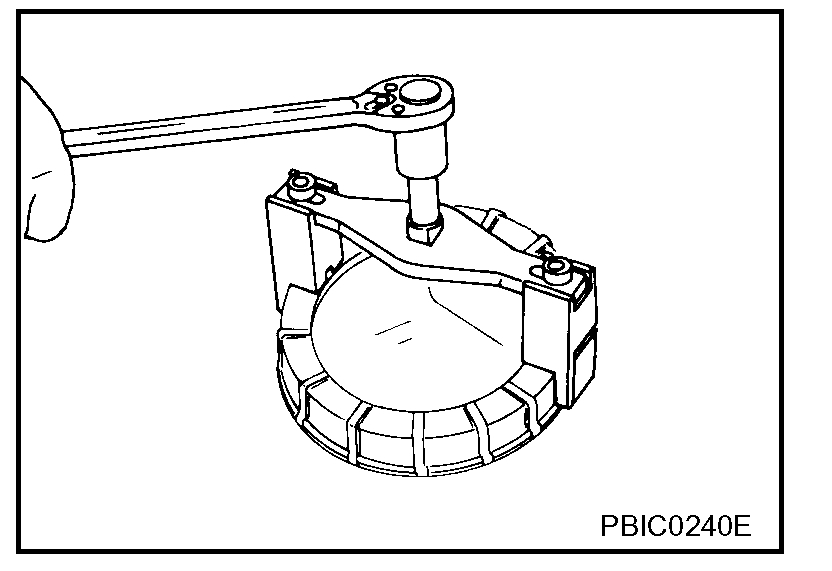
6. Using a lock ring wrench, remove the lock ring.
pic 7
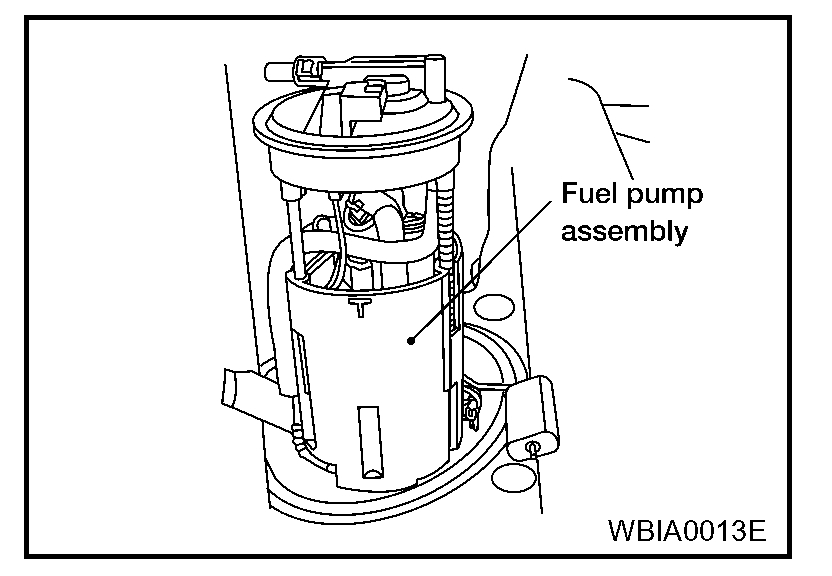
7. Remove the fuel pump assembly.
CAUTION: Do not bend the float arm during removal.
INSPECTION AFTER REMOVAL
Make sure the fuel pump is free from defects and foreign materials.
INSTALLATION
Installation is in the reverse order of removal.
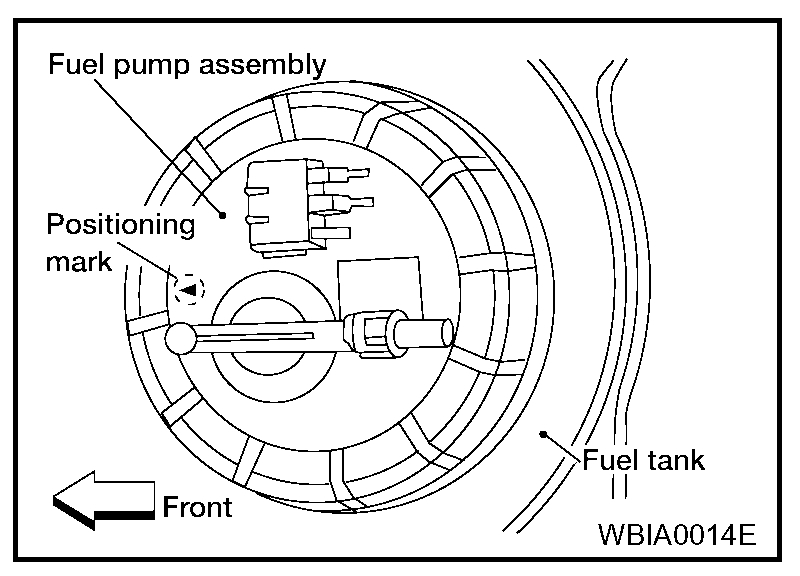
pic 8
- Install the fuel pump assembly with the front mark (arrow) facing the front of the vehicle.
pic 9
- Connect the quick connector as follows:
1. Check the connection for damage or any foreign materials.
2. Align the connector with the tube, then insert the connector straight into the tube until a click is heard.
3. Pull the tube and the connector to make sure they are securely connected.
pic 10
- Visually confirm that the two retainer tabs are connected to the connector.
INSPECTION AFTER INSTALLATION
- Start the engine and let it idle and make sure there are no fuel leaks at the fuel system connections.
__________________________________
Let me know if this helps or if you have other questions.
Take care,
Joe
Images (Click to enlarge)
May 13, 2019 at 8:29 PM