It is possible.
As far as the repair, yes, the tank has to come down for the repair. There is no other way to access it.
The sender is part of the fuel pump module itself.
Roy
Fuel Tank Replacement
Removal Procedure
Danger: To avoid any vehicle damage, serious personal injury or death when major components are removed from the vehicle and the vehicle is supported by a hoist, support the vehicle with jack stands at the opposite end from which the components are being removed and strap the vehicle to the hoist.
Warning: Refer to Gasoline/Gasoline Vapors Warning (See: Fuel > Technician Safety Information).
Warning: Refer to Safety Glasses Warning (See: Vehicle > Technician Safety Information > Safety Glasses Warning).
1. Relieve the system fuel pressure. Refer to Fuel Pressure Relief (See: Fuel Pressure Release > Procedures).
2. Drain the fuel tank. Refer to Fuel Tank Draining (See: Fuel Tank > Procedures > Fuel Tank Draining).
3. Raise and support the vehicle. Refer to Lifting and Jacking the Vehicle (See: Vehicle Lifting > Procedures)
4. Remove the right rear wheel. Refer to Tire and Wheel Removal and Installation (See: Wheels and Tires > Removal and Replacement)
5. Remove the exhaust system for access. Refer to Exhaust Muffler with Resonator, Exhaust, and Tail Pipe Replacement (See: Muffler > Removal and Replacement > Exhaust Muffler with Resonator, Exhaust, and Tail Pipe Replacement).
6. Remove the propeller shaft. Refer to Two-Piece Propeller Shaft Replacement (See: Drive/Propeller Shaft > Removal and Replacement > Two-Piece Propeller Shaft Replacement).
7. Remove the park brake cables. Refer to Parking Brake Rear Cable Replacement (See: Parking Brake Cable > Removal and Replacement).
Support the rear suspension with a jack stand.
Remove the front support bolts.
Loosen the rear support bolts in order to slide the fuel tank out.
For tightening specifications, refer to Rear Suspension Support Replacement (See: Rear Cross-Member > Removal and Replacement).
imageOpen In New TabZoom/Print
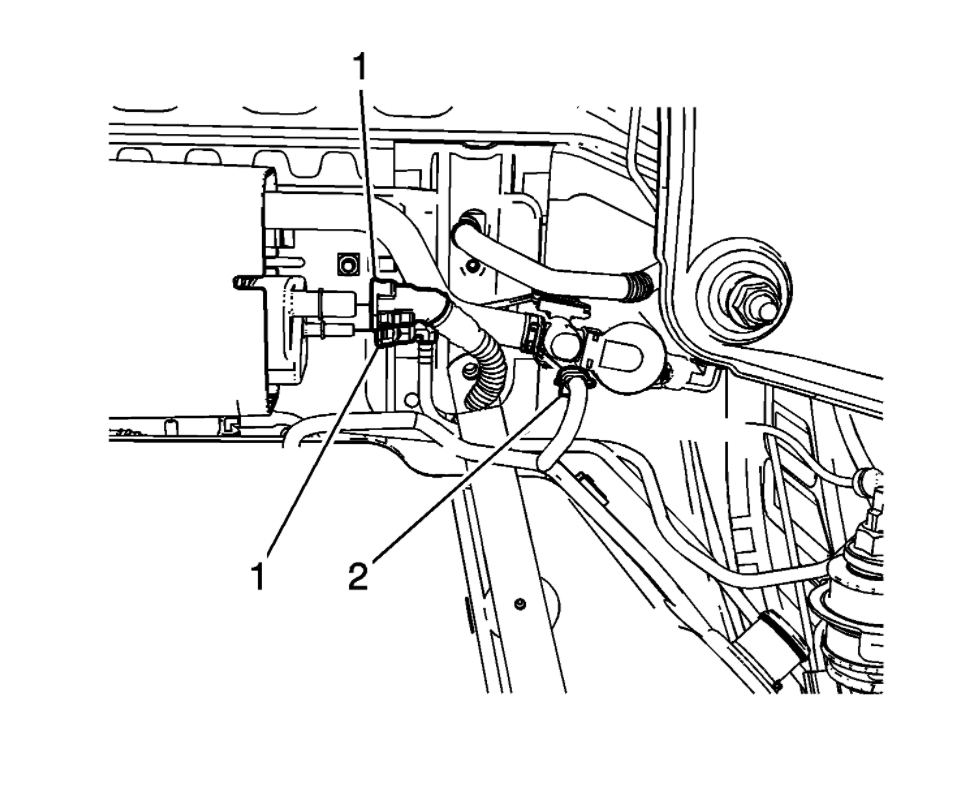
8. Disconnect the evaporative emission lines (1). Refer to Plastic Collar Quick Connect Fitting Service (See: Fuel Line Coupler > Removal and Replacement > Plastic Collar Quick Connect Fitting Service).
9. Disconnect the vent solenoid electrical connector (2).
imageOpen In New TabZoom/Print
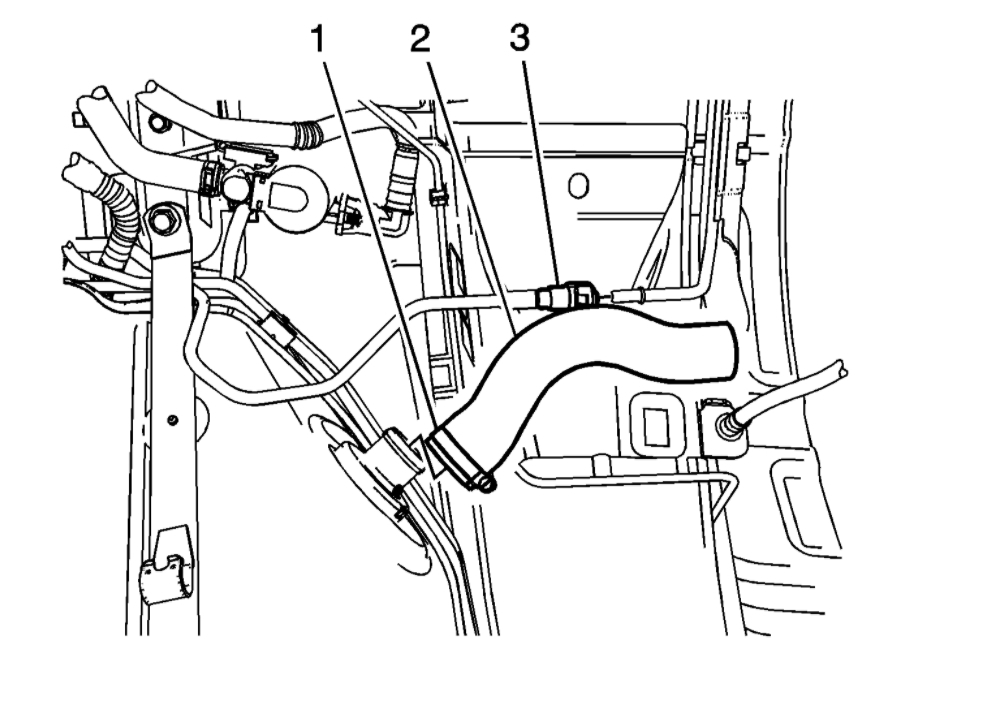
10. Loosen the hose clamp (1) and remove the filler tube (2).
11. Disconnect the evaporative emission line (3). Refer to Plastic Collar Quick Connect Fitting Service (See: Fuel Line Coupler > Removal and Replacement > Plastic Collar Quick Connect Fitting Service).
imageOpen In New TabZoom/Print
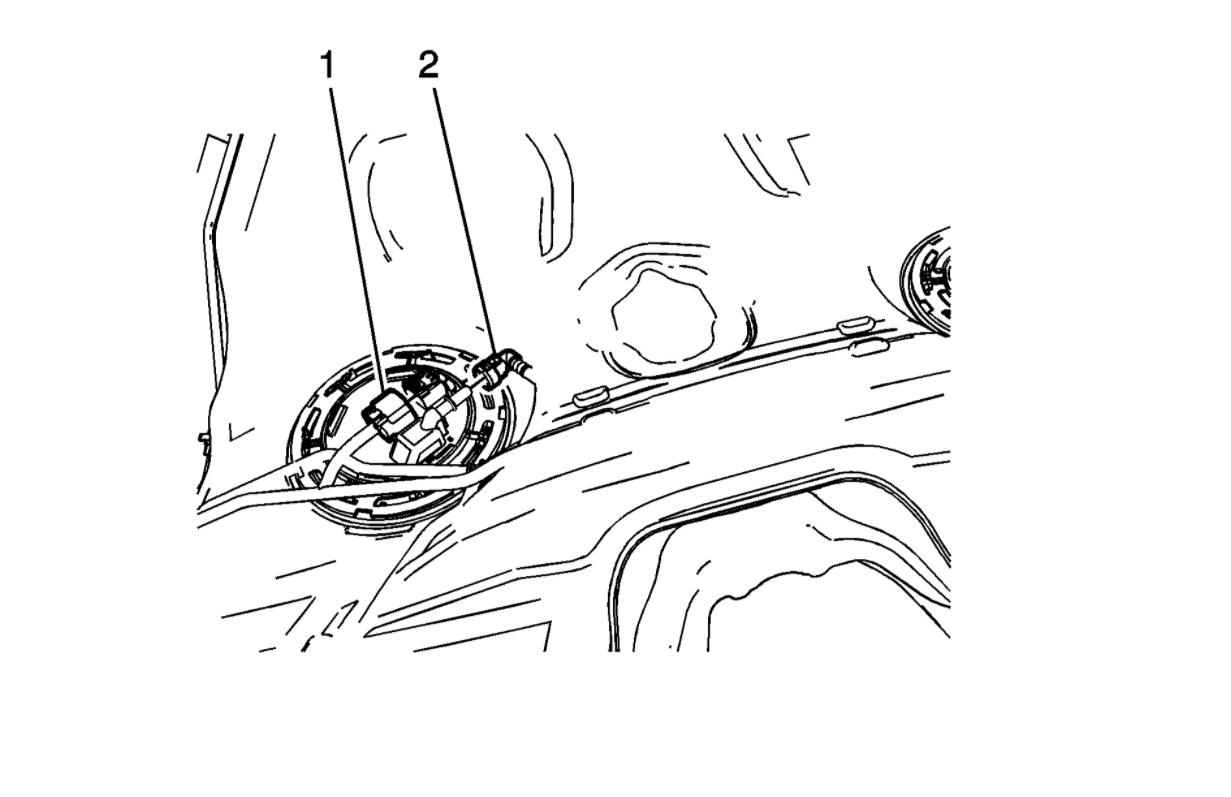
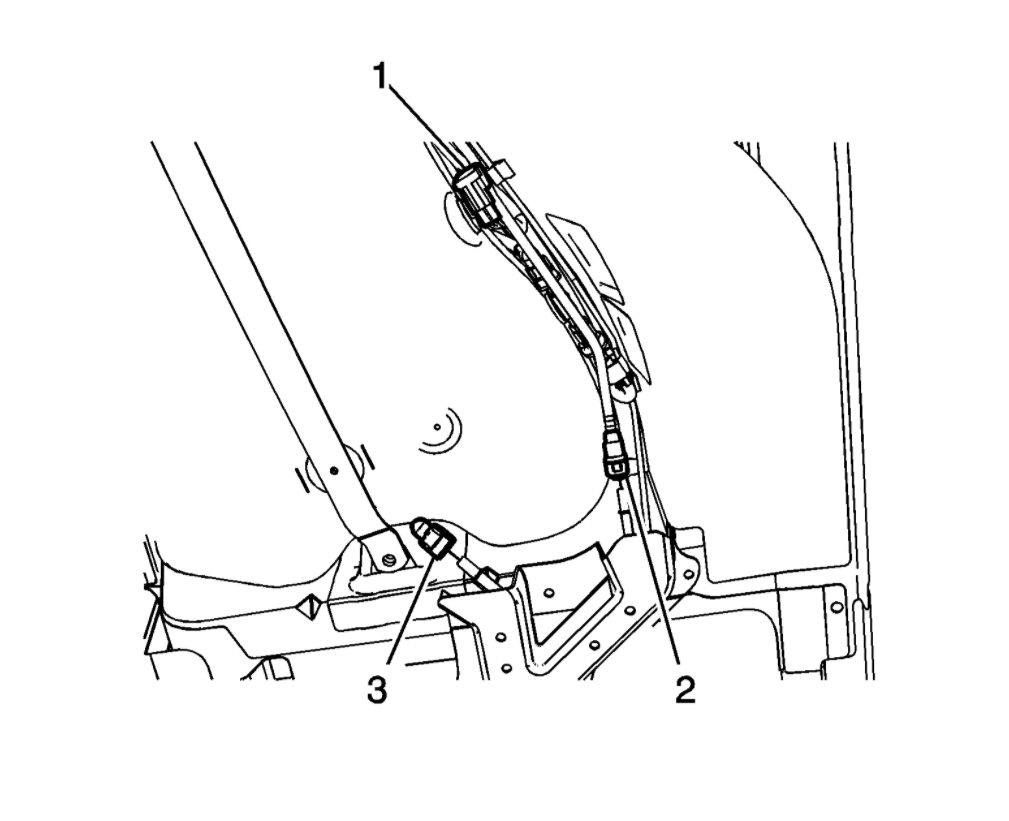
12. Disconnect the fuel tank electrical connector (1).
13. Disconnect the fuel feed line (3) and evaporative emission line (2). Refer to Plastic Collar Quick Connect Fitting Service (See: Fuel Line Coupler > Removal and Replacement > Plastic Collar Quick Connect Fitting Service) and Metal Collar Quick Connect Fitting Service (See: Fuel Line Coupler > Removal and Replacement > Metal Collar Quick Connect Fitting Service).
imageOpen In New TabZoom/Print
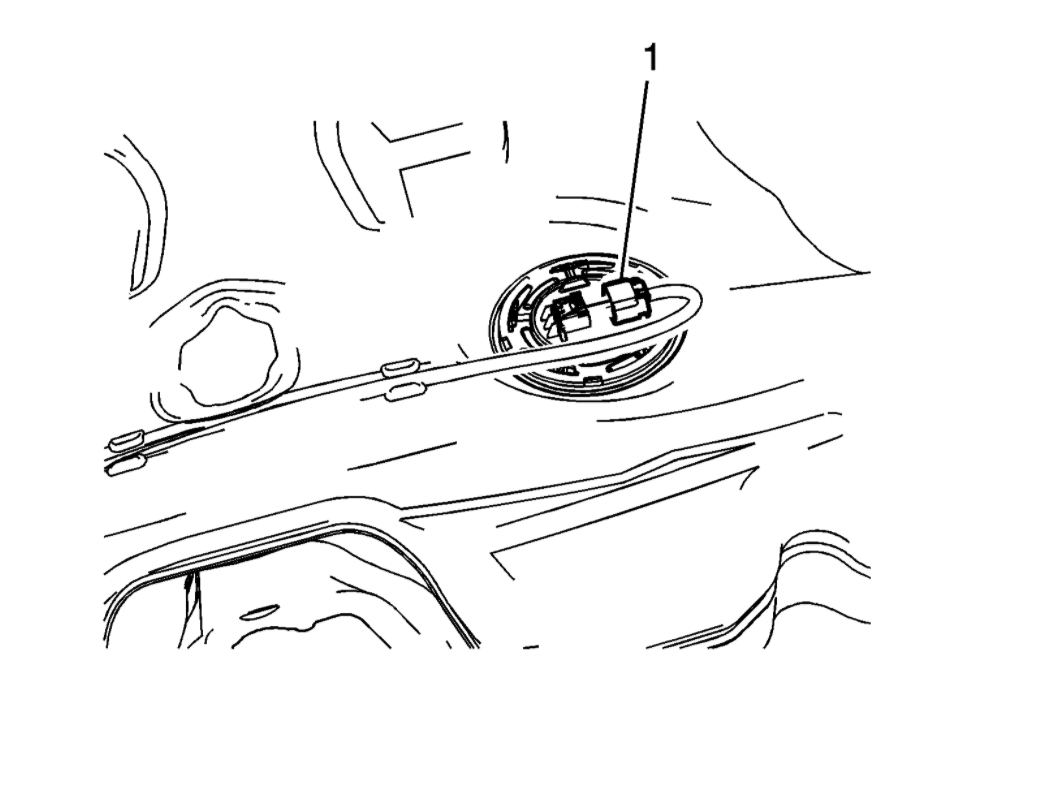
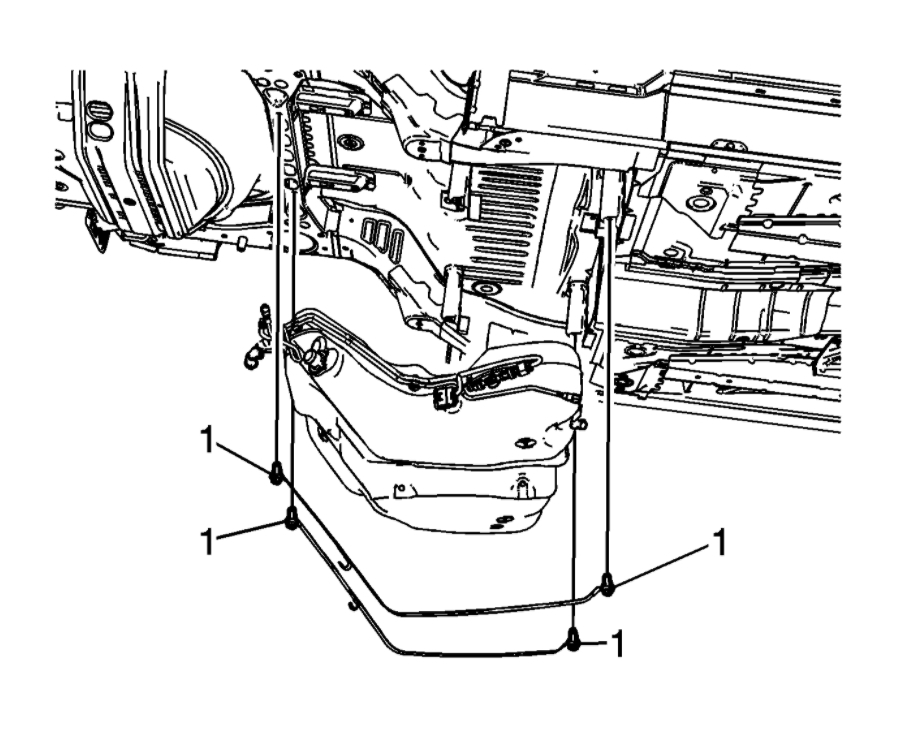
14. Support the fuel tank with a suitable jack.
15. Remove the fuel tank strap bolts (1).
16. Remove the fuel tank.
17. Remove the following components if replacing just the fuel tank.
1. Fuel pump module. Refer to Fuel Tank Fuel Pump Module Replacement - Right Side (See: Fuel Pump > Removal and Replacement > Fuel Tank Fuel Pump Module Replacement - Right Side).
2. Fuel level sensor. Refer to Fuel Level Sensor Replacement - Left Side (See: Fuel Level Sensor > Removal and Replacement > Fuel Level Sensor Replacement - Left Side).
3. Transfer components as necessary.
Images (Click to enlarge)
Oct 22, 2020 at 6:23 AM