Front vents will not blow air

Tiny
ALONZO ROSE
  • MEMBER
  • 2004 CHEVROLET TRAILBLAZER
  • V6
  • 2WD
  • AUTOMATIC
  • 143,000 MILES
So my grandpa has the vehicle listed above, the air blows out the side, feet, and dash vents but not the front vents. I have tried a new actuator, and I tried resetting the fuses under the back driver side seat. Does anyone know what else I can try to do?
Tuesday, May 14th, 2019 AT 4:29 PM

14 Replies

Tiny
ASEMASTER6371
  • MECHANIC
  • 52,797 POSTS
Good afternoon,

What actuator did you replace as there are several?

I attached a picture of the actuator that controls modes.

Roy
Was this
answer
helpful?
Yes
No
+1
Tuesday, May 14th, 2019 AT 5:01 PM
Tiny
ALONZO ROSE
  • MEMBER
  • 8 POSTS
From all the videos I watched I replaced the blend door actuator, what is this one called that I would have to replace, and thanks for the tip. Lol, I don't know that much.
Was this
answer
helpful?
Yes
No
Tuesday, May 14th, 2019 AT 5:12 PM
Tiny
ASEMASTER6371
  • MECHANIC
  • 52,797 POSTS
Is the one in the picture the one you replaced? That is the one for the blend door.

You're welcome.

Always glad to help.

Roy
Was this
answer
helpful?
Yes
No
Tuesday, May 14th, 2019 AT 5:31 PM
Tiny
ALONZO ROSE
  • MEMBER
  • 8 POSTS
That is the one I replaced, it may have been a faulty one, even though it was new.
Was this
answer
helpful?
Yes
No
Tuesday, May 14th, 2019 AT 5:50 PM
Tiny
ASEMASTER6371
  • MECHANIC
  • 52,797 POSTS
I would remove it again and hook up the wires. Then turn on the key and command heat and cold and see if the motor turns back and forth.

Roy
Was this
answer
helpful?
Yes
No
Tuesday, May 14th, 2019 AT 6:01 PM
Tiny
ALONZO ROSE
  • MEMBER
  • 8 POSTS
At first it did easily, but when I put the new one on it didnt turn at all so I put the old one back on and it barely budgeds back and forth now, not much at all.
Was this
answer
helpful?
Yes
No
Tuesday, May 14th, 2019 AT 6:09 PM
Tiny
ASEMASTER6371
  • MECHANIC
  • 52,797 POSTS
Does it move free with the motor off the case and the wires hooked up?

Roy
Was this
answer
helpful?
Yes
No
Tuesday, May 14th, 2019 AT 6:13 PM
Tiny
ALONZO ROSE
  • MEMBER
  • 8 POSTS
I didn't check the actuator its self. I tried turning the little plastic piece that the actuator attaches to, it turns but it's tough to turn it.
Was this
answer
helpful?
Yes
No
Tuesday, May 14th, 2019 AT 6:17 PM
Tiny
ASEMASTER6371
  • MECHANIC
  • 52,797 POSTS
Okay, that may be the issue. It should turn freely.

Is there anything in there that you can see?

Roy
Was this
answer
helpful?
Yes
No
Wednesday, May 15th, 2019 AT 4:27 PM
Tiny
ALONZO ROSE
  • MEMBER
  • 8 POSTS
No.
Was this
answer
helpful?
Yes
No
Wednesday, May 15th, 2019 AT 4:47 PM
Tiny
ALONZO ROSE
  • MEMBER
  • 8 POSTS
I don't see anything.
Was this
answer
helpful?
Yes
No
Wednesday, May 15th, 2019 AT 4:47 PM
Tiny
ASEMASTER6371
  • MECHANIC
  • 52,797 POSTS
Then good chance the door is the issue inside. The heater case would have to be removed and opened up to find the issue.

The downside is the dashboard has to be removed to gain access to the case that holds the door.

Roy

HVAC MODULE ASSEMBLY REPLACEMENT

TOOLS REQUIRED
- J 43181 Heater Line Quick Connect Release Tool
- J 39400-A Halogen Leak Detector

REMOVAL PROCEDURE
1. Drain the engine coolant. Refer to Draining and Filling Cooling System (Body Vin Code 6) Draining and Filling Cooling System (Body Vin Code 3) in Cooling System.
2. Recover the refrigerant.
3. Remove the I/P carrier. See: Dashboard / Instrument Panel > Removal and Replacement > Instrument Panel (IP) - Carrier Replacement
4. Reposition the heater hose clamps using J 43181.
5. Disconnect the heater hoses from the heater core.

ImageOpen In New TabZoom/Print

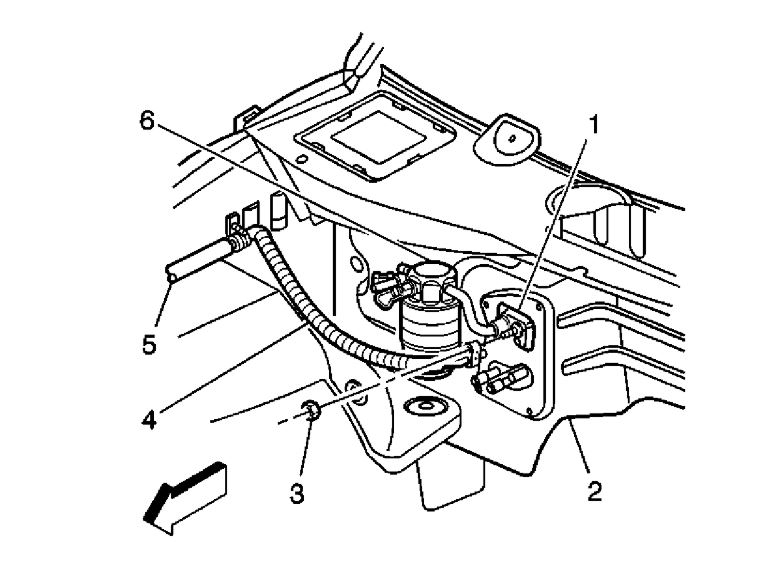
6. Remove the retaining nut (3) from the accumulator (6) at the evaporator (1).
7. Disconnect the accumulator (6) from the evaporator (1).
8. Disconnect the evaporator tube (4) from the evaporator (1).
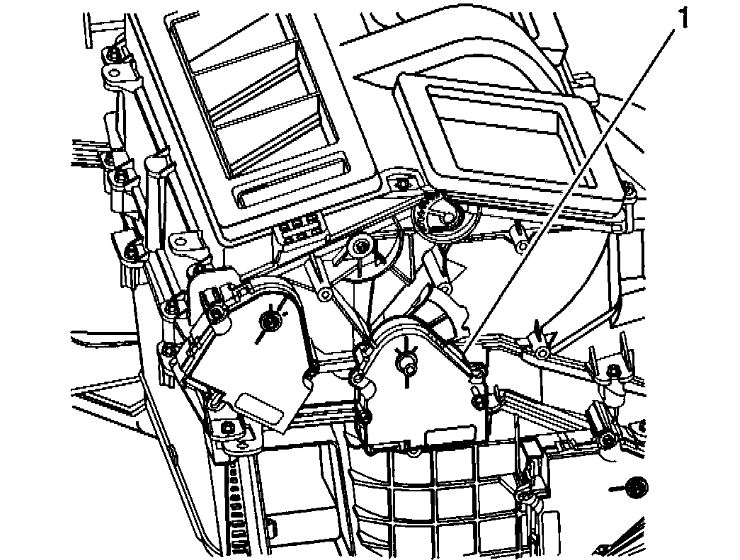
9. Disconnect all of the electrical connectors to the HVAC module assembly.
10. Remove the HVAC module assembly.

INSTALLATION PROCEDURE

imageOpen In New TabZoom/Print

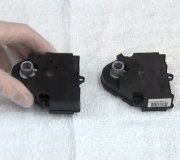
1. If replacing the HVAC module assembly (8), transfer the components from the old HVAC module assembly as necessary.
2. Install the HVAC module assembly (8).
3. Connect all of the electrical connectors to the HVAC module assembly.

ImageOpen In New TabZoom/Print

4. Connect the heater hoses to the heater core.
5. Connect the evaporator tube (4) to the evaporator (1).
6. Install the accumulator (6) to the evaporator (1).
7. Tighten the accumulator retaining nut.

NOTE: Refer to Fastener Notice in Service Precautions.
See: Heating and Air Conditioning > Vehicle Damage Warnings > Fastener Notice

Tighten
Tighten the nut to 4.5 N.M (40 lb in).

8. Install the I/P carrier.
9. Evacuate and recharge the A/C system.
10. Leak test the fittings of the components using the J 39400.
11. Refill the engine coolant. Refer to Draining and Filling Cooling System (Body Vin Code 6) Draining and Filling Cooling System (Body Vin Code 3) in Cooling System.
Was this
answer
helpful?
Yes
No
Wednesday, May 15th, 2019 AT 5:04 PM
Tiny
ALONZO ROSE
  • MEMBER
  • 8 POSTS
Thanks a lot man, I am going to give it a shot.
Was this
answer
helpful?
Yes
No
Wednesday, May 15th, 2019 AT 5:22 PM
Tiny
ASEMASTER6371
  • MECHANIC
  • 52,797 POSTS
You are welcome.

Always glad to help.

Roy
Was this
answer
helpful?
Yes
No
Wednesday, May 15th, 2019 AT 5:28 PM

Please login or register to post a reply.

Sponsored links