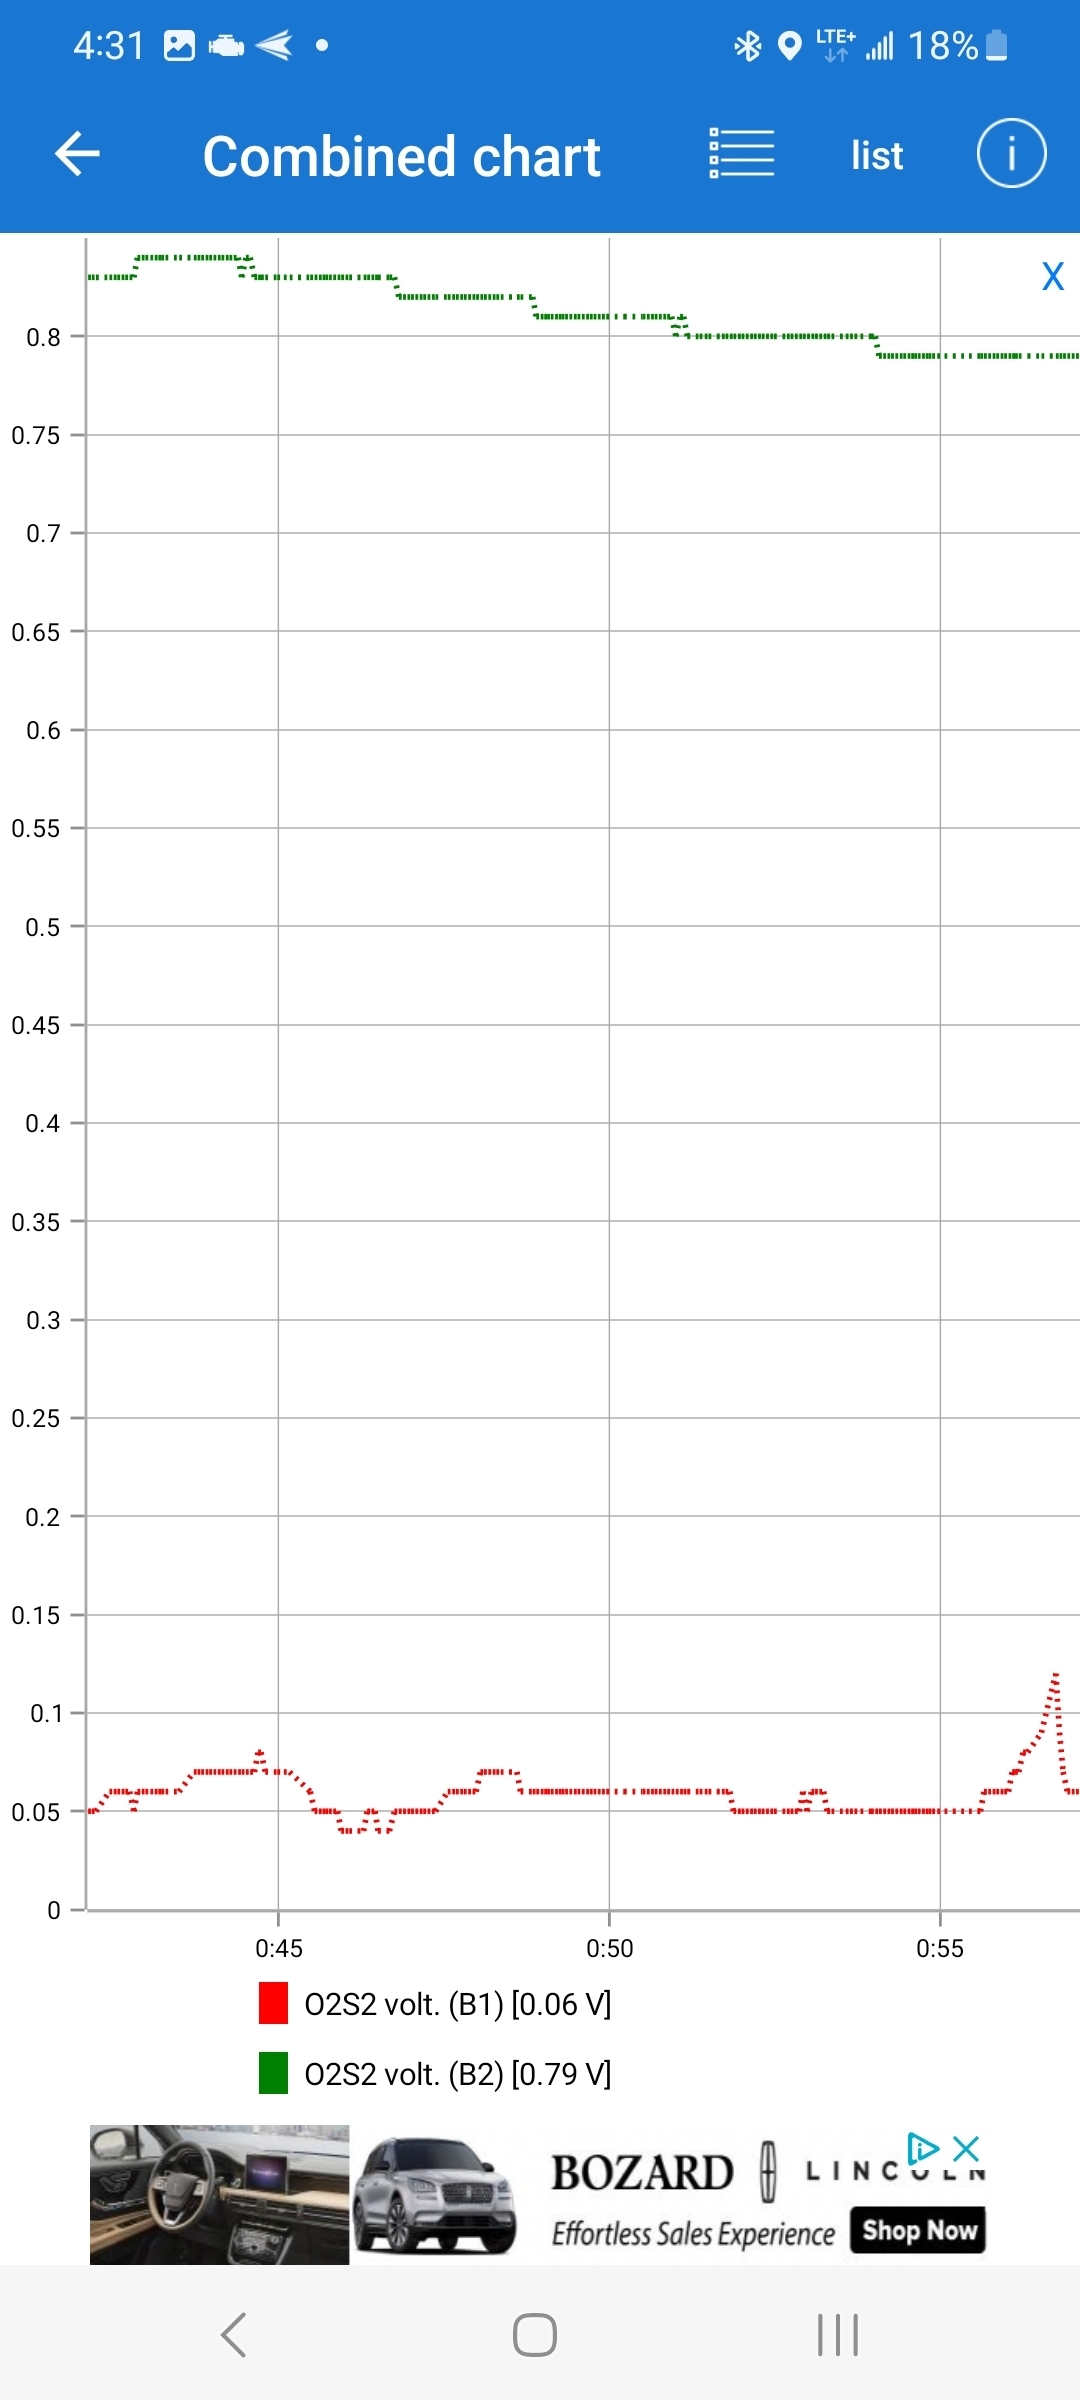
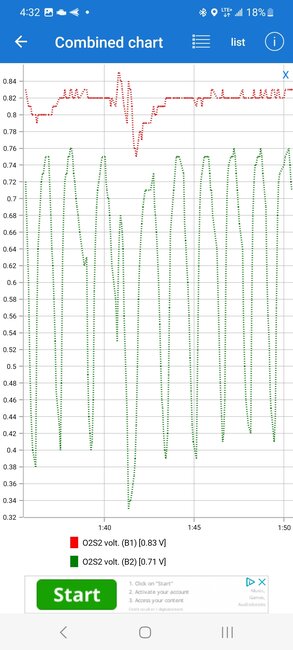
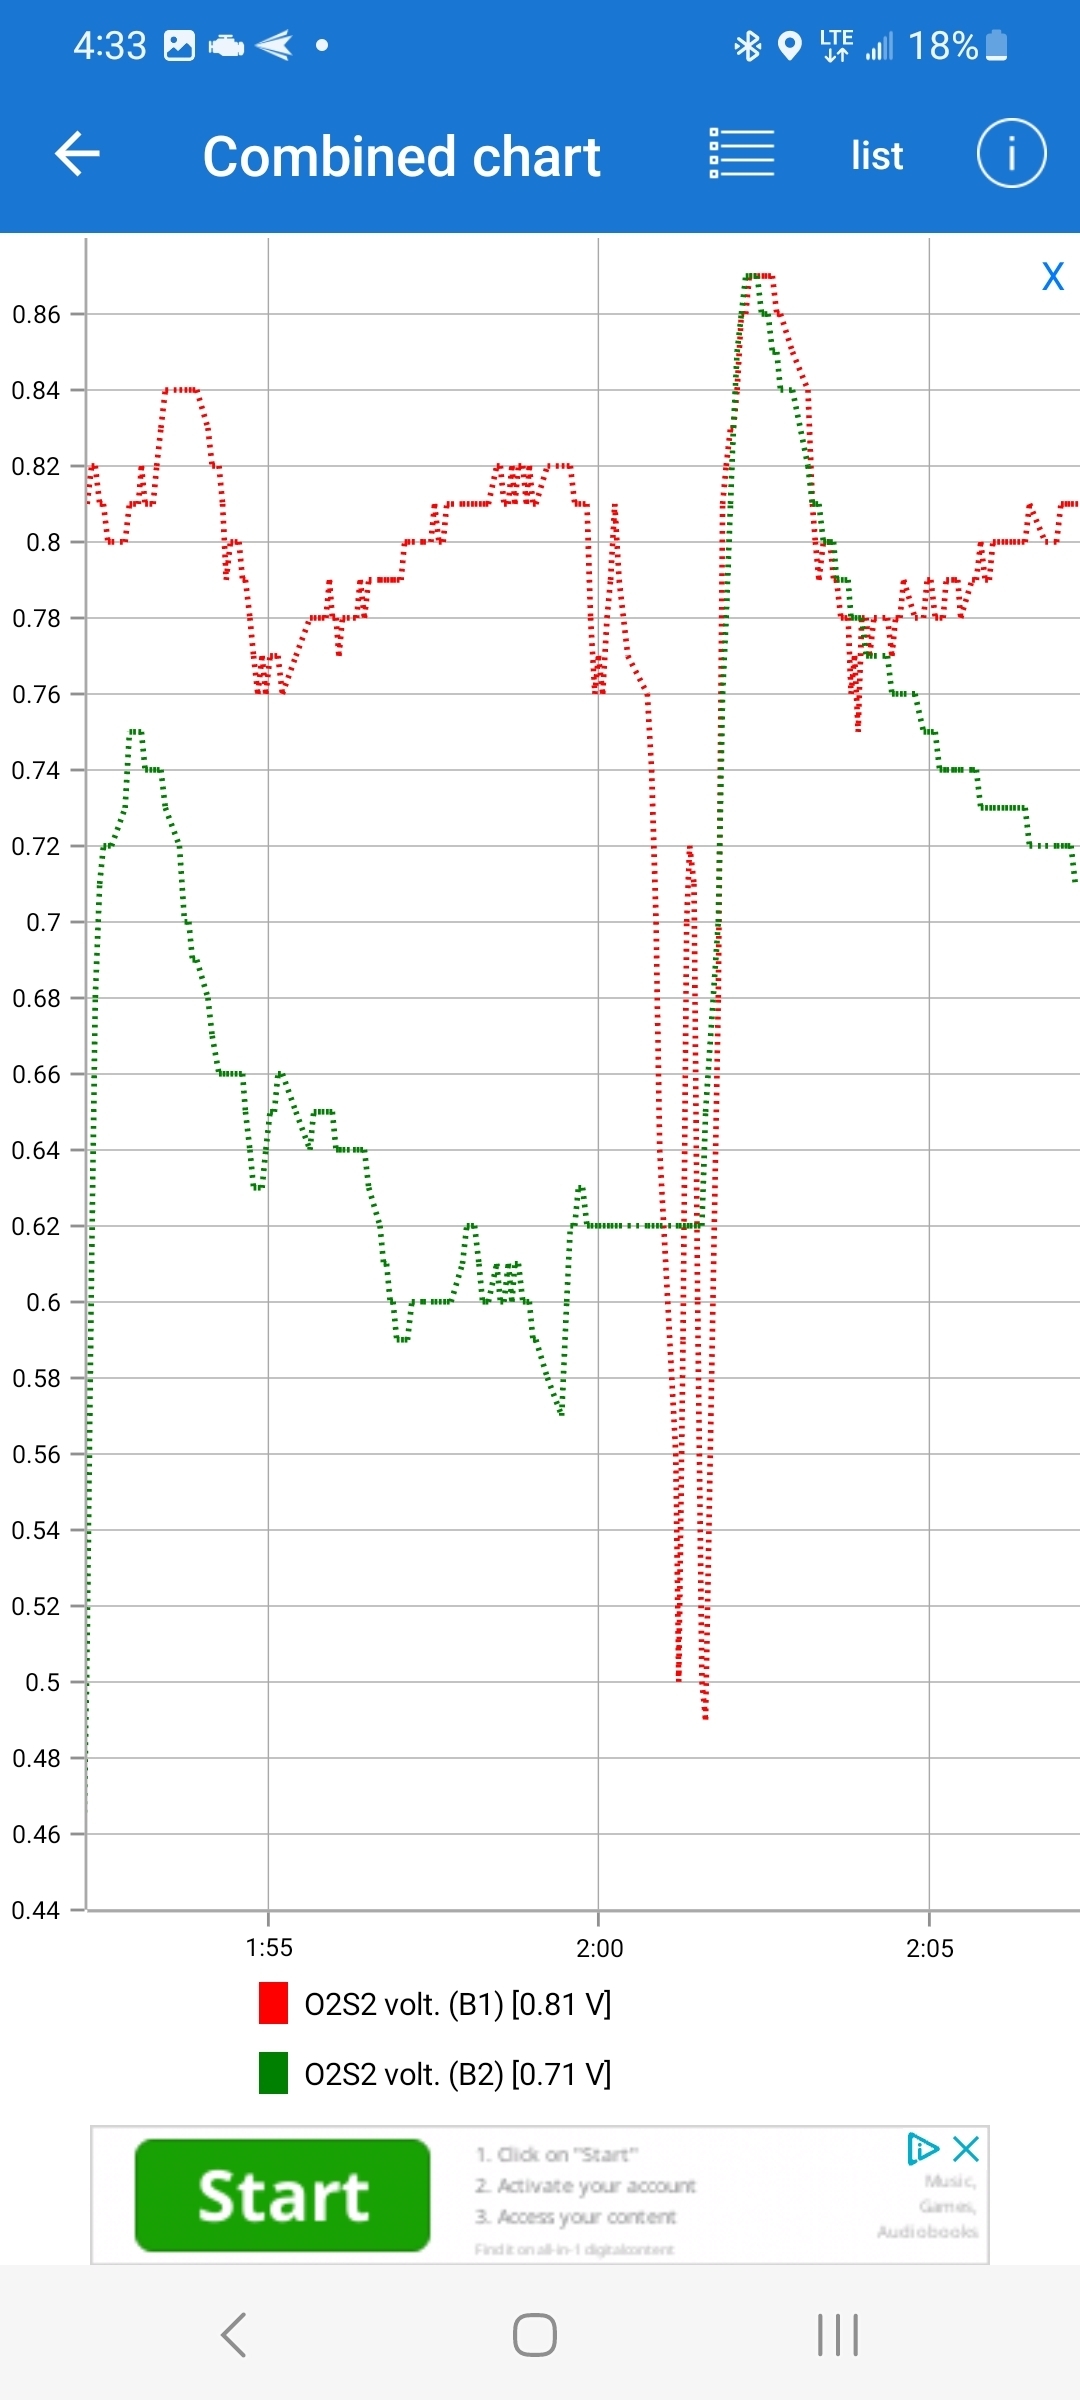
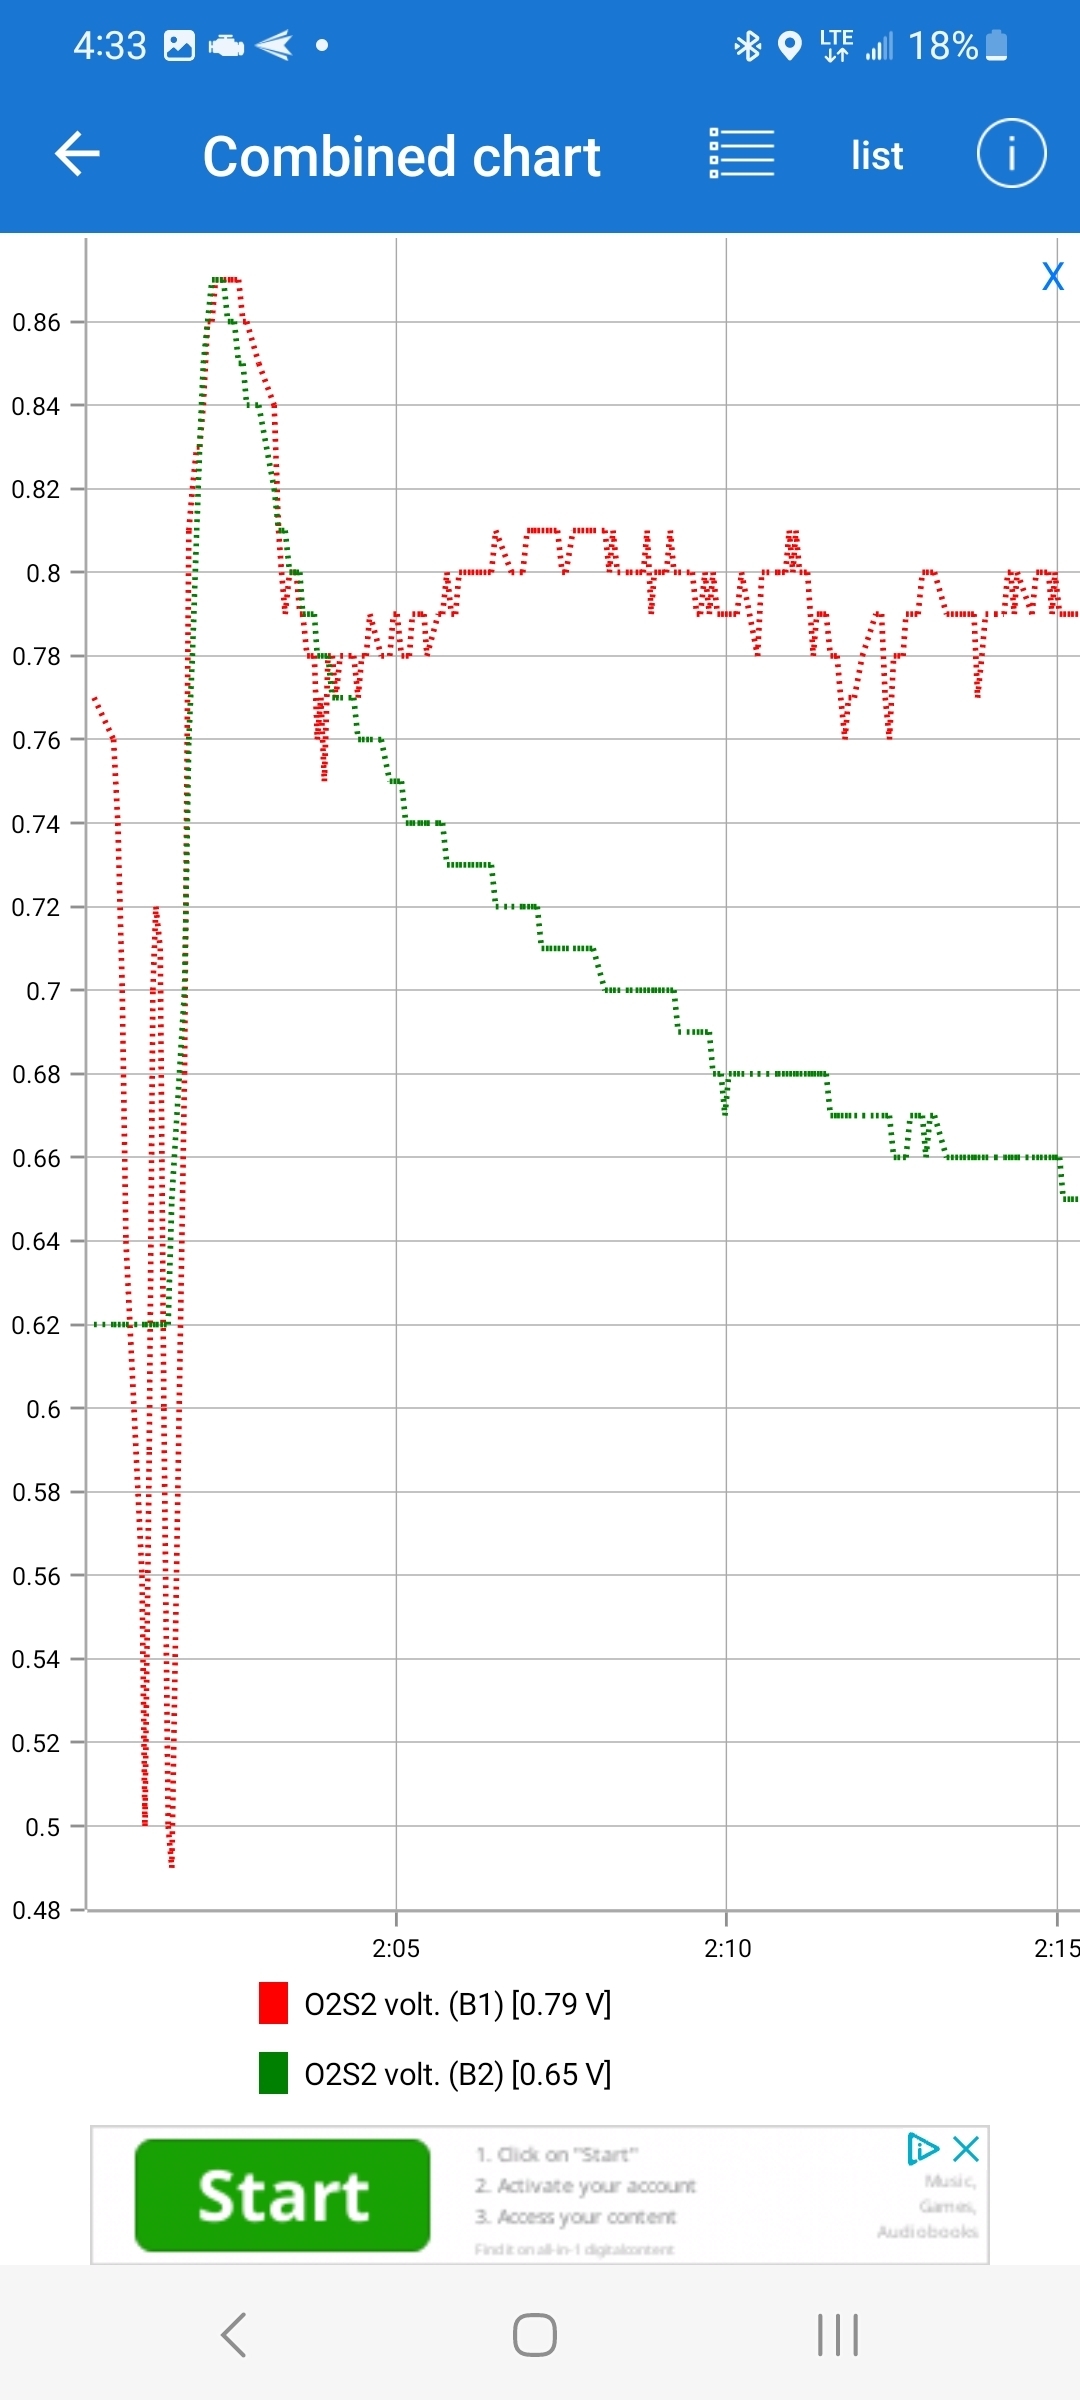
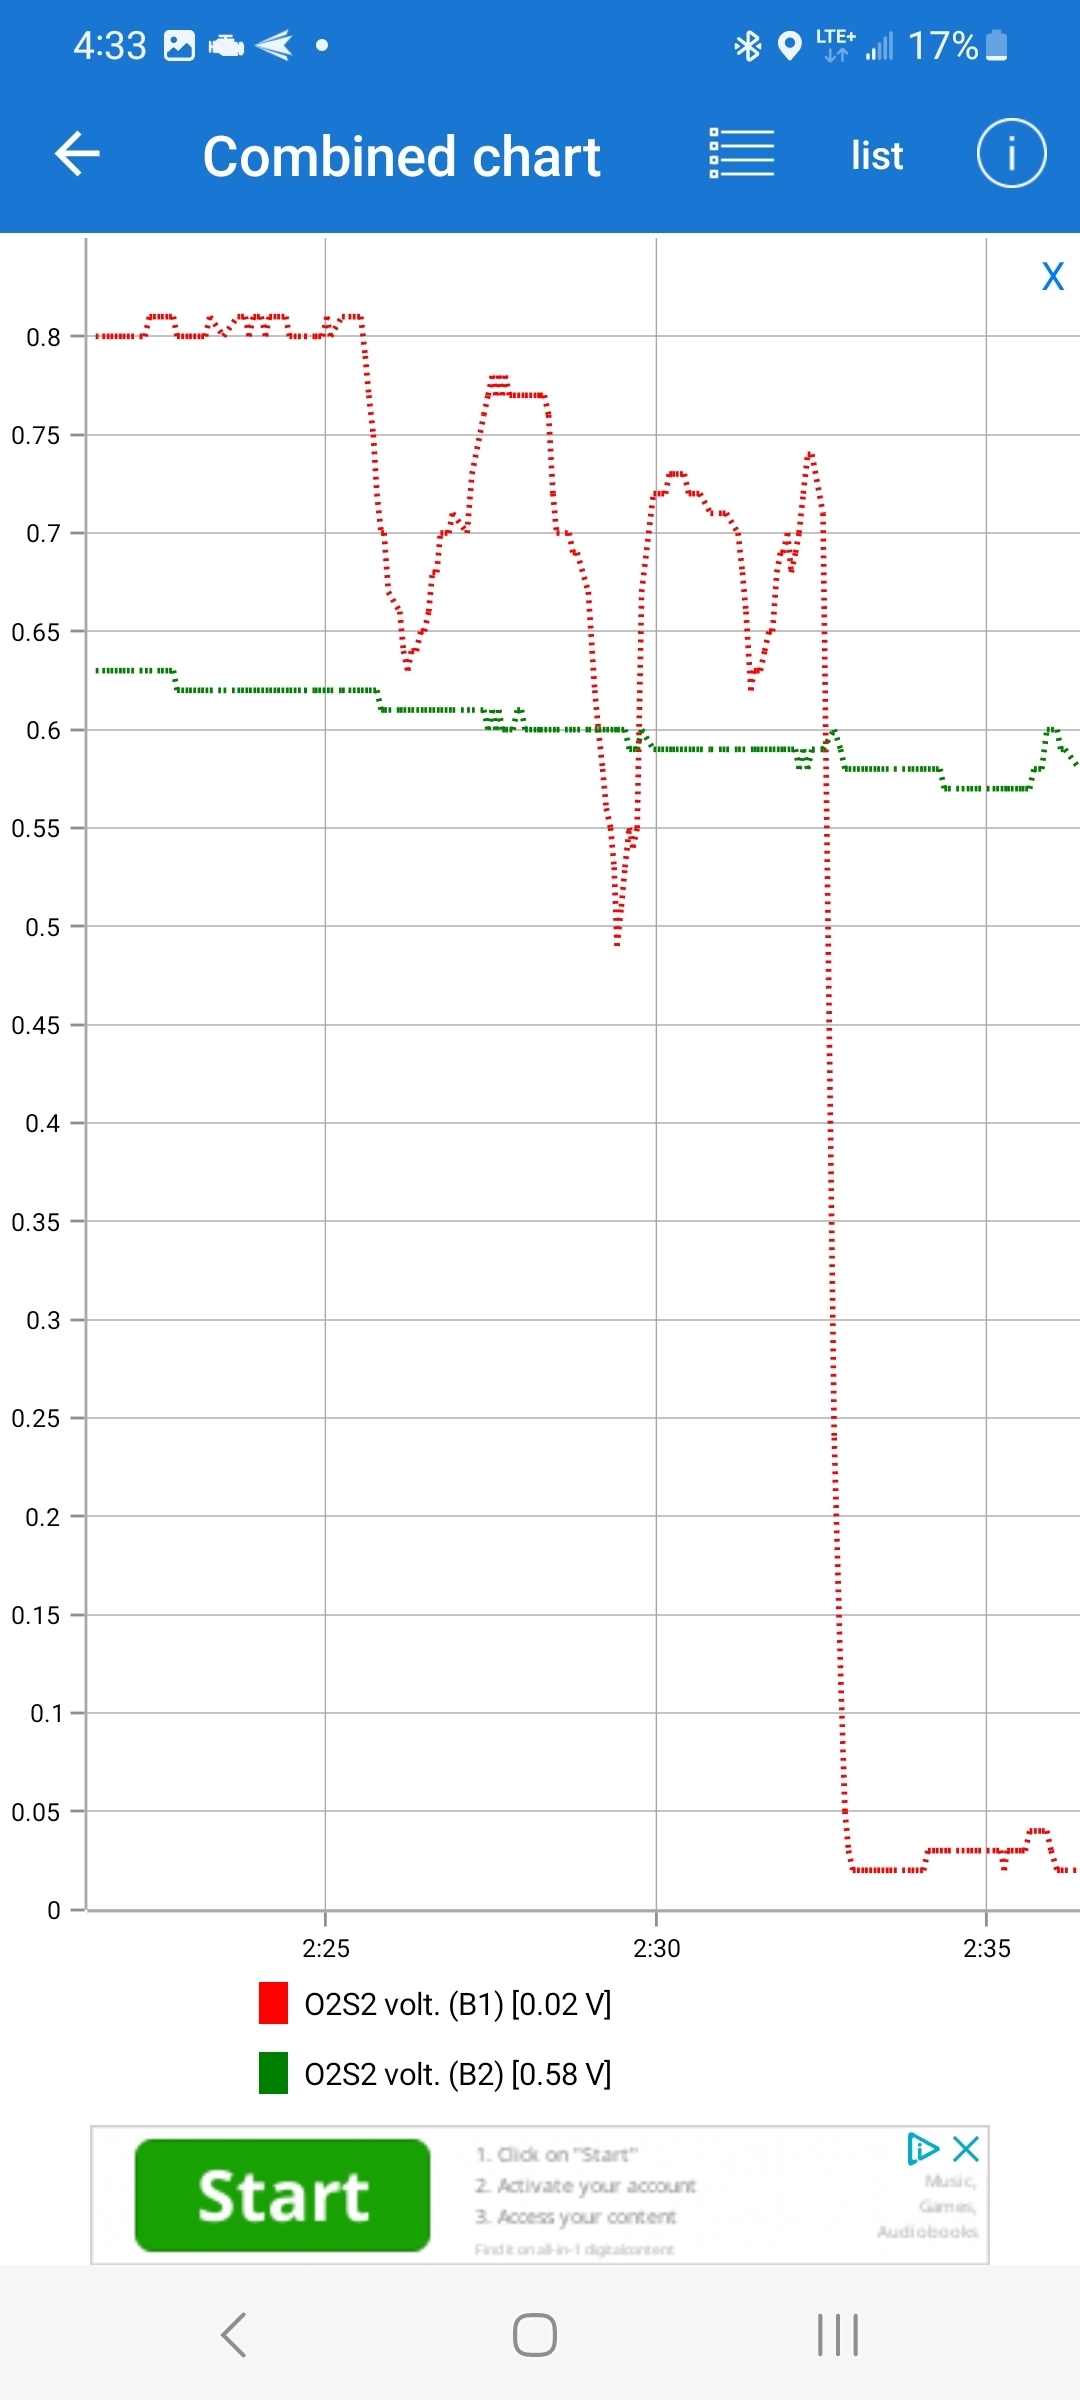
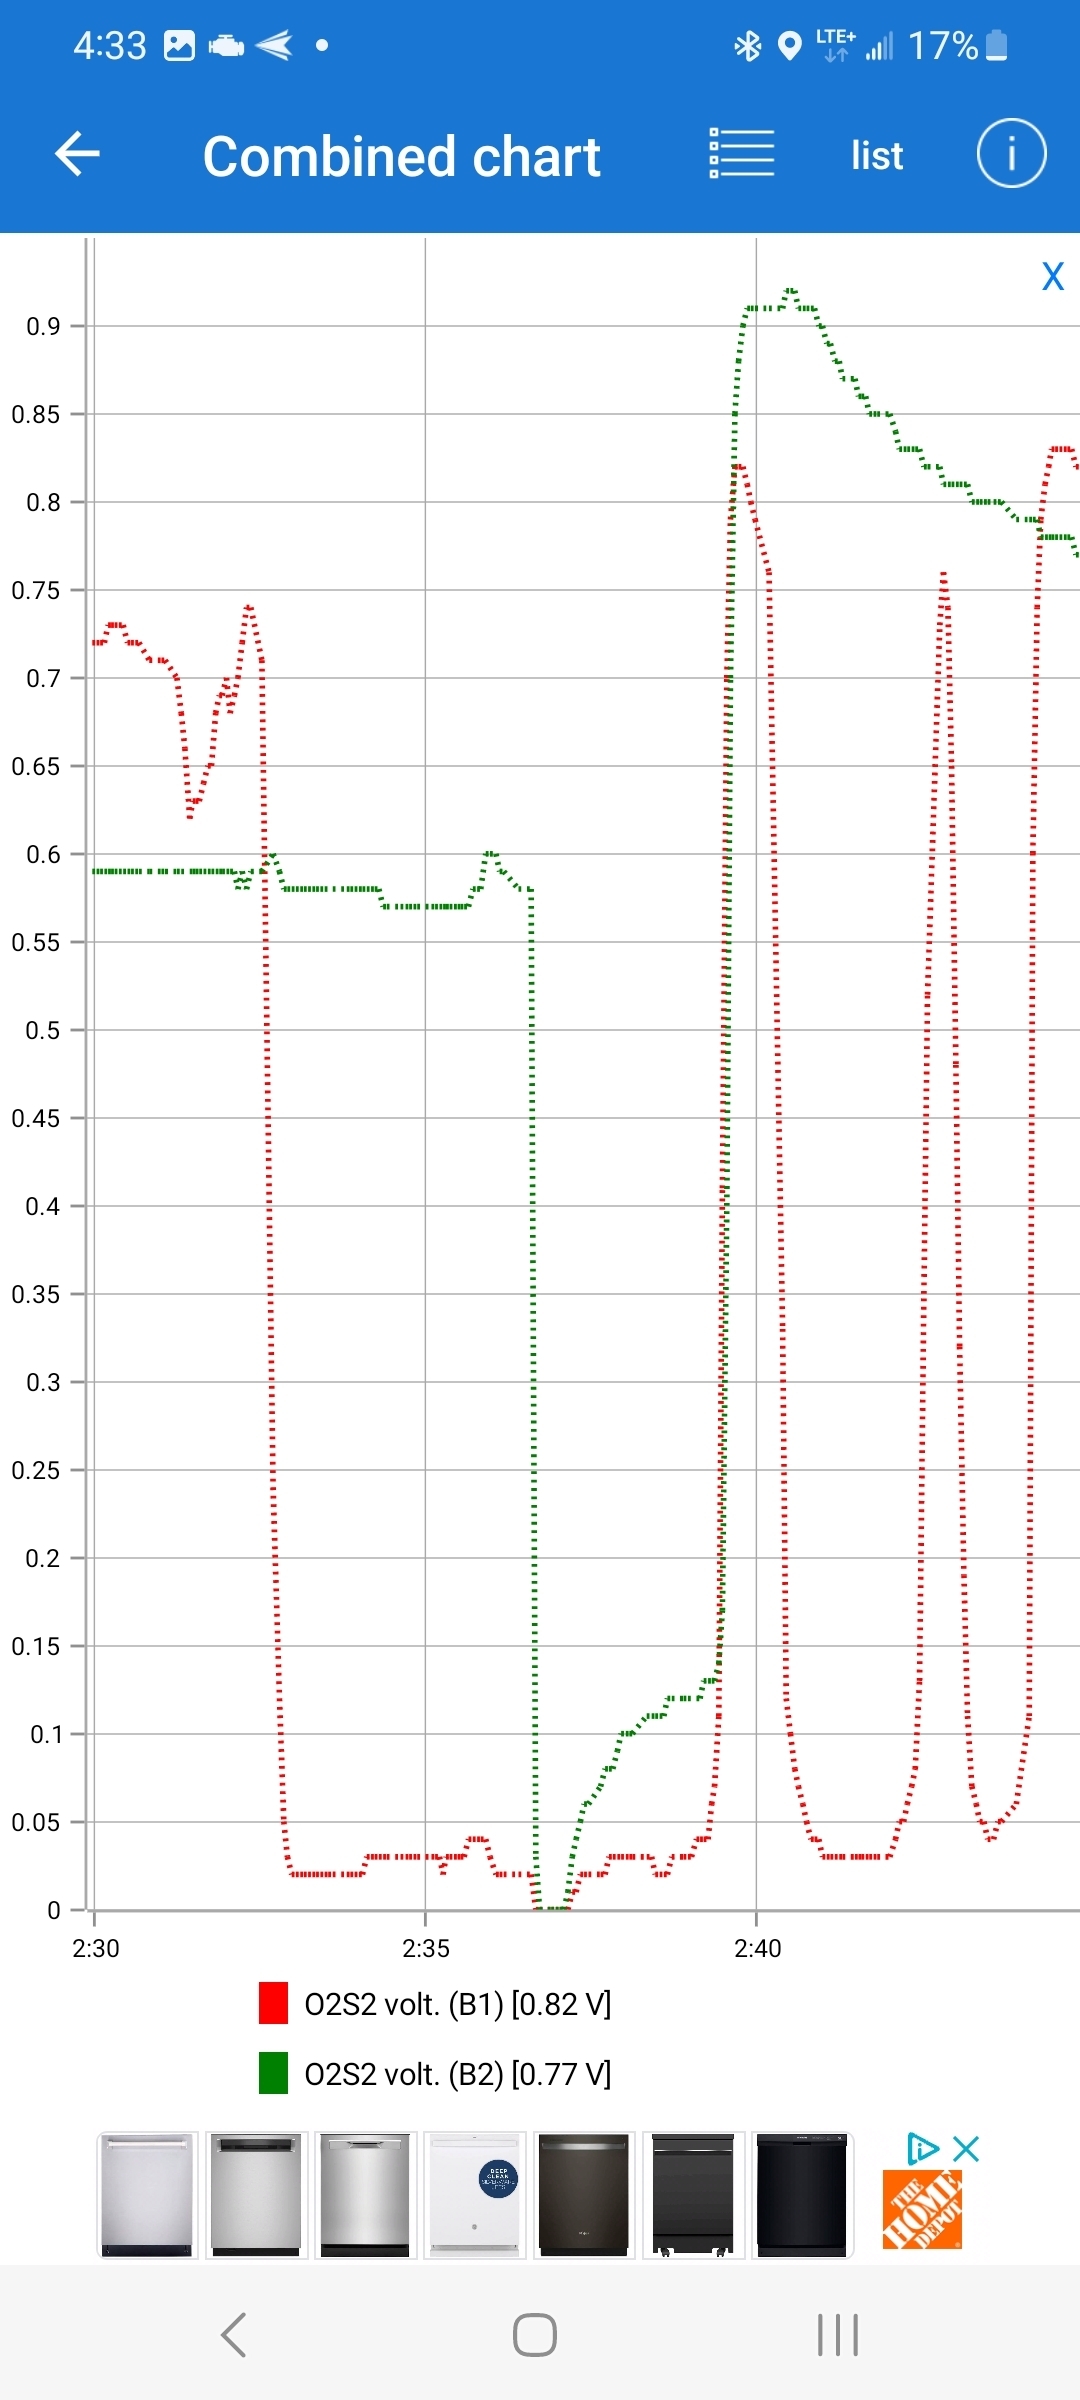
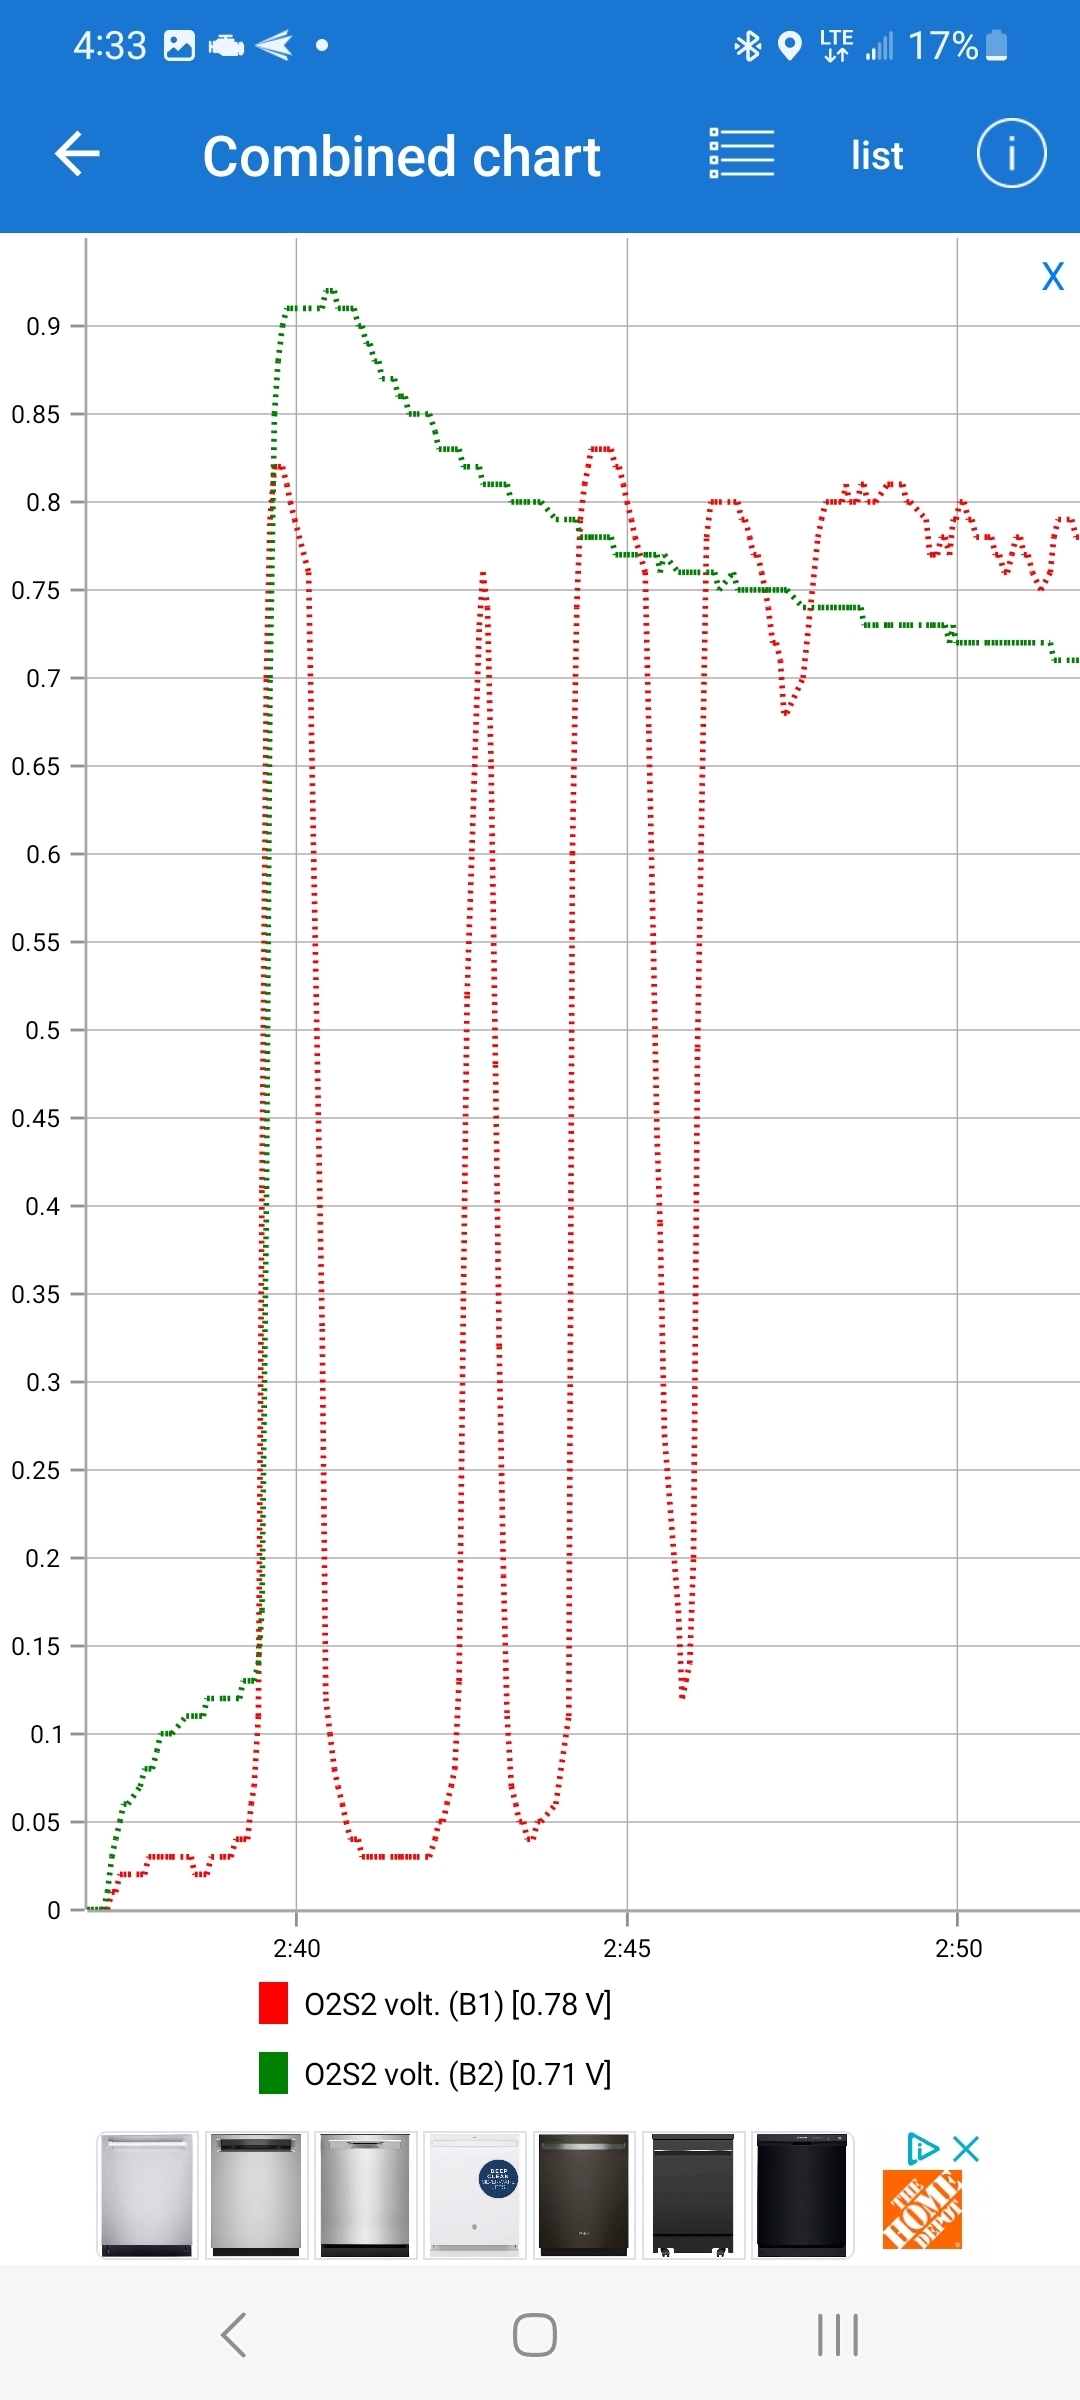
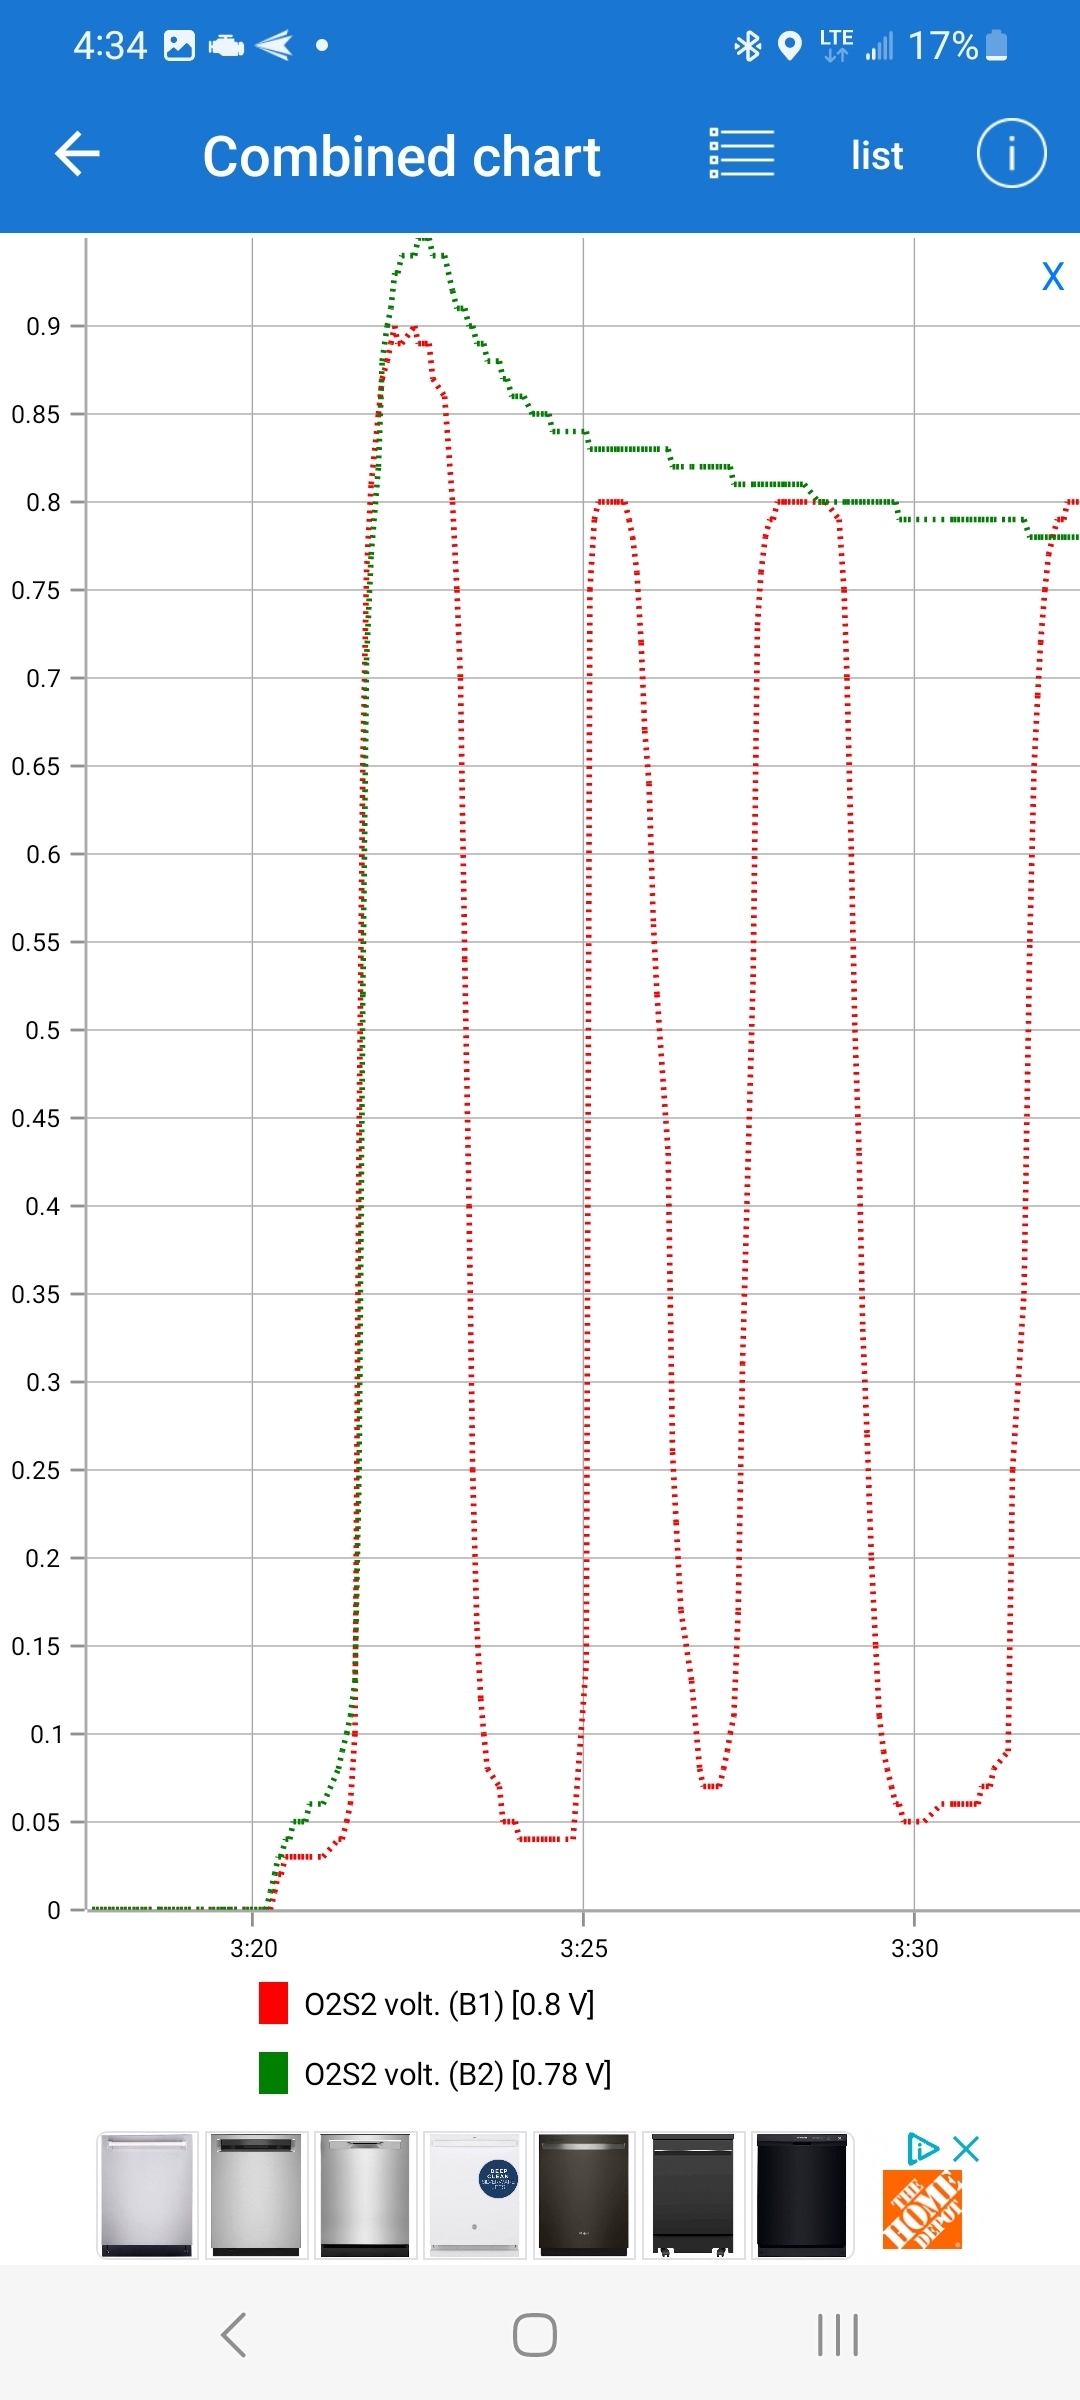
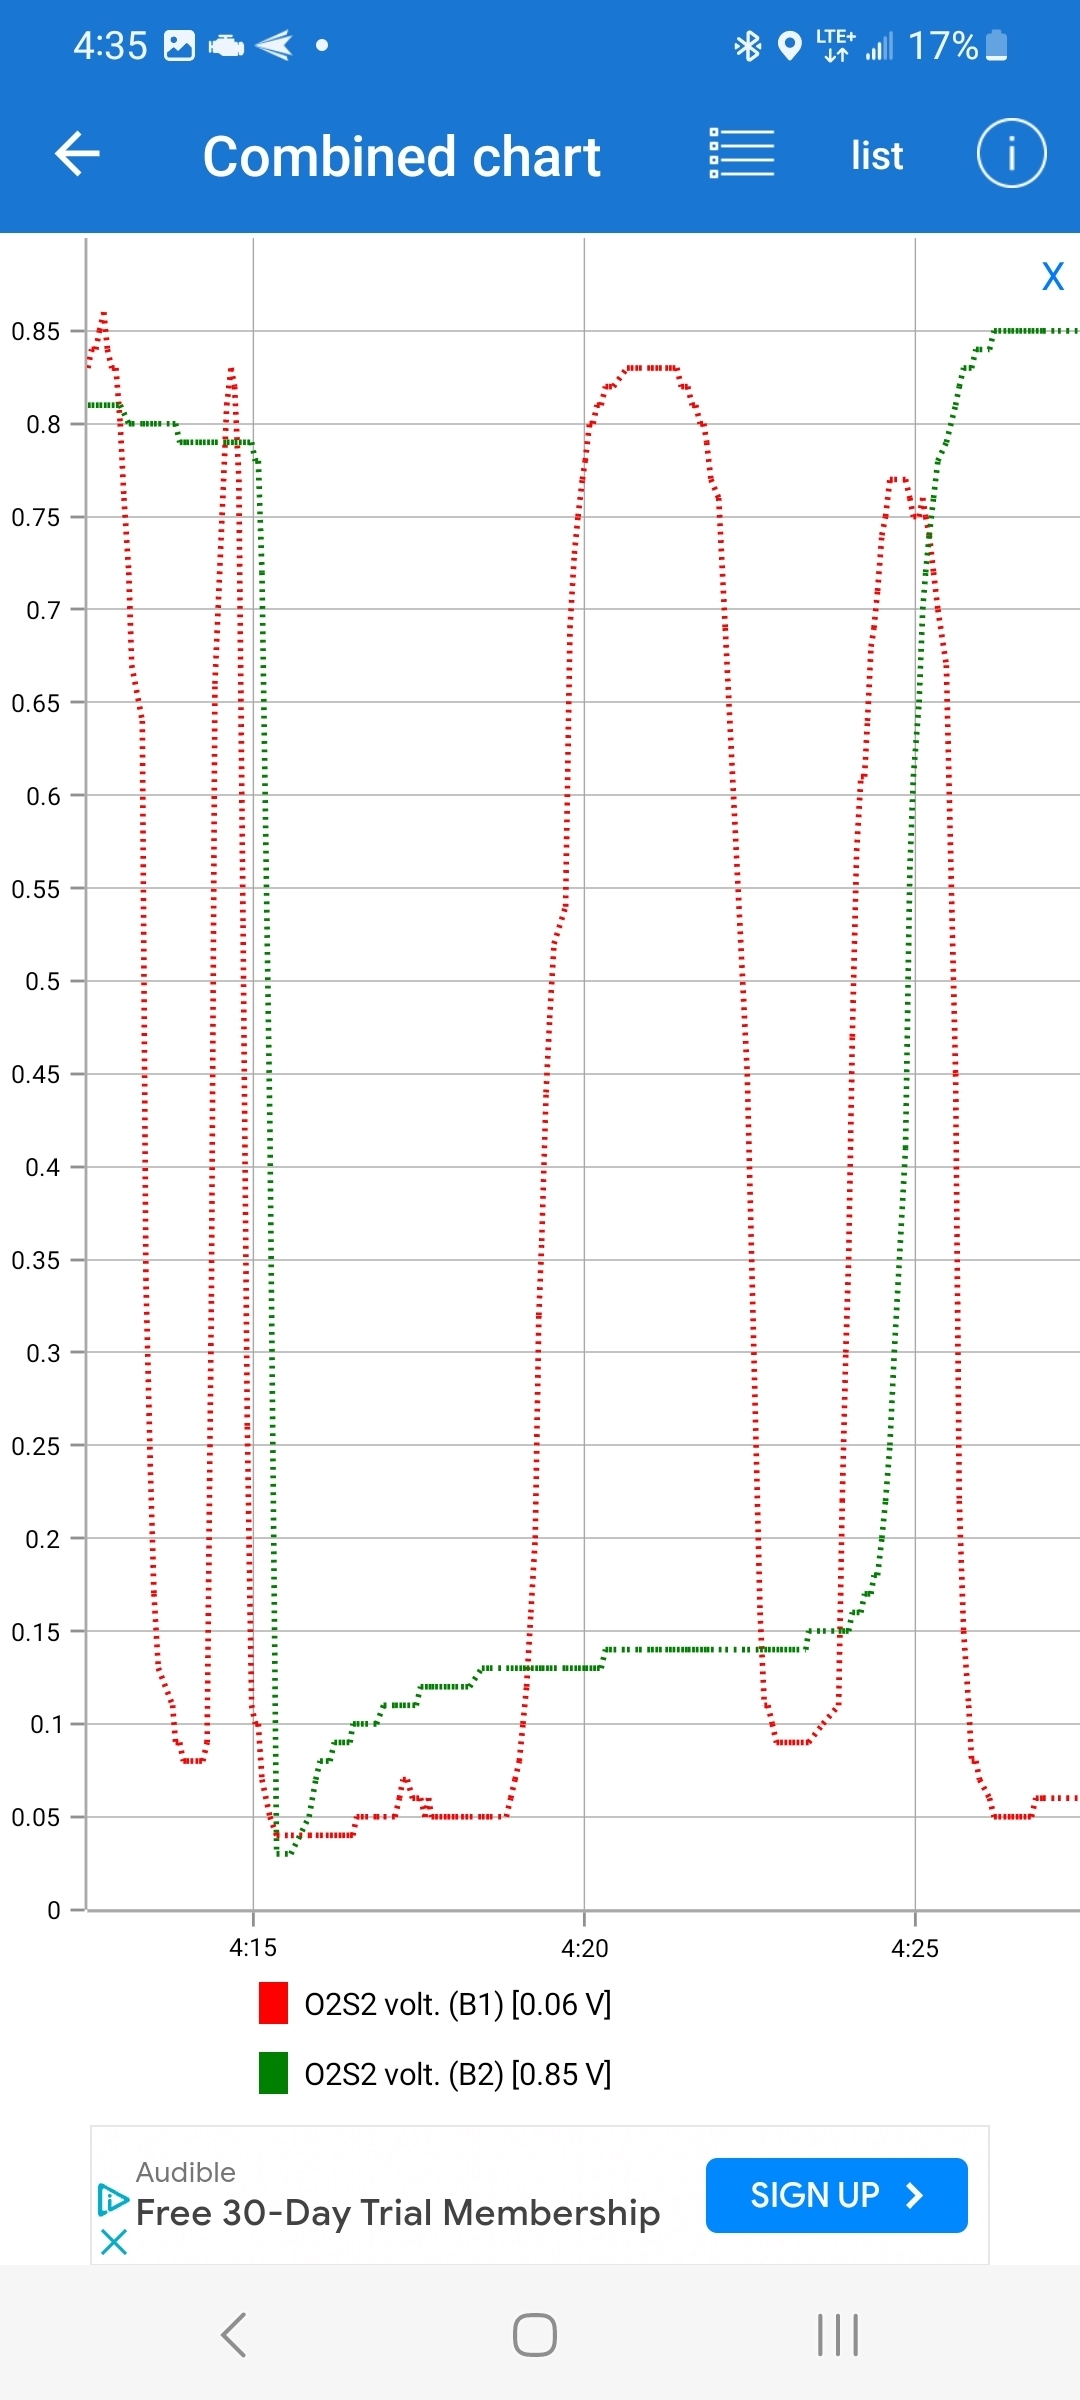
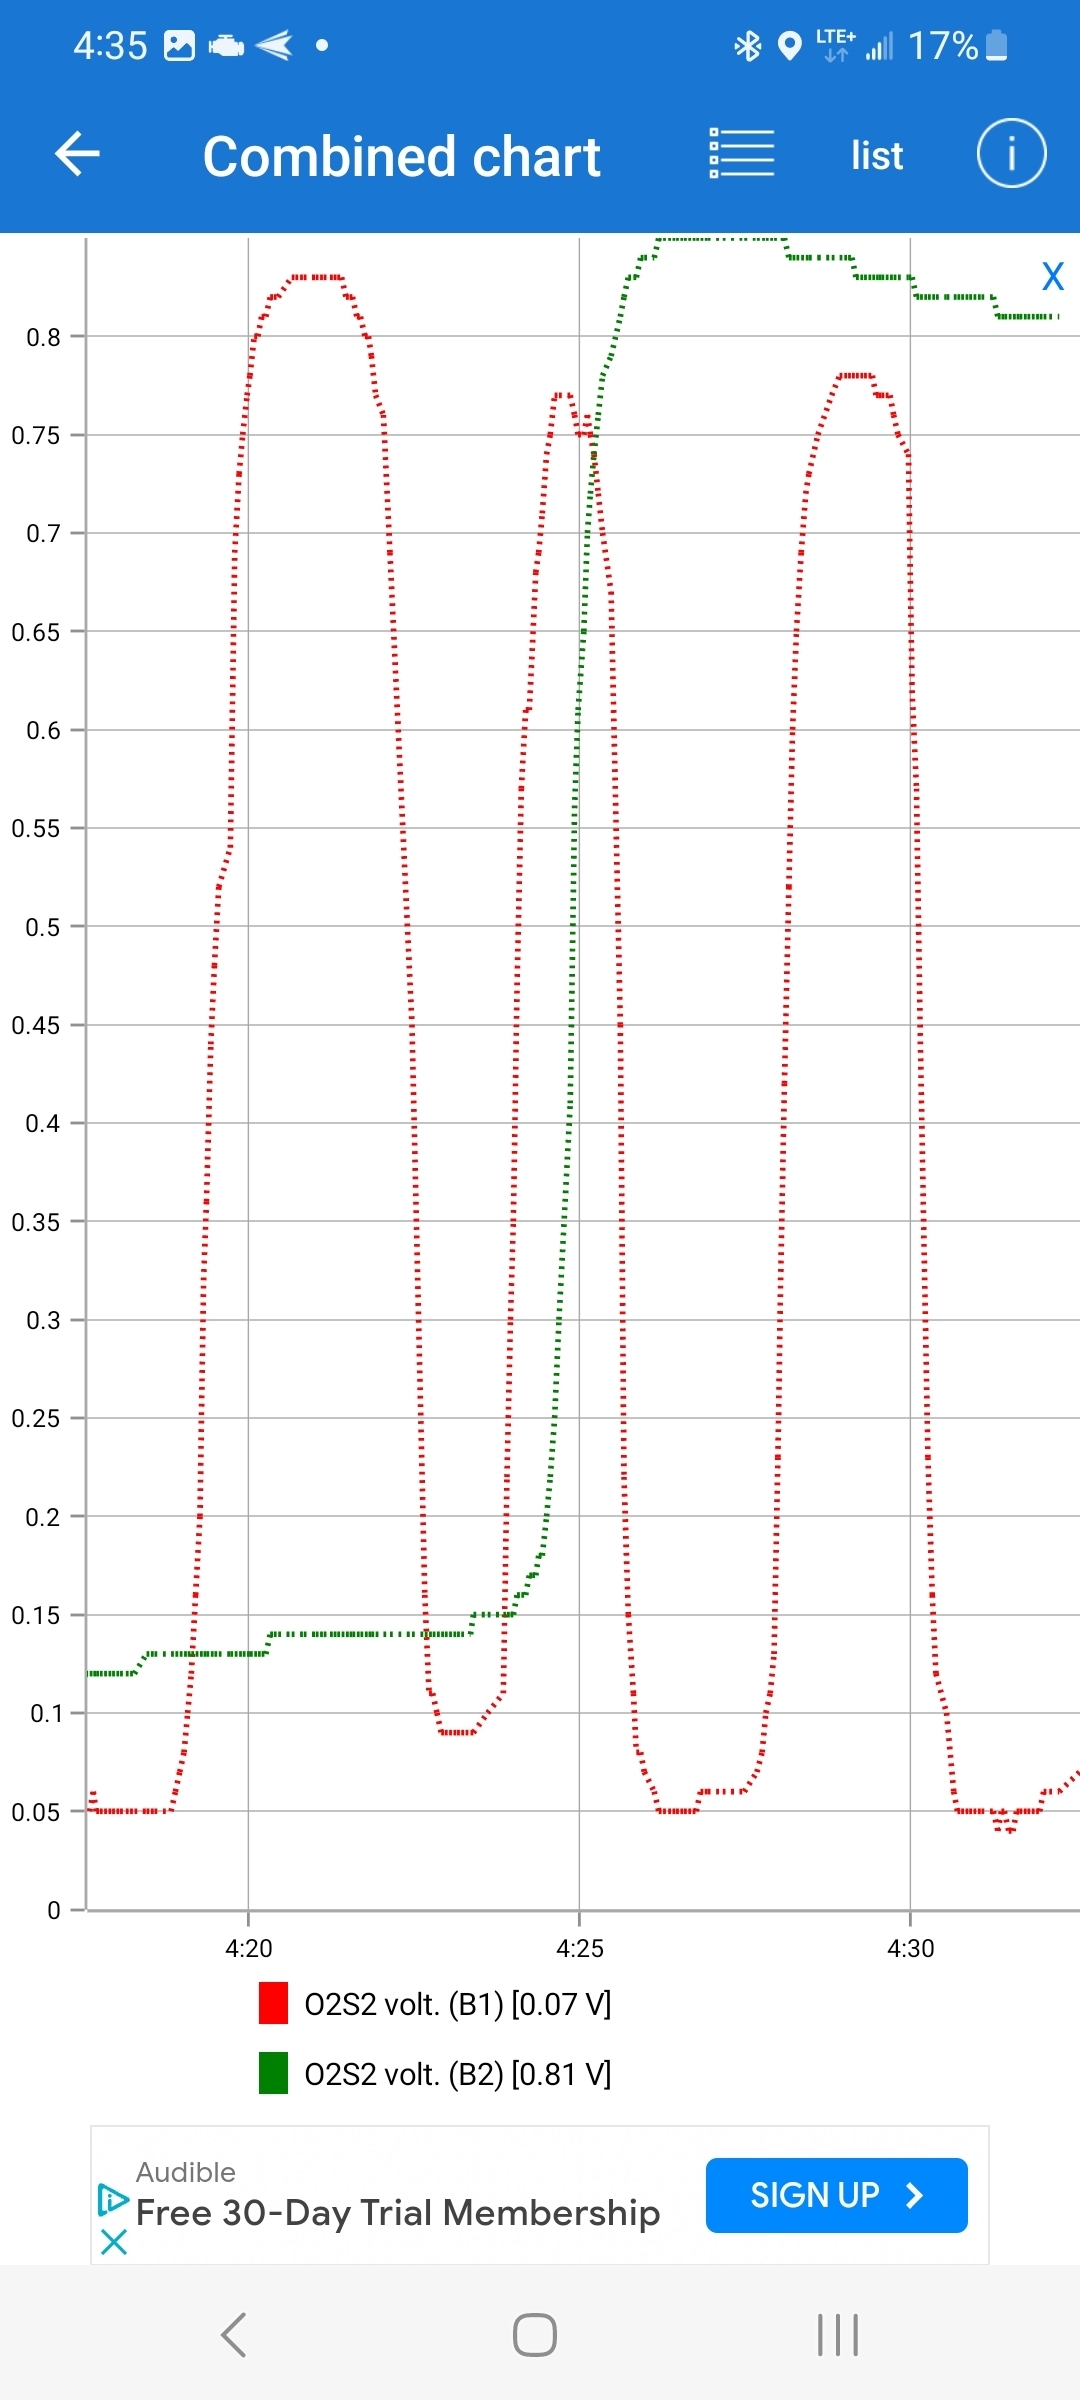
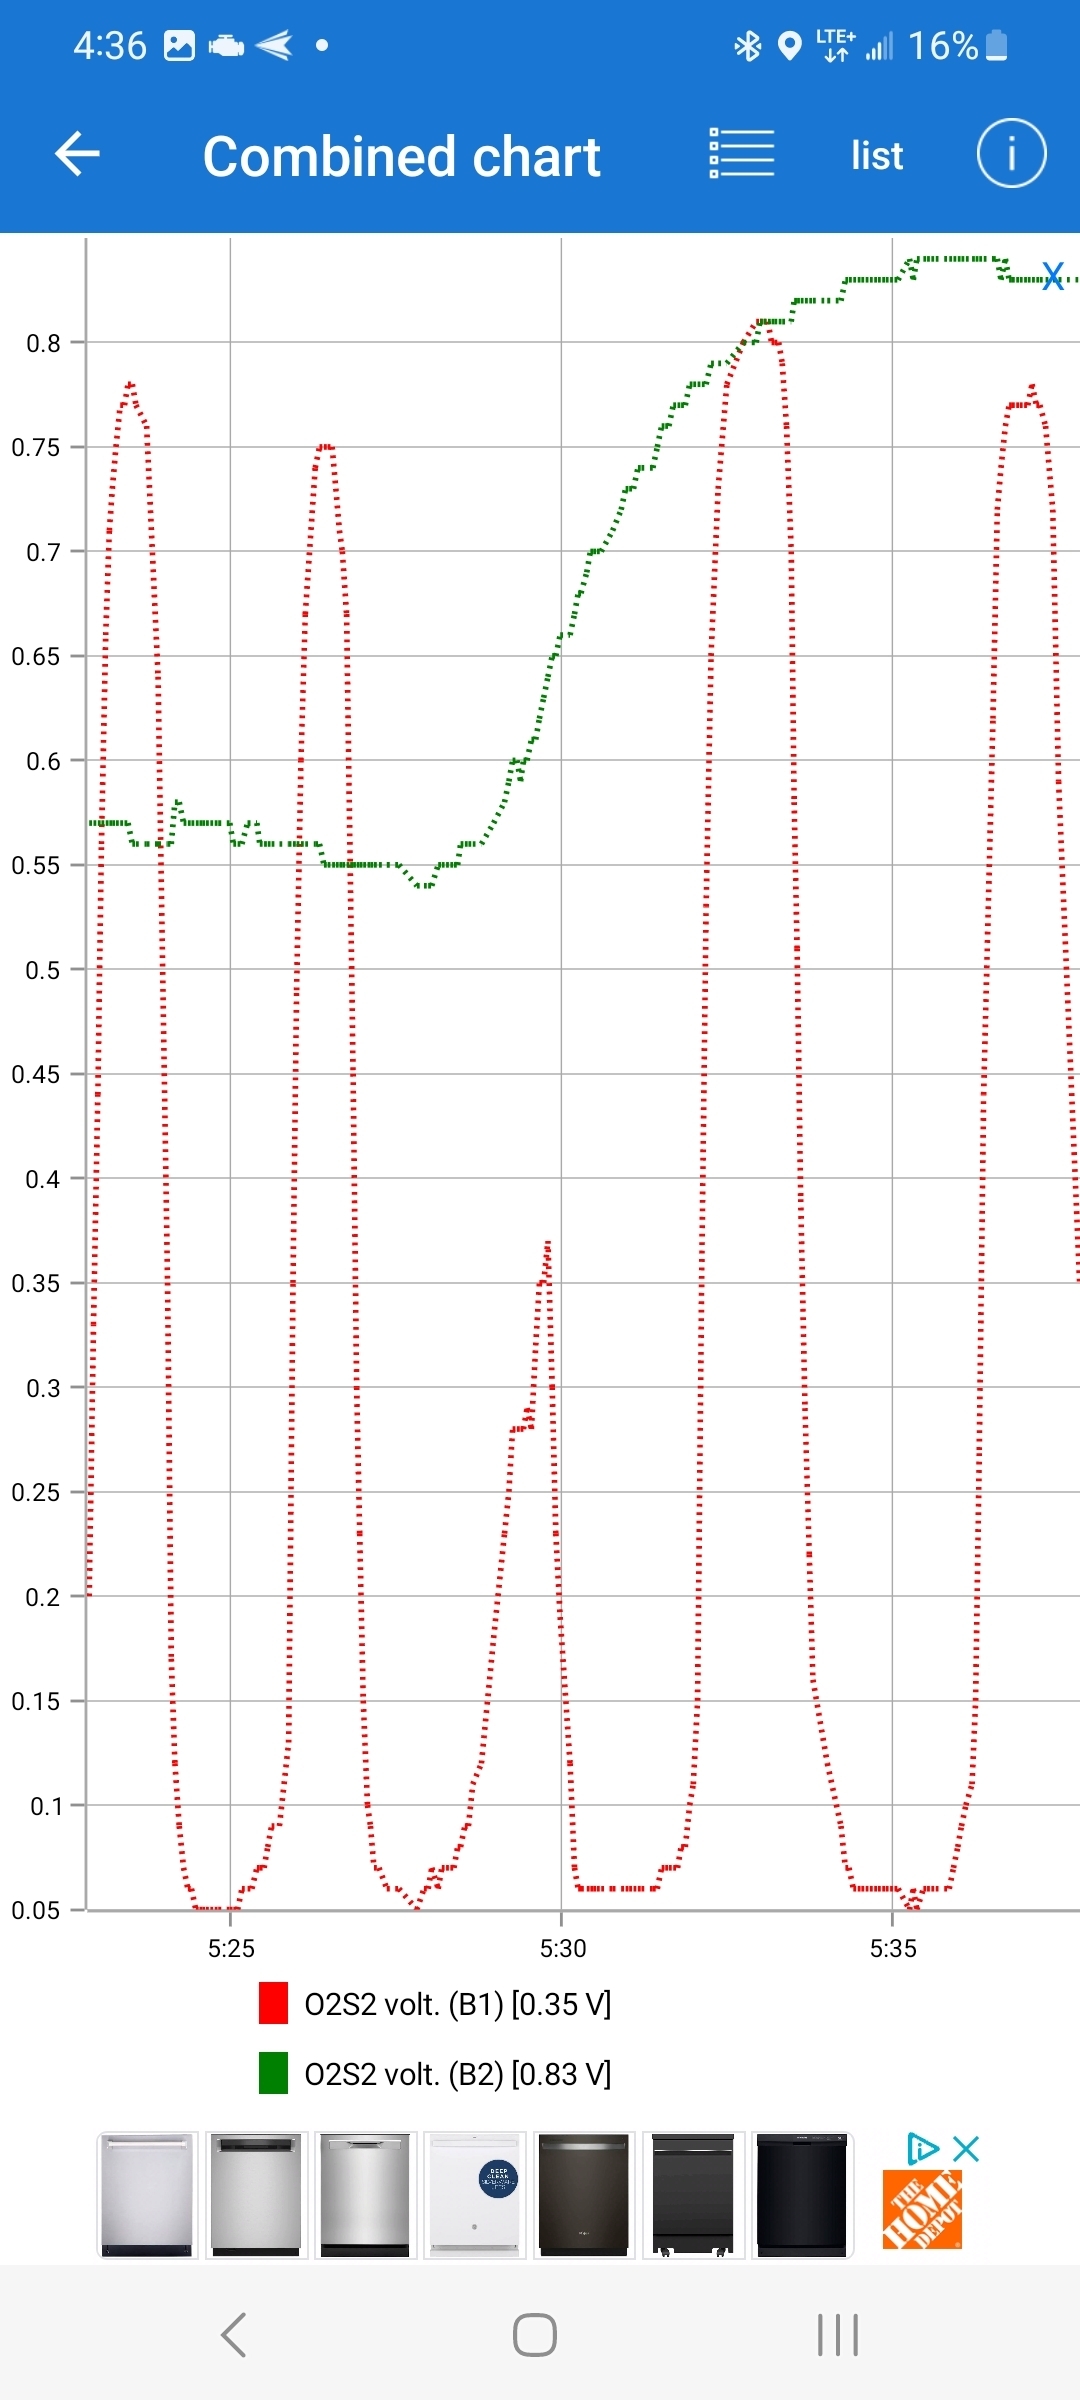
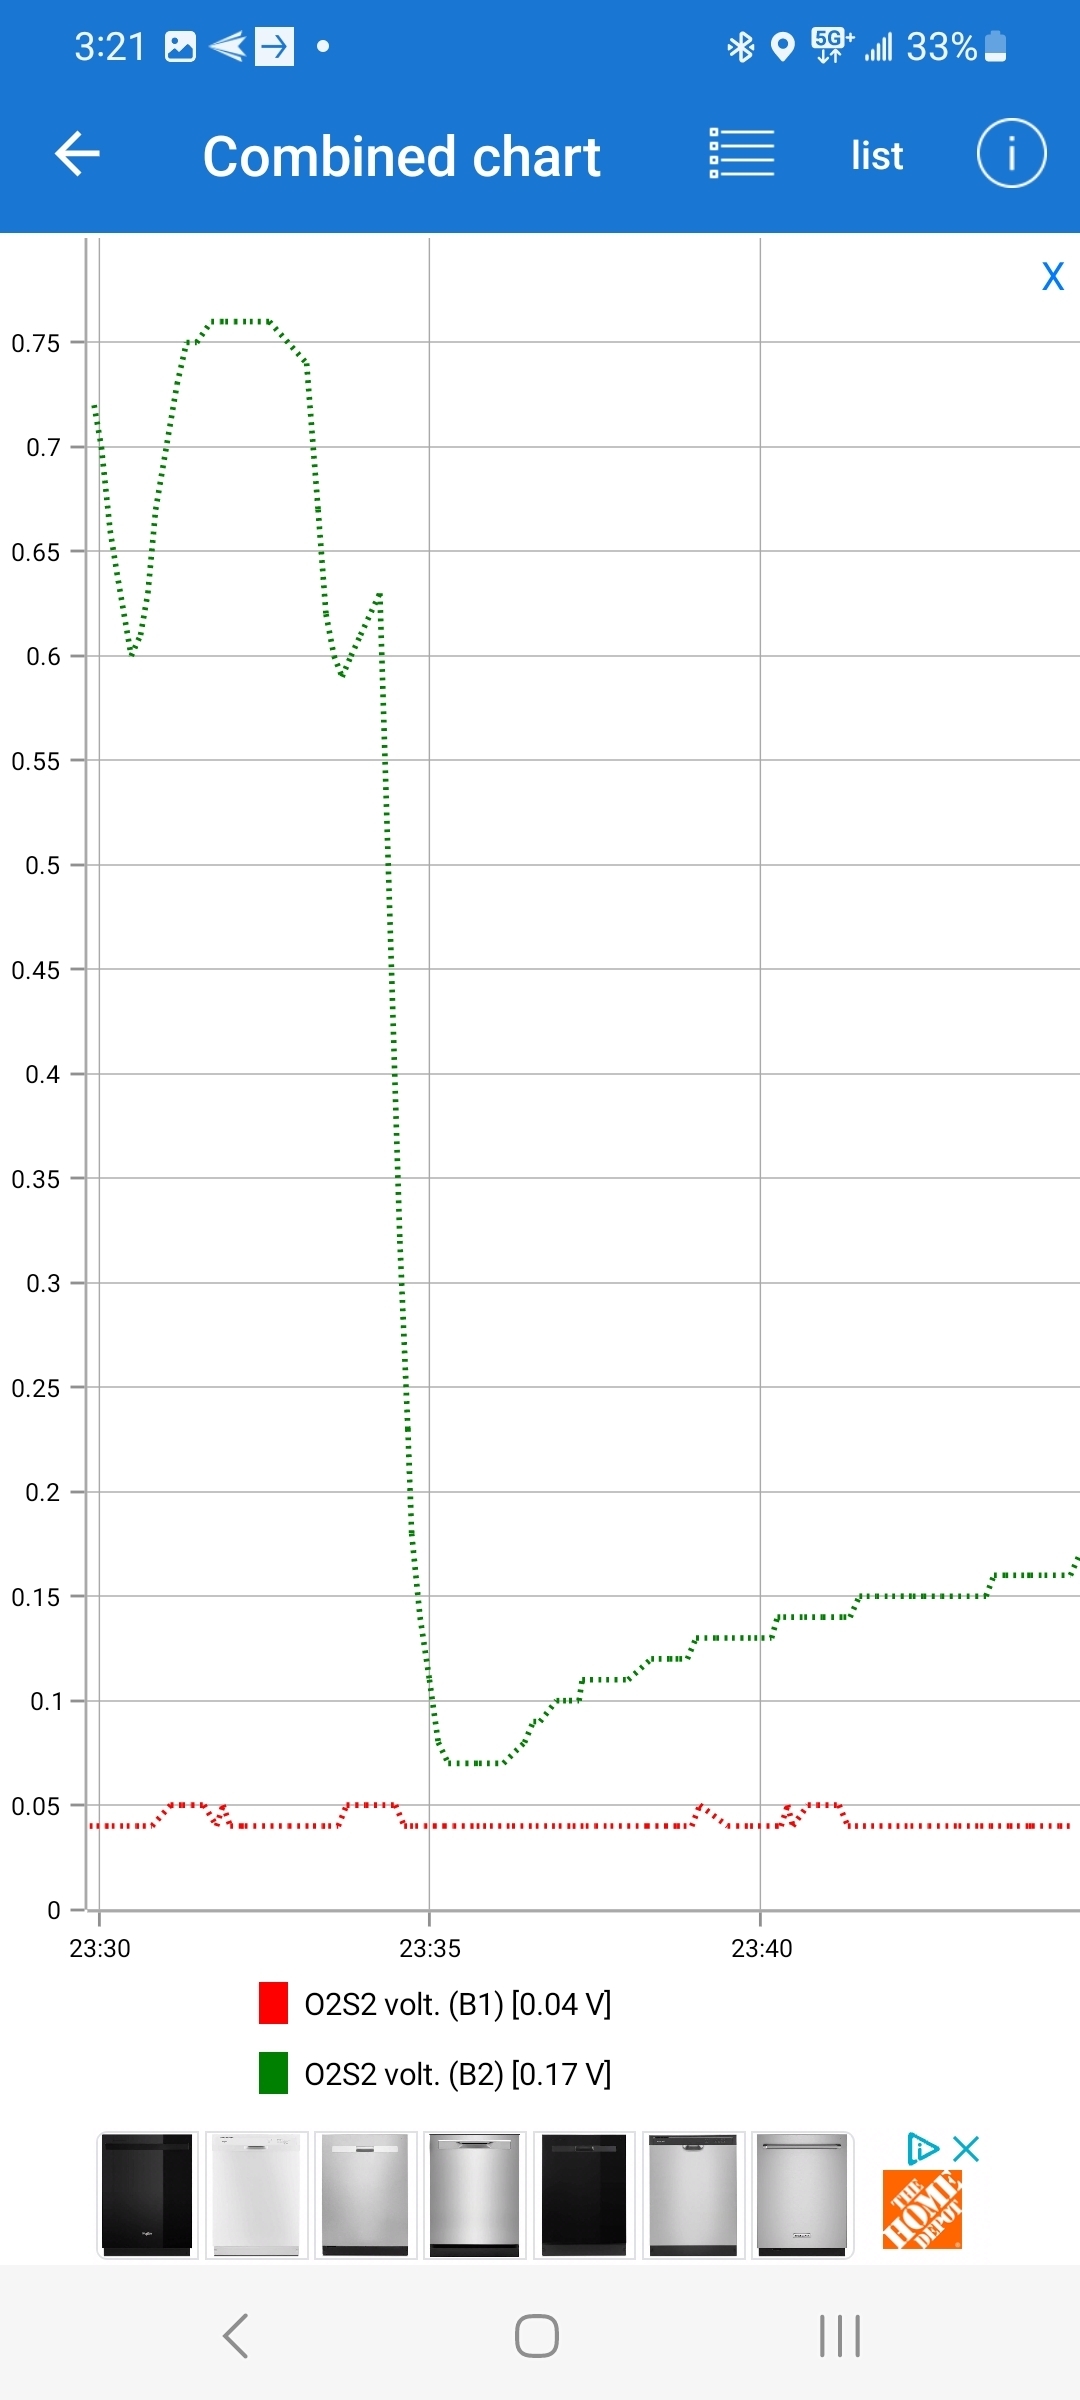
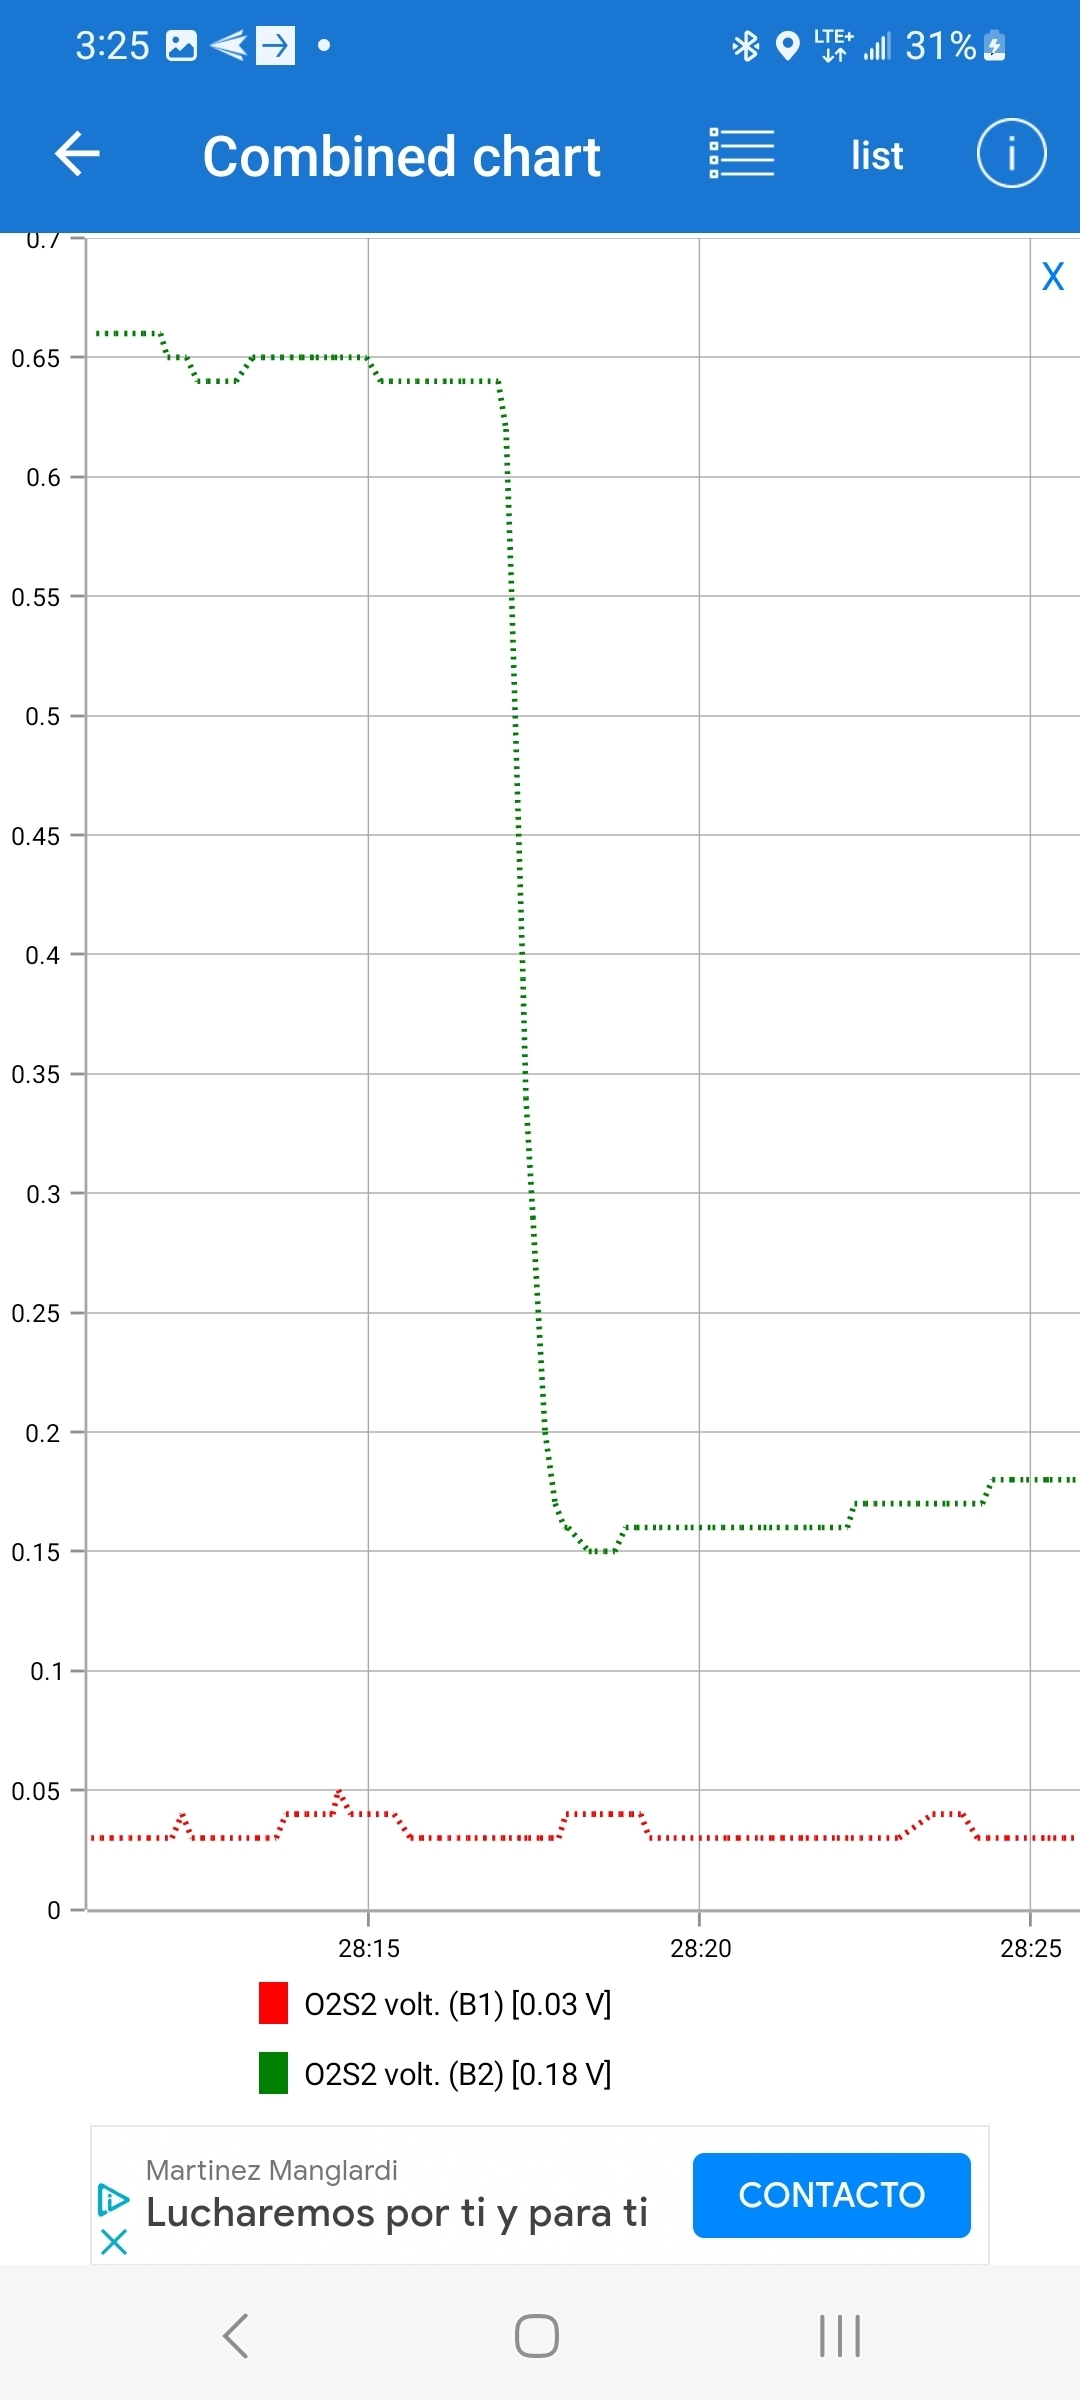
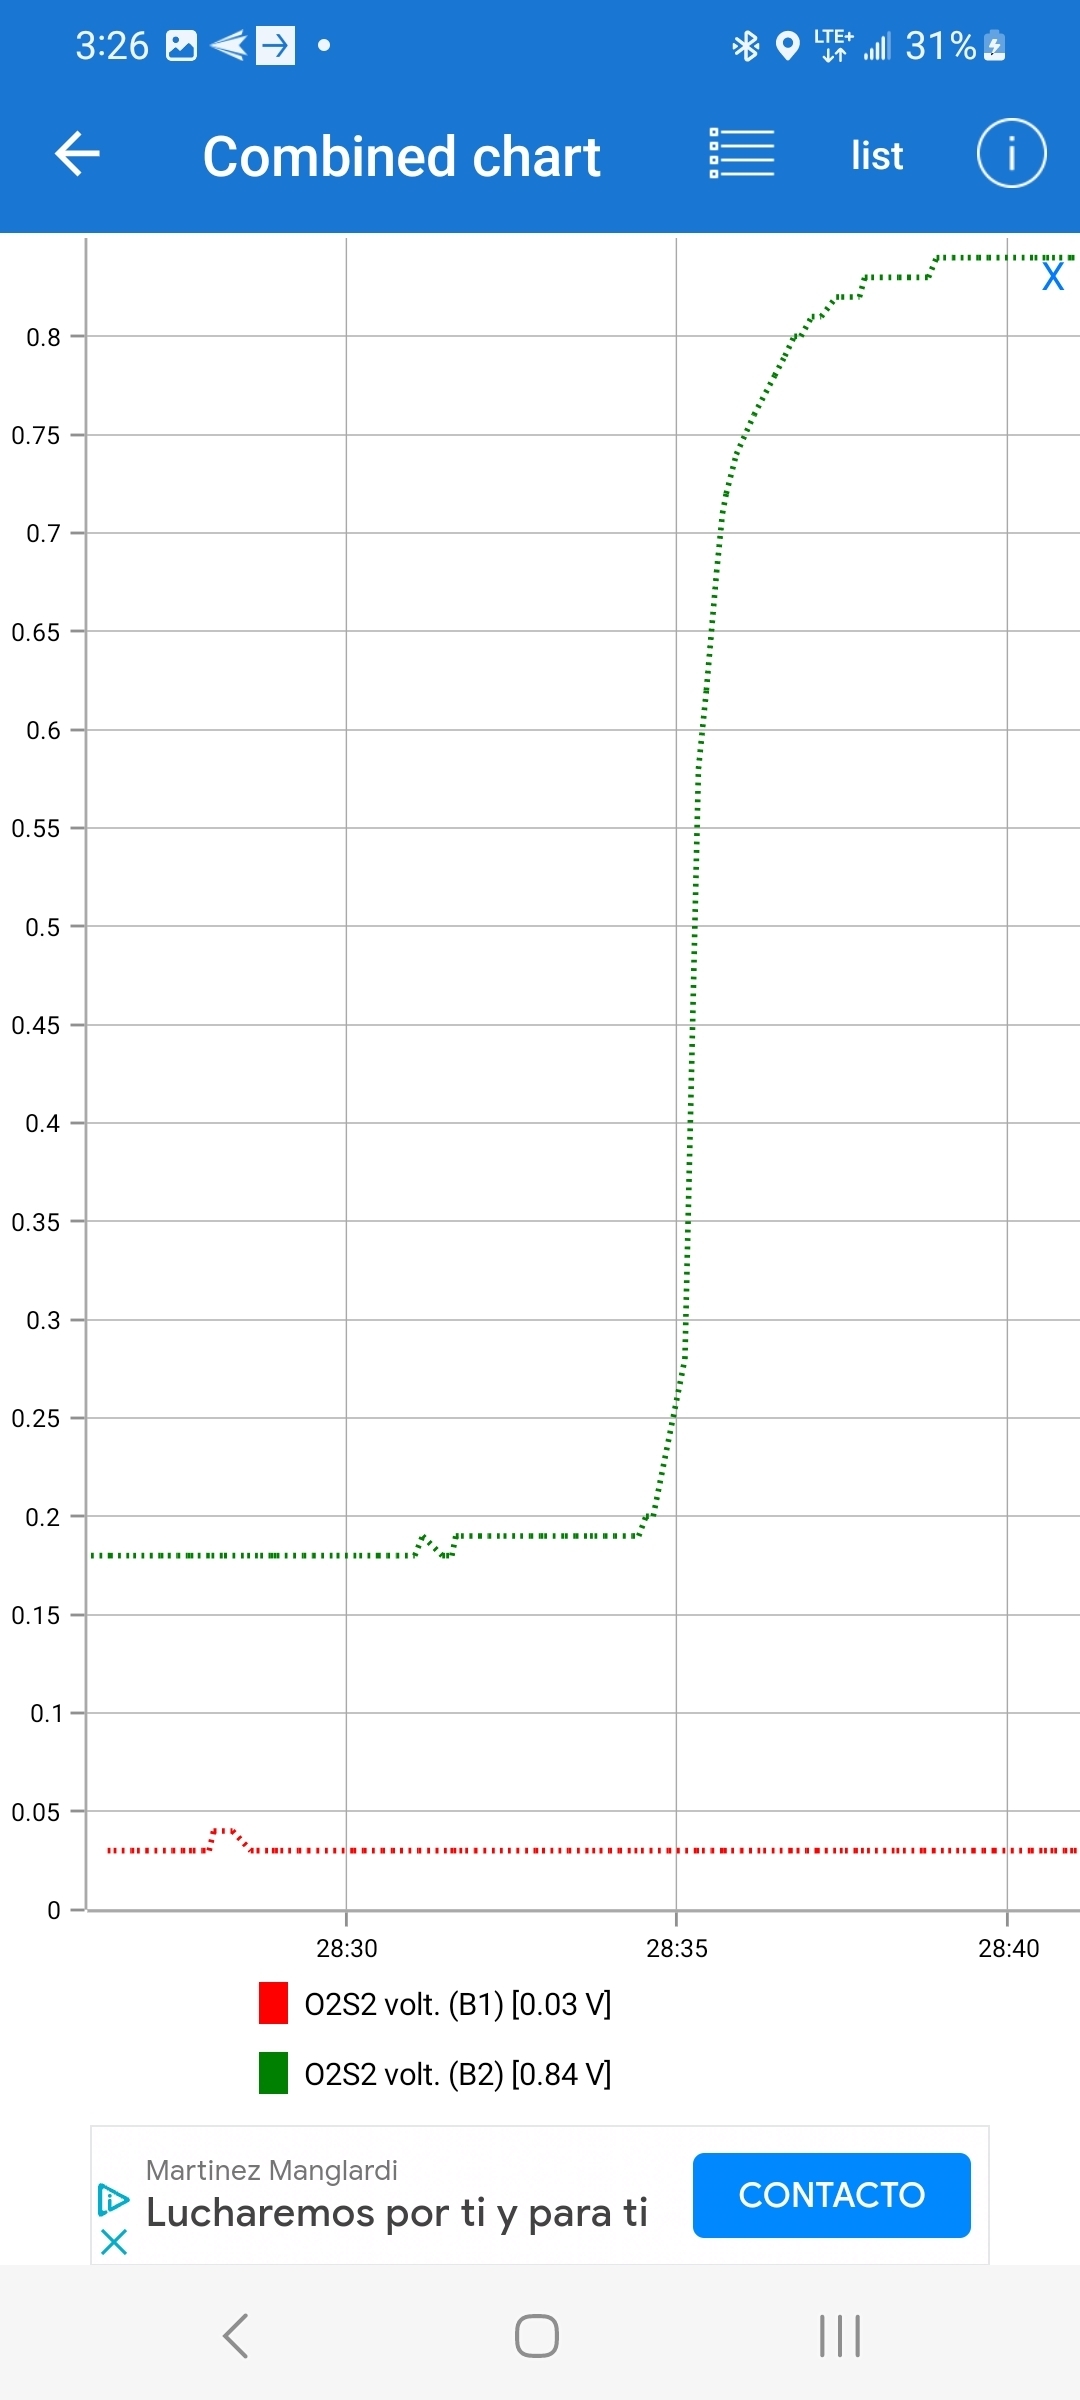
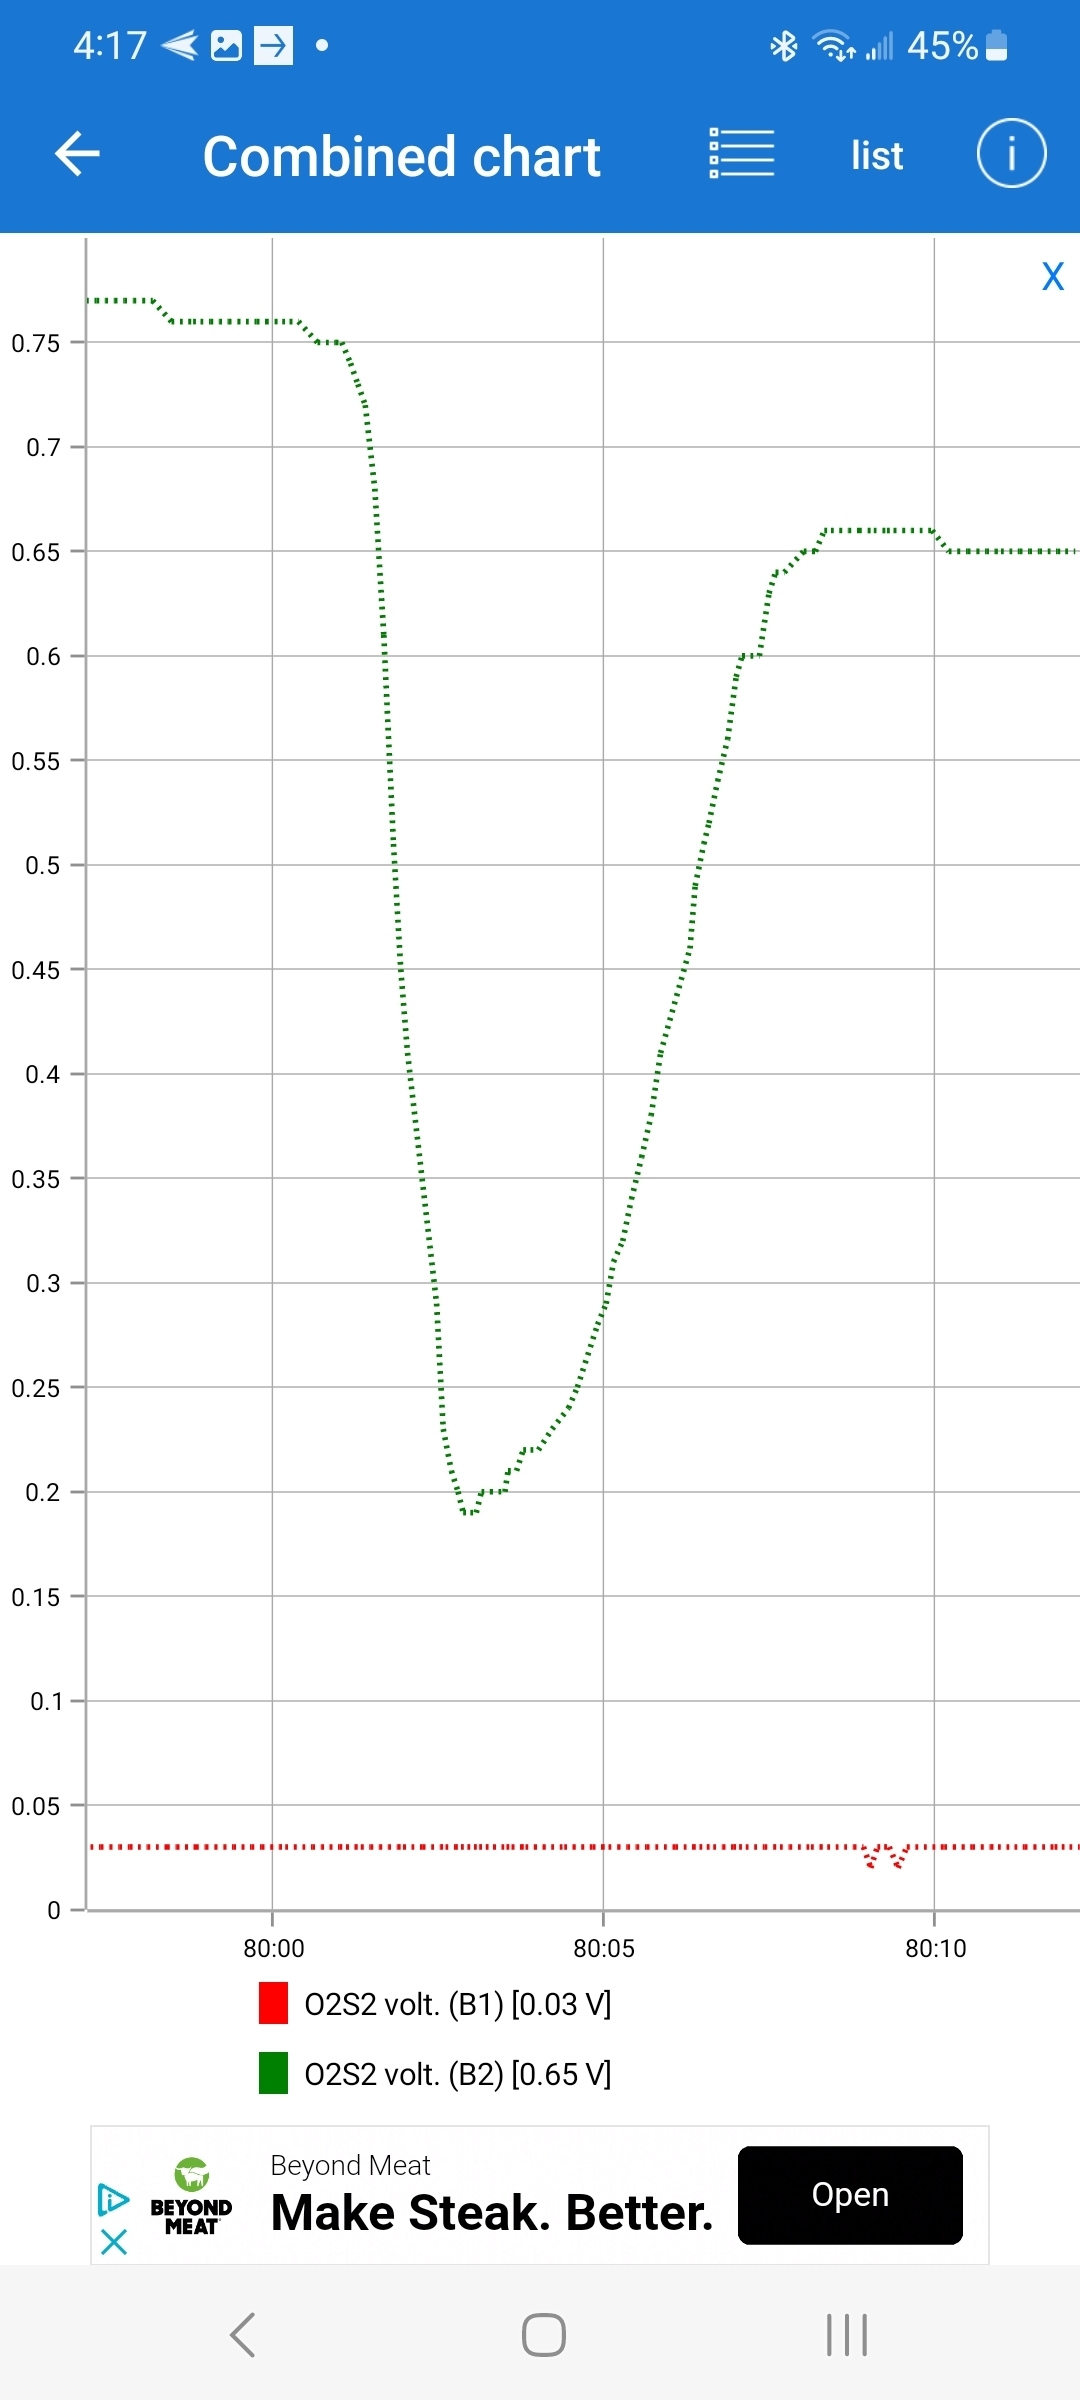
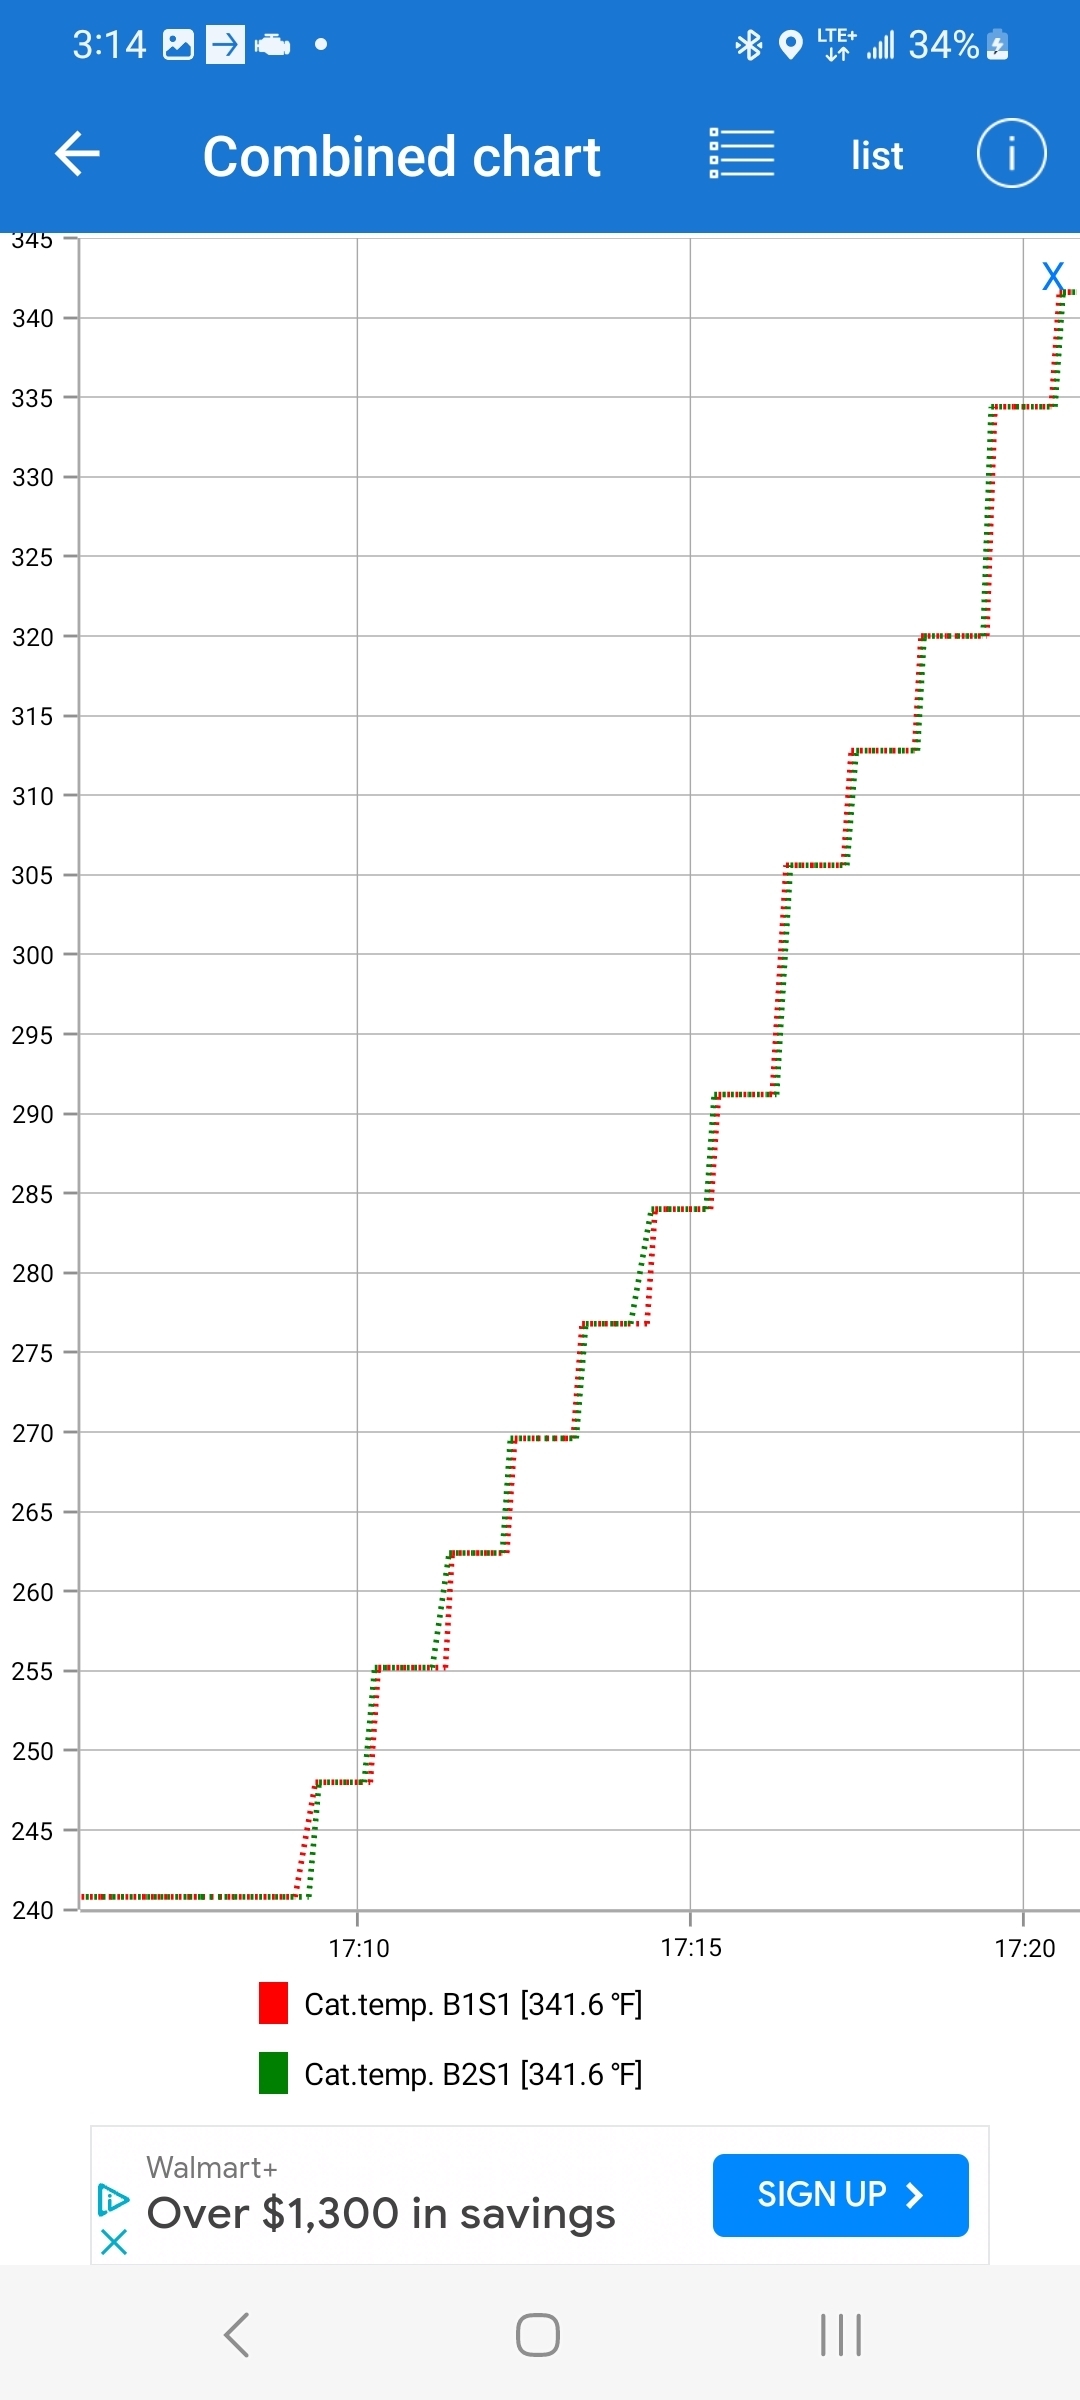
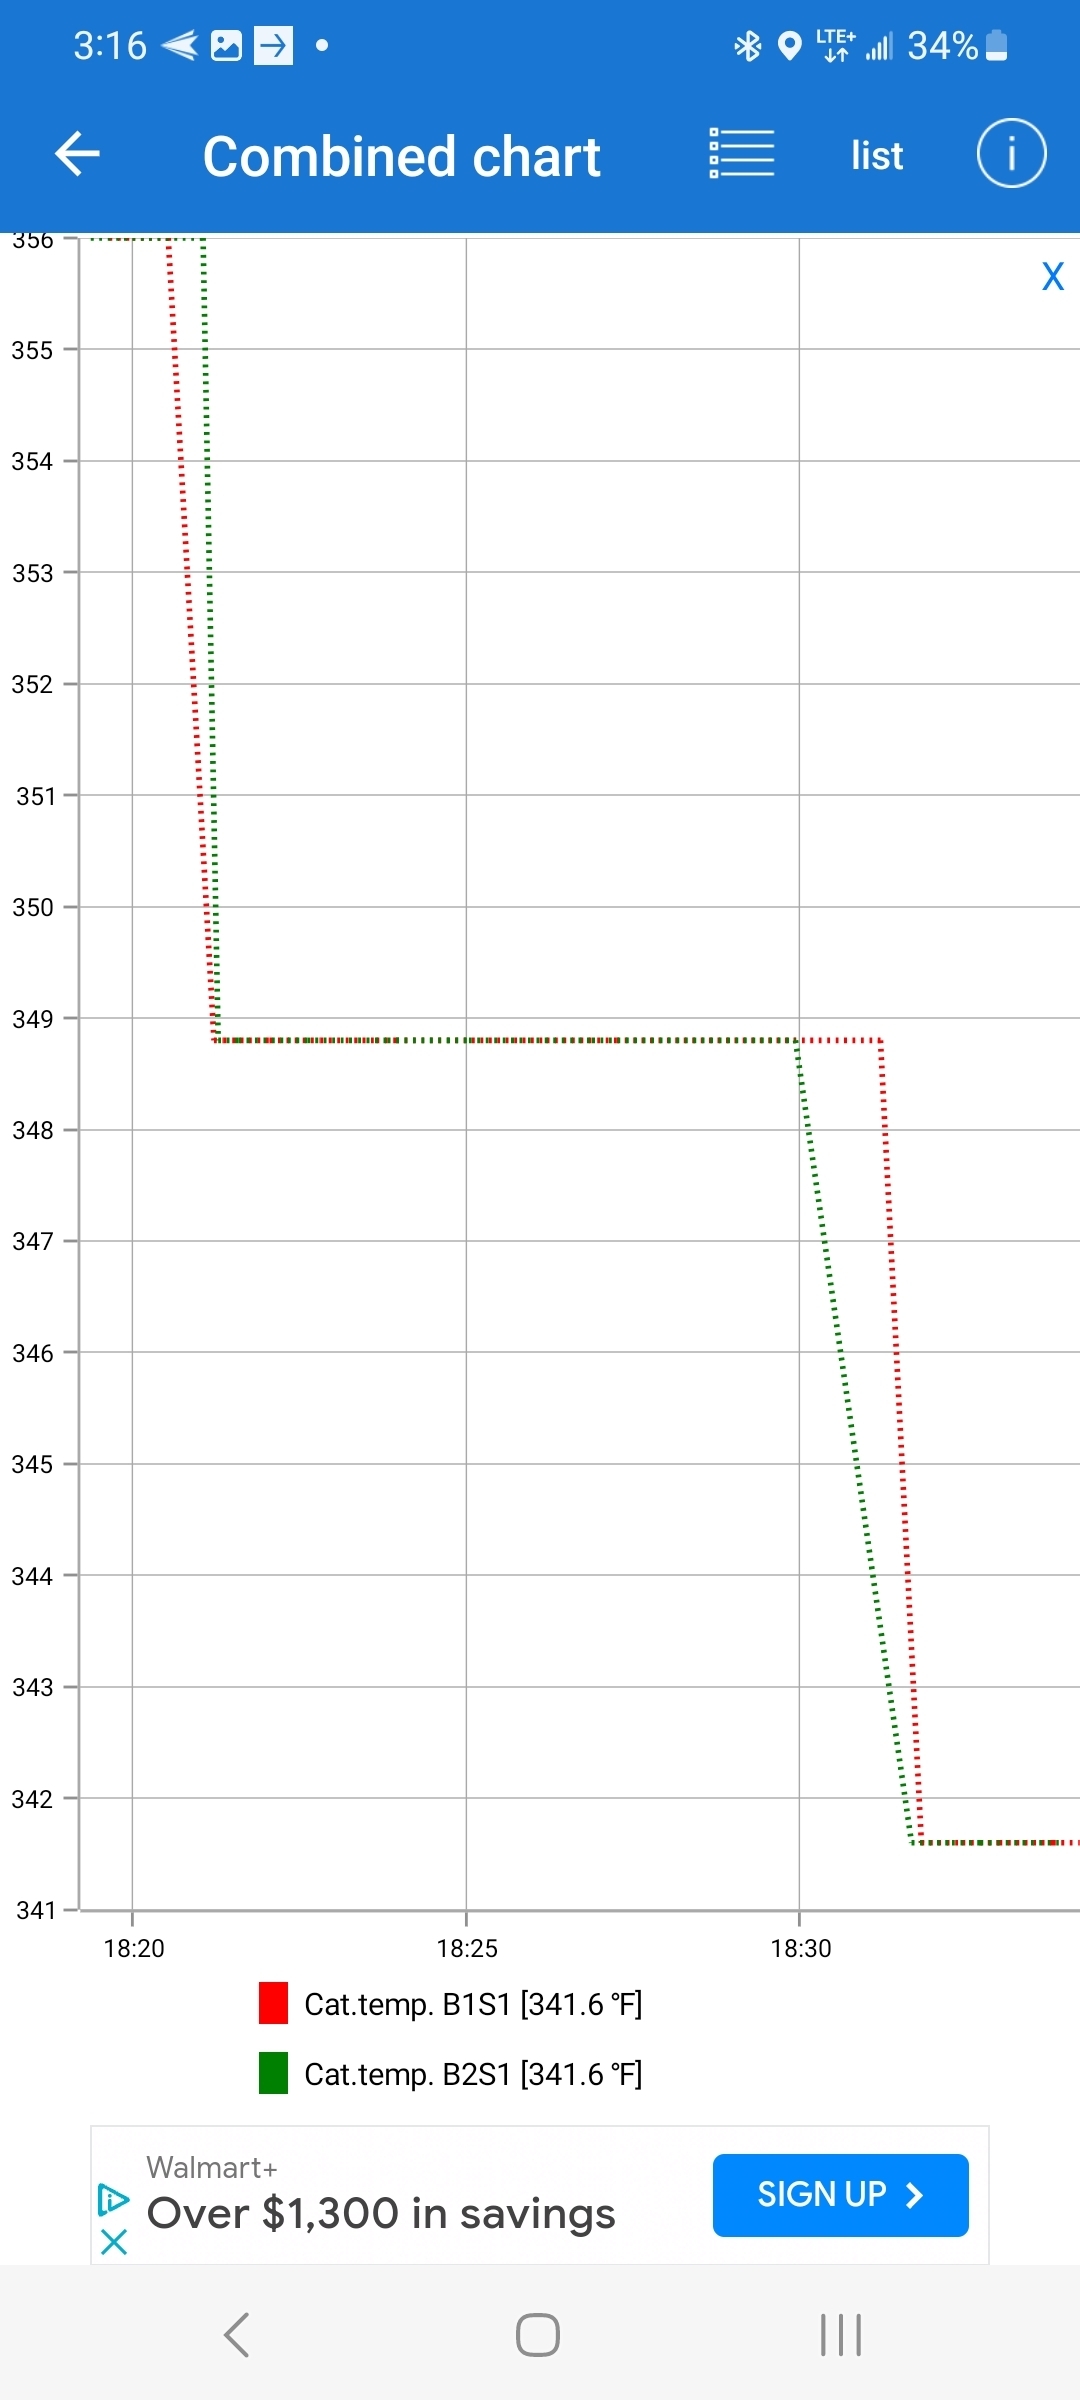
Sorry, I just noticed I was looking at the sensor 2(downstream) sensors, because how they had them labeled, I was expecting to be labeled like bank 1 sensor 1 and bank 2 sensor 1, with the bank displayed first but they had it has Sensor 1 bank 1 and sensor 1 bank 2, and I was reading fast and got it mixed up in my head. But the sensor 1's are actually really stable and even with each other, when Idle and when driving. But the sensor 2 readings are the ones that are very unstable. I couldn't remember which ones of the first ones I took where at idle so I took some more pics at idle and attached them, the first 4 are both the sensor 2's again, this time all at idle, after driving it around and letting them warm up a bit, the last 2 pics are of both the sensor 1's, in case you want to see those, I took them while driving because they were both just an identical flat line at idle, when driving there are only very marginal deviation from each other. But with the sensor 2's what's interesting is first how different they are, bank 1, the green line, the side with the error, stays relatively stable at little less than .05v, while bank 2, the red line, when stable, stays around .8v, way higher, the second interesting thing is that it's the bank 2 sensor that will occasionally drop drastically out of nowhere, just when idling, then shortly return back up to around .8v. So, I'm wondering if bank 2's maybe bad, and if that could cause back pressure to add pressure to bank 1's side or something to cause bank 1's sensor to be sensing a problem idk. The other thought is that since both sensor 1's are very stable and similar and it's the sensor 2's that are showing discrepancies, that seems to me like that might indicate an exhaust leak like you suggested, do you agree? I haven't gotten a chance to get in there and really check, a while ago when we first started looking into this, I just did a visual check and listened and felt for any exhaust coming out the catalyst joints/connection points, didn't get around to using soapy water to look for bubbles. But if that's the next likely suspect that will be the next thing I do. Also, I'm assuming if I can see the voltages of the sensors using the OBD scanner I shouldn't need to check the voltages of their data pins using a multimeter, correct?
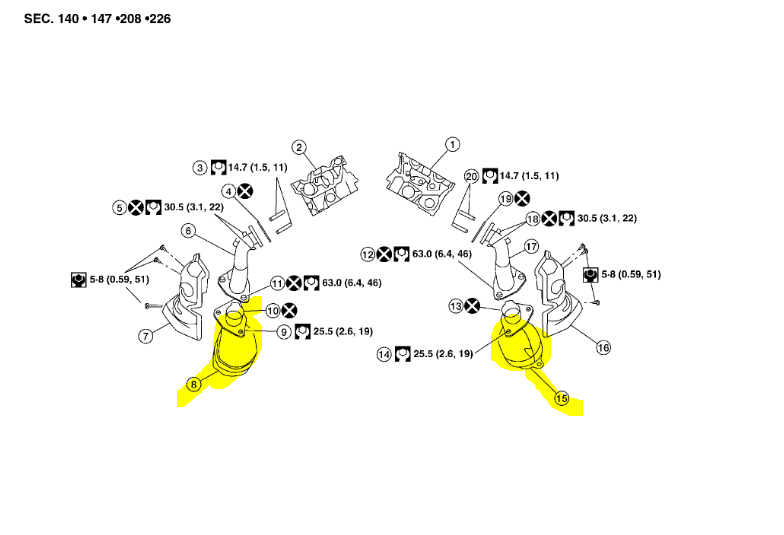
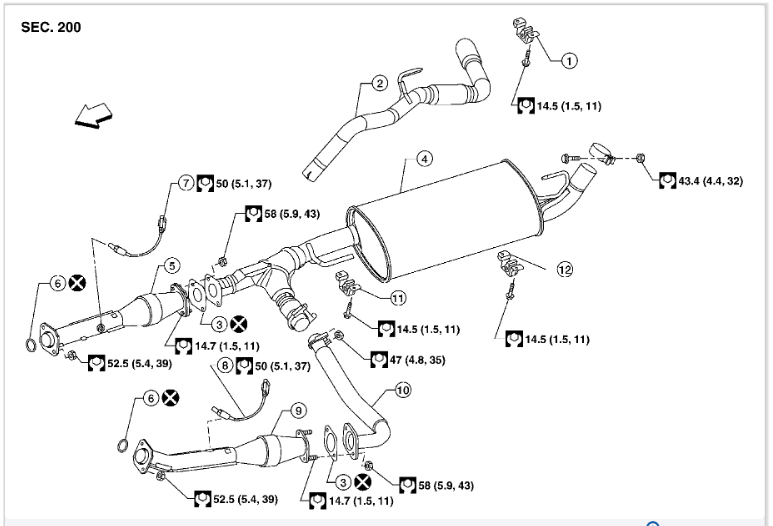
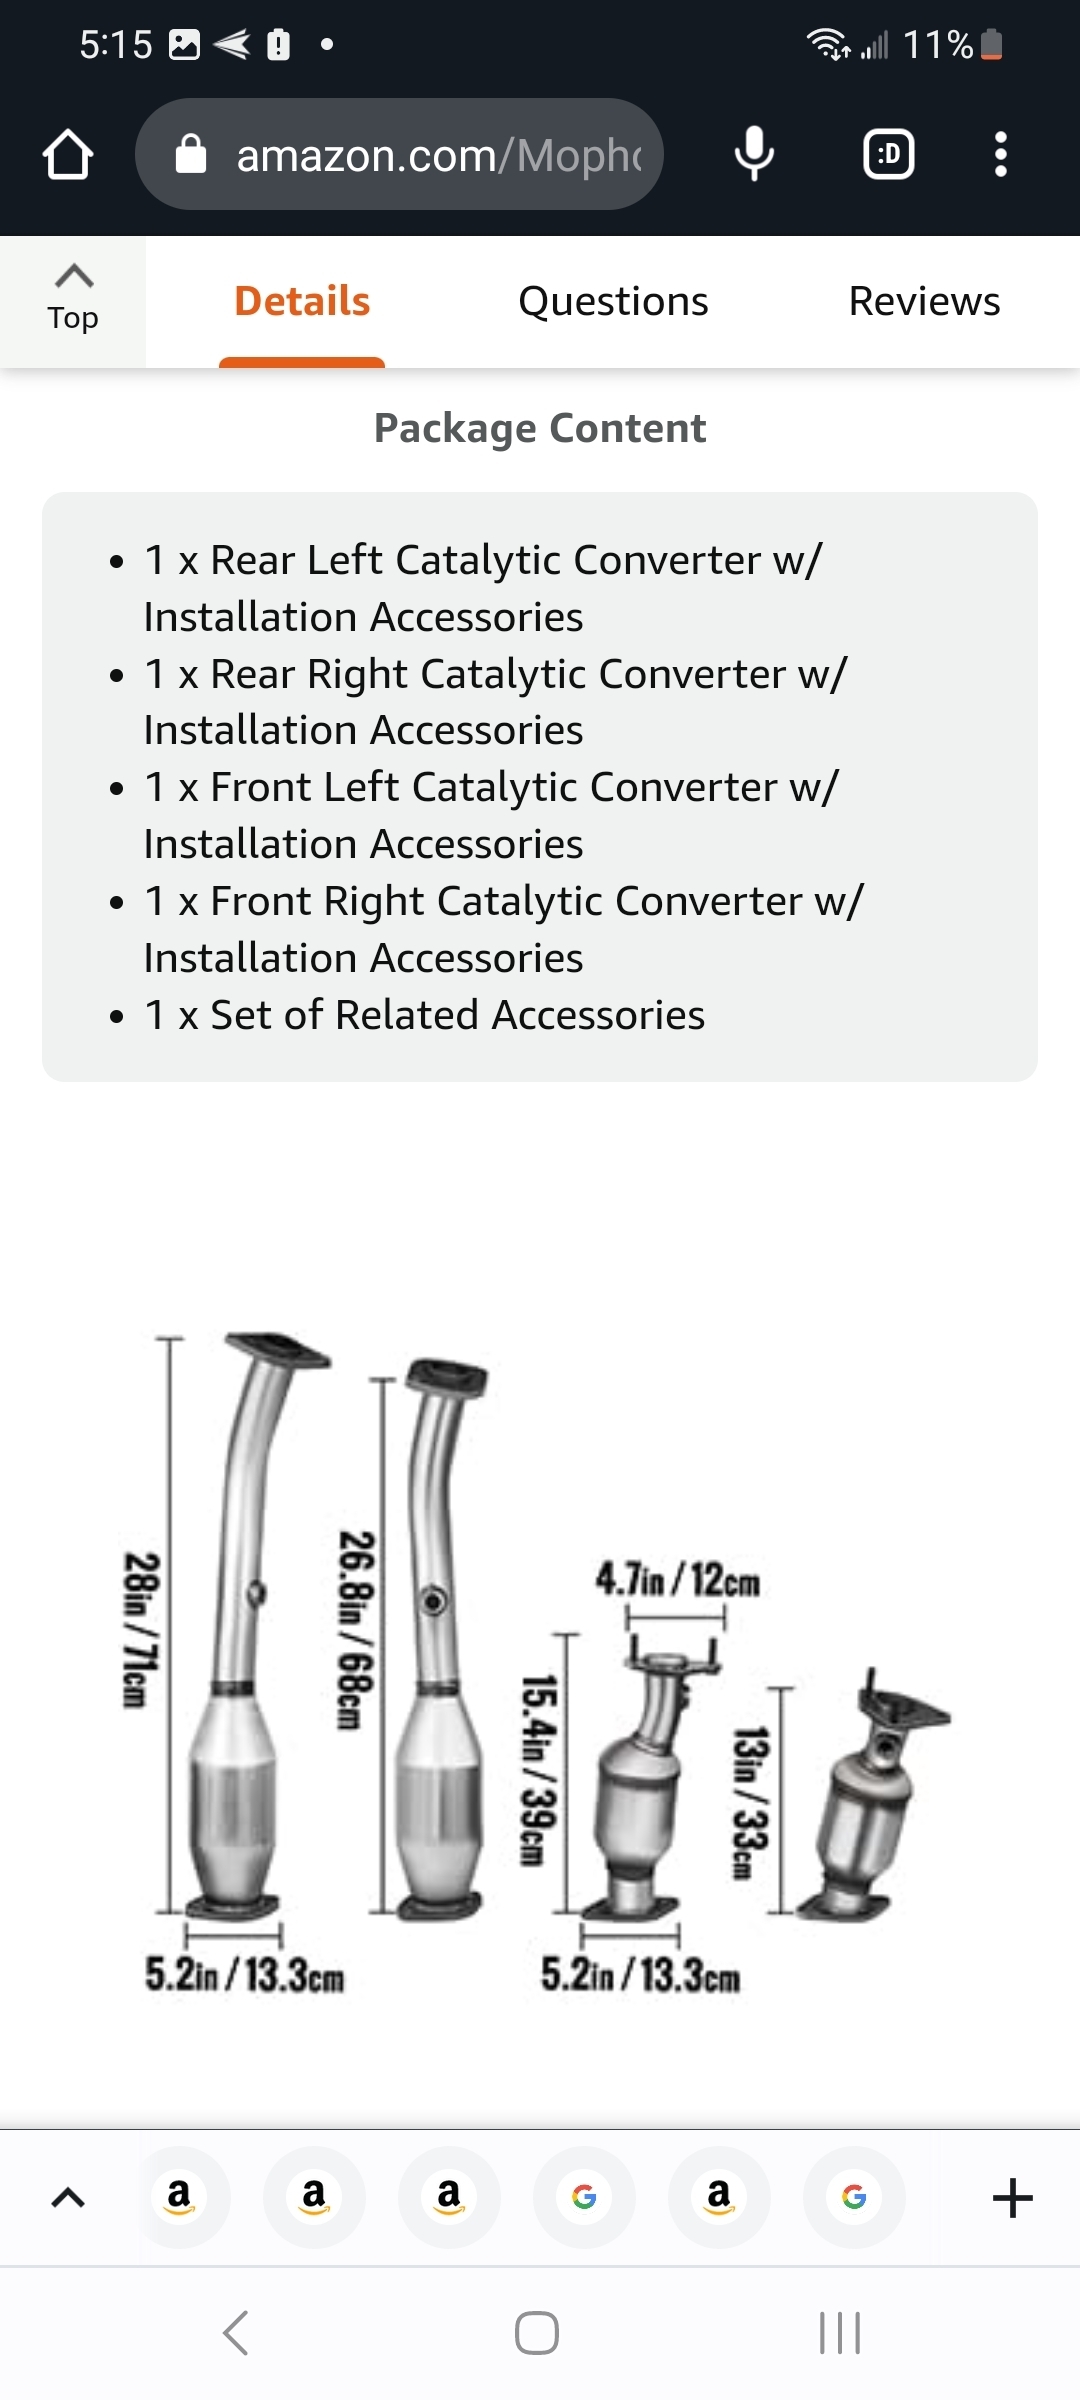
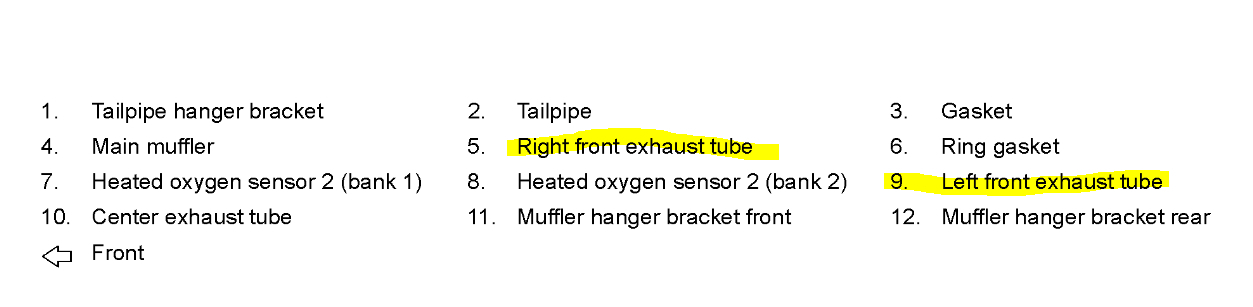
Images (Click to enlarge)
May 1, 2023 at 6:15 PM