Hi and thanks for using 2CarPros.com.
If the fans are coming on, then it sounds like a thermostat issue or maybe the system needs flushed.
I would actually do both at the same time since the system will need partially drained to replace the thermostat.
Take a look through these links. They discuss the cooling system, how to replace a thermostat, how to check a thermostat. The last link shows how to flush the cooling system. Honestly, I would do both at the same time.
https://www.2carpros.com/articles/engine-cooling-system
https://www.2carpros.com/articles/how-an-engine-thermostat-works
https://www.2carpros.com/articles/replace-thermostat
https://www.2carpros.com/articles/coolant-flush-and-refill-all-cars
____________________________________________________
If you decide to replace the thermostat, here are directions specific to your vehicle. The pictures attached correlate to these directions.
REMOVAL AND INSTALLATION
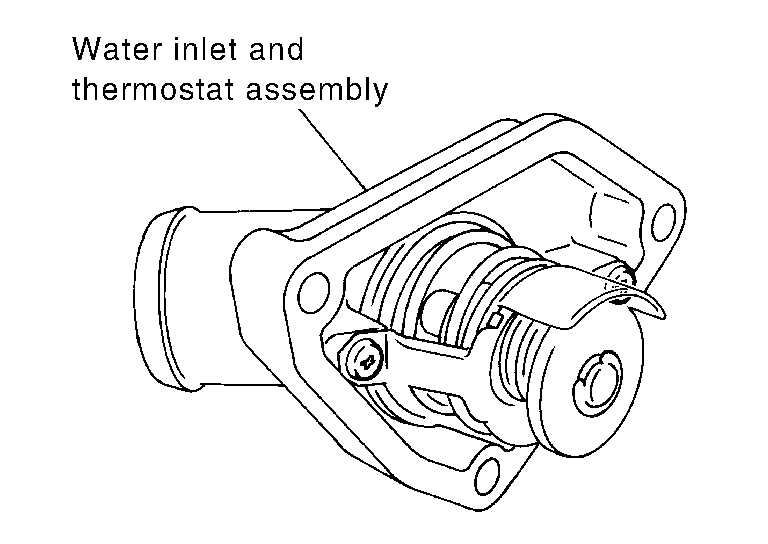
WATER INLET AND THERMOSTAT ASSEMBLY
Removal and Installation
WARNING:
Never remove the radiator cap when the engine is hot. Serious burns could occur from high pressure engine coolant escaping from the radiator. Wrap a thick cloth around the cap. Slowly turn it a quarter of a turn to release built-up pressure. Carefully remove radiator cap by turning it all the way.
REMOVAL
1. Remove engine cooling fan (Motor driven type). See: Radiator Cooling Fan > Removal and Replacement > Removal and Installation (Motor Driven Type)
2. Disconnect radiator hose (lower) and oil cooler hose from water inlet and thermostat assembly.
NOTE:
Cap or plug opening(s) to prevent fluid from spilling.
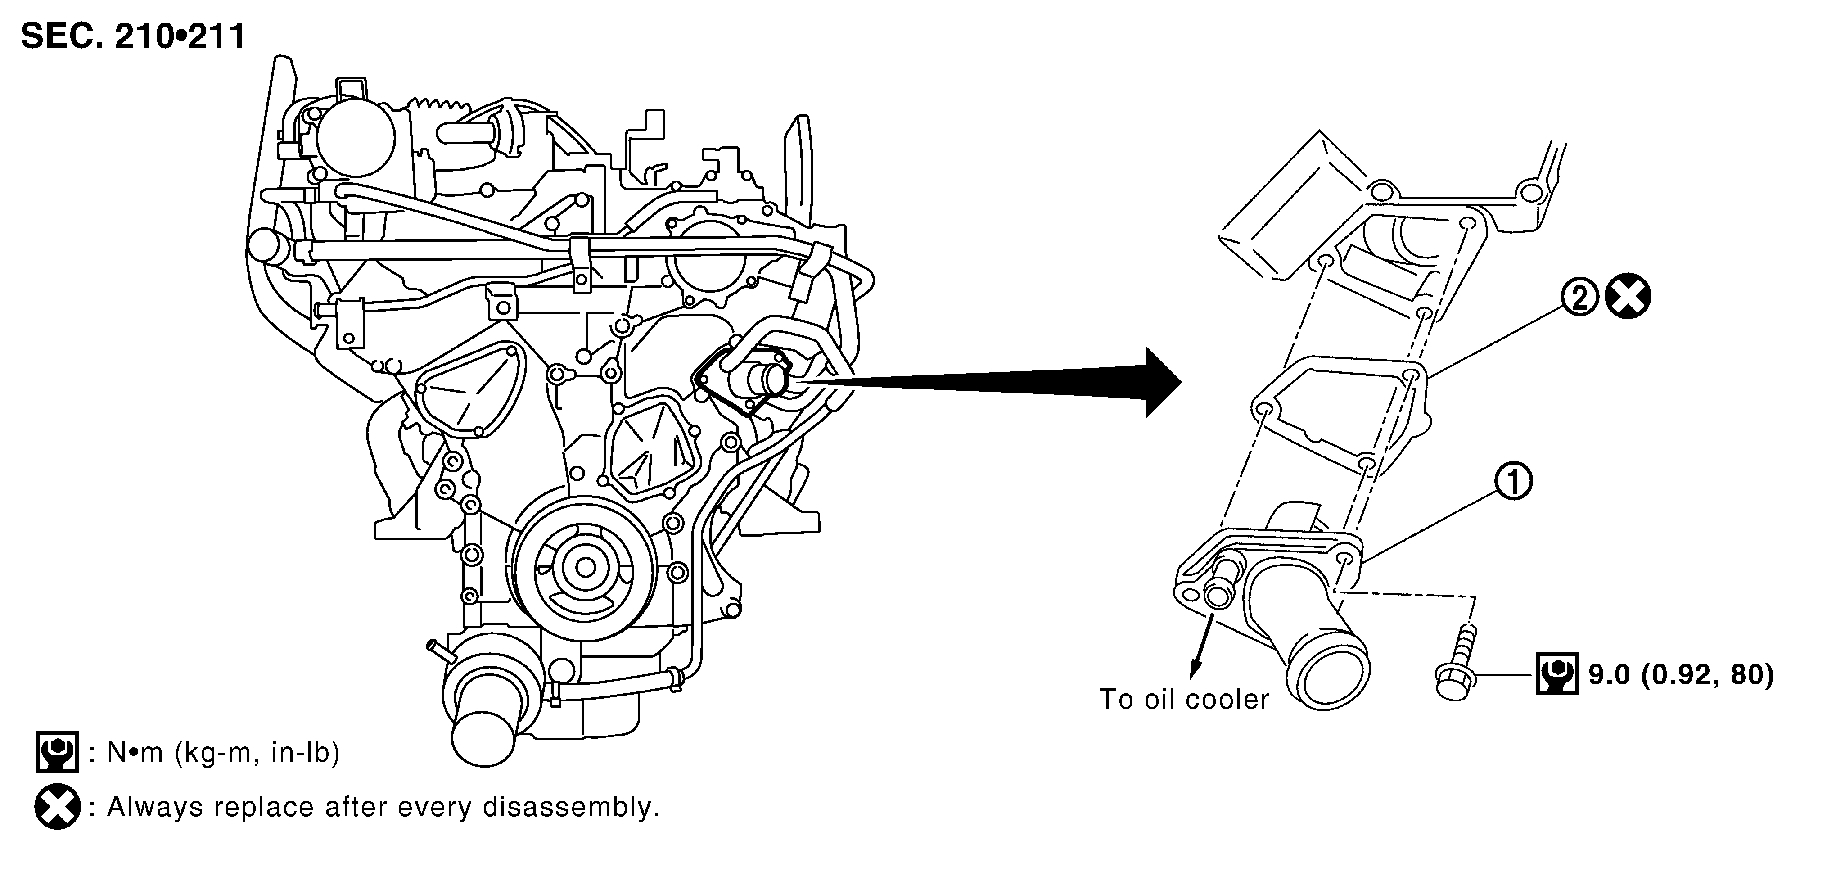
3. Remove water inlet and thermostat assembly.
CAUTION:
- Do not disassemble water inlet and thermostat assembly.
- Replace water inlet and thermostat assembly as a unit, if necessary.
INSPECTION AFTER REMOVAL
1. Check valve seating condition at room temperature. It should seat tightly.
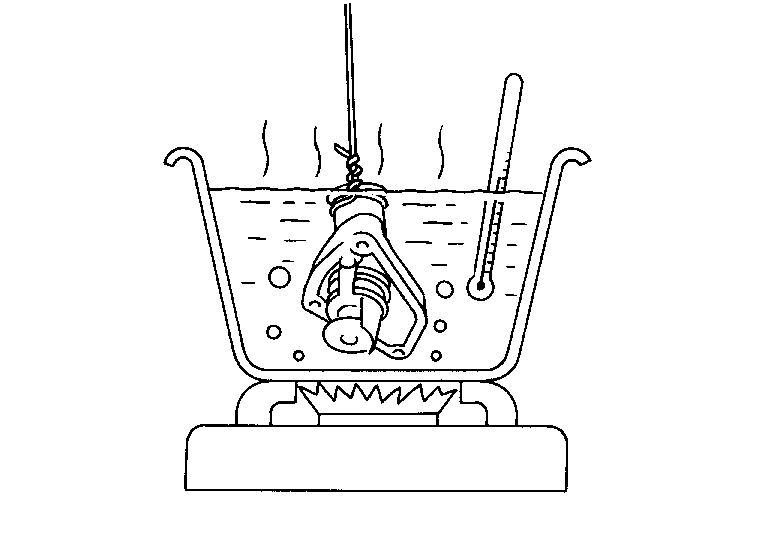
2. Check valve operation.
- Place a thread so that it is caught in the valve of the thermostat. Immerse fully in a container filled with water. Heat while stirring.
- The valve opening temperature is the temperature at which the valve opens and falls from the thread.
- Continue heating. Check the full-open lift amount.
- After checking the full-open lift amount, lower the water temperature and check the valve closing temperature.
- If valve seating at measured values are out of standard range, replace water inlet and thermostat assembly.
INSTALLATION
Installation is in the reverse order of removal, paying attention to the following.
- Do not spill engine coolant in engine room. Use rag to absorb engine coolant.
INSPECTION AFTER INSTALLATION
- Check for engine coolant leaks. See: Cooling System > Initial Inspection and Diagnostic Overview > System Inspection.
- Start and warm up engine. Visually check for engine coolant leaks. Repair as necessary.
__________________________________________
Let me know if this helps or if you have other questions. I will do my best in helping.
Take care,
Joe
Images (Click to enlarge)
Aug 16, 2018 at 8:04 PM