Hi,
If it is leaking, that is why it won't run. The pressure is being lost. You need to remove the fuel tank to determine which line is leaking.
Here are the directions for removing the tank. The attached pics correlate with the directions.
___________________________________
1997 Chevy Truck K Tahoe 4WD V8-5.7L VIN R
Tahoe/Yukon
Vehicle Powertrain Management Fuel Delivery and Air Induction Fuel Tank Service and Repair Procedures Fuel Tank Assembly Tahoe/Yukon
TAHOE/YUKON
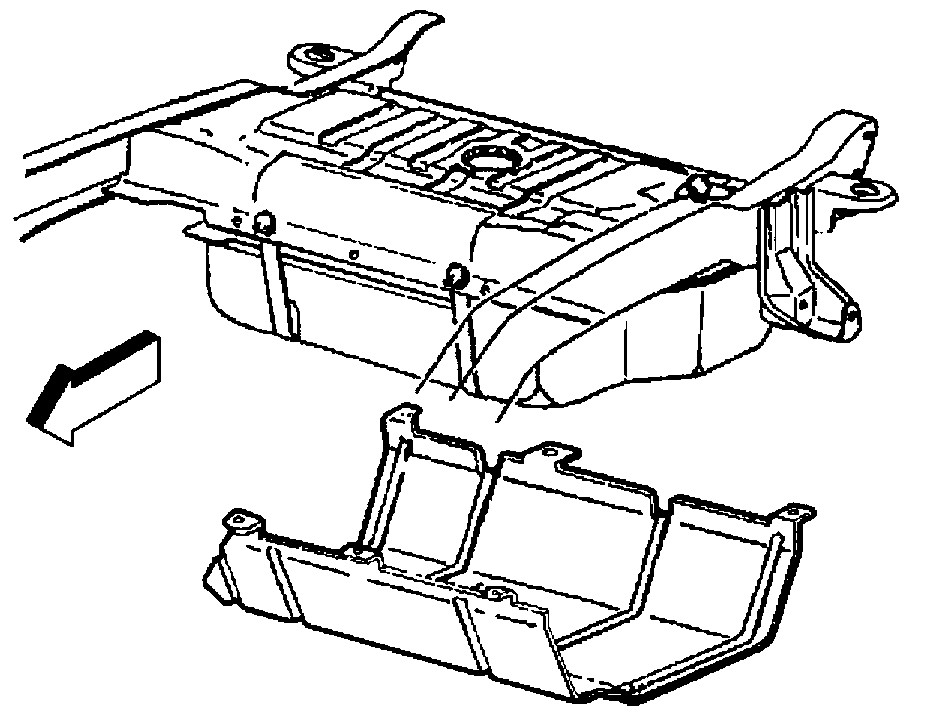
pic 1
Diagram
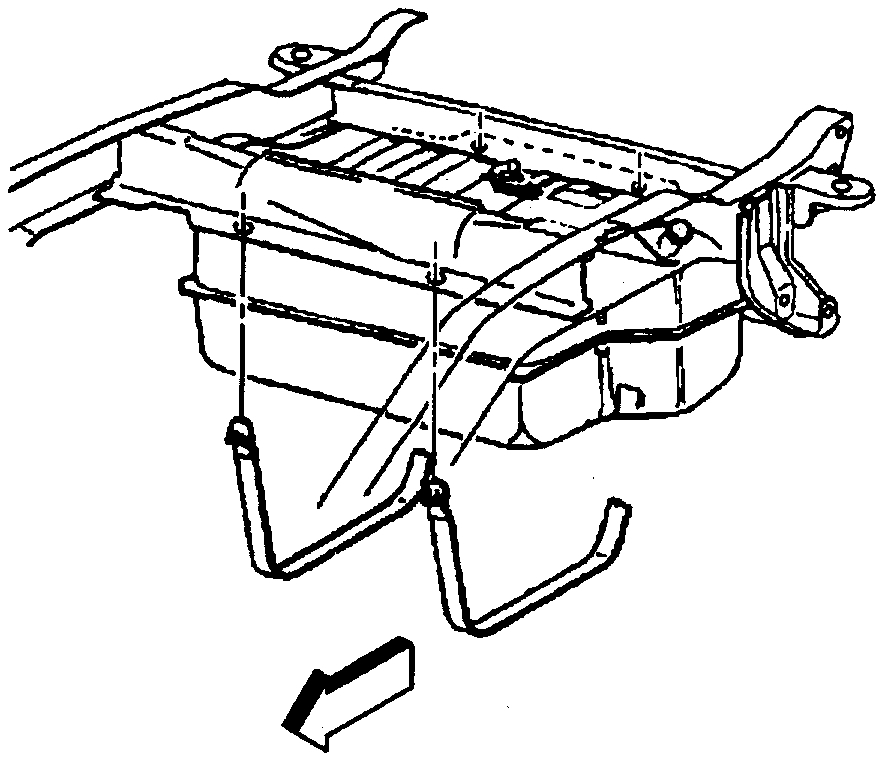
pic 2
Diagram
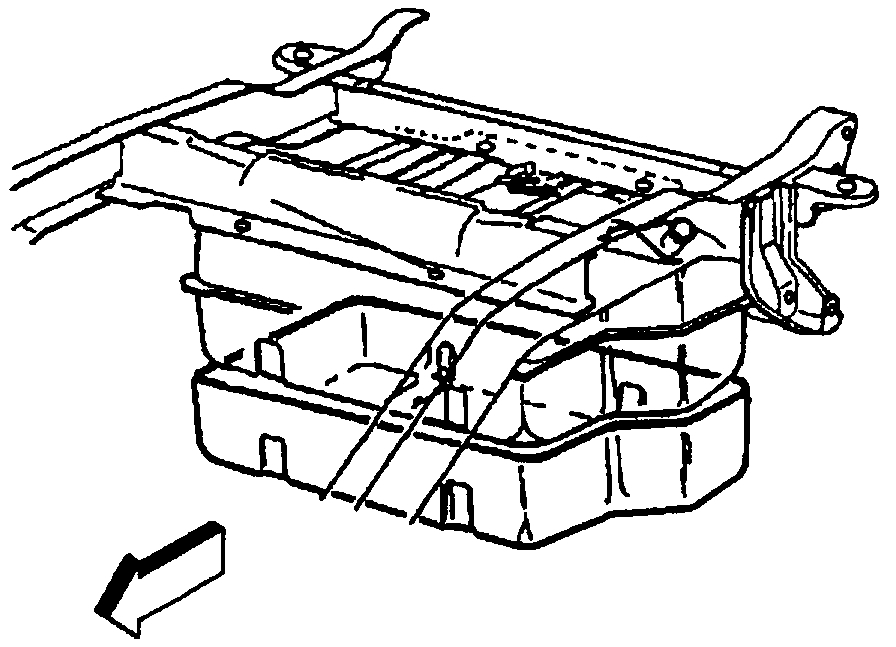
pic 3
Diagram
pic 4
Removal Procedure
1. Drain the fuel from the tank. Refer to Draining Fuel Tank.
2. Raise the vehicle.
3. Remove the fuel tank off-road shield, if equipped.
4. Loosen the filler neck hose clamp at the fuel tank and disconnect the fuel tank filler neck from the fuel tank.
5. Support the fuel tank and remove the tank straps and insulator strips, if equipped.
6. Lower fuel tank shield.
7. Lower the fuel tank. Disconnect the fuel feed and vapor hoses. Disconnect the electrical connections at the sender.
8. Remove the fuel sender assembly and seal ring, using tool J 39765. Discard the old seal ring. Purge the tank, if the tank is being repaired.
Installation Procedure
1. Install the new seal ring and reinstall the sender using tool J 39765.
2. Raise the tank slightly and reconnect the fuel feed and vapor hoses and the electrical connections at the sender.
3. Raise the tank fully.
4. Reinstall the fuel tank filler neck to the tank. Tighten the clamp.
NOTE: The strap nuts must be tightened by steps, alternating between the four nuts until the specified torque is reached. Otherwise, the bottom of the tank will flex upward and the fuel gage will indicate fuel remaining in the tank when the tank runs dry.
5. Install the fuel tank brackets with insulator strips in place.
Tighten
- Tighten the strap nuts to 45 Nm (33 lb. Ft.).
6. Install the fuel tank off-road shield, if equipped.
7. Replenish the fuel in the tank. Reinstall the fuel tank filler cap.
8. Reconnect the negative battery cable. If a memory retention device was not used, please reset (to the extent possible) all devices that lost their memory after the battery was disconnected.
9. Check for leaks.
9.1. Turn ON the ignition switch for 2 seconds.
9.2. Turn OFF the ignition switch for 10 seconds.
9.3. Again, turn the ignition switch to the ON position.
9.4. Check for fuel leaks.
________________________________________
Once the tank is out, let me know what you find. Also, if you have other questions, let me know.
Take care and God Bless,
Joe
Images (Click to make bigger)
Tuesday, May 4th, 2021 AT 12:40 PM