I hope this will help
1.Remove or disconnect the following:
â– Skid plate, if equipped
â– Front wheel
â– Split pin
â– Nut lock
â– Spring washer
â– Hub nut
â– Brake caliper and rotor
â– Wheel speed sensor, if equipped
â– Wheel bearing and hub assembly
2.Pry the inner tripod joint out of the differential and remove the axle halfshaft.
To install:
1.Install the axle halfshaft so that the snapring is felt to seat in the joint housing groove.
2.Install or connect the following:
â– Wheel bearing and hub assembly
â– Wheel speed sensor, if equipped
â– Brake caliper and rotor
â– Hub nut. Tighten the nut to 180 ft. lbs. (244 Nm).
â– Spring washer
â– Nut lock
â– Split pin
â– Front wheel
â– Skid plate, if equipped
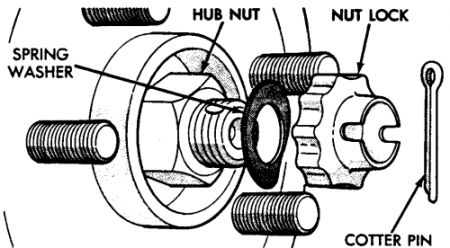
To separate the halfshaft from the hub, remove the cotter pin, nut lock and spring washer from the axle shaftSeal
1.Before servicing the vehicle, refer to the precautions in the beginning of this manual.
2.Remove or disconnect the following:
â– Front axle shafts
â– Differential cover
â– Differential and ring gear assembly
â– Axle seals
To install:
1.Press the axle seals into the differential housing with Turnbuckle 6797 and Disc set 8110.
2.Install or connect the following:
â– Differential and ring gear assembly. Tighten the bearing cap bolts to 45 ft. lbs. (61 Nm).
â– Differential cover. Tighten the bolts to 30 ft. lbs. (41 Nm).
â– Front axle shafts
3.Fill the axle assembly with gear oil and check for leaks
2.Remove or disconnect the following:
â– Axle halfshaft from the vehicle
â– Inner tripod joint boot clamps
â– Tripod joint housing
â– Snapring
â– Circlip
â– Tripod joint
To install:
NOTE
Use new snaprings, clips, and boot clamps for assembly.1.Install or connect the following:
â– Tripod joint
â– Circlip
â– Snapring
â– Tripod joint housing
2.Fill the tripod joint housing and boot with grease and tighten the boot clamps.
3.Install the axle halfshaft.
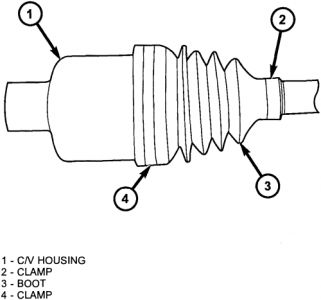
Boot clamp location
Removing the snapring
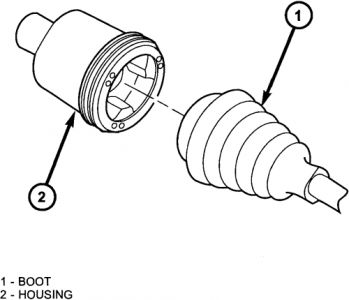
CV joint housing
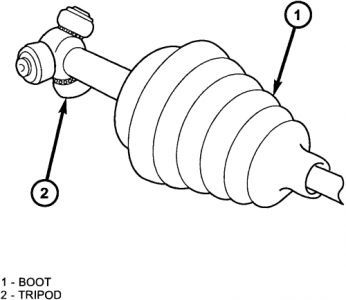
Tripod joint
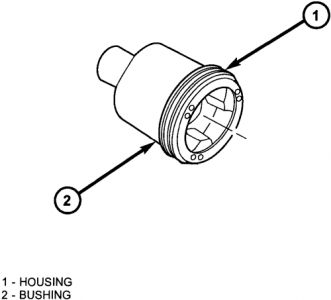
Housing bushing
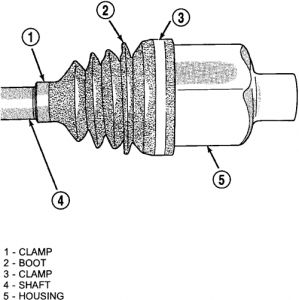
Inner CV joint boo
Oct 24, 2008 at 8:56 PM