This is that crank sensor replacement instructions,
CRANKSHAFT POSITION SENSOR
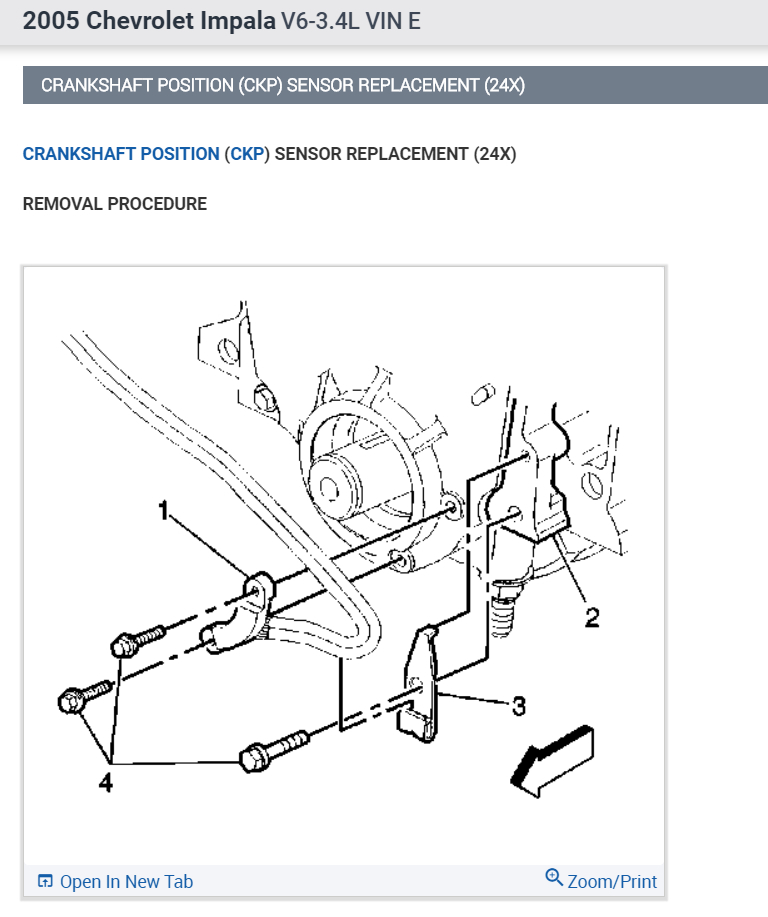
Removal (3.1L & 3.4L - CKP Sensor "A")
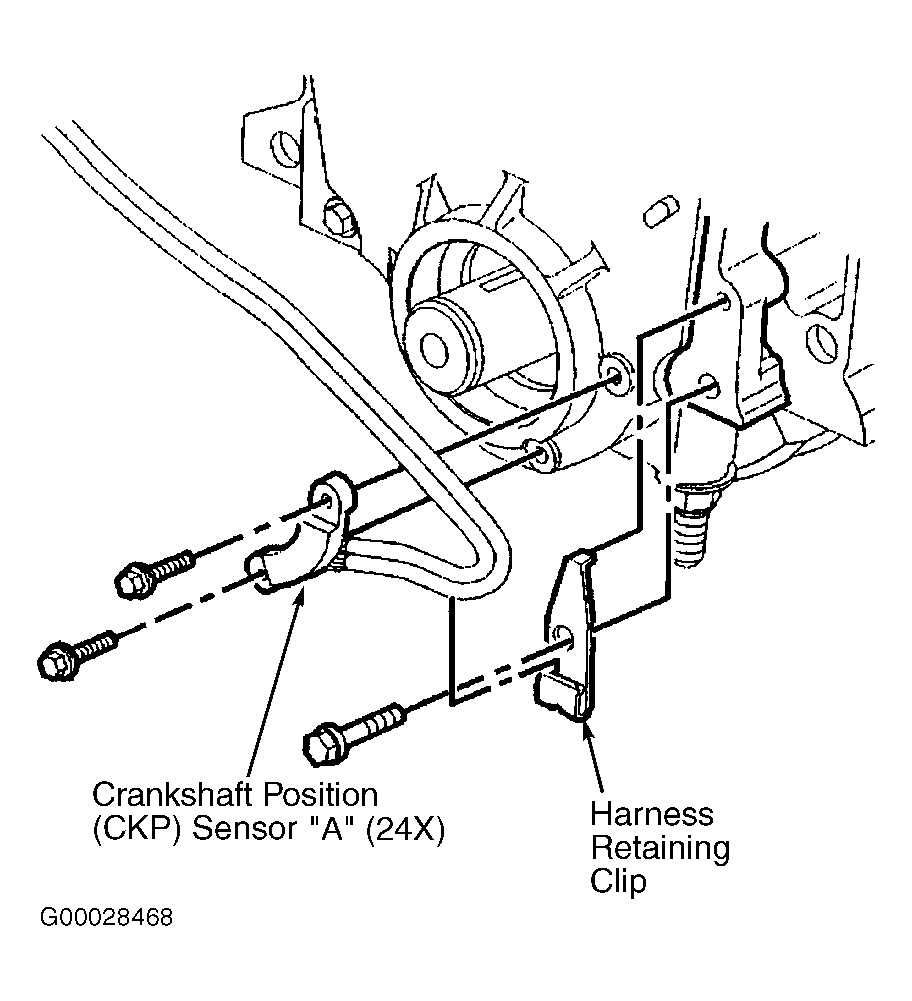
Crankshaft Position (CKP) sensor "A" may also be referred to as CKP sensor 24X. CKP sensor is located behind the crankshaft balancer. See Fig 1. Turn OFF the ignition. Remove the drive belt. Raise and support the vehicle. Remove the lower air deflector. Disconnect the CKP sensor harness connector.
Remove the crankshaft balancer bolt. Using Crankshaft Balancer Puller (J-24420-C), remove the crankshaft balancer. Note the routing of the CKP sensor harness before removal. Remove the harness retaining clip and bolt. Disconnect the CKP sensor electrical connector. Remove the sensor bolts. Remove the CKP sensor.
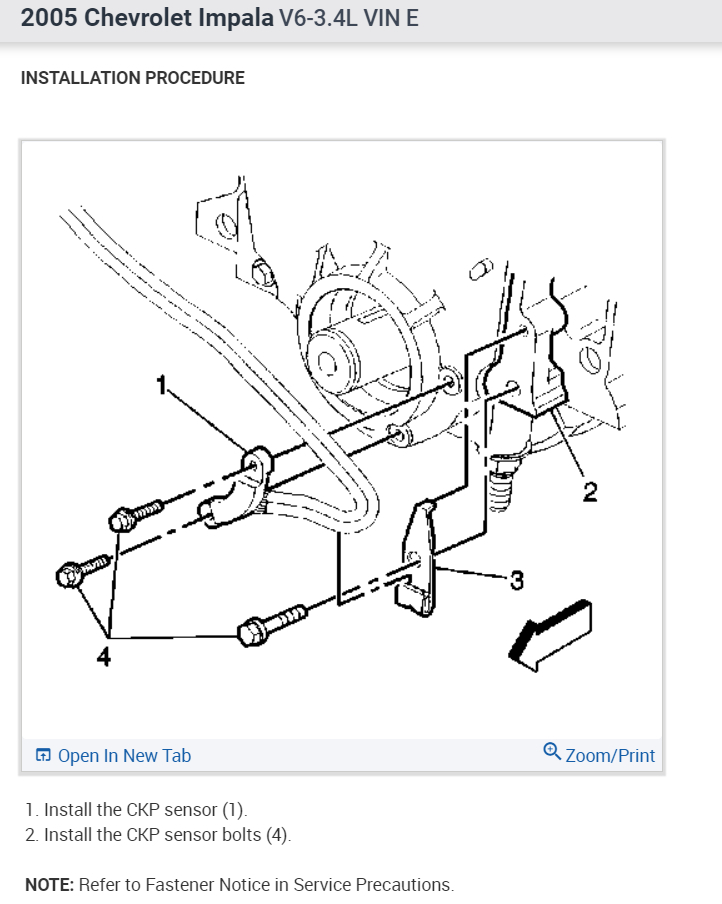
Installation
Install the CKP sensor with bolts and the route harness as noted during removal. Install the harness retaining clip and bolt. Tighten the bolts to specification. See TORQUE SPECIFICATIONS.
Connect the CKP sensor electrical connector. Apply Sealer (12345739) or the equivalent to the keyway of the crankshaft balancer. Install the crankshaft balancer into position over the key in the crankshaft. Using Crankshaft Balancer Installer (J-29113), install the crankshaft balancer to the crankshaft.
Remove the crankshaft balancer installer from the crankshaft balancer. Install the crankshaft balancer washer and the crankshaft balancer bolt. Tighten the bolt to specification.
Install the lower air deflector. Lower the vehicle. Install the drive belt. Perform the CKP System Variation Learn Procedure. See COMPUTER RELEARN PROCEDURES article in GENERAL INFORMATION.
Fig 1: Locating Crankshaft Position Sensor "A" (3.1L & 3.4L)
G00028468
Courtesy of GENERAL MOTORS CORP.
Removal (3.1L - CKP Sensor "B")
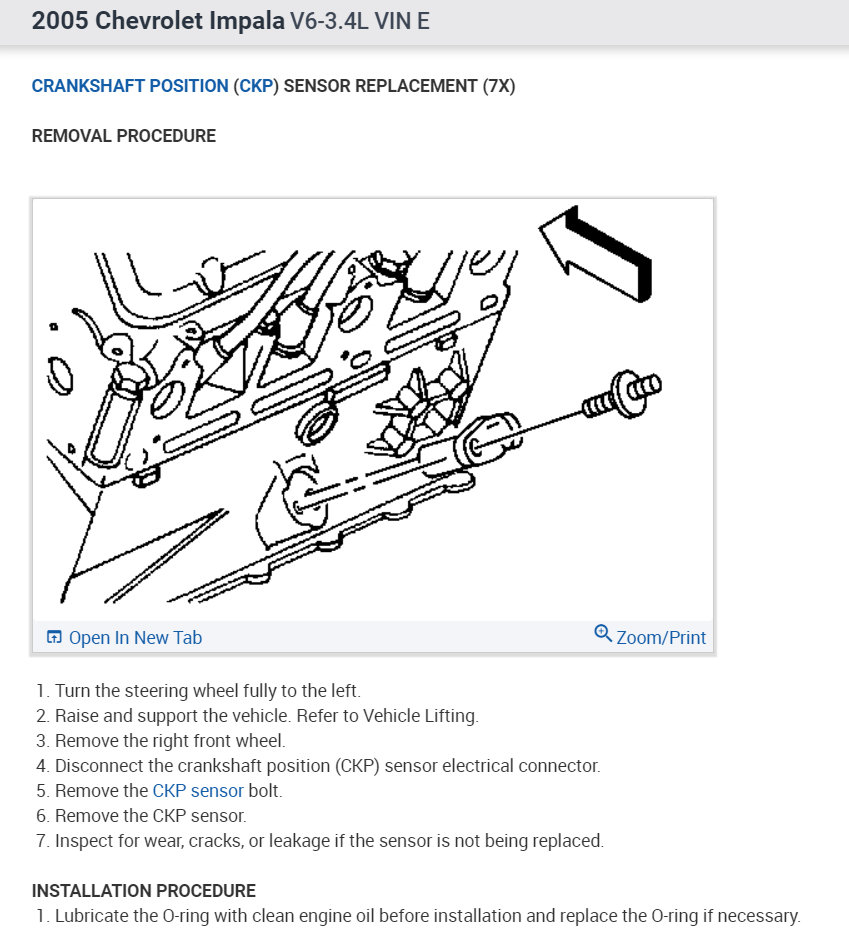
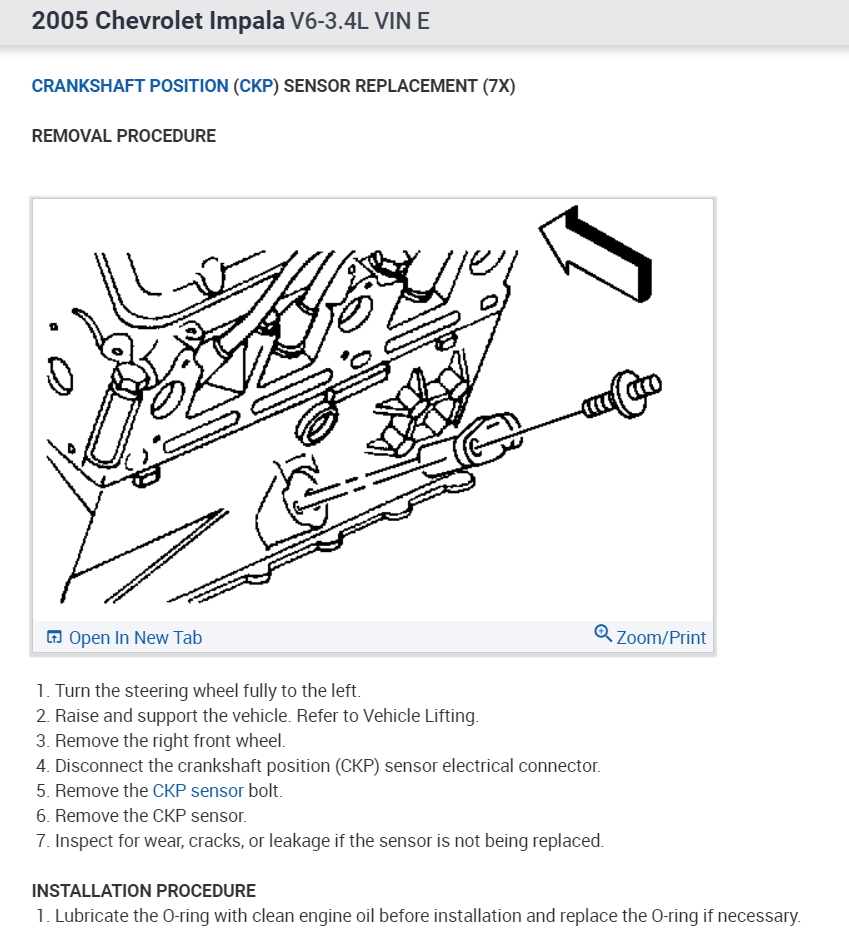
The Crankshaft Position (CKP) sensor "B" may also be referred to as CKP sensor 7X. CKP sensor is mounted in cylinder block. See Fig 2. Turn the steering wheel fully to the left. Raise and support the vehicle. Remove the right front tire and wheel.
Disconnect the CKP sensor electrical connector. Remove the CKP sensor attaching bolt. Remove the CKP sensor from the engine. Inspect for wear, cracks, or leakage if the sensor is not being replaced.
Installation
Replace the "O" ring, if it is damaged. Lubricate the "O" ring with clean engine. Install the sensor to the block. Install the CKP sensor attaching bolt. Tighten the bolt to specification. See TORQUE SPECIFICATIONS.
Install the CKP sensor electrical connector. Install right front tire and wheel. Lower the vehicle. Perform the CKP System Variation Learn Procedure. See COMPUTER RELEARN PROCEDURES article in GENERAL INFORMATION.
Fig 2: Locating Crankshaft Position Sensor "B" (3.1L & 3.8L)
G00028469
Courtesy of GENERAL MOTORS CORP.
Removal (3.8L)
Turn OFF the ignition. Disconnect the negative battery cable. Remove the drive belt. Raise and support the vehicle. Remove the right front tire and wheel. Remove the right engine splash shield retainers and the engine splash shield. Remove the torque converter cover. Install the Flywheel Holder (J-37096) to hold the flywheel.
CAUTION: Do not separate the crankshaft pulley from the crankshaft balancer. Service the crankshaft pulley and the crankshaft balancer as an assembly.
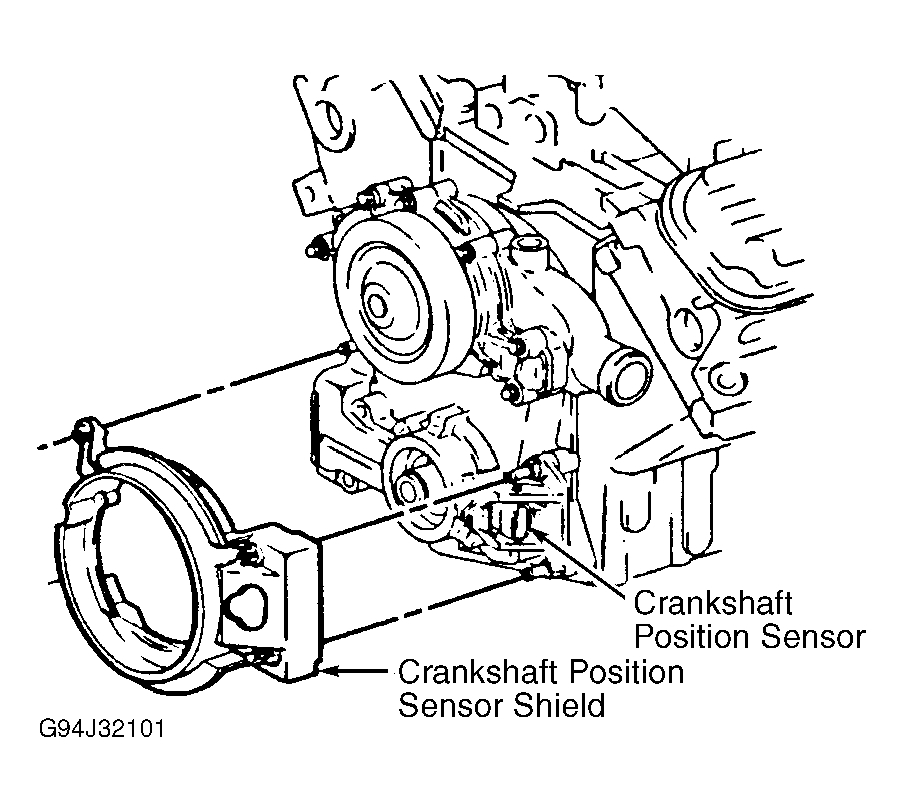
Remove the crankshaft balancer retaining bolt. Install the Crankshaft Balancer Remover (J-38197-A). Remove the crankshaft balancer. Remove the crankshaft balancer remover. Disconnect the Crankshaft Position (CKP) sensor electrical connector. Remove the CKP sensor shield. See Fig 3. DO NOT use a pry bar. Remove the CKP sensor studs. Remove the CKP sensor.
Fig 3: Removing Crankshaft Position Sensor Shield (3.8L)
G94J32101
Courtesy of GENERAL MOTORS CORP.
Installation
Install the CKP sensor. Install the CKP sensor studs. Tighten the studs to specification. See TORQUE SPECIFICATIONS. Install the CKP sensor shield. Connect the CKP sensor electrical connector.
Coat the engine front cover seal contact area on the crankshaft balancer, and the seal surface with clean engine oil. Install the crankshaft balancer. Install the crankshaft balancer retaining bolt. Use the Flywheel Holder (J-37096) to keep the flywheel from turning. Tighten the crankshaft balancer bolt to specification.
Remove the flywheel holder. Install the torque converter cover. Install the right engine splash shield and the engine splash shield retainers. Install the right front tire and wheel. Lower the vehicle. Install the drive belt. Reconnect the negative battery cable. Perform the CKP System Variation Learn Procedure. See COMPUTER RELEARN PROCEDURES article in GENERAL INFORMATION.
Image (Click to make bigger)
Wednesday, March 17th, 2021 AT 5:14 PM
(Merged)