Hi and thanks for using 2CarPros. Com.
I have some good news for you. All Honda engines are interference except 3.0L and 3.2. That basically means you are still in good shape.
I do not know if you need them, but here are the directions specific to your vehicle for replacing the timing belt. All attached pictures correlate with this process.
______________________________________
iming Belt Removal
1. Remove the right front wheel.
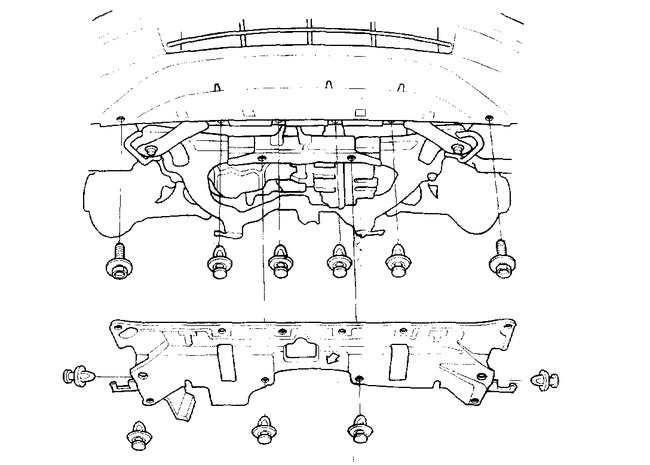
2. Remove the splash shield.
3. Remove the drive belt.
4. Remove the drive belt auto-tensioner.
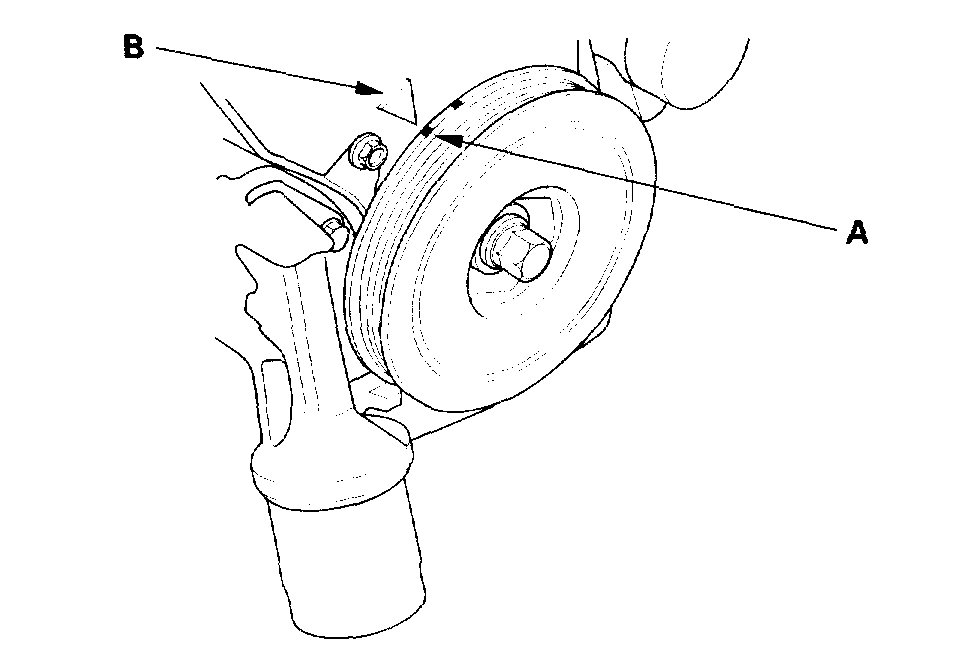
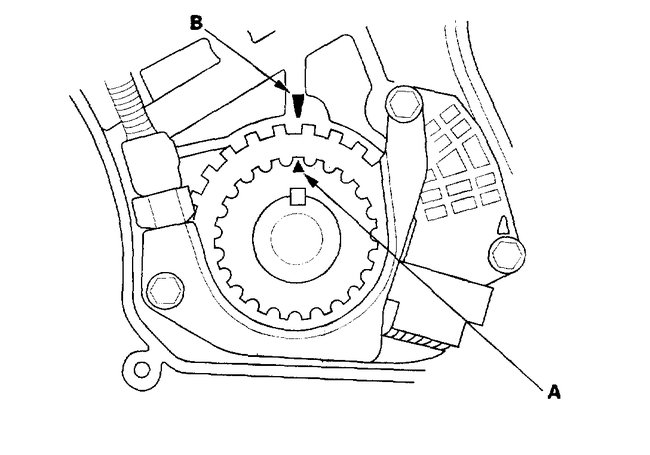
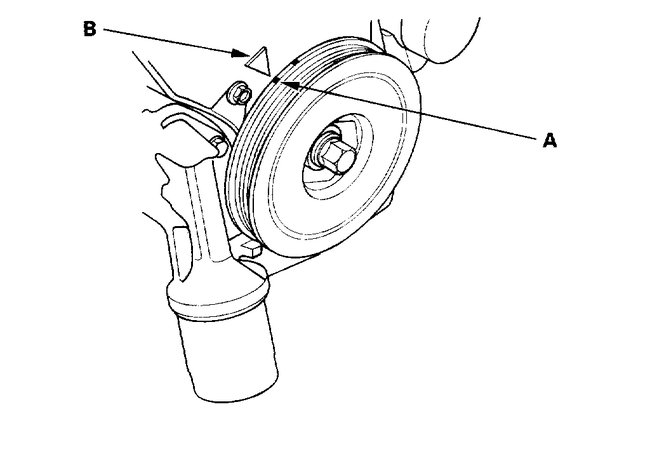
5. Turn the crankshaft so its white mark (A) lines up with the pointer (B).
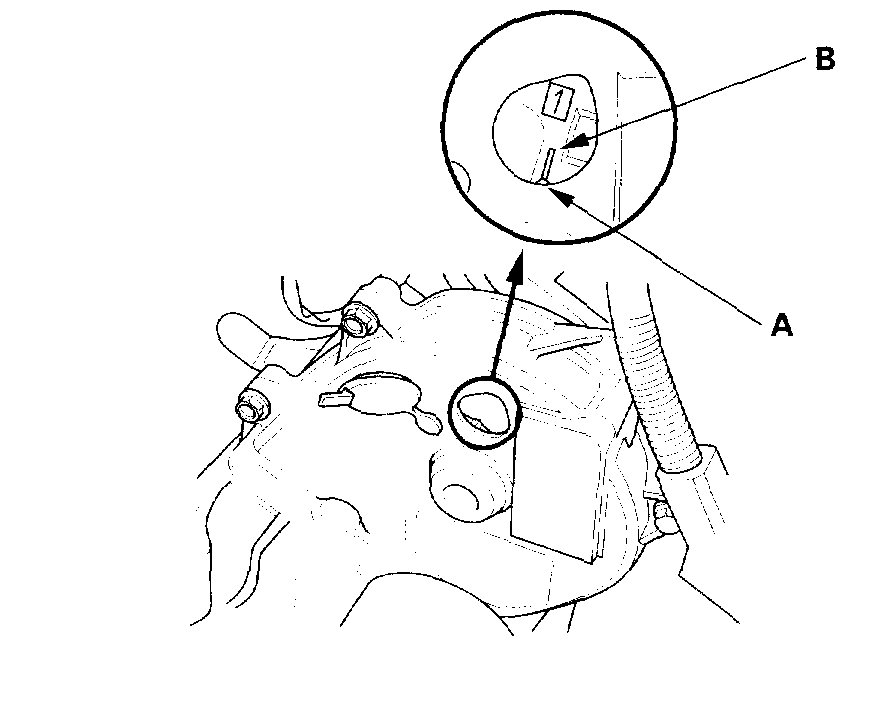
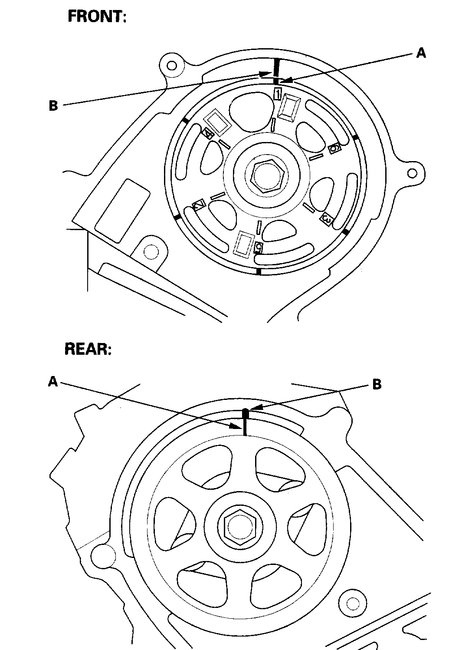
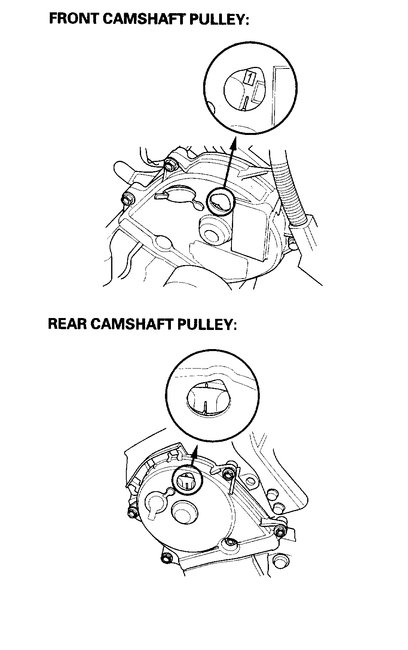
6. Check that the No. 1 piston top dead center (TDC) mark (A) on the front camshaft pulley and the pointer (B) on the front upper cover are aligned.
Note: If the marks are not aligned, rotate the crankshaft 360 degrees, and recheck the camshaft pulley mark.
7. Support the engine with a jack and wood block under the oil pan.
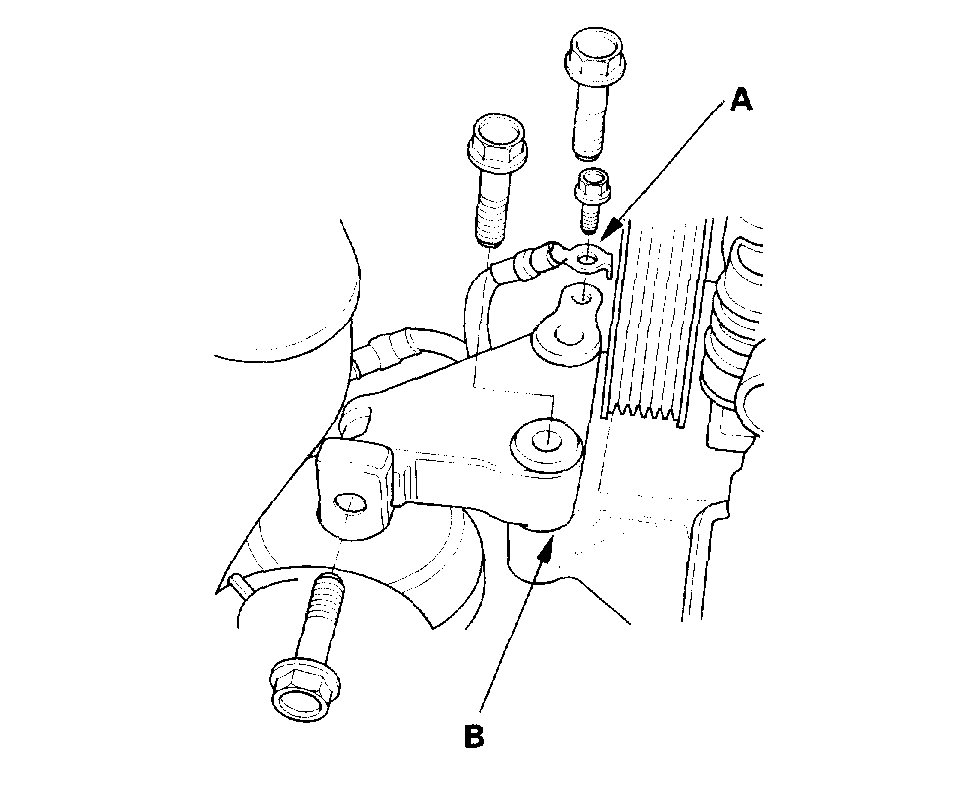
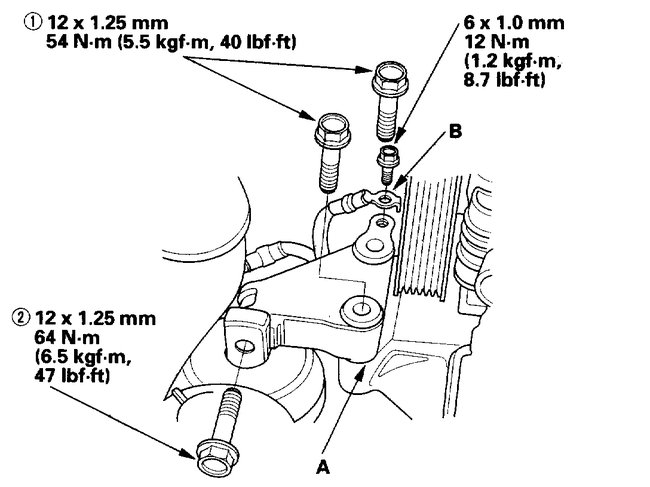
8. Remove the ground cable (A), then remove the side engine mount bracket (B).
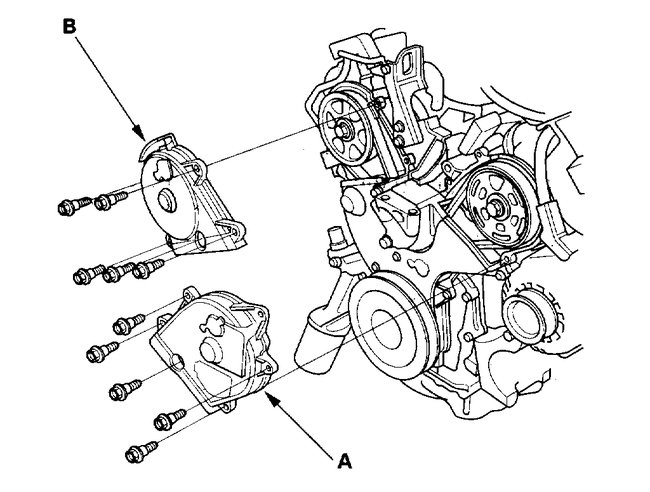
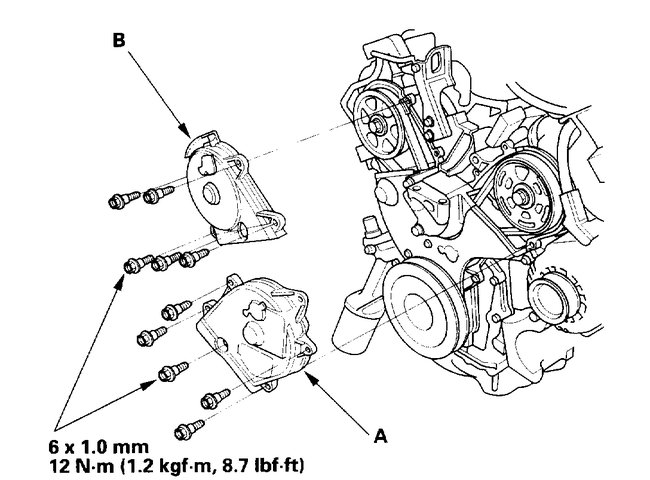
9. Remove the front upper cover (A) and rear upper cover (B).
10. Remove the crankshaft pulley.
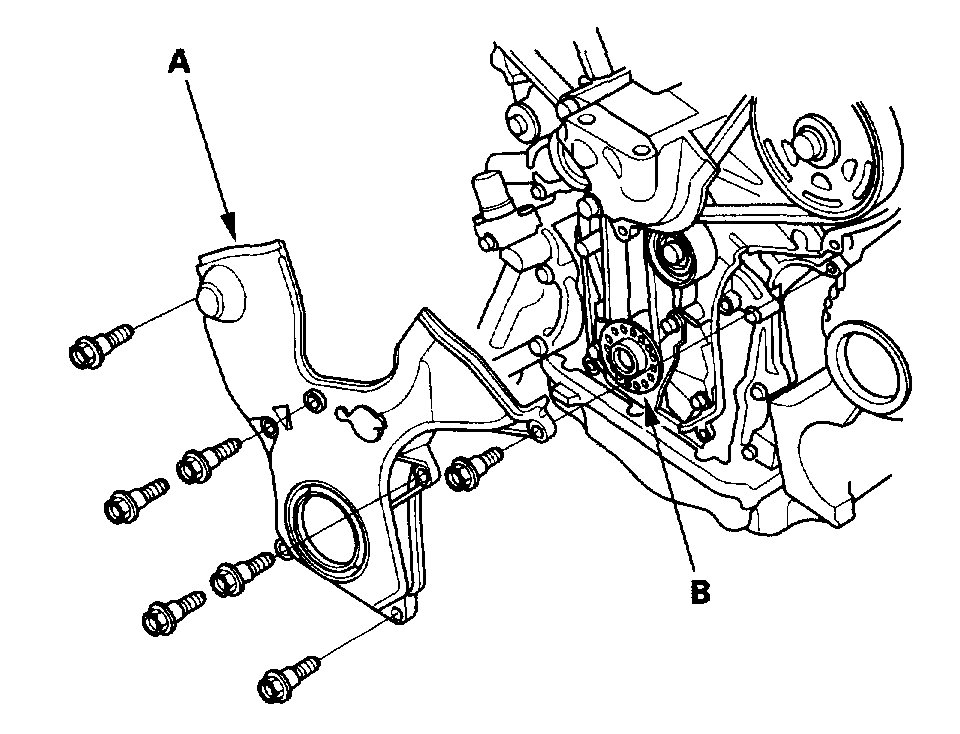
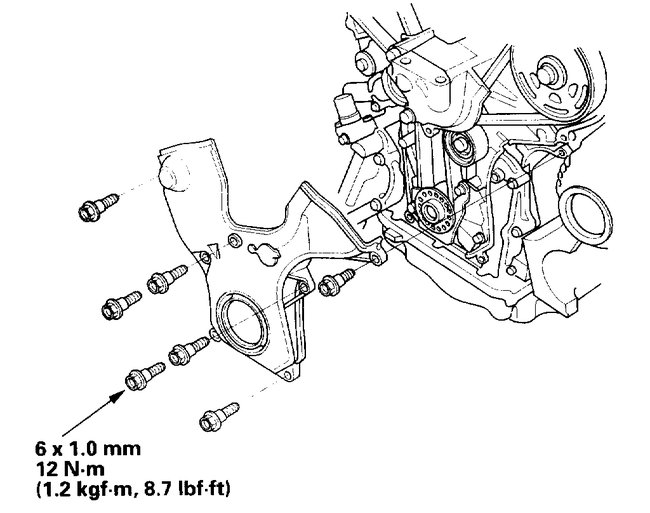
11. Remove the lower cover (A).
12. Remove the timing belt guide plate (B).
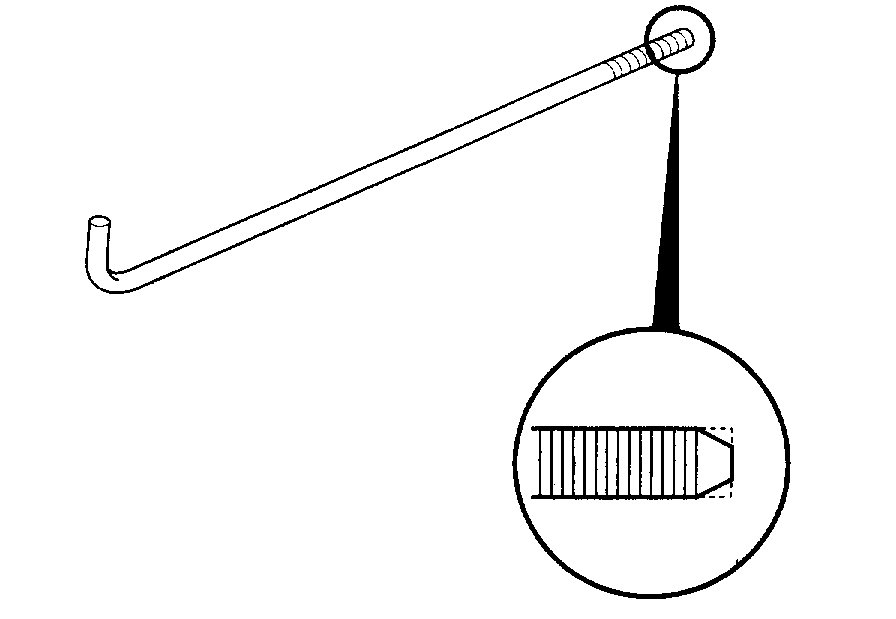
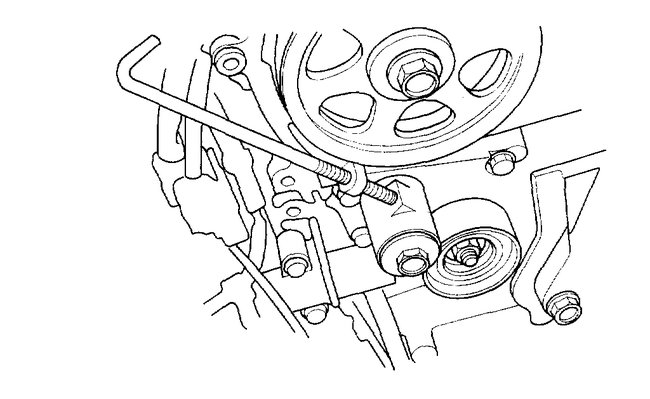
13. Remove one of the battery clamp bolts from the battery tray, and grind the end of it as shown.
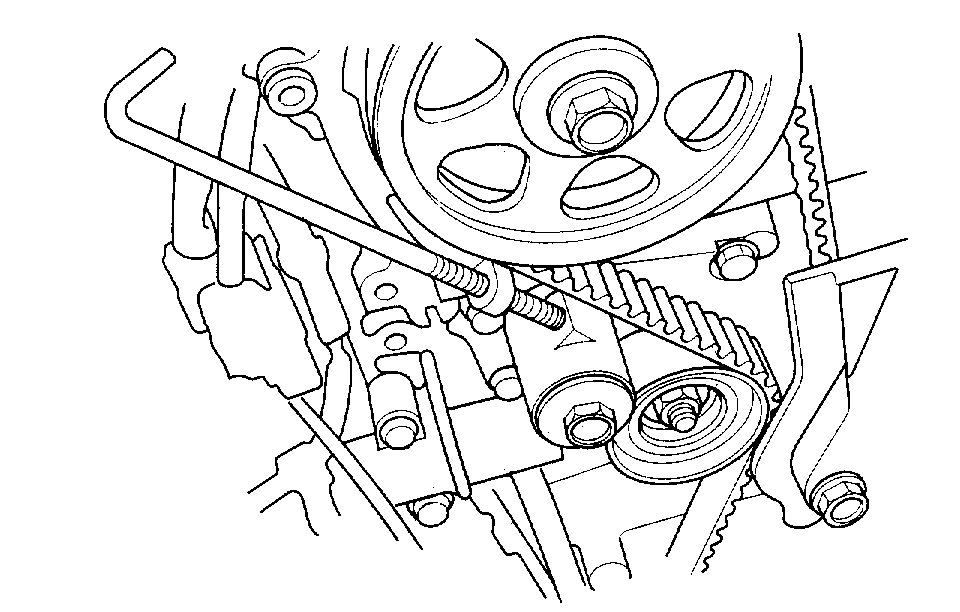
14. Screw the battery clamp bolt in as shown to hold the timing belt adjuster in its current position. Tighten it by hand; do not use a wrench.
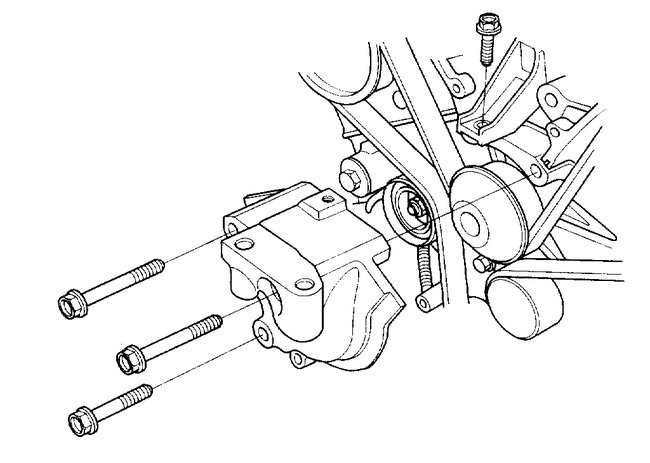
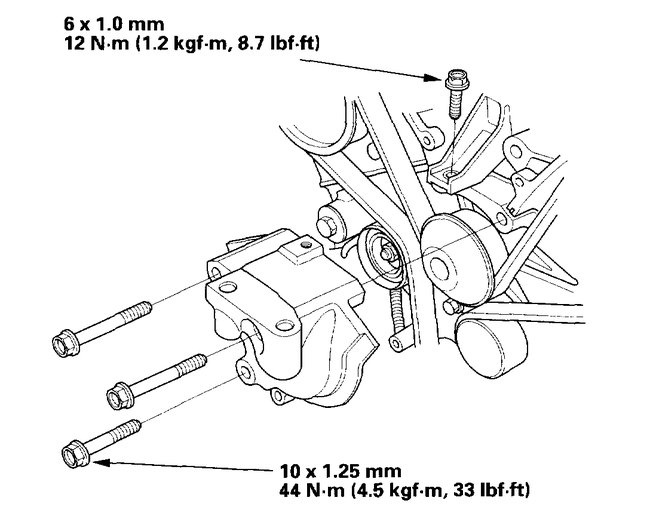
15. Remove the engine mount bracket.
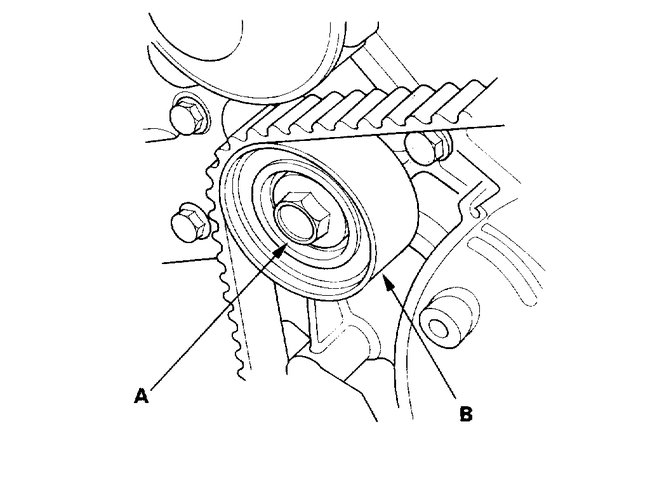
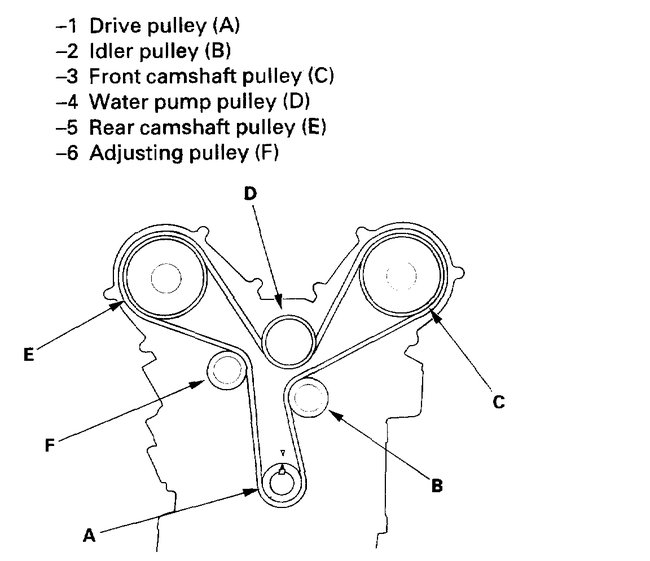
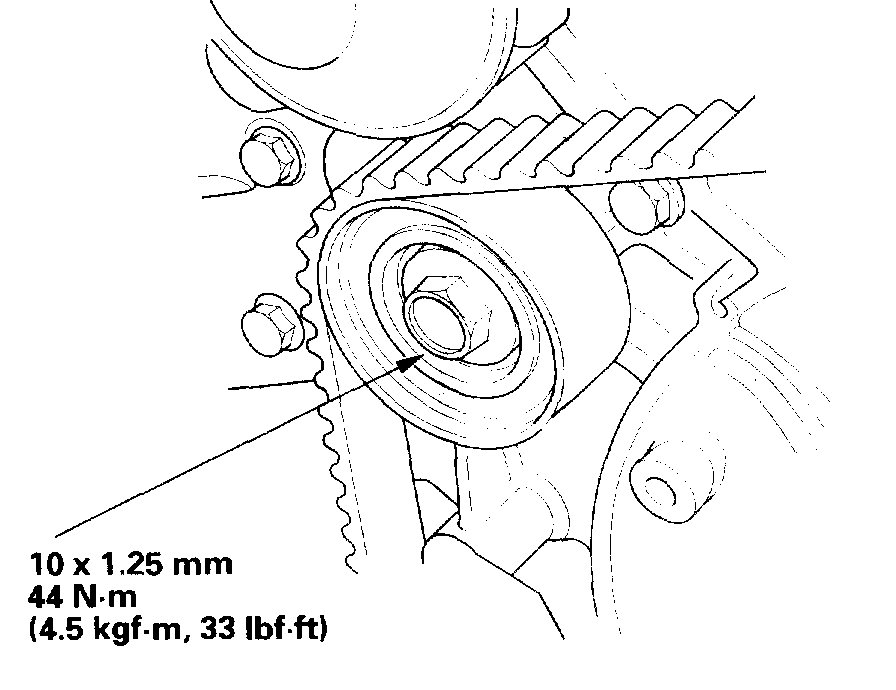
16. Remove the idler pulley bolt (A) and idler pulley (B), then remove the timing belt.
__________
Timing Belt Replacement
1. Remove the timing belt.
2. Clean the timing belt pulleys, timing belt guide plate, and the upper and lower covers.
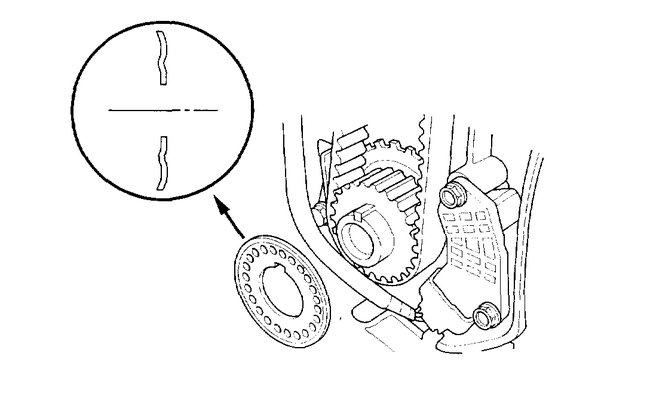
3. Set the timing belt drive pulley to TDC by aligning the TDC mark (A) on the tooth of the timing belt drive pulley with the pointer (B) on the oil pump.
4. Set the camshaft pulleys to TDC by aligning the TDC marks (A) on the camshaft pulleys with the pointers (B) on the back covers.
5. Remove the battery clamp bolt from the back cover.
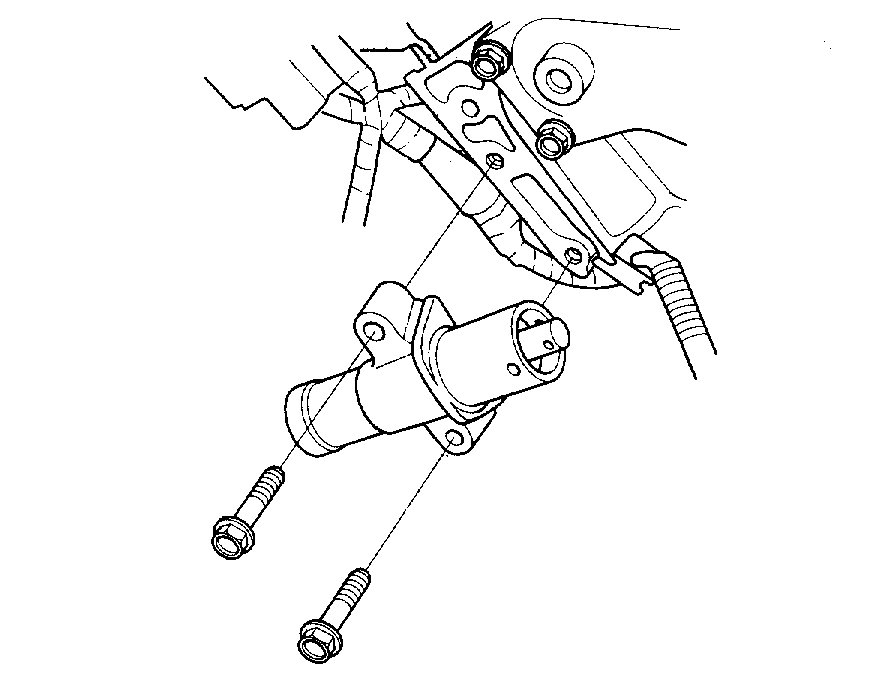
6. Remove the auto-tensioner.
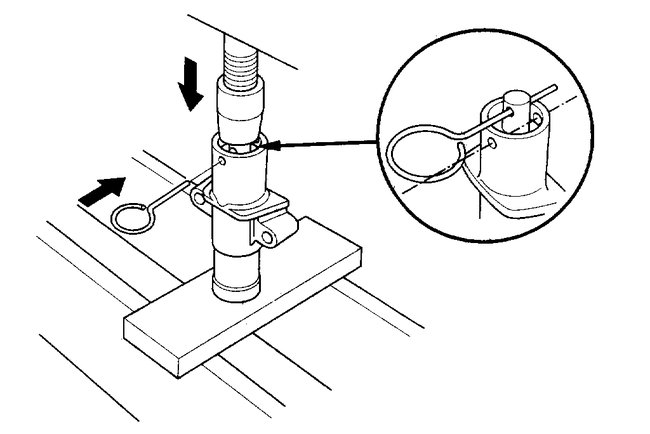
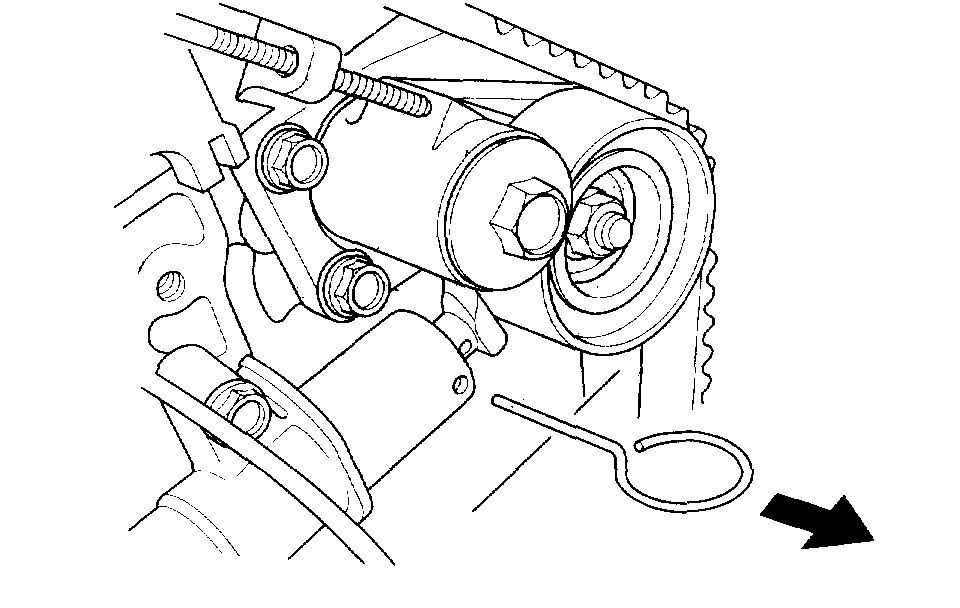
7. Align the holes on the rod and housing of the auto-tensioner.
8. Use a hydraulic press to slowly compress the auto-tensioner. Insert a 2.0 mm (0.08 inch) pin through the housing and the rod.
NOTE: The compression pressure should not exceed 9,800 N (1,000 kgf, 2,200 lbf).
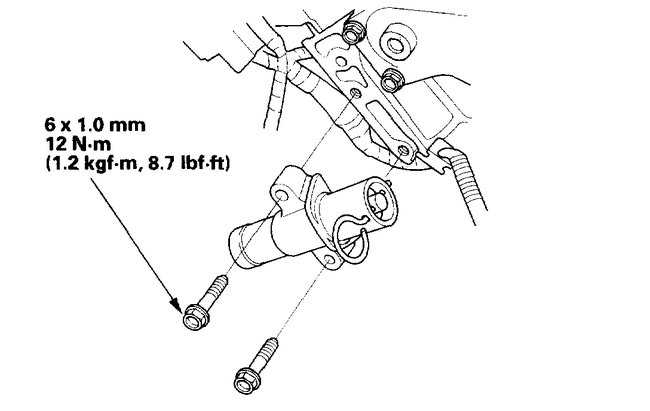
9. Install the auto-tensioner.
NOTE: Make sure the pin stays in place.
10. Screw the battery clamp bolt in as shown to hold the timing belt adjuster. Tighten it by hand; do not use a wrench.
11. Apply liquid thread lock (P/N 08713-0001) to the idler pulley bolt, then loosely install the idler pulley.
12. Install the timing belt in a counterclockwise sequence starting with the drive pulley.
13. Tighten the idler pulley bolt.
14. Remove the pin from the auto-tensioner.
15. Remove the battery clamp bolt from the back cover.
16. Install the engine mount bracket.
17. Install the timing belt guide plate as shown.
18. Install the lower cover.
19. Install the crankshaft pulley.
20. Install the front upper cover (A) and rear upper cover (B).
21. Rotate the crankshaft pulley about five or six turns clockwise so the timing belt positions itself on the pulleys.
22. Turn the crankshaft pulley so its white mark (A) lines up with the pointer (B).
23. Check the camshaft pulley marks.
- If the camshaft pulley marks are at TDC go to step 24.
- If the camshaft pulley marks are not at TDC, remove the timing belt and repeat steps 2 through 23.
24. Install the side engine mount bracket (A), then tighten the bolts in the numbered sequence shown.
25. Install the ground cable (B).
26. Install the drive belt auto-tensioner.
27. Install the drive belt.
28. Install the splash shield.
29. Install the right front tire/wheel.
30. Do the crankshaft position (CKP) pattern clear/CKP pattern learn procedure.
_________________________________________
I hope this information is helpful to you. Let me know if you have questions or need more information.
Take care,
Joe
Images (Click to make bigger)
Saturday, August 18th, 2018 AT 7:50 PM
