Hi,
Replacing front brake pads and rotors really isn't too hard. You can expect to get around 25,000 miles from a set of pads, but that is based on driving habits and terrain. Changing them yourself can save you a lot. If you get lifetime parts from a parts store and do it yourself, you shouldn't have to pay for brake pad replacement again.
First, here is a link that shows in general how the process is done:
https://www.2carpros.com/articles/how-to-replace-front-brake-pads-and-rotors-fwd
Here are the directions specific to your vehicle. The attached pics correlate with the directions.
_______________________________
2001 Chevrolet Cavalier L4-2.2L VIN 4
Brake Pads Replacement
Vehicle Brakes and Traction Control Disc Brake System Brake Pad Service and Repair Procedures Brake Pads Replacement
BRAKE PADS REPLACEMENT
Brake Pads Replacement
Removal Procedure
pic 1
1. Inspect the fluid level in the brake master cylinder reservoir.
2. If the brake fluid level is midway between the maximum-full point and the minimum allowable level, then no brake fluid needs to be removed from the reservoir before proceeding. If the brake fluid level is higher than midway between the maximum-full point and the minimum allowable level, then remove brake fluid to the midway point before proceeding.
3. Raise and support the vehicle. Refer to Vehicle Lifting.
4. Remove the tire and wheel assembly.
5. Hand tighten 2 wheel lug nuts in order to retain the rotor to the hub assembly.
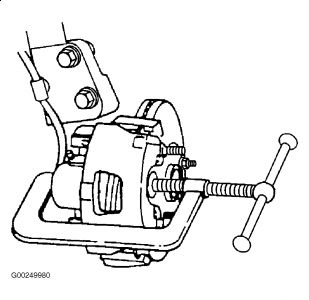
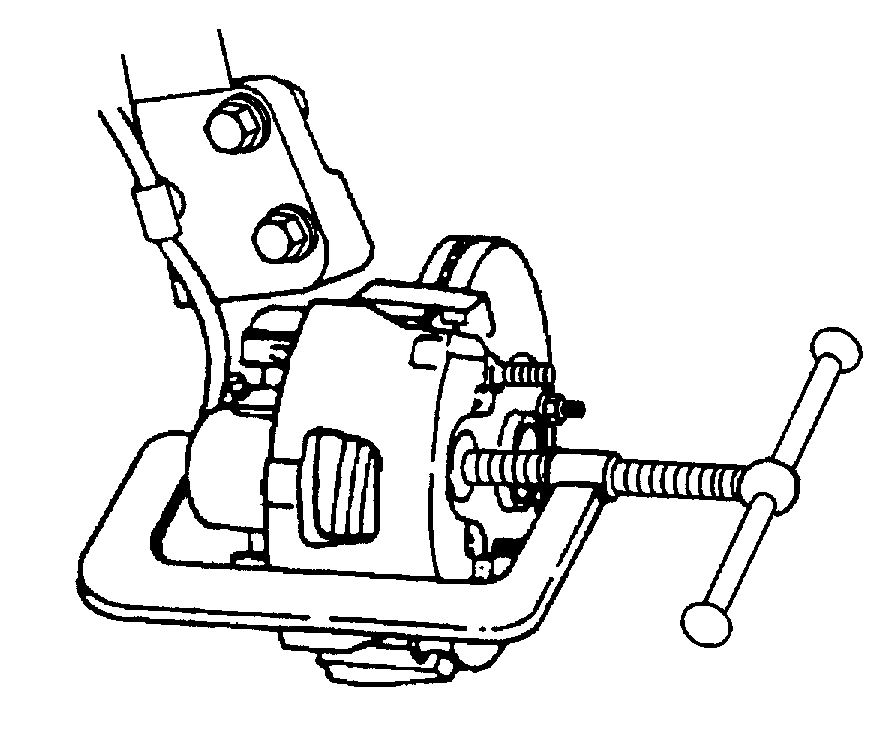
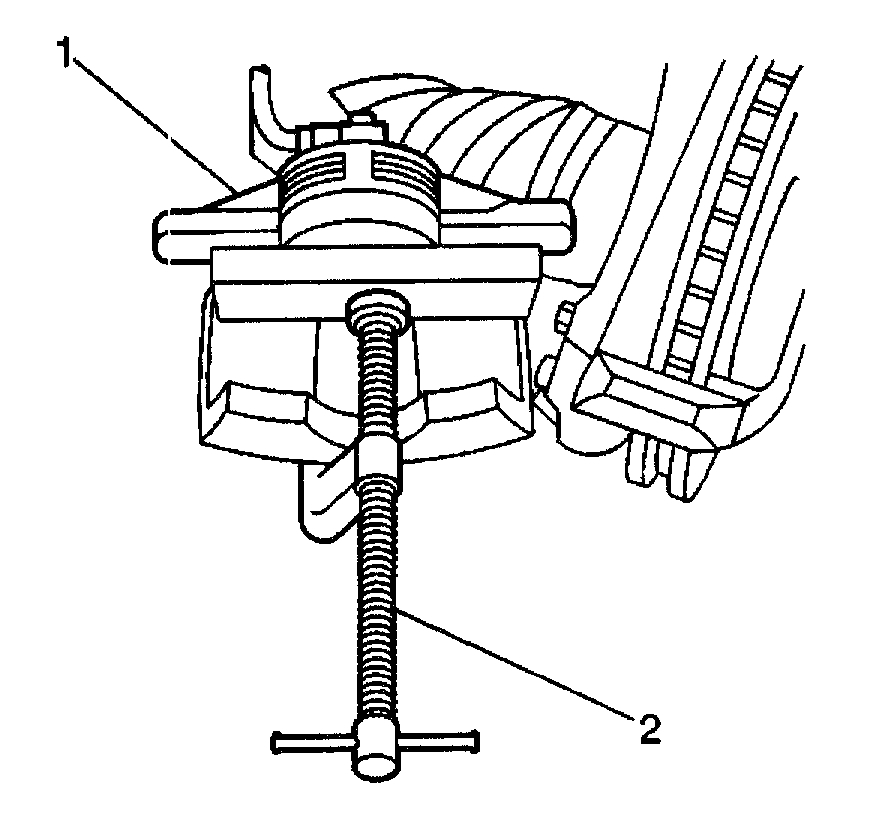
6. Push the piston into the caliper bore to provide clearance between the pads and the rotor for caliper removal.
6.1.Install a large C-clamp over the top of the caliper housing and against the back of the outboard pad.
6.2.Slowly tighten the C-clamp until the piston pushes into the caliper bore enough to slide the caliper off the rotor.
6.3.Remove the C-clamp from the caliper.
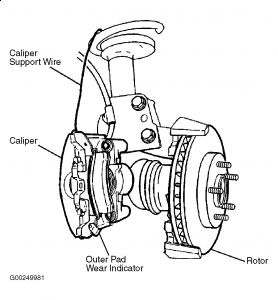
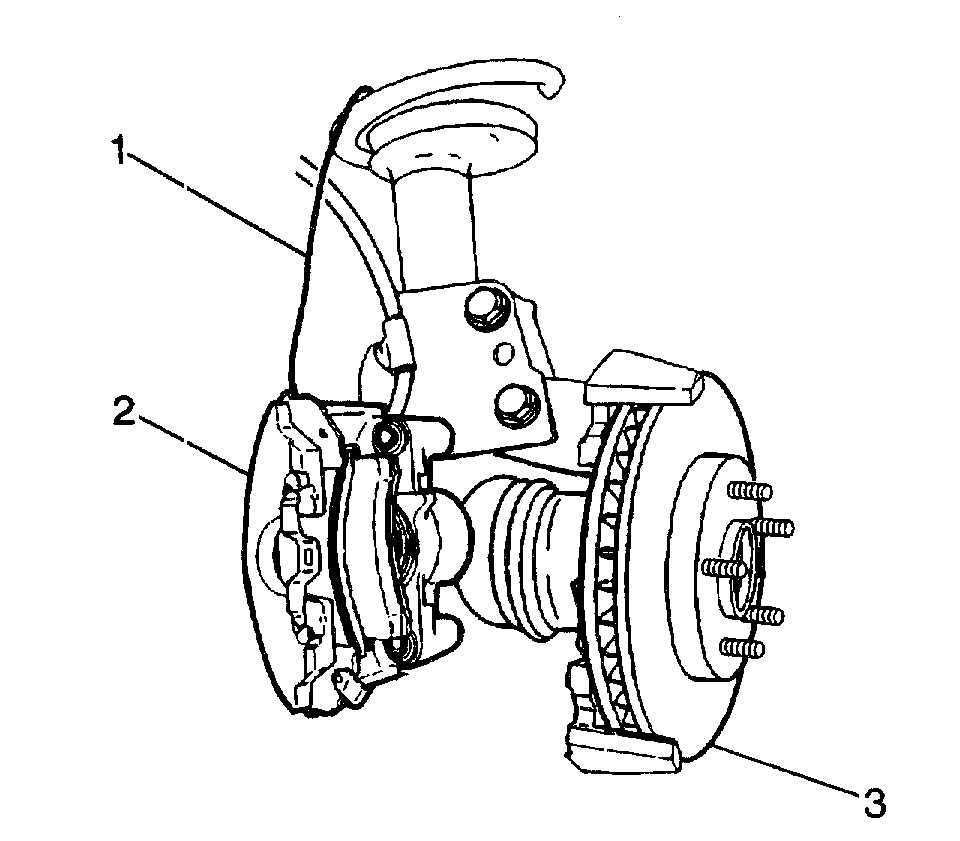
7. Remove the caliper bolts (1, 4).
Notice: Support the brake caliper with heavy mechanic's wire, or equivalent, whenever it is separated from it's mount and the hydraulic flexible brake hose is still connected. Failure to support the caliper in this manner will cause the flexible brake hose to bear the weight of the caliper, which may cause damage to the brake hose and in turn may cause a brake fluid leak.
pic 2
8. Remove the caliper (2) from the knuckle. Suitably support the caliper.
9. Remove the pads from the caliper (2).
10. Inspect the caliper bolts for corrosion or damage.
Use new parts, including bushings, when installing the caliper if any corrosion is found. Do not attempt to polish away corrosion.
Installation Procedure
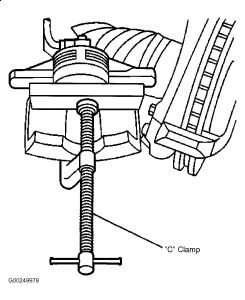
Important: Before installing new brake pads, wipe the outside surface of the caliper boot clean. Use denatured alcohol.
pic 3
1. Bottom the piston into the caliper bore. Use an old brake pad or a wooden block across the face of the piston. Do not damage the piston or the caliper boot.
pic 4
2. Install the pads to the caliper (2).
3. Install the caliper (2) to the knuckle.
Notice: Refer to Fastener Notice in Service Precautions.
4. Install the caliper bolts (1, 4).
Tighten
Tighten the caliper bolts to 51 Nm (38 ft. lbs.).
5. Remove the wheel lug nuts securing the rotor to the hub.
6. Install the tire and wheel assemblies.
7. Lower the vehicle.
8. With the engine OFF, gradually apply the brake pedal to approximately 2/3 of its travel distance.
9. Slowly release the brake pedal.
10. Wait 15 seconds, then repeat steps 8 and 9 until a firm brake pedal is obtained. This will properly seat the brake caliper pistons and brake pads.
11. Fill the master cylinder to the proper level with clean brake fluid.
12. Burnish the pads and the rotors.
_________________________________________
I hope this helps. Let me know if you have other questions.
Take care and God Bless,
Joe
Images (Click to enlarge)
Feb 24, 2021 at 12:00 PM