Hi and thanks for using 2CarPros.
If there are no leaks, even a bit of air in the system won't cause it to go to the floor. I really think a different brand of master cylinder would be a good idea. However, look through this link first. It discusses all the possible causes for a brake pedal to reach the floor.
https://www.2carpros.com/articles/brake-pedal-goes-to-the-floor
Since the brakes worked at first and now this is happening again, my first suspect is the master cylinder. Here is a link that shows in general how one is replaced:
https://www.2carpros.com/articles/how-to-replace-a-brake-master-cylinder
Here are the directions specific to your vehicle for replacement. I will add the bleeding instructions after the replacement directions. All pictures correlate with these directions.
_______________________________________________
PROCEDURES
Master Cylinder Replacement
NOTICE: Do not spill brake fluid on the vehicle; it may damage the paint. If brake fluid does contact the paint, wash it off immediately with water.
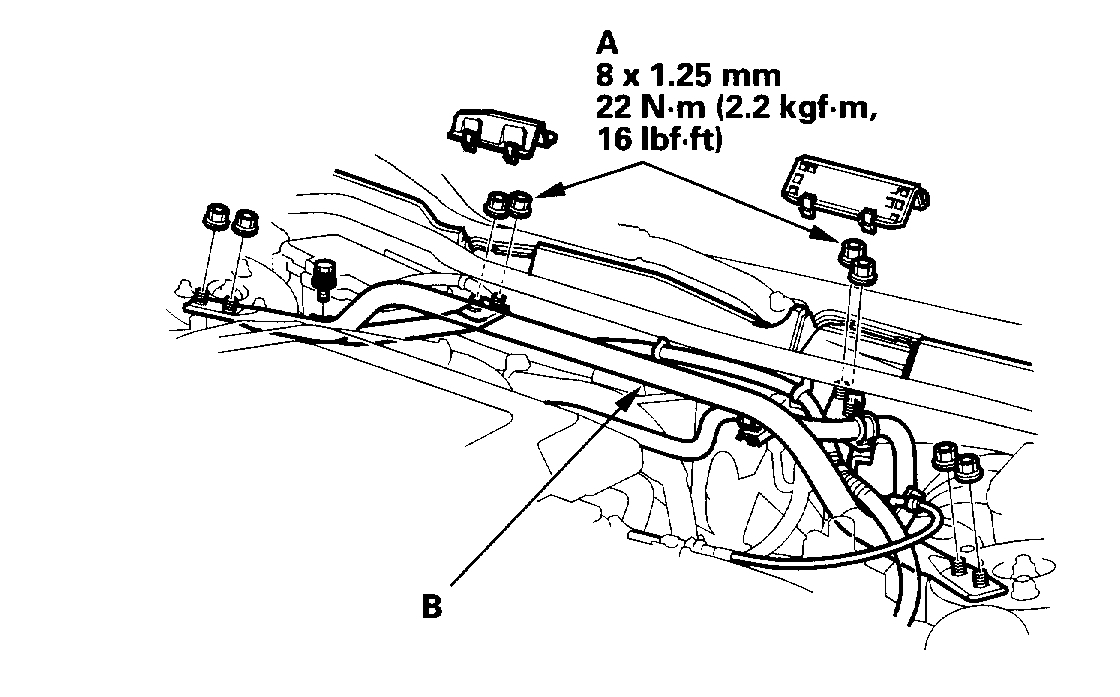
Picture 1
1. Remove the 8 mm flange nuts (A).
2. Remove the strut brace (B).
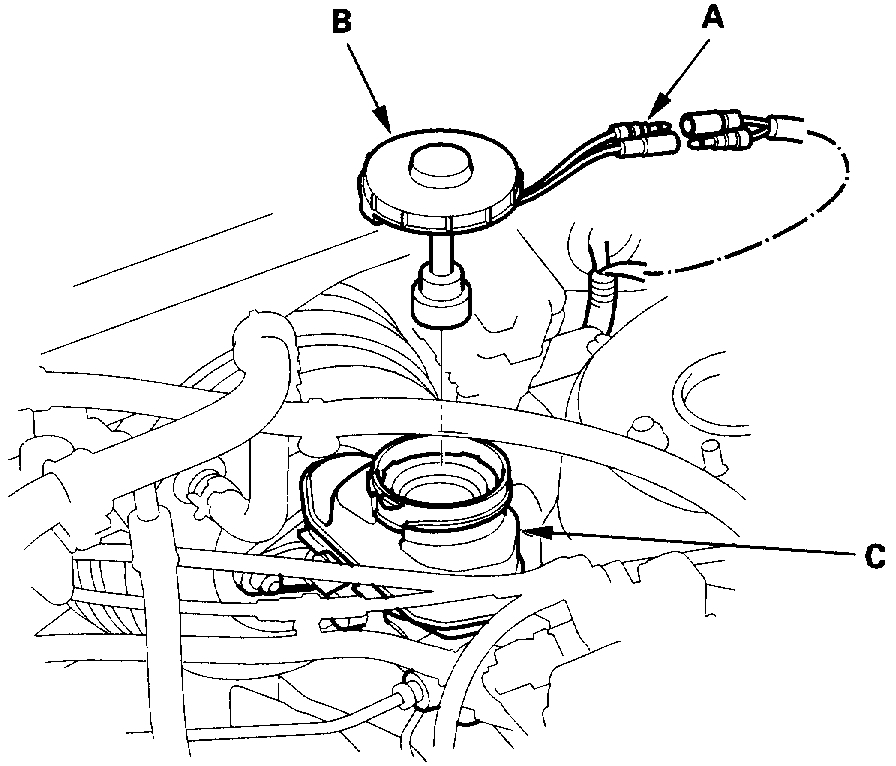
Picture 2
3. Disconnect the brake fluid level switch connectors (A), and remove the reservoir cap (B).
4. Remove the brake fluid from the master cylinder reservoir (c) with a syringe.
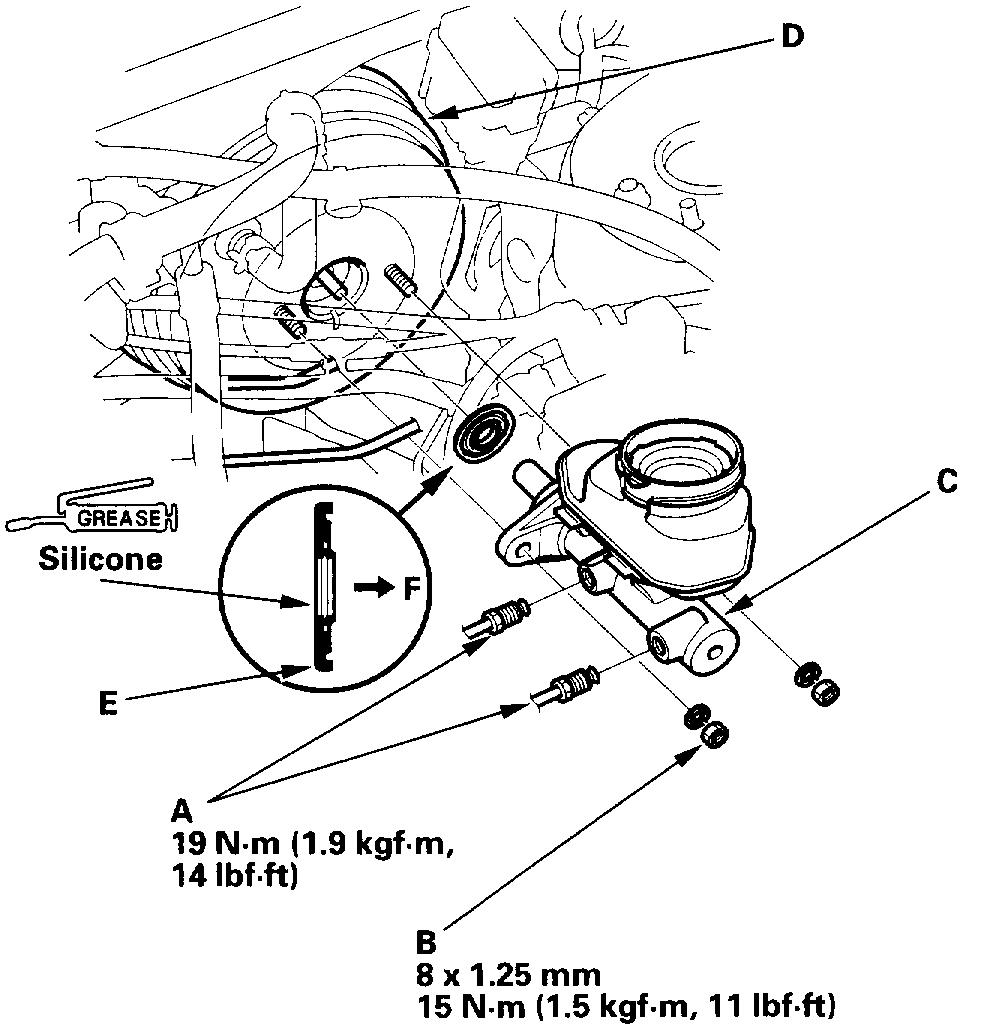
Picture 3
5. Disconnect the brake lines (A) from the master cylinder. To prevent spills, cover the hose joints with rags or shop towels.
6. Remove the master cylinder mounting nuts (B) and washers.
7. Remove the master cylinder (c) from the brake booster (D). Be careful not to bend or damage the brake lines when removing the master cylinder.
8. Remove the rod seal (E) from the master cylinder.
9. Install the master cylinder in the reverse order of removal, and note these items:
^ Replace all rubber parts with new ones whenever removed.
^ Coat the lip of the new rod seal with recommended seal grease in the master cylinder set.
^ Install the rod seal onto the master cylinder with its grooved side (F) toward the master cylinder.
___________________________________________________________
Brake System Bleeding
NOTE:
- Do not reuse the drained fluid.
- Always use Honda DOT 3 Brake Fluid. Using a non
- Honda brake fluid can cause corrosion and decrease the life of the system.
- Make sure no dirt or other foreign matter is allowed to contaminate the brake fluid.
- Do not spill brake fluid on the vehicle, it may damage the paint; if brake fluid does contact the paint, wash it off immediately with water.
- The reservoir on the master cylinder must be at the MAX (upper) level mark at the start of bleeding procedure and checked after bleeding each brake caliper. Add fluid as required.
Conventional Method
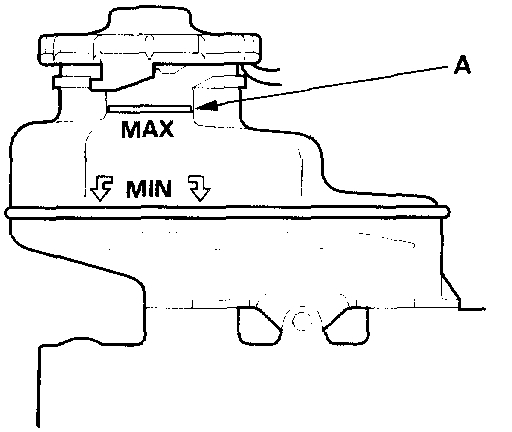
Picture 4
1. Make sure the brake fluid level in the reservoir is at the MAX (upper) level line (A).
2. Attach a length of clear drain tube to the bleed screw.
3. Have someone slowly pump the brake pedal several times, then apply steady pressure.
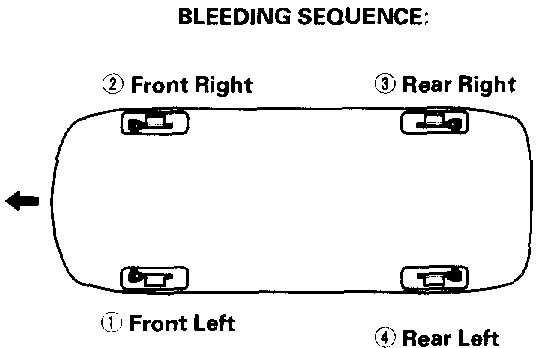
4. Loosen the left-front brake bleed screw to allow air to escape from the system. Then tighten the bleed screw securely.
Picture 5
5. Repeat the procedure for each wheel in the sequence shown until air bubbles no longer appear in the fluid coming out of the drain tube.
6. Refill the master cylinder reservoir to the MAX (upper) level line.
Pressure Bleeding
1. Install the appropriate power probe pressure bleeder adapter onto the master cylinder.
Picture 5 Again
2. Use the bleeding sequence below, and follow the bleeding instructions that come with your pressure bleeder.
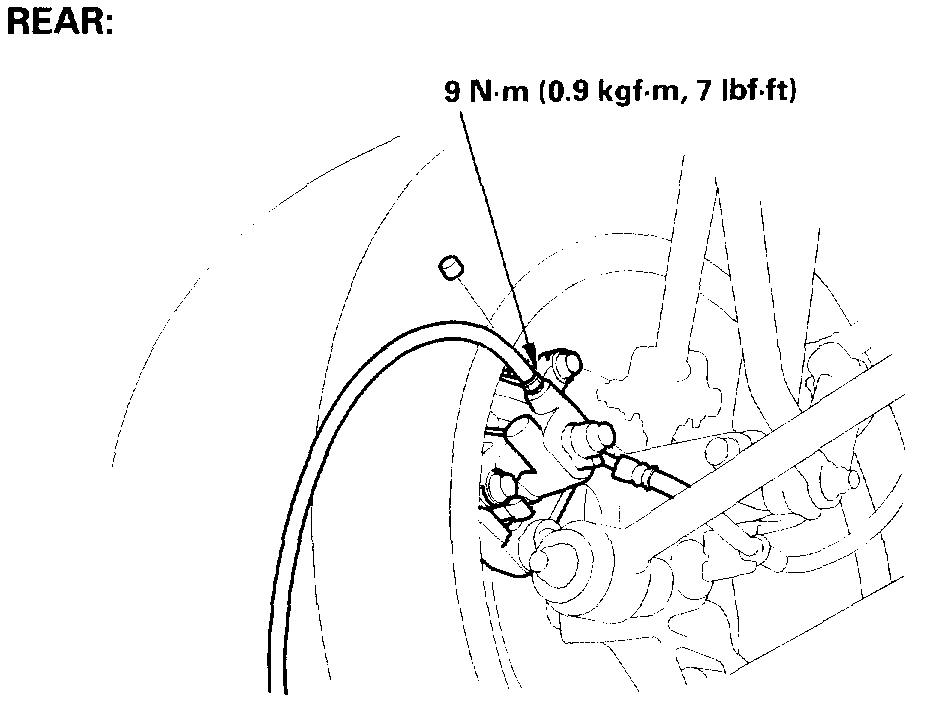
Picture 6
imageOpen In New TabZoom/Print
Picture 7
Bleed Screw Locations
_______________________________________________
Let me know what you find or if you have other questions. If you are purchasing a remanufactured master cylinder, they may just be faulty. I suggest a new one. Remember, the components wear out. As long as them meet the minimum specifications, they will rebuild them.
Here is one last link. It shows in general the bleeding process and how to flush the system. If the present fluid is excessively dirty, that can be causing parts to wear faster than they should.
https://www.2carpros.com/articles/how-to-bleed-or-flush-a-car-brake-system
Take care and if you could, let me know the results.
Joe
Images (Click to enlarge)
Apr 14, 2021 at 2:32 PM